

容器镜像仓库-Harbor的安装及踩坑 - Akai-yuan
source link: https://www.cnblogs.com/akai-yuan/p/17094221.html
Go to the source link to view the article. You can view the picture content, updated content and better typesetting reading experience. If the link is broken, please click the button below to view the snapshot at that time.
容器镜像仓库-Harbor的安装及踩坑
之前实验室的师兄让我帮忙给服务器上装一个Harbor,花了不少时间,遂记录之,以避坑。
在学习使用Harbor之前,需要了解Docker的使用,可以看看我之前的博客:应用容器引擎-Docker、Dockerfile详解,在此之后,你还需要知道如何部署一个前后端分离的项目:部署实战-Docker+nginx部署前后端分离项目
@Author:Akai-yuan
@更新时间:2023/2/5
1.harbor-assets下载
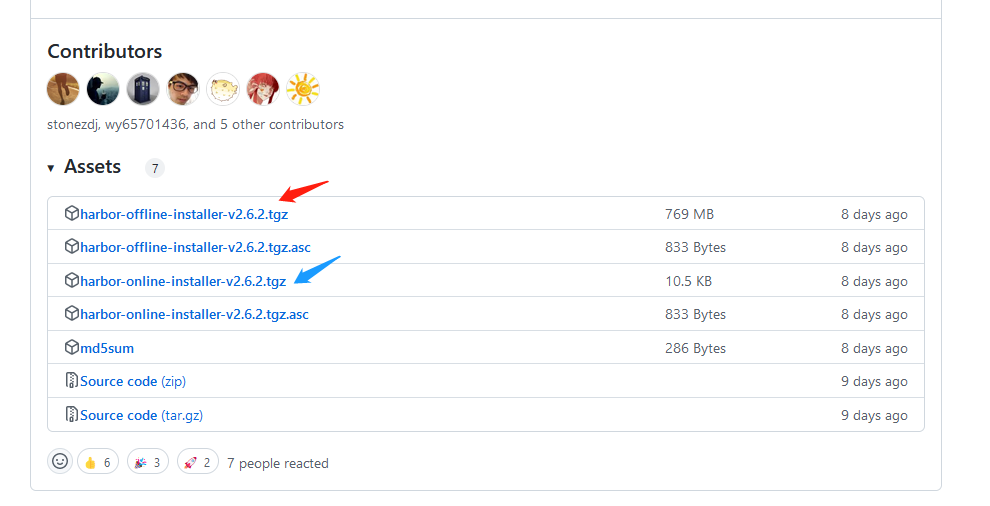
Harbor下载链接
红色箭头的是离线下载的压缩文件,已经将一些组件打包好了,不需要自己再去手动install或者pull images等需要连网的操作了。
蓝色箭头下是需要在线安装的压缩文件,需要保证你的虚拟机有网络,现在网上的资料大多数是该类的安装教程。
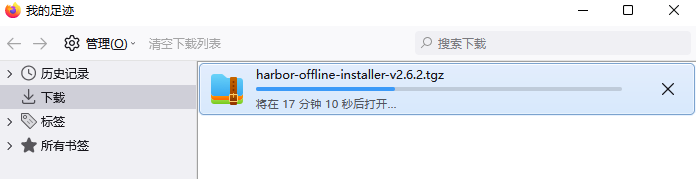
等待安装中:
2.Harbor安装细则
1.登录虚拟机
2.新建一个存放harbor文件的文件夹
mkdir /home/topview/harbor
3.检查路径
pwd

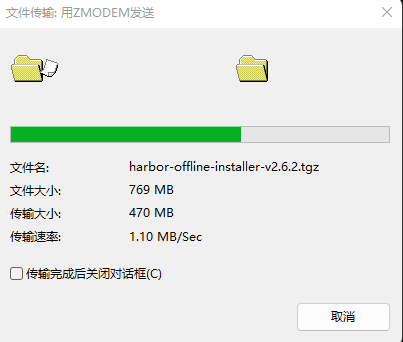
4.传输tgz压缩文件
执行远程传输文件命令:
注意:这里可以选择直接使用Xftp传输,使用rz指令可能会有乱码文件夹生成,需要手动删除,很麻烦
rz
5.传输完成后检查文件夹是否存在压缩文件

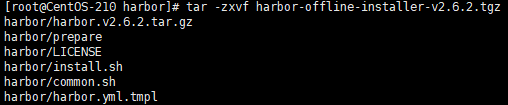
6.执行压缩命令
tar -zxvf harbor-offline-installer-v2.6.2.tgz
7.拷贝harbor的配置文件
cp harbor.yml.tmpl harbor.yml
8.查看文件夹下文件
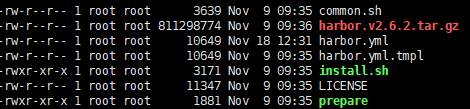
9.编辑harbor.yml文件
vi harbor.yml
10.开始编辑
点击键盘a键开启修改模式
11.修改配置文件内容
设置端口时记得查看所有的被占用的端口,不要和正在使用的端口重复:
netstat -ntulp
配置文件修改内容:
(1)设置hostname访问地址
(2)设置port端口号,注意避免和占用端口重复
(3)将https注释掉
(4)修改harbor仓库数据目录
此处有两种选择:
(1)采用http协议通信,注释https,只不过此处后面需要给daemon.json文件修改配置
(2)采用https协议,http保留作为兜底防止https失效,不过这样做很麻烦,会需要你去申请证书,步骤非常繁琐,而且容易出错。链接:harbor配置https访问
  ...
 hostname: 192.168.1.18   //设置访问地址,可以是ip、主机名,不可以设置为127.0.0.1或localhost
 # http related config
 http:             //启用http
 # port for http, default is 80. If https enabled, this port will redirect to https port
    port: 80       //http默认端口为80
 //将https注释掉,以关闭https支持
 # https related config
 #https:                //注释
 # https port for harbor, default is 443
 # port: 443           //注释
 # The path of cert and key files for nginx
 # certificate: /your/certificate/path     //注释
 # private_key: /your/private/key/path     //注释
 ...
 # Remember Change the admin password from UI after launching Harbor.
 harbor_admin_password: Harbor12345      //harbor登录密码
 ...
 # The default data volume
 data_volume: /opt/harbor/data        //修改harbor仓库数据目录
 ...
12.保存
点击左上角 **Esc键 **后,输入 **:wq **再点击 Enter键 保存成功
13.修改daemon.json配置文件
vim /etc/docker/daemon.json
补充具体内容如下:
{
  "registry-mirrors": ["https://mg4q1xho.mirror.aliyuncs.com"],
    "insecure-registries": ["10.21.23.91:80"]
}
注意添加"insecure-registries": ["10.21.23.91:80"],别忘了前面的逗号。
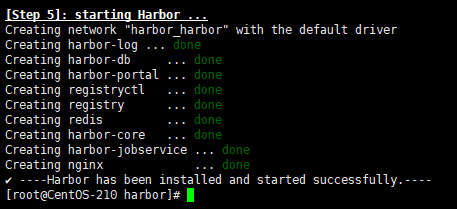
14.启动安装脚本
./install.sh
15.重新执行,安装成功
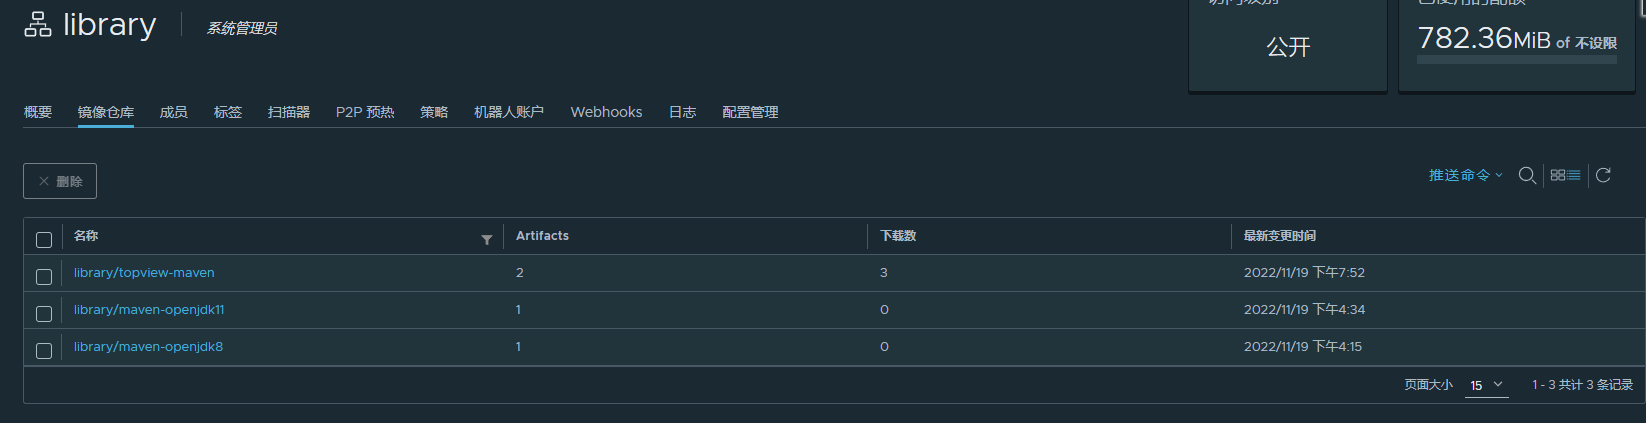
16.推送镜像到harbor
首先docker tag
docker tag adoptopenjdk/maven-openjdk8 10.21.23.91:80/library/maven-openjdk8:latest
然后docker push
docker push 10.21.23.91:80/library/maven-openjdk8:latest
此时登录harbor查看镜像是否存在:
镜像可以从DockerHub中找到:
https://hub.docker.com/r/adoptopenjdk/maven-openjdk8
https://hub.docker.com/r/adoptopenjdk/maven-openjdk11
17.制作jdk+maven docker镜像
链接如下:
https://blog.csdn.net/cloud_engineer/article/details/126690346
18.修改域名与ip映射
此处因为涉及到流水线,gitlab-ci.yml配置文件需要从harbor中拉取镜像,所以必须和gitab-ci.yml中的镜像同名。
此处image中就是从harbor中拉取镜像,newharbor.server.topviewclub.cn就是域名,需要修改宿主机中的hosts文件,ip与自定义域名映射起来。
cd /etc
vim hosts

写成ip[空格]域名形式就好
本文作者:Akai-yuan
本文链接:https://www.cnblogs.com/akai-yuan/p/17094221.html
版权声明:本作品采用知识共享署名-非商业性使用-禁止演绎 2.5 中国大陆许可协议进行许可。
Recommend
About Joyk
Aggregate valuable and interesting links.
Joyk means Joy of geeK