

Beginners’ Guide to Run a Linux Server Securely
source link: https://dzone.com/articles/beginners-guide-to-run-a-linux-server-securely
Go to the source link to view the article. You can view the picture content, updated content and better typesetting reading experience. If the link is broken, please click the button below to view the snapshot at that time.
Beginners’ Guide to Run a Linux Server Securely
This article explains what you need to take some essential considerations for tackling common security risks with Linux Server.
Linux could be a fantastic choice for your next cloud server. Imagine you can benefit from an up-to-date and fully-loaded operating system on a 90s hardware configuration of 512 MB and 1-core CPU. Apart from technical benefits, it is the cheapest option to have, so you may have decided to run your services on it. Although connecting to a server just using a single line command, you are keeping it secure could be a bit tricky. I will go through what you need to take some essential considerations for tackling common security risks with server hardening.
Choosing a Distro to Start
Unlike Windows and macOS, Linux is a family of open-source operating systems, and many different distros have been published. Some of the most popular Linux distros are Red Hat, CentOS, Fedora, Debian, Ubuntu, Kali, Mint, etc. However, from a high-level point of view, there are two major families of distros: Red Hat-based and Debian-based.
For many Linux beginners, it is a matter of high significance to choose a distro as a starting point. Although you can take your time to thoroughly investigate different options, the best course would be just starting with one of them and be sure you will enjoy the taste of Linux with all of them. If you have no idea and want to start, I recommend choosing Ubuntu, thanks to its community and its myriad of available documents.
Ubuntu is a Debian-based Linux distribution introduced by Canonical in 2004. There are three editions of Ubuntu: Desktop, Server, and Core. The second edition, as its name shows, is considered to be used for servers. Against the Desktop edition, Ubuntu Server doesn't comprise any graphical user interface, and you may use a command-line tool named bash to manage the server.
Connecting to Server
No matter which provider you choose to buy a server from, after ordering a VPS, you need to acquire its connection info. Generally, it should be dropped in your inbox as soon as you check out your order. Then, all you need to connect and set up your machine are two things: the server's address and its root password.
To connect to the server, you may need an application that supports SSH, which is a protocol for communication between two computers. It doesn't matter if you are using Windows or macOS; you can connect to your server using the ssh command in a command-line tool like this:
ssh [USER]@[SERVER_IP_Address]
Possibly, providers do not mention the username, but you should know the username is the root. By executing the ssh command, you will be prompted to insert the password, and by providing that, you will log in to your fantastic server.
Once you log in, you can see a couple of information about the Ubuntu version and allocated hard disk capacity and can start loading your services; however, you may need to do further steps to secure your server as there are others intended to use your resources illegally without taking its responsibility. Therefore, it is crucial for you to apply at least some essential security measures on your newly bought machine.
Knowing the Threats
Suppose an evil wants to use your machine without your allowance; what do they need? Yeah, the server IP address and the password.
Although finding a combination of an unknown IP address and a random password might seem to be impossible, believe me, it is viable via a brute force tool, as I have been a victim a couple of times. To have a clue check the server's IP address using ping, and you will see how a valid IP can be identified among many other invalid IP addresses.
ping [SERVER_IP_ADDRESS]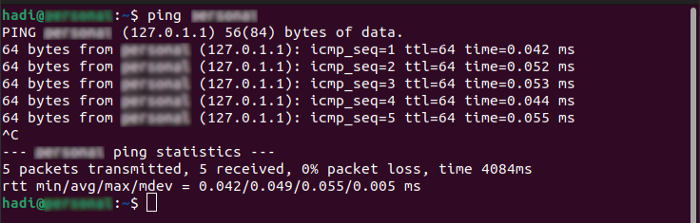
ping Command
As soon as unauthorized access is attained, it is not predictable in which way they will use your resources with your responsibility. So let's dive into some simple steps you can do to minimize the risks.
Adding Some Security
Step 1 — Strong Password: This is the first way that comes to mind. Based on password strength checker tools like this, if you use a random password, it should be at least ten characters in length so that it takes one day to be found by bots. As well it may be much easier if you use a pattern to create your password, so go for a longer password in length.
Step 2 — Remove root Access: You can simply add another complexity to the SSH login by removing root access. This way, plus the IP address and password, the username must be provided to log in, as the default username which is root is blocked. To this end, you must add a new sudoer user to the server before blocking root access.
# Add a user

sudo useradd -m {username}


# Set a password for new user

sudo passwd {username}


# Add the new user to sudoers' list

usermod -aG sudo {username}
Next, you should disable root login from ssh_config (you may need to install nano using apt install nano):
# Open SSH config file

nano /etc/ssh/sshd_config
Find PermitRootLogin, uncomment the line by removing # and set to no. The final state of this parameter should be as shown.
Removing root login from sshd config file
Then, after saving the file, you need to restart ssh service.
systemctl restart sshdNote: For many operations on the server, you need an sudo access; so after login using the new user, you can switch back to root using su command.
su rootStep 3 — Change ssh Port Number: SSH uses a default port 22 that can be modified in the sshd_config config file. This change adds another complexity for connecting to the server because the port number has to be provided in the login. To this end, you must open the file again and change the value Port to another number like 12345. Likewise, you need to restart ssh the service again. Remember that after changing the default port number, you should provide that in the login.
ssh -p [NEW_PORT_NUMBER] [USER]@[SERVER_IP_Address]

# example: ssh -p 12345 [email protected]
Conclusion
It is worth understanding how to tackle security risks. Although it is difficult to guarantee the server's safety, adding complexity is a reasonable and effective approach for server hardening. Crawlers and bots must make much more effort to do their evil meaning.
Recommend
About Joyk
Aggregate valuable and interesting links.
Joyk means Joy of geeK