

Hidden Samsung Galaxy Features That Will Make Your Phone Even Better
source link: https://www.slashgear.com/1174751/hidden-samsung-galaxy-features-that-will-make-your-phone-even-better/
Go to the source link to view the article. You can view the picture content, updated content and better typesetting reading experience. If the link is broken, please click the button below to view the snapshot at that time.
Hidden Samsung Galaxy Features That Will Make Your Phone Even Better

Samsung Galaxy smartphones are beloved by many for their sleek designs, innovative tech, and plentiful features. Their powerful processors, high-resolution displays, and outstanding camera capabilities have pushed them above many competitors in a period of exceptional user experience focus. But as they continue to grow in popularity with many Samsung enthusiasts claiming to be experts, the Galaxy series may still have a few tricks up its sleeve.
Join us as we uncover the full potential of the Samsung Galaxy range with hidden features that few may know of. From increasing productivity to boosting security, these settings and preferences might just revolutionize the way you use and see your smartphone.
It's worth noting that although we have tried our best to ensure that all proposed hidden features work across newer and older Samsung Galaxy models, there may be a few limitations or alternative steps needed for older devices. Having said that, as long as your device is supported by Android 6 or higher, you're bound to learn something new!
One-Handed Mode

With the arrival of borderless designs and high-definition displays, Samsung Galaxy smartphones are getting bigger by the year. Users are often left holding the back of their screen with one hand and scrolling with the next. One-Handed Mode, therefore, aims to optimize your scrolling experience by shrinking the size of your screen so you can return to one-handed functionality.
This can be incredibly handy (see what we did there?) if you're lying in bed, holding something, or have smaller hands in general. To make things even better, not only will your screen reduce in size, but so will your keyboard. Typing will be easier and more convenient as the letters, numbers, and symbols will shift closer to one side of the screen. No more accidental phone drops as you stretch for 1, Q, A, and Z!
How to set up One-Handed Mode on your Samsung Galaxy S22 (via Verzion):
- Open the "Settings" app.
- Select "Advanced Features."
- Navigate to "One-Handed Mode," and turn it on.
- When prompted with a "Gesture" or "Button" option, select your preference.
- If you have chosen the "Gesture" option, you can activate One-Handed Mode by swiping inwards from the "Home" button.
- Alternatively, if you have chosen the "Button" option, enable One-Handed Mode by tapping the "Home" button three times in quick succession.
Although One-Handed Mode works with most apps, you may run into compatibility issues here and there, which could cause the app's interface to not display correctly. You'll then have to exit One-Handed Mode and relaunch the app again. Furthermore, older Samsung Galaxy phones may need to follow alternative steps to activate One-Handed Mode.
Split Screen and Multi-Window
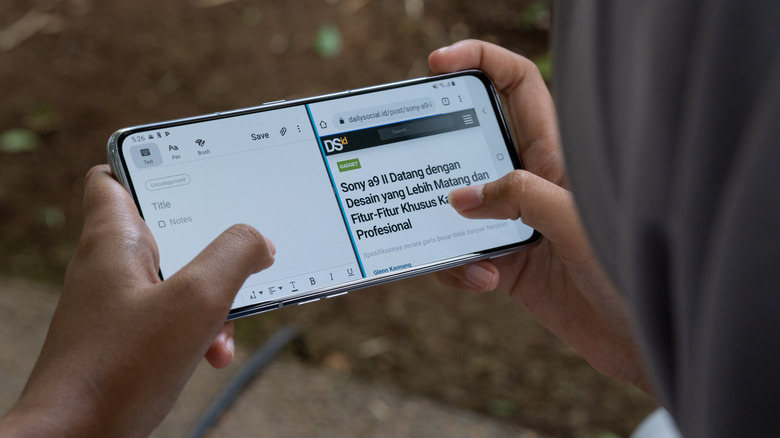
Split Screen or Multi-Window is a feature that allows Samsung Galaxy owners to run two apps simultaneously on the same screen. This can potentially increase your productivity, as you can easily reference information from one app to the other without having to switch back and forth. For example, students can read a PDF document on one side of the screen, while making notes on the other using Microsoft Word.
Additionally, Split Screen and Multi-Window functionality can also be extended into the entertainment capabilities of your Samsung Galaxy. Watch YouTube videos or your favorite streamer while you browse social media or chat with your friends. Alternatively, you can combine productivity and entertainment by listening to music while summarizing notes.
How to set up Split Screen on your Samsung Galaxy S22 (via Verzion):
- Go to the "Home" screen and select the "Recent apps" icon located in the bottom left of your display.
- Scroll left or right and choose the app you want to split screen.
- Tap the app icon, and then select "Open in split screen view." For example, if you have chosen WhatsApp, tap the actual green and white logo.
- From the bottom half of your Samsung Galaxy, you can now select the "second app" you'd like to split screen.
- The size of the apps can now be adjusted by dragging the dividing line up or down.
- To close Split Screen mode, tap the "Recent apps" icon again and swipe up on the "Split Screen window."
Once again, although the majority of apps work with Split Screen mode, older applications may not display their interface correctly. You can try updating the app or launching it individually should this occur. Furthermore, older Samsung Galaxy phones may need to follow alternative steps to activate Split Screen or Multi-Window mode.
Secure Folder

As we use our Samsung Galaxy smartphones, we will eventually accumulate a lot of sensitive information over time. A Secure Folder is a powerful feature that allows you to create a private space for all your photos, videos, and apps. Using Samsung's defense-grade Knox security platform, users can now protect their data from unauthorized access and malicious attacks.
Now, before you throw all your files into a Secure Folder you should be aware of the most important limitations. For starters, a Secure Folder is placed in complete isolation, so apps and files outside the folder cannot access each other. In other words, if you want to upload a picture from your secure folder to your public Twitter app, which is located on your Home screen, you will run into trouble.
Additionally, you'll still need to make sure that the app you'd like to move into your Secure Folder is secure itself. If you have somehow downloaded an app that contains malware, it could access your sensitive information once inside. After all, a Secure Folder protects entry, but not the contents within once authorized.
How to setup a Secure Folder on your Samsung Galaxy S22 (via Samsung):
- Go to "Settings" and tap "Biometrics and security."
- Select "Secure Folder" and tap "Continue."
- Sign into your "Samsung account" and tap "OK."
- Now choose how you would like to protect your folder. You can select a Pattern, Password, or PIN.
- Follow the on-screen instructions on how to set up your passcode, and tap "OK."
- Once the Secure Folder is ready, you can add files by selecting the "+" icon on the Secure Folder interface.
As an alternative passcode, you may also choose to enable biometric authentication. You can then use your fingerprint or facial recognition as a means of entry.
Palm Swipe to Capture
The most common way to take a screenshot on a Samsung Galaxy phone is with a combination of both the power and volume buttons. While this may seem easy enough for most, complications may arise if your device is particularly large leading you to fumble and fail at your capture attempts. Enter Palm Swipe To Capture, the convenient way to take screenshots by simply swiping your hand across the screen. Users can now increase productivity and capture important information instantaneously.
How to setup Palm Swipe to Capture on your Samsung Galaxy S22 (via Samsung):
- Go to your "Settings" and open "Advanced features."
- Scroll down and tap "Motion and gestures."
- Scroll down again and enable "Palm swipe to capture."
The next time you want to take a screenshot, swipe across the front of your screen using your hand. It's best to keep your hand in a straight vertical position, with your thumb pointing upwards, moving from the right to left of your screen in a semi-fast motion. Once you've successfully captured your display, you should receive the screenshot pop-up notification that saves to your gallery.
If your Samsung Galaxy device's sensor is not recognizing the palm swipe motion, this may be due to your phone case or screen protector. These accessories may interfere with the feature and block the accuracy of your swiping motion. Remove them and try the swiping motion again.
Lastly, keep in mind that screenshot functionality may not work with all apps. This may be due to privacy reasons or compatibility issues. Nonetheless, a pop-up notification should alert you of this, which should not be confused with a failed Palm Swipe to Capture recognition issue.
Mute With Gestures
Nobody likes an unexpected phone call or alarm, especially if you're in a meeting, at class, or sleeping in. The initial jump scare often leaves users surprised, followed by incorrect menu commands as they panic to silence the noise. Previously known as Easy Mute, Samsung's Mute With Gestures is a feature that allows Galaxy owners to mute their device by simply turning their phone face down or covering the proximity sensor.
How to setup Mute With Gestures on your Samsung Galaxy S22: (via Samsung):
- Open "Settings" and tap "Advanced Features."
- Scroll down and select "Motions and gestures."
- Tap "Mute with gestures."
- The toggle switch for Mute With Gestures feature should now be blue.
The next time you receive a phone call or alarm you should be able to easily and quickly mute incoming notifications. Similar to Palm Swipe to Capture, your Samsung Galaxy will rely on its proximity sensor to determine whether motion has been detected. If for some reason Mute With Gestures does not work, ensure that your screen protector or phone case is not obstructing the sensor. Additionally, take care when turning your phone over and placing it face down, as you could potentially crack the screen with too much force.
Please note that although Mute With Gestures is available on almost all recently released Samsung Galaxy phones, users with older models may have the feature labeled as "Turn Over to Mute" on their devices. Nevertheless, the same instructions above apply and it will function exactly the same.
Secure Wi-Fi
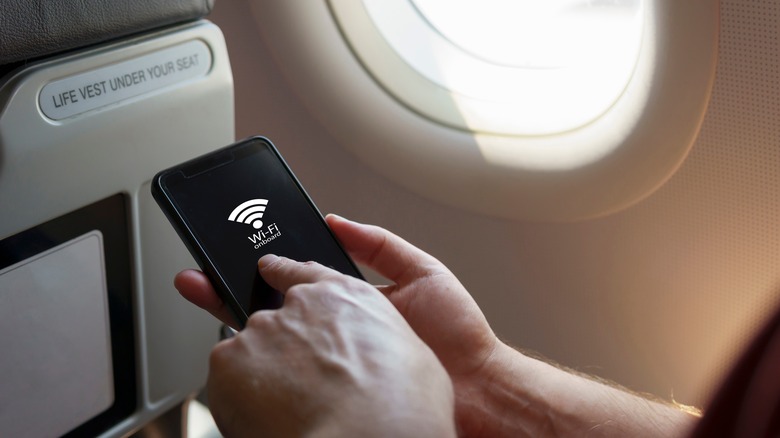
Secure Wi-Fi is an excellent way to protect your Samsung Galaxy phone from malicious Wi-Fi networks and cybercriminals. Similar to a virtual private network, Secure Wi-Fi encrypts your internet connection, making it difficult for hackers to intercept or monitor your online activities. While the feature is free, it is limited to 1024 MB of data per month. A subscription plan will then need to be purchased for unlimited protection at $1.99 a month, but these charges may vary per region and network.
How to setup Secure Wi-Fi on your Samsung Galaxy S22 (via Samsung):
- Go to "Settings" and tap "Security and privacy."
- Scroll down to Secure Wi-Fi and tap "Allow location access."
- Now tap "Protect" under "Ready to protect."
- Secure Wi-Fi will now be activated.
- If you'd like to upgrade your Secure Wi-Fi, select "Protection plan" on the same window and choose from the range of options.
Keep in mind that the Secure Wi-Fi feature is not a substitute for a dedicated VPN service or antivirus software. While your IP address may be hidden, and your information encrypted, some forms of malware may still pose a risk to your Samsung Galaxy. This may be through phishing links or harmful files downloaded from the web itself. Additionally, your connection speed may be affected by the sheer amount of data required for encryption.
With that said, Secure Wi-Fi is still a better option as opposed to nothing and could be a fail-safe should you need an emergency public internet connection. Just ensure that your Samsung Galaxy phone supports this feature before heading out. Free public Wi-Fi can come with serious consequences if you're not careful.
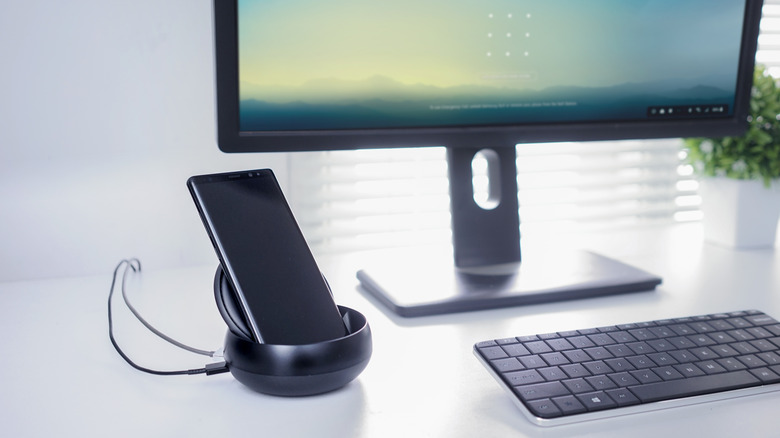
Are you ready to turn your Samsung Galaxy into a computer? Well, if you own a compatible Samsung Galaxy phone, mouse, keyboard, and monitor you could convert these into a full desktop experience. With access to all the files and apps installed on your Galaxy device, DeX allows users to increase productivity with a fully functioning workstation.
Now before you get too excited, note that DeX isn't available on all Samsung Galaxy devices. In fact, it's limited to a select few models only. Furthermore, depending on the type of accessories and external monitors you have, the setup process may vary. With that said, we have summarized the most popular instructions that should work with nearly all Samsung Dex devices.
How to setup DeX on your Samsung Galaxy device:
- Connect a USB-C to HDMI cable to your Samsung Galaxy device and HDMI monitor.
- Swipe down from your "Home screen" to access the "Quick settings panel" and tap "DeX."
- If it's your first time using Samsung DeX, a pop-up window may appear, select "Continue," and then "Start."
- Your external monitor should now display a desktop interface.
DeX can also be set up wirelessly with a TV, but this is further restricted to the Note 20, S21, and S22 at the time of this writing. Furthermore, the display must support Miracast technology or be a 2018 Samsung Smart TV for the very least. To set up Samsung DeX wirelessly:
- Swipe down from the "Quick settings panel."
- Tap "Dex" on the TV or monitor.
- Select "Start."
You can now control your new desktop using your Samsung Galaxy device as a touchpad, or opt to add a wireless keyboard and mouse via Bluetooth.
To connect wireless accessories:
- Open "Settings" and tap "Bluetooth."
- Select your accessories and "Pair."
Always On Display
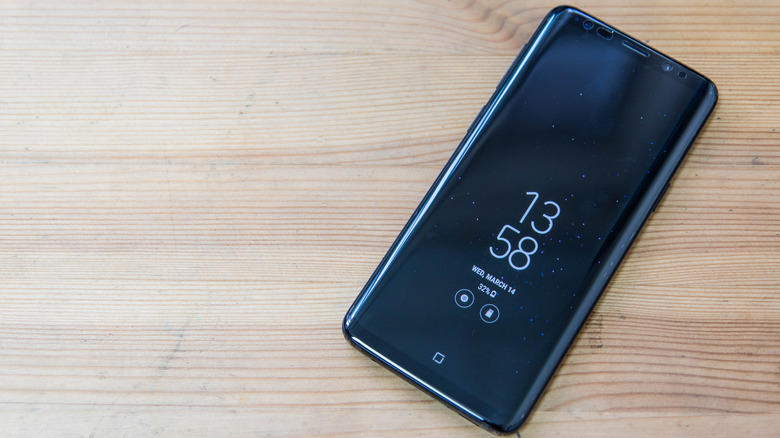
Always On Display (AOD) is a convenient feature that allows you to check the time or view notifications without fully waking your Samsung Galaxy phone. This is particularly useful for users who have long passwords or complicated patterns that are required to unlock their phones. You might even find yourself increasing your focus, as you'll no longer have to fully open your messaging apps to view incoming notifications.
Unlike many features on this list, AOD has a few variations. You should therefore be aware of these to further customize your settings to your preferences. As a baseline, the default profile is "Tap to show," which activates the AOD for 10 seconds when the screen is tapped. Other variations include: "Show as scheduled," which lets you choose the times the AOD is active; "Show always," which continuously displays the AOD as long as the phone is locked; and Show for new notifications, which activates the AOD when you receive a new notification.
How to setup Always on display on your Samsung Galaxy S22 (via Samsung):
- Open up "Settings" and navigate to "Lock screen."
- Inside your Lock screen settings, tap "Always on display."
- The toggle switch for "Always on display" should now be blue.
- To further customize your "Always on display" settings, select the text itself.
- You will now be presented with the additional variations above.
Now you may be wondering about screen burn-in since the AOD feature has the capability to stay on infinitely. Fortunately, there's nothing to worry about, as Samsung has designed the AOD image to slightly reposition itself over time. The drawback, however, is a somewhat strained battery. Continuous use and screen time may diminish your phone's charge levels over time, especially if you opt for the Show always setting.
Smart Stay
Screen timeouts can be frustrating when you're watching a video or reading a lengthy piece of text. Sure you can adjust the time it takes before your screen goes black, but these settings are never really optimized to your ideal preference. Set a short timeout limit and you'll be left constantly needing to unlock your device. On the other hand, set a timeout limit for too long and you'll risk wasting the battery should you accidentally leave your phone unattended.
Samsung's Smart Stay is therefore the ultimate solution for keeping your screen on if you want to keep using your device without any interruptions. Using the front camera of your Samsung Galaxy, Smart Stay can detect your eyes and face when you're looking directly at the phone. The feature also overrides any timeout setting, so it will stay on no matter what, and turn off when you're finished.
How to setup Smart Stay on your Samsung Galaxy S22 (via Samsung):
- Open "Settings" and select "Advanced features."
- Scroll down and tap "Motions and gestures."
- Tap "Smart stay."
- The toggle switch should now be blue.
- If Smart Stay isn't available, your Galaxy Smartphone may have it labeled as "Keep screen on while viewing."
- Tap "Keep screen on while viewing," and the Smart Stay feature will apply.
Since the Smart Stay feature relies on the front-facing camera, certain external factors may influence functionality. If your Samsung Galaxy continues to timeout, the following may be affecting performance: The device is not being held upright; there is a source of light behind you; you're using the device in the dark; the front camera is being used by another app; or you're face or eyes are not entirely visible.
Dual Audio
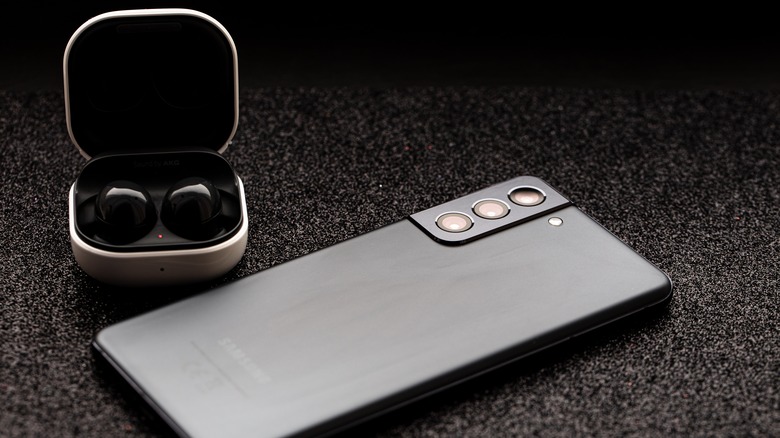
Dual Audio is an innovative feature that lets Samsung Galaxy owners share their audio between two Bluetooth speakers or headphones (receivers) simultaneously. Perfect for entertainment purposes, you can now spread your audio to your heart's content as you fill your home with music, while using a single audio source. Alternatively, you can also watch movies on your smartphone with friends, forever separated from the dreaded shared-earphone phobia.
Now, as a relatively new Samsung feature, Dual Audio is currently limited to Bluetooth 5.0 devices and is predominantly found on Android OS versions 10, 11, and 12. Although the functionality can deliver exceptional sound quality based on your audio receiver (headphones, earphones, or speakers), it will still be constricted by the range of your Bluetooth 5.0 version itself which should hover around 250 meters or 800 feet.
Additional factors such as walls and outside interference may further reduce these numbers, so it's worthwhile keeping your Samsung Galaxy at an equal distance apart from both audio receivers for the best dual performance.
How to setup Dual Audio on your Samsung Galaxy S22 (via Samsung):
- Open "Settings" and select "Connections."
- Enable "Bluetooth" and then enter the tab itself.
- Turn on your two Bluetooth receiver devices and have them in pairing mode.
- Once the Bluetooth devices appear on your Samsung Galaxy, select the first one and tap on "Pair" when prompted.
- Tap the Home button and go back into "Settings > Connections > Bluetooth."
- Select the second Bluetooth device, and tap on "Pair" when prompted.
- Swipe down from the top of your screen and select "Media output."
- Tick the two Bluetooth audio receivers you have connected.
- Adjust the volumes to your preferences.
- You can now stream audio to both devices.
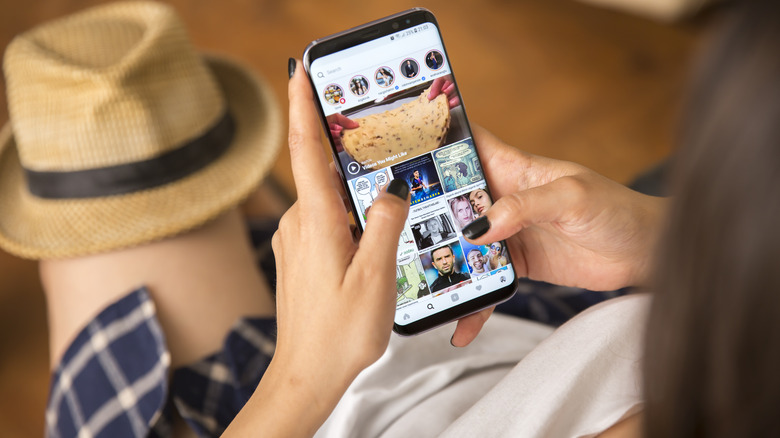
12 Things You Never Knew Your Smartphone Could Do
For many, it's a ritual to wake up, grab your phone, and open Instagram. You start scrolling an endless feed, only to realize a while after that you need to get on with your day. But your smartphone can do more than just calling, messaging, and scrolling through social media, much of which is quite productive.
Modern phones are capable of doing things like controlling the gadgets in your smart home, for example. But even if you don't have a smart home, you can do plenty of cool things with a smartphone.
Some of those cool things are built into your phone out of the box. Other things require installing an app from the App Store or the Play Store. Give the compulsive social media scrolling a break and use your smartphone for something more productive or innovative.
In this guide, we cover 12 things you didn't know you could do with your smartphone.
Create cool looping videos
You've probably edited videos on your phone before. There are tons of apps out there and you can also create cool stuff with Instagram's boomerang. But did you know you can create cool looping videos with the Clips app if you use an iPhone?
These aren't your basic run-of-the-mill looping videos. Here's how to make it happen:
Start by recording a simple loop video and import it into the Clips app. Next, trim the beginning and end of the video so it loops by itself. Then, add more clips with the same movement. Finally, change an unexpected element of your video (for instance, scale or change an object).
If you need some help with editing, Apple has a tutorial for editing videos on the Clips app. Once you've created your video, you can directly post it on social media, share it with a friend, or save it on your device.
Control your car
Ever had to drive a car parked for hours under the sun? The first few minutes are excruciatingly hot even with the AC turned on. Wouldn't it be awesome if you could cool down the car before you start driving?
You can do that, and a lot more, with Viper SmartStart. It essentially converts your smartphone into your vehicle's remote control. Installing the complete system allows you to unlock and start the car, open the trunk, find your car's location, and activate its security system, among other things. With Viper SmartStart installed, you'll have the option to prepare the car for a comfortable experience before you use it.
The app is available for both Android and iOS for free, but you'll need to invest in hardware and pay Viper's monthly service fee to use the system. The total cost of installing the system will also vary from installer to installer since it's not a DIY system.
Use your phone as a tape measure
Need to measure the length of an object, but don't have your tape measure handy? There's little to worry about when you have a smartphone. There are several mobile apps that can help you measure the length of an object by using the phone's camera.
For instance, you can use the Measure app on the iPhone to measure an object's length. The app uses augmented reality (AR) to calculate the object's dimensions. To use the Measure app:
Start by launching the app. Point your phone's camera towards an object. Keep adjusting the camera's angle until you see a white circle with a dot at its center. Then, bBring the dot over the starting point of the object. This is where it will start measuring from.
Next, press the Add (+) button. Move the phone across the object until the dot is on the other end of the object. Press the Add (+) button again when the circle is over the point where you want to end the measurement.
Display the directions on the windshield
Have you ever driven when it's foggy or raining heavily? It's hard to see what's on the road. You want to drive as slowly and carefully as you can to avoid missing a turn and driving your car off the road. The good thing is that your smartphone can help.
You can use the Hudway app to display the directions on your windshield. Download the app on your Android or iOS device, enter the destination and let Hudway pull the correct directions. Place the phone on your car's dashboard so it can project the map onto the windshield.
Note that you should mount the phone properly so it doesn't fall off the dashboard. Also, place it appropriately so it doesn't keep you from seeing the road clearly. The app uses your phone's GPS, which means it will consume more battery, so be sure to keep your charger handy in case you need it.
Use your phone as a metal detector
No, you can't use your phone for treasure hunting. However, if you've lost a piece of jewelry or want to find a needle that rolled off your hand, you can use your smartphone as a metal detector.
You'll find a ton of metal detector apps on the Google Play Store and App Store. The apps are free, though not ad-free. Download one of those to your Android or iOS device and start your metal search by moving your phone around.
The app will use a built-in magnetometer to find metallic objects as you move your device, and notify you when it finds a metal object.
Note that there might also be other metallic objects in the area and electronic items like TV and refrigerator. These objects may get in the way when you're using a metal detecting app. The results are usually not completely reliable and depend on your phone's magnetic sensor, but they're helpful nonetheless.
Measure blood alcohol content
Wonder if you're ok to drive? Well, your smartphone can help you verify this before you get behind the wheels and save you from a DUI and potential accidents. You can use your smartphone as a breathalyzer by installing an app like BACtrack on your Android and iOS device.
Of course, you also need an actual breathalyzer from BACtrack that connects with your phone and syncs with the app. Once those are connected, you'll be able to blow into the device and check the app to look at your current blood alcohol content. With BACtrack, you'll always know if it's best to use a cab or you're good to drive without putting yourself and anybody else's lives at risk.
Note that you should wait at least 15 minutes after your first drink to check your blood alcohol content and it might continue to rise until one hour after your last drink (per WebMD).
Use your smartphone as a remote
Lost your remote again? Guess what? You don't need to find it if you have a smartphone. You can install an app, or use a built-in function if your phone has it, to control electronic devices like TV, AC, DVD player, and projector, among others.
Newer iPhones and Android TVs typically have built-in controls for Apple TV and Google TV, respectively. However, you can download an app like ASmart Remote IR (Android) or EzRemote Lite (iOS) and use your phone as a remote control for almost any household device. You can also use the manufacturer's app in some cases.
These apps usually rely on your phone's IR blaster, but there are other ways to use your smartphone as a remote if your phone doesn't have an IR blaster. For instance, you can use the Google TV app to control an Android TV. The app syncs with the Android TV and uses WiFi, so it works even without an IR blaster.
Digitize old negatives
Found some old film negatives while cleaning the house? How about digitizing them real quick using your smartphone? Since most photos exist only as a digital copy now, it makes sense to scan these negatives and store them as digital files instead of converting them into a physical photo album.
You don't need a film and slide scanner to scan negatives. You can scan negatives with your smartphone by clicking a picture of the negative and scanning it with one of the negative scanner apps available on the Play Store or App Store.
You can use apps like Photo Negative Scanner (Android) and FilmBox (iOS) to quickly capture negatives and turn them into high-quality pictures. The apps use a scanning algorithm to automatically invert colors and improve image quality to produce excellent quality pictures. Once you've digitized these pictures, you can export them to your device and share it with friends and family. You can also convert them into an album using an app like Google Photos.
Stop sharing data with apps you no longer use
If you're like most people, you have a few unused apps installed on your phone. Even though you're not using them, they can still access data on your phone. For instance, if you installed a dating app last year, but have since found someone, it makes sense to revoke the app's access to your data.
There's an easy way to stop these apps from collecting your data on Android. Android's permission auto-reset option periodically cleans up permissions from unused apps. You'll receive a notification each time the permissions are reset. If you wish to continue allowing access to data to a certain app, you can always go back and change the permissions.
You can also review app permissions in iOS by going into Settings > Privacy. You can select individual apps and grant or revoke access to data based on your preference. There's no auto-reset option for permissions granted to unused apps on iOS, though, so you'll need to make these changes manually.
Split screen
Splitting your screen is an excellent way to multitask. It's always been easy to split screens on your laptop, but did you know you could split your smartphone's screen too? Both Android and iOS devices let you split screens. The option is built-in on Android so you don't need to install any third-party apps, but you'll need a third-party app on iPhone.
Here's how you can split the screen on stock Android or Samsung devices:
Launch both apps you want to use after splitting the screen. Then, tap the recent apps button from the bottom of your screen. Find the app you want to use in split screen and hold-press the app's icon at the top. Next, select "Split Screen". Finally, select the other app you'd like to use after splitting the screen.
iPads do have a built-in split screen option, but on iPhone you can use an app like Split Screen View to multitask.
Use smart lock
Android Smart Lock solves one of the most annoying parts of smartphone security — having to unlock the phone every time you want to use it. Instead, Smart Lock offers conditional security. It doesn't lock the phone at specific times as per your preference, and locks it otherwise.
For instance, you can set the Smart Lock such that the phone will remain unlocked as long as it's in a certain place (such as your home). Similarly, you can also keep the phone unlocked when it's on your body or connected to a trusted device.
You can enable Smart Lock on Android 5.0 Lollipop and later by going to Settings > Security > Advanced > Trust agents. Your phone may house Smart Lock in a different place, but you should be able to find it by searching for "Smart Lock" in Settings.
Once you've set up Smart Lock, you don't need to worry about repeatedly inserting the security pin or pattern every time you want to unlock your phone.
Use notification history
How many times have you read a message from a friend from the notification panel and decided to leave the notification untouched as a reminder for replying to them? If you do this too, you're probably careful about not clearing the notifications panel because it means your reminders are gone. It's even worse if you forget to respond to your boss because you cleared your notifications.
However, there's an easy solution. You can enable notifications history on your Android smartphone. Doing this will create a log of notifications that you'll be able to access even if you inadvertently clear all the notifications.
Enabling notification history is fairly straightforward. Here's how you can do it on Android 12:
Go to Settings > Notifications > Notification history. Then, toggle the button on for the "Use notification history" option.
Once you've done this, you'll see a log of subsequent notifications in a section under the "Use notification history" option.
Recommend
About Joyk
Aggregate valuable and interesting links.
Joyk means Joy of geeK