

通过Docker启动Solace,并在Spring Boot通过JMS整合Solace - 南瓜慢说
source link: https://www.cnblogs.com/larrydpk/p/17059116.html
Go to the source link to view the article. You can view the picture content, updated content and better typesetting reading experience. If the link is broken, please click the button below to view the snapshot at that time.
Solace是一个强大的实时性的事件驱动消息队列。本文将介绍如何在Spring中使用,虽然代码使用的是Spring Boot,但并没有使用相关starter,跟Spring的整合一样,可通用。JMS是通过的消息处理框架,可以深入学习一下,不同的MQ在JMS的整合上都是类似的。
2 通过Docker启动Solace
有两种方式试用Solace,一种是通过Docker来启动,另一种是使用Cloud版本,但Cloud版本有试用期限,我们使用Docker来启动吧。
先下载镜像:
$ docker pull solace/solace-pubsub-standard:9.13.0.16
然后通过以下命令启动:
$ docker run -d -p 8080:8080 -p 55554:55555 -p 8008:8008 -p 1883:1883 -p 8000:8000 -p 5672:5672 -p 9000:9000 -p 2222:2222 --shm-size=2g --env username_admin_globalaccesslevel=admin --env username_admin_password=admin --name=solace solace/solace-pubsub-standard:9.13.0.16
这里端口改为55554,是因为Mac的原因。
然后便可以访问来登陆管理界面:http://localhost:8080/
用户名密码为:admin/admin
登陆后可以看到如下界面,Solace按VPN来管理队列,VPN有点像分组,比如某个业务线使用某个VPN。
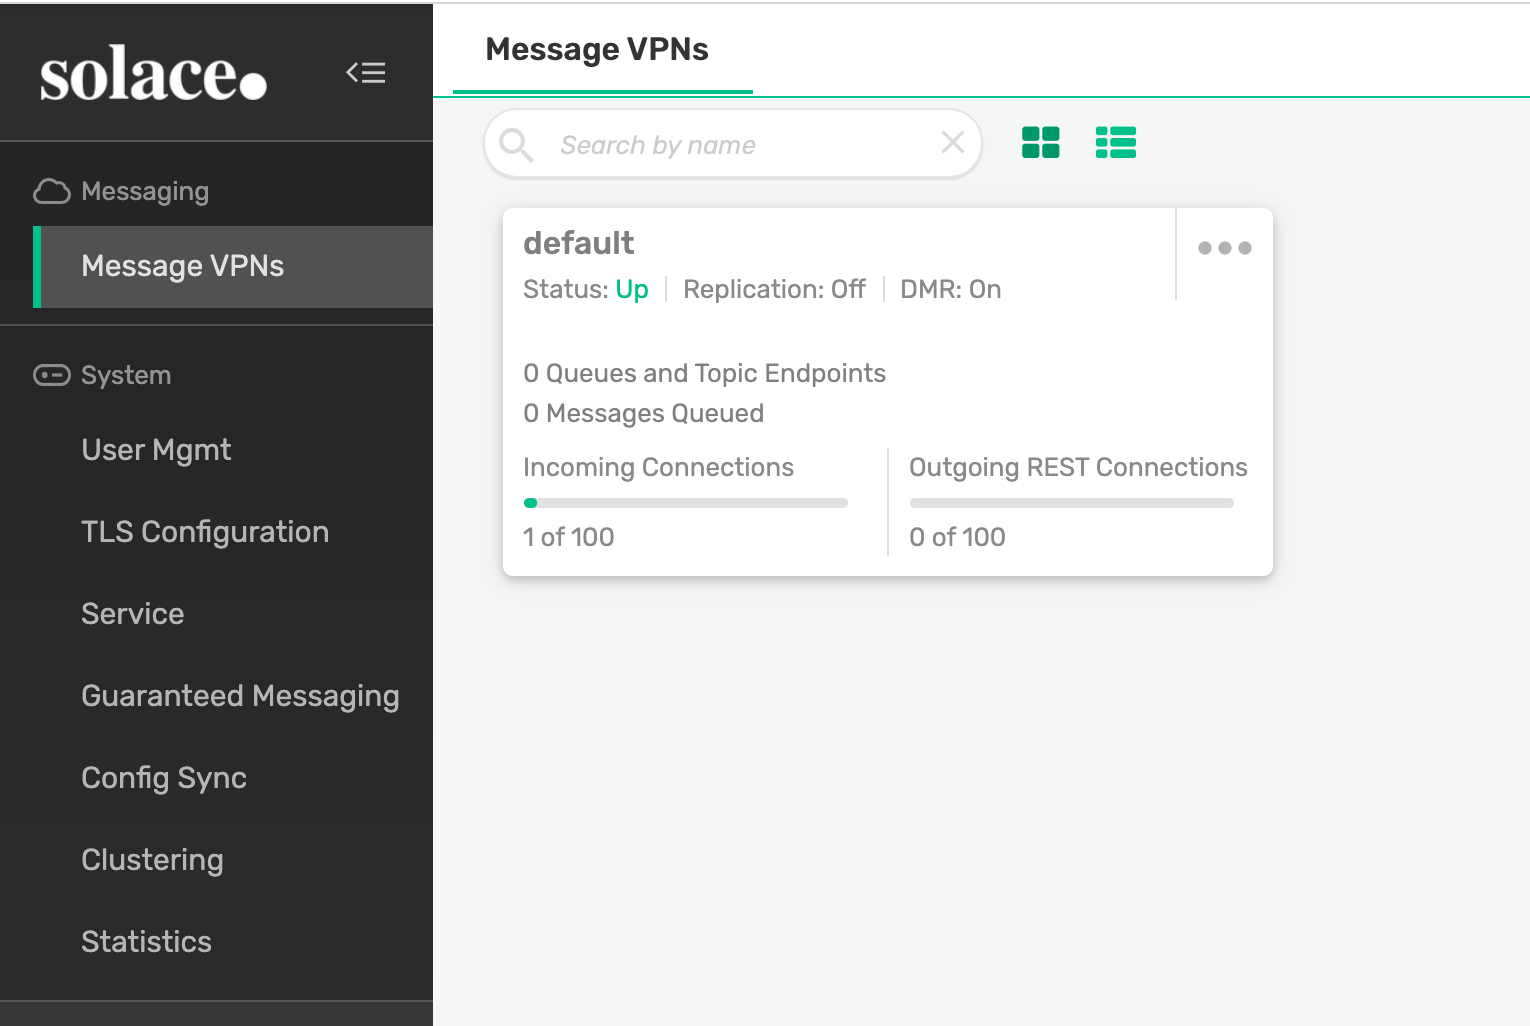
我们在default的VPN上创建一个Queue,名为pkslow-queue:
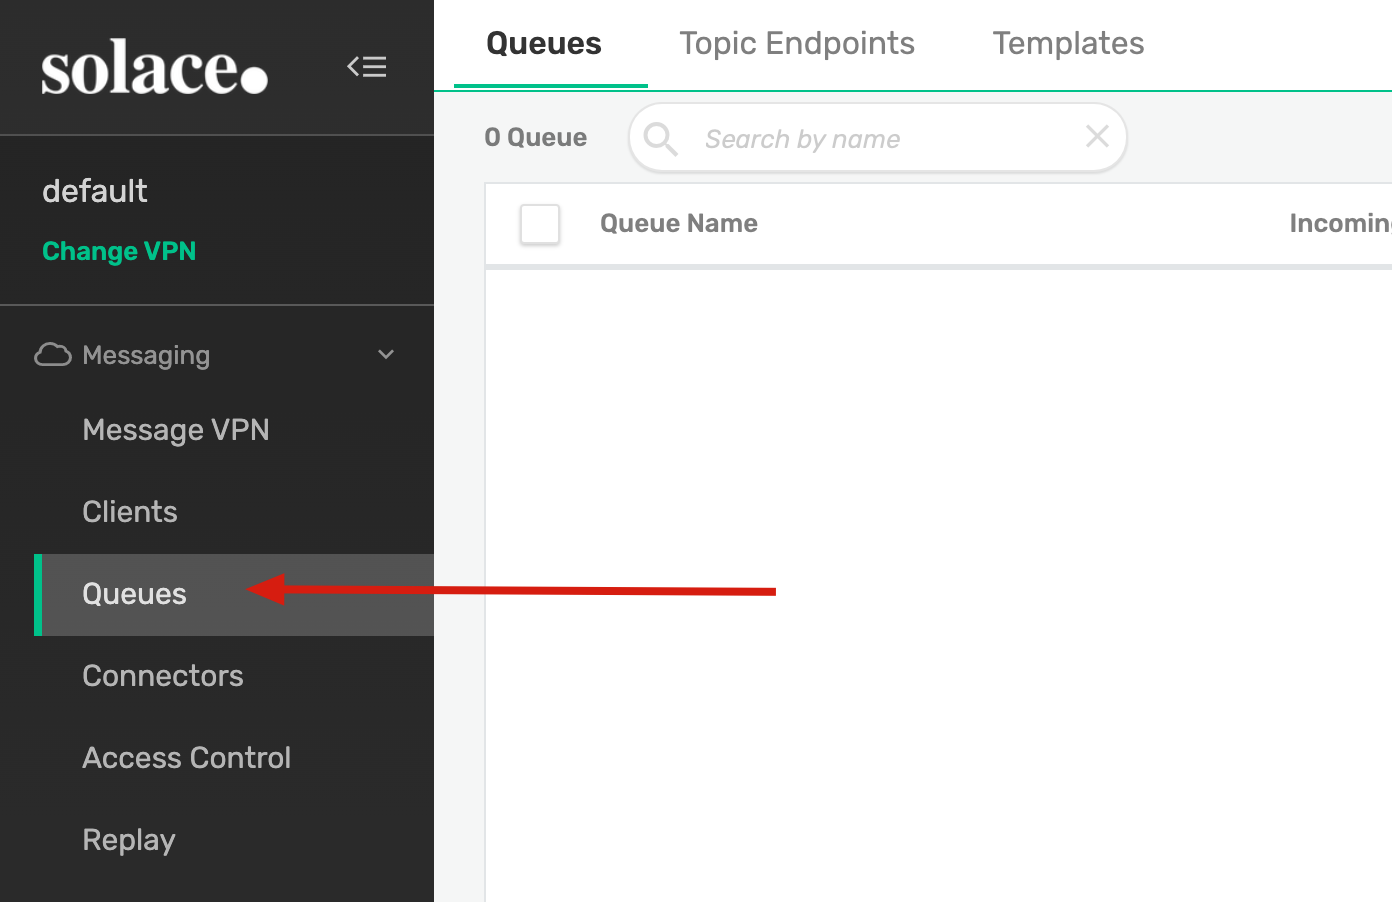
其它设置如下:
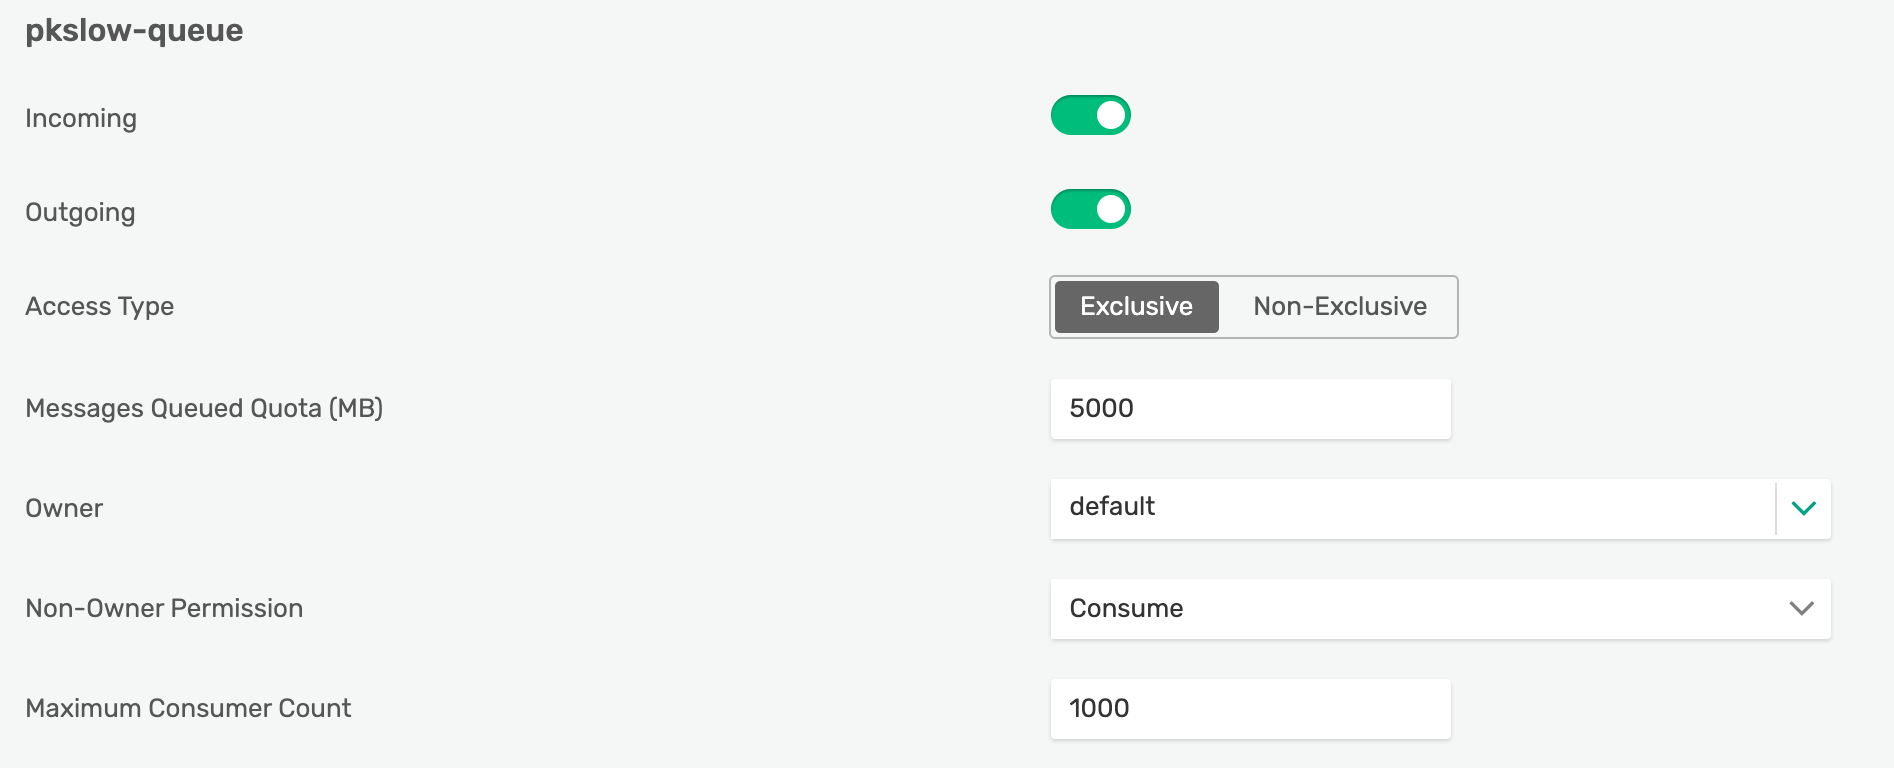
接着在该Queue上创建Topic:

创建完成后,我们可以直接测试一下:
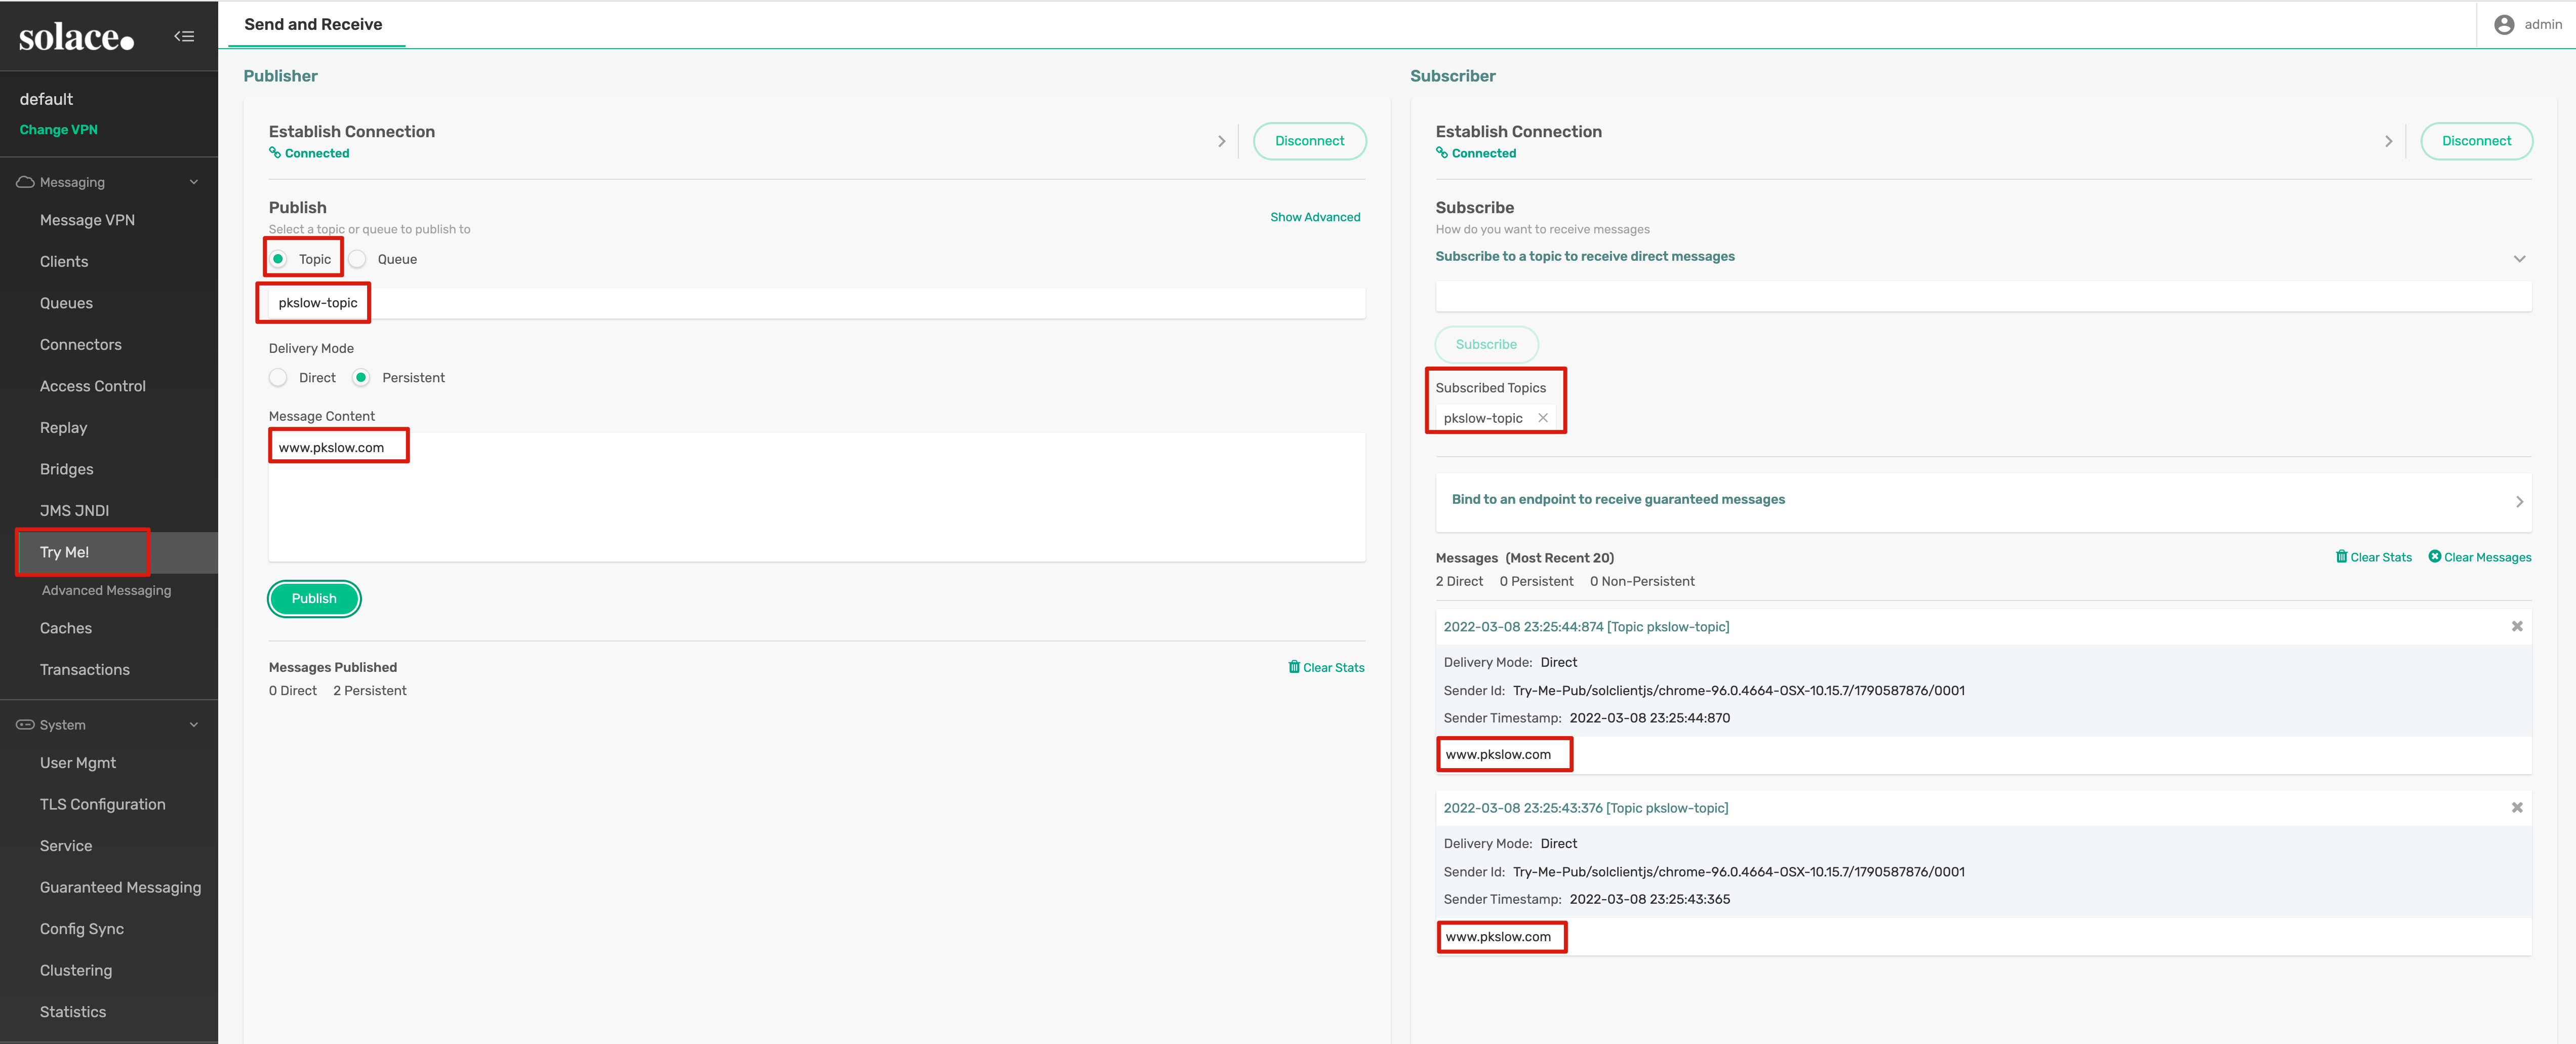
可以Publish到Topic或Queue,也可以从其中一个Subscribe。
完成以上设置后,我们就可以在Spring Boot中整合了。
3 Spring Boot JMS整合Solace
3.1 发送消息
我们是通过JmsTemplate来发送消息的,而JmsTemplate需要连接到MQ,就需要一个ConnectionFactory,这个Factory是带着MQ的一些连接信息。配置代码如下:
@Configuration
public class SolacePubConfig {

    private final SolaceProperties solaceProperties;

    public SolacePubConfig(SolaceProperties solaceProperties) {
        this.solaceProperties = solaceProperties;
    }

    @Bean("connectionFactory")
    public ConnectionFactory connectionFactory() throws Exception {
        Properties env = new Properties();
        env.put(InitialContext.INITIAL_CONTEXT_FACTORY, "com.solacesystems.jndi.SolJNDIInitialContextFactory");
        env.put(InitialContext.PROVIDER_URL, solaceProperties.getBrokerUrl());
        env.put(SupportedProperty.SOLACE_JMS_VPN, solaceProperties.getVpn());
        env.put(InitialContext.SECURITY_PRINCIPAL, solaceProperties.getUsername());
        env.put(InitialContext.SECURITY_CREDENTIALS, solaceProperties.getPassword());
        return SolJmsUtility.createConnectionFactory(env);
    }

    @Bean
    public CachingConnectionFactory cachingConnectionFactory(ConnectionFactory connectionFactory) {
        CachingConnectionFactory cachingConnectionFactory = new CachingConnectionFactory(connectionFactory);
        cachingConnectionFactory.setSessionCacheSize(10);
        return cachingConnectionFactory;
    }

    @Bean
    public JmsTemplate pubJmsTemplate(CachingConnectionFactory cachingConnectionFactory) {
        JmsTemplate jmsTemplate = new JmsTemplate(cachingConnectionFactory);
        jmsTemplate.setPubSubDomain(true);
        jmsTemplate.setExplicitQosEnabled(true);
        jmsTemplate.setDeliveryPersistent(true);
        jmsTemplate.setDefaultDestinationName(solaceProperties.getDefaultPubDestinationName());
        return jmsTemplate;
    }

}
生成JmsTemplate后,就可以引用并发送消息了:
@RestController
@RequestMapping("/solace")
public class SolaceTestController {
    private final JmsTemplate pubJmsTemplate;
    private final SolaceProperties solaceProperties;

    public SolaceTestController(JmsTemplate pubJmsTemplate, SolaceProperties solaceProperties) {
        this.pubJmsTemplate = pubJmsTemplate;
        this.solaceProperties = solaceProperties;
    }

    @GetMapping
    public String send() {
        pubJmsTemplate.send(solaceProperties.getDefaultPubDestinationName(), session -> session.createTextMessage("www.pkslow.com"));
        pubJmsTemplate.send(session -> session.createTextMessage("Larry Deng"));
        return "OK";
    }
}
用到的属性配置如下:
server.port=8083

pkslow.solace.brokerUrl=smf://127.0.0.1:55554
pkslow.solace.vpn=default
pkslow.solace.username=default
pkslow.solace.password=default
pkslow.solace.defaultPubDestinationName=pkslow-topic
pkslow.solace.defaultSubDestinationName=pkslow-queue
@Configuration
@ConfigurationProperties(prefix = "pkslow.solace")
@Setter
@Getter
public class SolaceProperties {
    private String brokerUrl;
    private String vpn;
    private String username;
    private String password;
    private String defaultPubDestinationName;
    private String defaultSubDestinationName;
}
3.2 接收消息
我们通过MessageListenerContainer来接收消息,MessageListenerContainer也需要一个ConnectionFactory,也有MQ的连接信息。还需要一个MessageListener,用来定义如何处理消息。我们的配置如下:
@Configuration
@Slf4j
public class SolaceSubConfig {
    private final SolaceProperties solaceProperties;

    public SolaceSubConfig(SolaceProperties solaceProperties) {
        this.solaceProperties = solaceProperties;
    }

    @Bean
    public SingleConnectionFactory singleConnectionFactory(@Qualifier("connectionFactory") ConnectionFactory targetConnectionFactory) {
        return new SingleConnectionFactory(targetConnectionFactory);
    }

    @Bean
    public MessageListener messageListener() {
        return message -> {
            try {
                log.info("Received message " + ((TextMessage) message).getText() + " on destination: " +
                        message.getJMSDestination().toString());
            } catch (JMSException ex) {
                throw new RuntimeException(ex);
            }
        };
    }


    @Bean
    public MessageListenerContainer messageListenerContainer(SingleConnectionFactory singleConnectionFactory, MessageListener messageListener) {
        DefaultMessageListenerContainer container = new DefaultMessageListenerContainer();
        container.setConnectionFactory(singleConnectionFactory);
        container.setDestinationName(solaceProperties.getDefaultSubDestinationName());
        container.setMessageListener(messageListener);

        return container;
    }
}
这里@Qualifier("connectionFactory") ConnectionFactory targetConnectionFactory复用了在SolacePubConfig创建的对象。
3.3 测试
发送GET请求就可以触发发送了:
GET http://localhost:8083/solace
我发了三次,结果日志如下:

代码请看GitHub: https://github.com/LarryDpk/pkslow-samples
References:
Recommend
About Joyk
Aggregate valuable and interesting links.
Joyk means Joy of geeK