

【JVM实战系列】「监控调优体系」实战开发arthas-spring-boot-starter监控你的微服务...
source link: https://www.cnblogs.com/liboware/p/16998541.html
Go to the source link to view the article. You can view the picture content, updated content and better typesetting reading experience. If the link is broken, please click the button below to view the snapshot at that time.
相信如果经历了我的上一篇Arthas的文章[【JVM实战系列】「监控调优体系」针对于Alibaba-Arthas的安装入门及基础使用开发实战指南]之后,相信你对Arthas的功能和使用应该有了一定的理解了。那么我们就要进行下一步的探索功能。
Arthas对于SpringBoot2的支持和监控体系
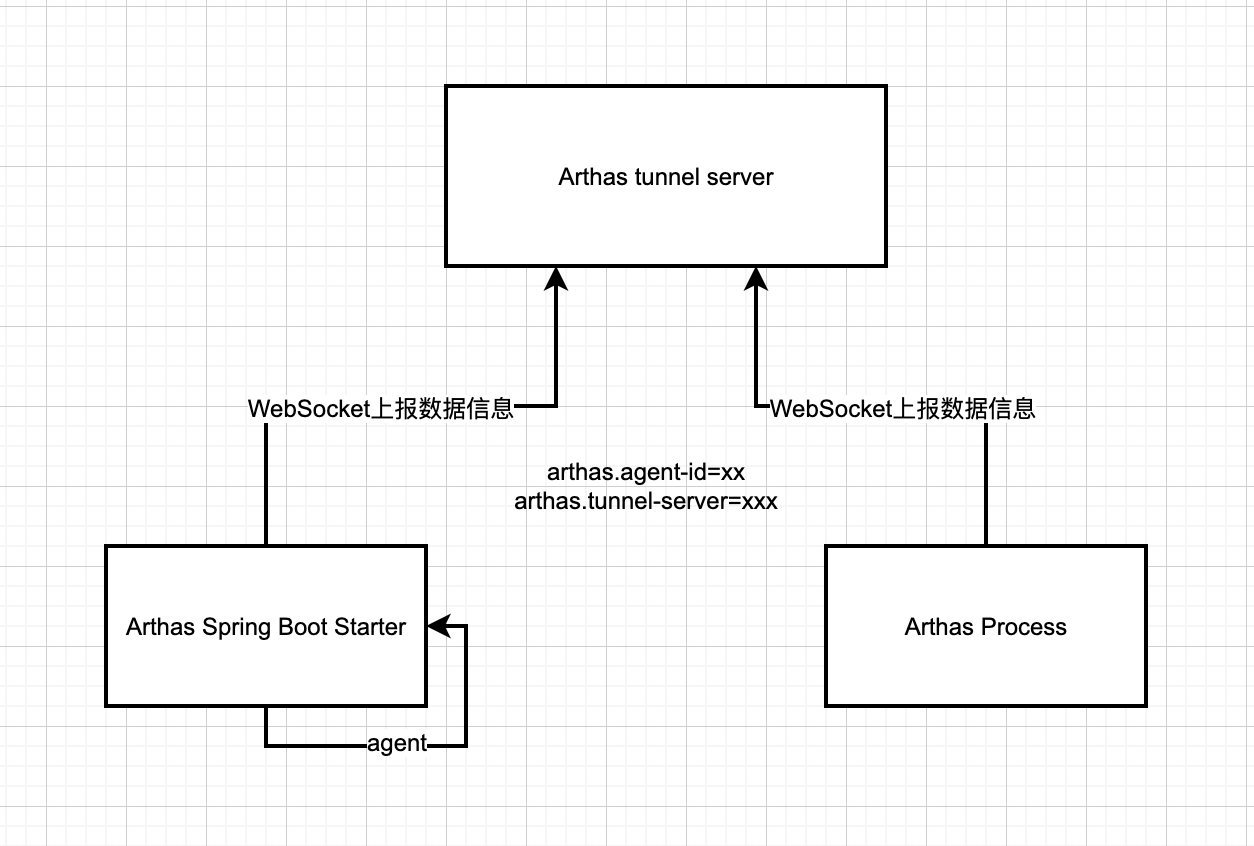
在SpringBoot2应用中加入arthas-spring-boot-starter后,Spring会启动arthas服务,并且进行attach自身进程,并配合tunnel server实现远程管理。这样的方案非常适合在微服务容器环境中进行远程诊断,在容器网络环境中仅需要对外暴露tunnel server的端口。
Arthas的监控体系所需要的组件支持
- Arthas Tunnel Server/Client(Java agent探针的管理和监控,方便我们管理服务和探针)
- Web Console
什么是Arthas Tunnel
在容器化部署的环境内部,Java进程可以是在不同的机器启动的,想要使用Arthas去诊断会比较麻烦,因为用户通常没有机器的权限,即使登陆机器也分不清是哪个Java进程。在这种情况下,可以使用 Arthas Tunnel Server/Client。
Arthas Tunnel的作用和目的
整个Arthas的功能体系中,可以通过Arthas Tunnel Server/Client来远程管理/连接多个Agent(也就代表着可以监控多个JVM进程)。主要目的用于监控和获取目标的JVM的进程数据信息。
下载部署Arthas tunnel server
Github源码仓库下载
下载地址Arthas tunnel server,目前最新版本为arthas-all-3.6.7版本,如下图所示。
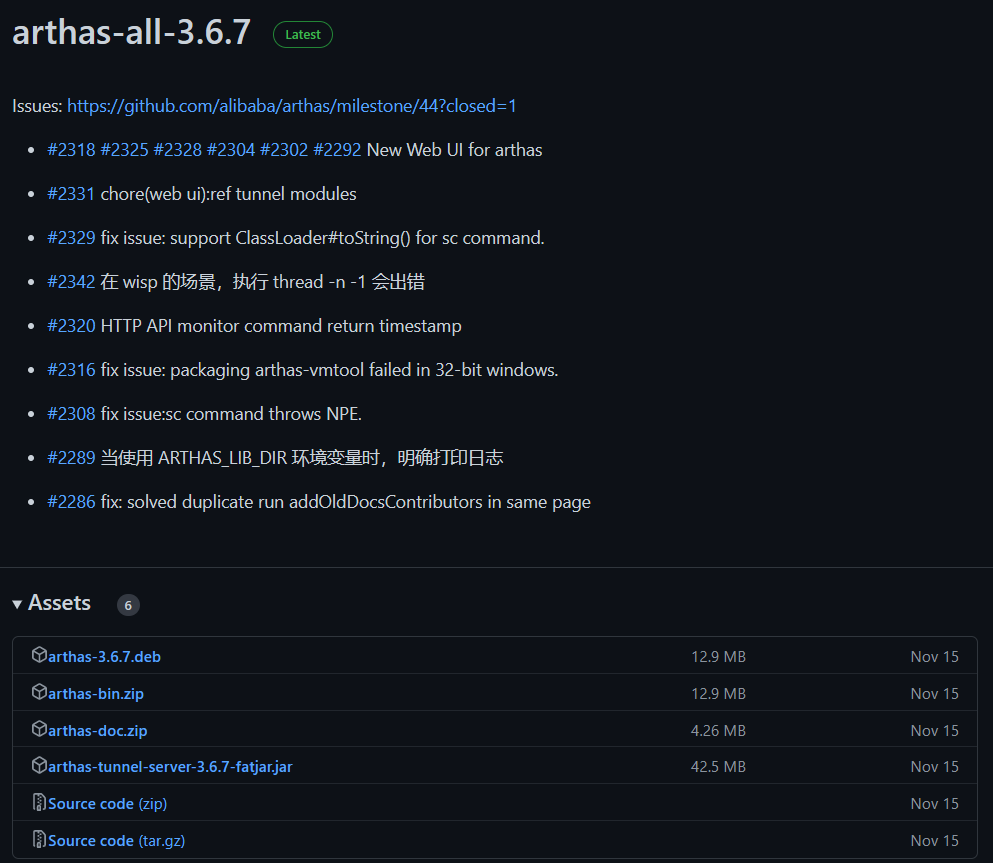
针对于Arthas的安装包进行下载资料进行介绍:
- arthas-3.6.7.deb:主要用于debian操作系统去运行的安装包
- arthas-bin.zip:二进制可运行执行包
- arthas-doc.zip:针对于arthas的文档
- arthas-tunnel-server-3.6.7-fatjar.jar:Arthas tunnel server服务的Jar可以执行包
- Source code(zip):源码zip压缩包
- Source code(tar.gz):源码tar包
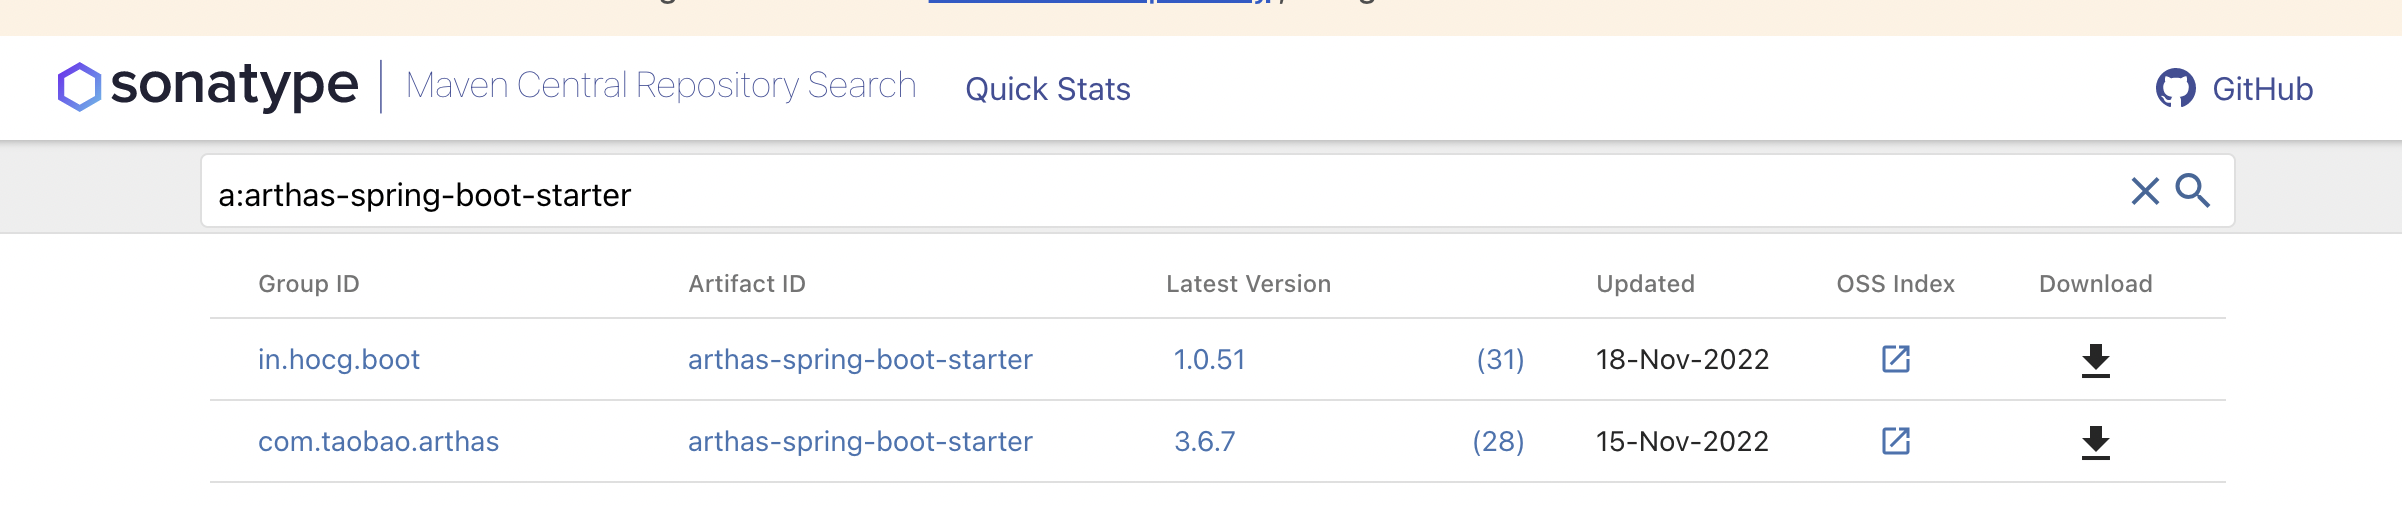
Maven仓库下载
阿里云的下载地址:https://arthas.aliyun.com/download/arthas-tunnel-server/latest_version?mirror=aliyun
直接运行对应的Arthas tunnel server
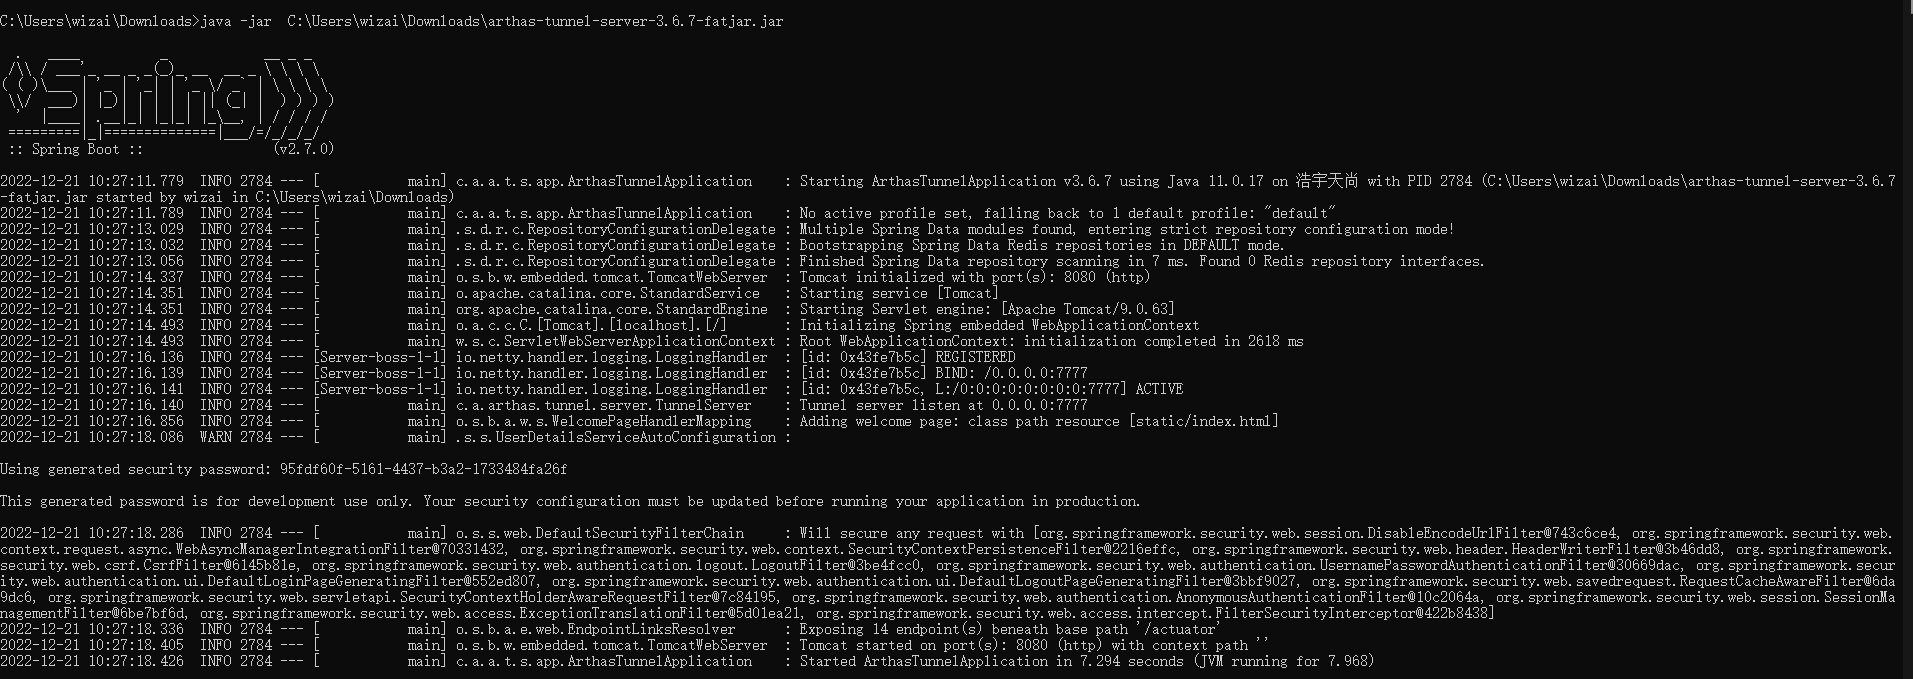
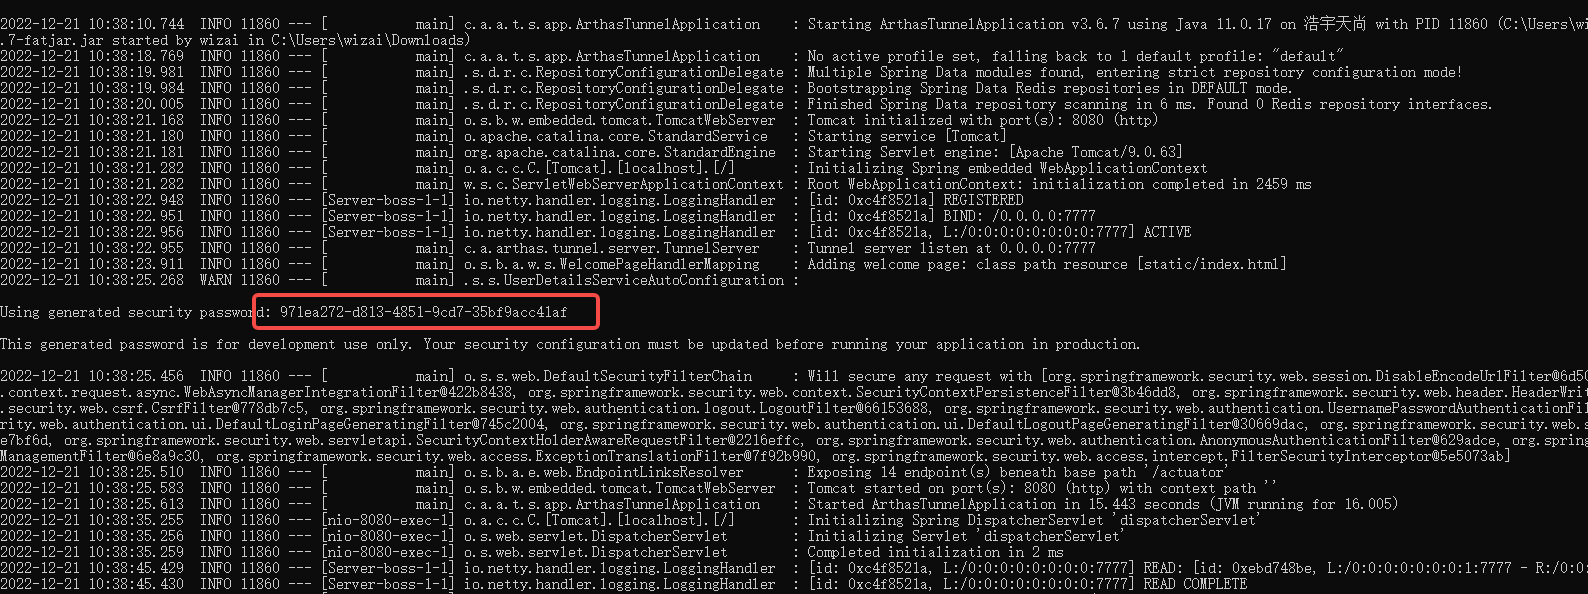
Arthas tunnel server是一个Spring boot fat jar 应用,直接java -jar启动:
java -jar arthas-tunnel-server.jar
默认情况下,arthas tunnel server的web端口是8080,Arthas agent 连接的端口是7777
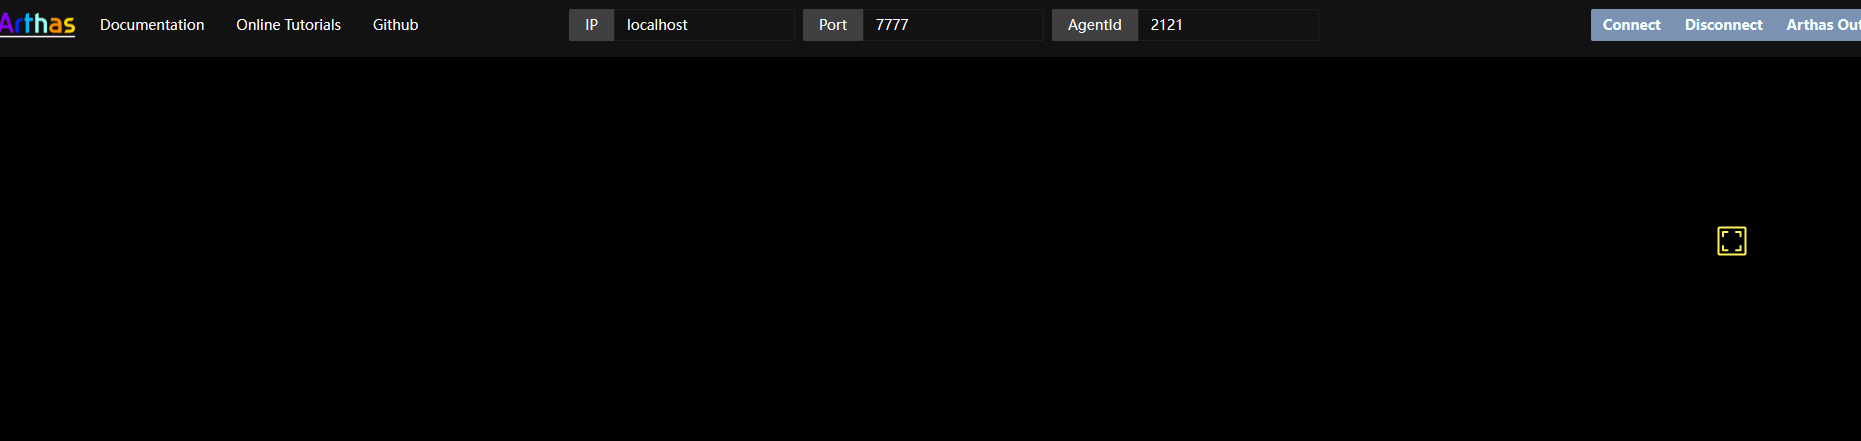
打开WebConsole,分别输入Arthas agent的ip(127.0.0.1)和port(7777),和SpringBoot应用里配置的agent-id(URJZ5L48RPBR2ALI5K4V),点Connect即可。
Web Console
如果希望可以通过浏览器连接Arthas服务,此时这里的Arthas服务指的不是Arthas tunnel server,Arthas是总体的服务控制端,发送指令的部分,而Arthas tunnel server属于对接和管理agent的专门服务(依赖于Arthas Spring Boot Starter的服务)。
出了CLI模式之外,Arthas目前支持 Web Console,用户在attach成功之后,可以直接访问:http://127.0.0.1:8563/。
可以填入 IP,远程连接其它机器上的arthas。启动之后,可以访问 http://127.0.0.1:8080/ ,再通过agentId连接到已注册的arthas agent 上,如下图所示。
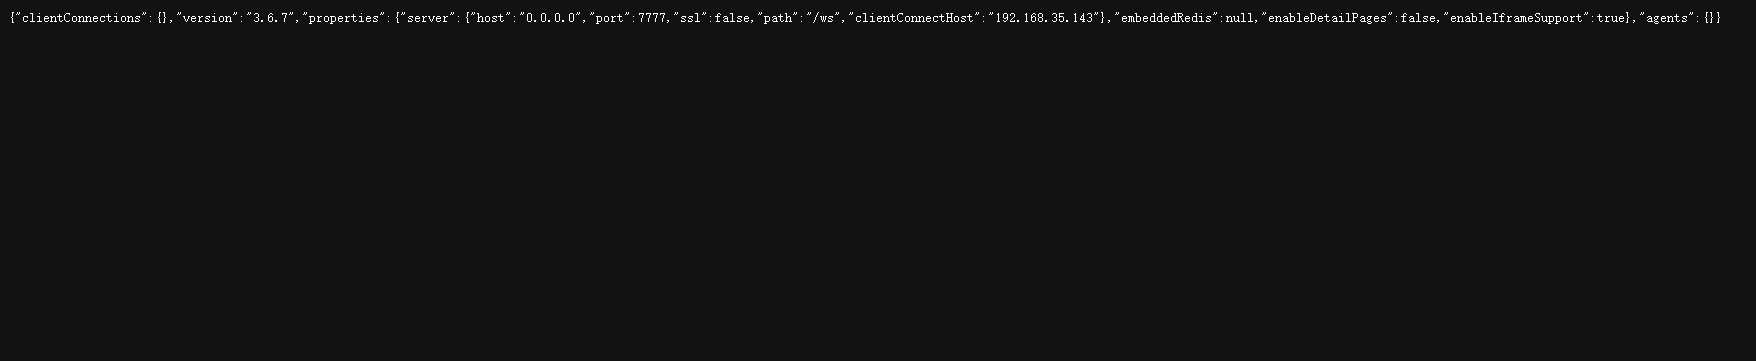
通过Spring Boot的Endpoint,可以查看到具体的连接信息: http://127.0.0.1:8080/actuator/arthas ,
登陆用户名是arthas,密码在 arthas tunnel server 的日志里可以找到,比如:
注意:默认情况下,arthas 只 listen 127.0.0.1,所以如果想从远程连接,则可以使用 --target-ip参数指定 listen 的 IP,更多参考-h的帮助说明。 注意会有安全风险,考虑下面的 tunnel server 的方案。
如何将服务连接Arthas tunnel server
主要有两种模式连接Arthas tunnel server:
- 远程运行的Arthas server连接Arthas tunnel server
- 远程运行的Arthas Spring Boot Starter的agent探针服务连接Arthas tunnel server
启动 arthas 时连接到 tunnel server
在启动 arthas,可以传递--tunnel-server参数,比如:
as.sh --tunnel-server 'ws://127.0.0.1:7777/ws'
如果有特殊需求,可以通过--agent-id参数里指定 agentId。默认情况下,会生成随机 ID。attach 成功之后,会打印出 agentId。
  ,---.  ,------. ,--------.,--.  ,--.  ,---.   ,---.
 /  O  \ |  .--. ''--.  .--'|  '--'  | /  O  \ '   .-'
|  .-.  ||  '--'.'   |  |   |  .--.  ||  .-.  |`.  `-.
|  | |  ||  |\  \    |  |   |  |  |  ||  | |  |.-'    |
`--' `--'`--' '--'   `--'   `--'  `--'`--' `--'`-----'

wiki      https://arthas.aliyun.com/doc
tutorials https://arthas.aliyun.com/doc/arthas-tutorials.html
version   3.1.2
pid       86183
time      2022-11-30 15:40:53
id        URJZ5L48RPBR2ALI5K4V
即使是启动时没有连接到 tunnel server,也可以在后续自动重连成功之后,通过 session 命令来获取 agentId:
[arthas@86183]$ session
 Name           Value
-----------------------------------------------------
 JAVA_PID       86183
 SESSION_ID     f7273eb5-e7b0-4a00-bc5b-3fe55d741882
 AGENT_ID       URJZ5L48RPBR2ALI5K4V
 TUNNEL_SERVER  ws://127.0.0.1:7777/ws
在浏览器里访问 http://localhost:8080/arthas,输入agentId,就可以连接到本机/其他机器上上的 arthas 了。
tunnel server的注意要点
- agentId要保持唯一,否则会在 tunnel server 上冲突,不能正常工作。
- 如果arthas agent配置了appName,则生成的agentId会带上appName的前缀。
添加对应的app-name参数
as.sh --tunnel-server 'ws://127.0.0.1:7777/ws' --app-name demoapp ,则生成的 agentId 可能是demoapp_URJZ5L48RPBR2ALI5K4V。
Tunnel server 会以_做分隔符,提取出appName,方便按应用进行管理。
解压的 arthas 目录下的 arthas.properties,或者在 spring boot 应用的application.properties里配置appName。
Arthas Spring Boot Starter的agent服务连接Jar
只支持 springboot2
- 配置 maven 依赖:
arthas.version:3.6.7
<dependency>
     <groupId>com.taobao.arthas</groupId>
    <artifactId>arthas-spring-boot-starter</artifactId>
    <version>${arthas.version}</version>
</dependency>
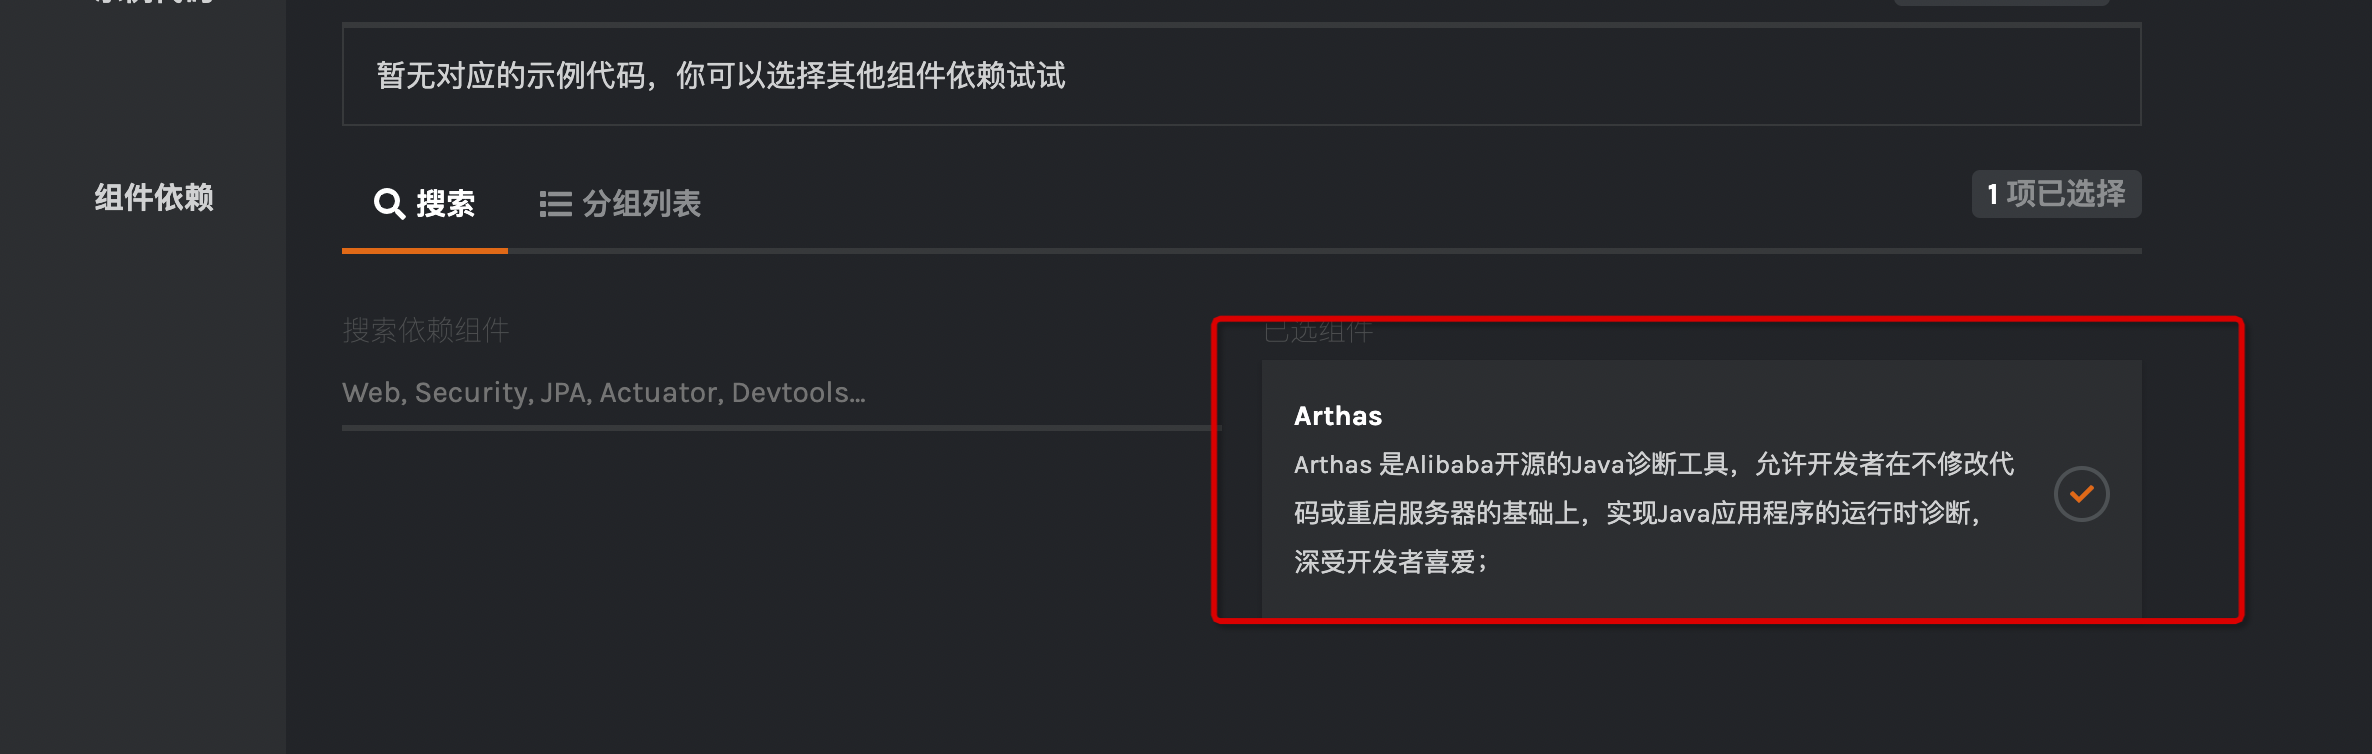
应用启动后,spring 会启动 arthas,并且 attach 自身进程。如果你不知道如何创建或者引入哪些依赖,可以采用一键创建包含 Arthas Spring Boot Starter 的工程:点击跳转到云原生脚手架
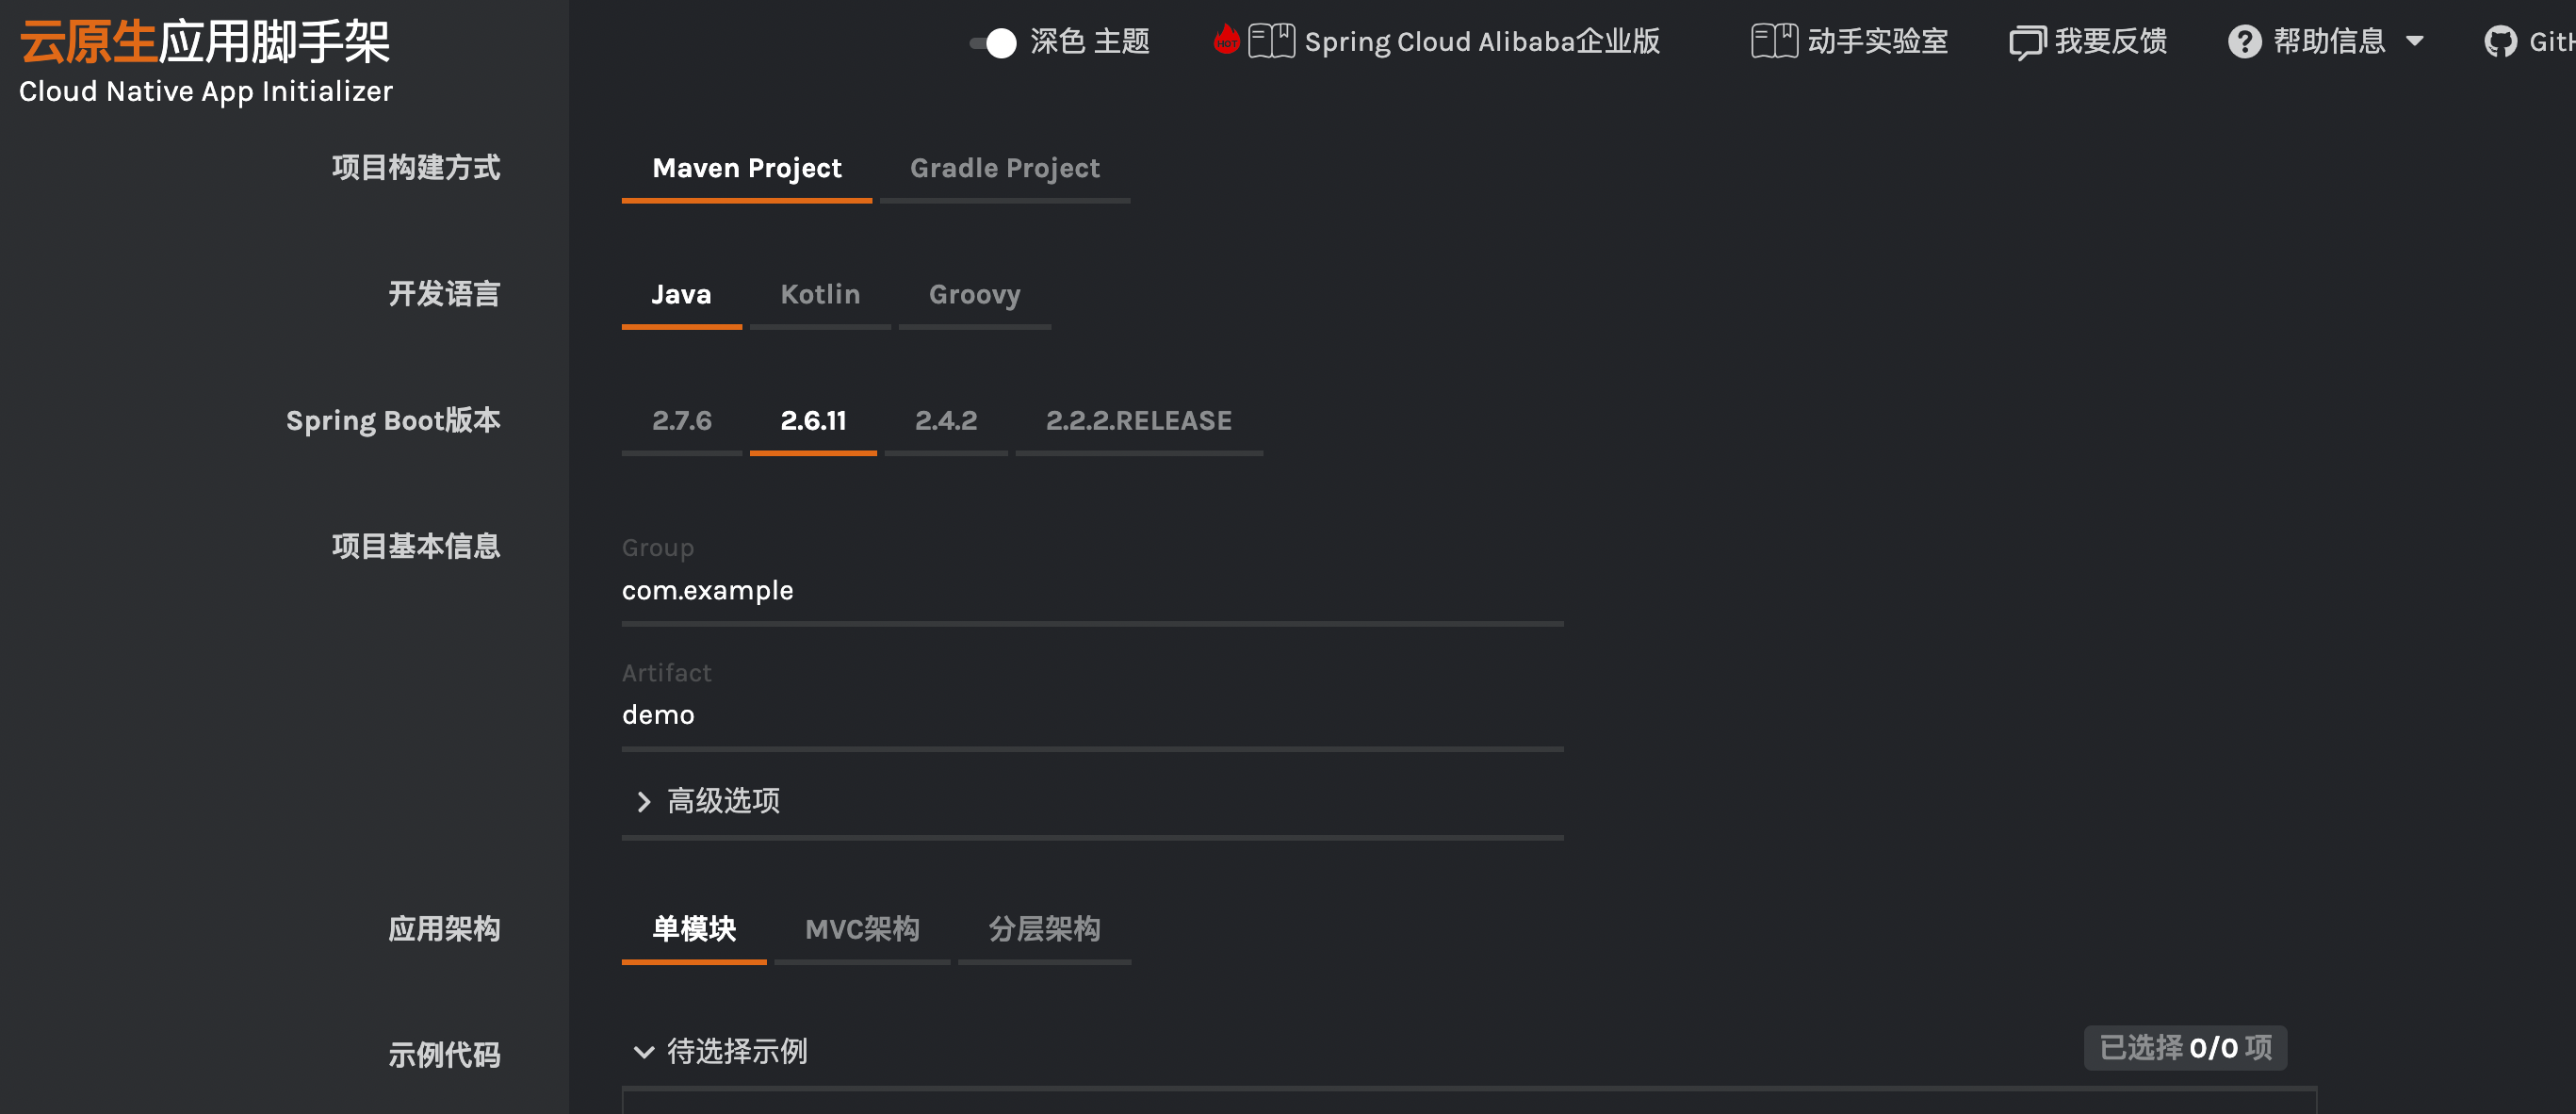
可以看到最下面已经自动勾选了arthas的监控机制体系。
application.yml配置
arthas:
  agent-name: nihaotest
  agent-id: URJZ5L48RPBR2ALI5K4V  #需手工指定agent-id
  tunnel-server: ws://127.0.0.1:7777/ws
查看 Endpoint 信息
需要配置 spring boot 暴露 endpoint:假定endpoint 端口是 8080,则通过下面 url 可以查看:
{
    "arthasConfigMap": {
        "agent-id": "hsehdfsfghhwertyfad",
        "tunnel-server": "ws://47.75.156.201:7777/ws",
    }
}
最后,启动SpringBoot服务即可。
非 spring boot 应用使用方式
非 Spring Boot 应用,可以通过下面的方式来使用:
 <dependency>
     <groupId>com.taobao.arthas</groupId>
     <artifactId>arthas-agent-attach</artifactId>
     <version>${arthas.version}</version>
 </dependency>
 <dependency>
      <groupId>com.taobao.arthas</groupId>
     <artifactId>arthas-packaging</artifactId>
     <version>${arthas.version}</version>
</dependency>
attach本身的服务进行探针探测。
import com.taobao.arthas.agent.attach.ArthasAgent;
public class ArthasAttachExample {
	public static void main(String[] args) {
		ArthasAgent.attach();
	}
}
也可以配置属性:
HashMap<String, String> configMap = new HashMap<String, String>();
configMap.put("arthas.appName", "demo");
configMap.put("arthas.tunnelServer", "ws://127.0.0.1:7777/ws");
ArthasAgent.attach(configMap);
Tunnel Server 的管理页面
需要在 spring boot 的application.properties里配置 arthas.enable-detail-pages=true
注意,开放管理页面有风险!管理页面没有安全拦截功能,务必自行增加安全措施。
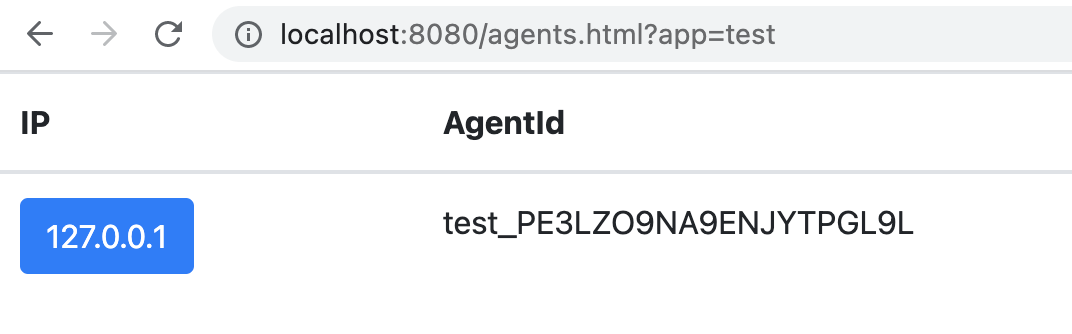
在本地启动 tunnel-server,然后使用as.sh attach,并且指定应用名--app-name test:
$ as.sh --tunnel-server 'ws://127.0.0.1:7777/ws' --app-name test
telnet connecting to arthas server... current timestamp is 1627539688
Trying 127.0.0.1...
Connected to 127.0.0.1.
Escape character is '^]'.
  ,---.  ,------. ,--------.,--.  ,--.  ,---.   ,---.
 /  O  \ |  .--. ''--.  .--'|  '--'  | /  O  \ '   .-'
|  .-.  ||  '--'.'   |  |   |  .--.  ||  .-.  |`.  `-.
|  | |  ||  |\  \    |  |   |  |  |  ||  | |  |.-'    |
`--' `--'`--' '--'   `--'   `--'  `--'`--' `--'`-----'

wiki       https://arthas.aliyun.com/doc
tutorials  https://arthas.aliyun.com/doc/arthas-tutorials.html
version    3.5.3
main_class demo.MathGame
pid        65825
time       2022-07-29 14:21:29
id         test_PE3LZO9NA9ENJYTPGL9L
然后访问 tunnel-server,可以看到所有连接的应用列表:
http://localhost:8080/apps.html

再打开详情,则可以看到连接的所有 agent 列表:
http://localhost:8080/agents.html?app=test
__EOF__
Recommend
About Joyk
Aggregate valuable and interesting links.
Joyk means Joy of geeK