

Android HDR | Migrating from TextureView to SurfaceView (Part #1) — How to Migra...
source link: https://medium.com/androiddevelopers/android-hdr-migrating-from-textureview-to-surfaceview-part-1-how-to-migrate-6bfd7f4b970e
Go to the source link to view the article. You can view the picture content, updated content and better typesetting reading experience. If the link is broken, please click the button below to view the snapshot at that time.

Android HDR | Migrating from TextureView to SurfaceView (Part #1) — How to Migrate
Part #1 of a technical guide on how to migrate away from TextureView to the much preferred SurfaceView to enable HDR playback on supported devices.
Intro
Users are creating and consuming more content daily, especially video content. Whether it’s social media, video calls, or watching your favorite movie on demand, we know that users expect the highest quality content they can get their hands on.
This is why on Android, we are committed to supporting app developers in adopting 10-bit HDR (High Dynamic Range).
Recently at the Android Developer Summit, we talked about improving your social experience quality using Android Camera. In this talk, we described how to get HDR Video Capture working in Android 13 and how beneficial HDR is with 10-bit color support, resulting in brighter and higher contrast videos.
Mozart Louis @ ADS 22 talking about HDR Video Capture with Android 13
My colleague Ray also talked about the full scope of HDR 10-bit capture, playback, and sharing.
Raymond Tiong @ ADS 22 talking about HDR Capture, Playback and Sharing
To support HDR 10-bit, you need to use SurfaceView, either with ExoPlayer (which we recommend) or your own custom decoder with 10-bit support.
Many developers opt to use TextureView instead of SurfaceView for the ability to draw content offscreen, but this comes at the expense of several benefits that come with using SurfaceView.
This series is meant to help developers migrate away from TextureView and fully use SurfaceView for displaying all your content. We’ll go in-depth on the inner workings of SurfaceView and how to replace some, if not all, the existing functionality you have with TextureView.
Let’s start this series off with how to migrate away from TextureView to SurfaceView. There’s a lot to cover here, so buckle up and get ready to ride into the land of Android HDR!
A closer look at SurfaceView
SurfaceView has been around since the beginning of Android in API 1. By definition, it provides a dedicated drawing surface embedded inside of a view hierarchy. This means that each instance of a SurfaceView lives on its own plane. In fact, when displaying a SurfaceView, it essentially cuts out a hole to display the content directly on screen. Here’s a visual example of what this looks like:

Here you can imagine your app being the “App Surface.” SurfaceView cuts a hole within your app’s surface and displays content from the underlying surface directly to your screen.
The underlying Surface driving the SurfaceView is assigned a hardware overlay. This means the content is made available directly to the display controller for scanout without a copy into the application UI. This leads to the following benefits:
- Better power efficiency.
- 10-bit HDR support (dependent on support from the display on the device).
- DRM playback support.
With all these amazing benefits and the fact that it’s been here since the beginning of Android, why are developers using TextureView?
Why are developers using TextureView?
TextureView was introduced in API 14. The general thought is that because TextureView is a newer API, TextureView should be better than SurfaceView in every way. TextureView does have some advantages over SurfaceViewFor instance, unlike SurfaceView, TextureView doesn’t create a separate window, but instead behaves as a regular view. This key difference allows a TextureView to have translucency, arbitrary rotations, and complex clipping.
For example, you can make a TextureView semi-translucent by calling:
myView.setAlpha(0.5f)
While this can be very useful for some cases, it comes with a performance penalty and extra battery drain (we have some numbers here). That’s because TextureView contents must be copied, internally, from the underlying surface into the view displaying those contents. This copy operation makes TextureView less efficient than SurfaceView, which displays its contents directly to the screen.
Another reason developers are using TextureView is because SurfaceView rendering wasn’t properly synchronized with view animations until API 24. On earlier releases this could result in unwanted effects when a SurfaceView was placed into a scrolling container, or when it was subjected to animation. Such effects included the view’s contents appearing to lag slightly behind where it should be displayed, and the view turning black when subjected to animation.
To achieve smooth animation or scrolling of video before API 24, it’s therefore necessary to use TextureView rather than SurfaceView.
With that being said, We still recommend using SurfaceView for most cases. Use TextureView when:
- You need translucency, arbitrary rotations, and complex clipping.
- You need to support API 23 and below, but use SurfaceView for API 24+.
If at all possible, developers should use ExoPlayer as it alleviates the need to decide on TextureView or SurfaceView and handles all of the complexities of HDR display.
Moving over from TextureView to SurfaceView
In this section, we will cover and give guidance on how to move over from TextureView to SurfaceView. We’ll provide code and overall suggestions on what to do when something that was available in TextureView is not available in SurfaceView. Here are examples we will go though:
- Using MediaPlayer to display a local video on either a TextureView or a SurfaceView.
- Creating a simple decoder with MediaFormat and MediaCodec to decode and display 10-bit HLG HEVC video content.
- Identifying Color Quality Issues when displaying 10-bit content on a TextureView and how to address it (Part #2).
- An HDR vertical video carousel implementation to show how SurfaceView handles transformations (Part #3).
In these examples, we’ll note the differences between TextureView and SurfaceView. All code samples will be in Kotlin and can be found in our graphics samples repository! Download the repository to follow along as we deep dive into the transitionary steps between TextureView and SurfaceView
Prerequisite #1 — Let’s create some custom, fixed aspect views
TextureView and SurfaceView don’t automatically adjust their frame size to the aspect ratio of the displayed content. This can result in distorted views. Because of this, we need to create a FixedAspectTextureView and FixedAspectSurfaceView.
These are simply helper classes that will override the onMeasure() function to allow us to set a specific aspect ratio like 16 by 9. We will set it by creating a setAspectRatio() function.
caYou can view the full implementation for FixedAspectTextureView.kt & FixedAspectSurfaceView.kt files within our Graphics samples.
Prerequisite #2 — We need some sample content!
We need some HDR content to try to display on screen. Not every device is currently capable of HDR Video Capture, in our graphics samples, We’ve included sample files. These were all caught on a Pixel 7 Pro, some with HDR and some without. This will be a great starting point to seeing the differences, especially when displaying 10-bit HDR content.
You are always welcome to use your own content as well.

And reference them from a Constants.kt class (change if necessary):
Ok, with all that out of the way, let’s get into the logic!
Playing a local video on TextureView vs SurfaceView
We’re going to use MediaPlayer to play our non-HDR video to show the difference in implementation for TextureView and SurfaceView. MediaPlayer will render the media to any surface it’s given, so this will work on both TextureView and SurfaceView. As mentioned earlier, if you are using ExoPlayer for video playback, this will all be handled for you by the library. To learn how to get started with ExoPlayer, see the ExoPlayer documentation.
Let’s create TextureViewVideoPlayer.kt. We’re using view binding here to bind to our texture_view_player.xml:
The key thing to point out here is that our class implements the SurfaceTextureListener, which is an interface that we need to get important callbacks for TextureView operations. SurfaceView has similar callbacks that we’ll compare later.
As of API 33, SurfaceTextureListener requires that you implement 4 callbacks:
- onSurfaceTextureAvailable() — Invoked when a TextureView’s SurfaceTexture is ready for use.
- onSurfaceTextureSizeChanged() — Invoked when the SurfaceTexture’s buffers size changed.
- onSurfaceTextureDestroyed() — Invoked when the specified SurfaceTexture is about to be destroyed.
- onSurfaceTextureUpdated() — Invoked when the specified SurfaceTexture is updated through SurfaceTexture.updateTexImage(). You can make per frame mutations here if need be.
We can use these callbacks and hook up our MediaPlayer to the SurfaceTexture and provide media playback. Its implementation would look something like this:
With this implemented, you should get a result like this!

Now, let’s create the same exact scenario using SurfaceView instead of TextureView. SurfaceViewVideoPlayer.kt, :
It’s essentially the same deal, but you can see that instead of using a SurfaceTextureListener, we’re using SurfaceHolder.Callback. This interface receives information about changes to the surface. Every SurfaceView will have one of these and it is accessible via Surfaceview.getHolder(). So we can call binding.surfaceViewVideoPlayerView.holder.addCallback(this) and implement the SurfaceHolder callbacks. As of API33, the available callbacks are:
- surfaceCreated() — This is called immediately after the surface is created.
- surfaceChanged() — This is called immediately after any structural changes (format or size) have been made to the surface.
- surfaceDestroyed() — This is called immediately before a surface is being destroyed.
We can use the SurfaceHolder callbacks to implement our MediaPlayer the same way we did with SurfaceTextureListener:
With this implemented, we should see the same exact behavior as with TextureView. It’s as if nothing has changed!

Similarities and differences between SurfaceTextureListener & SurfaceHolder.Callback
You’ve seen that TextureView’s callback (SurfaceTextureListener) and SurfaceView’s callback (SurfaceHolder.Callback) are almost the same in functionality. Essentially,
- onSurfaceTextureAvailable() == surfaceCreated()
- onSurfaceTextureDestroyed() == surfaceDestroyed()
- onSurfaceTextureSizeChanged() is similar to surfaceChanged()
This allowed us to easily transition to using SurfaceView with MediaPlayer without much changes.
Where you will find a difference between the two is that SurfaceHolder.Callback doesn’t have an equivalent to onSurfaceTextureUpdated() in SurfaceTextureListener. onSurfaceTextureUpdated() is called every time there is a new frame of video in this case, which can be useful for per-frame processing and analysis as needed. Depending on your work, this can be critical.
With SurfaceView, you’ll have to intercept frames between MediaCodec and SurfaceView to have the same functionality.
Lifecycle differences between TextureView and SurfaceView
Another key difference between the two views is how the underlying Surface lifecycle is handled. When a SurfaceView is made invisible, the underlying surface is destroyed. This is not true for TextureView. A TextureView’s SurfaceTexture is tied to attachment and detachment from the window, rather than on visibility events.
This means that depending on your use cases, you can experience a SurfaceView going blank or black as its surface has been destroyed. We will cover more on this in part #3 when we implement our vertical HDR video carousel.
Playing back HDR content on a SurfaceView using MediaCodec
Playing HDR content requires the use of the MediaCodec class. This class gives access to low-level media codecs, i.e. encoder/decoder components. It is part of the Android low-level multimedia support infrastructure.
Creating an optimized decoder is not part of the scope of this guide, but we created a simple CustomVideoDecoder.kt in our graphics samples that has the ability to decode our HDR files. It’s important to note that this decoder is only meant to decode video and skip audio.
In CustomVideoDecoder.kt, we don’t need to explicitly set the KEY_PROFILE to HEVCProfileMain10 for our MediaFormat instance since MediaExtractor takes care of that piece for us internally.
If you wish to manually set a format, use the setInteger() method on your MediaFormat instance like so:
At the top of the process method, we call the setUpDecoder() method, which will use our MediaFormat MIME type to create a decoder for the HEVCProfileMain10 in the file.
Depending on what kind of codec you are using, it may or may not be supported by the device.
You can check if the code is supported ahead of time by calling MediaCodecList.findDecoderForFormat():
Now with the decoder created, we can implement another SurfaceViewVideoPlayer, but instead, use our custom decoder instead of the MediaPlayer. Let’s call this one SurfaceViewVideoPlayerHDR.ktand just override a couple of parameters on our open base class SurfaceViewVideoPlayer.kt:
To get our custom decoder hooked up, we just need to override the surfaceCreated() and surfaceDestroyed() methods and initialize our decoder there.
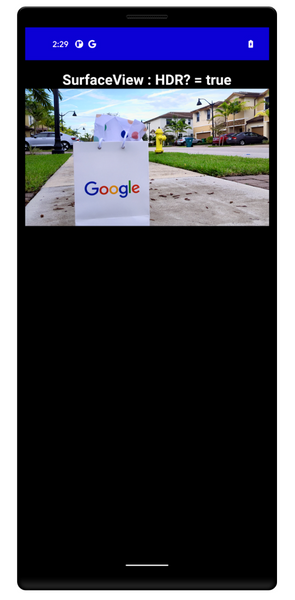
With that, you should now be able to view a 10-bit HLG HDR file being played back on screen.
Going on to Part #2 — Dealing with Color Washout
With everything above, you should be able to get some HDR content playing back and see the difference of implementation when it comes to TextureView and SurfaceView!
As a reminder, a complete sample app is available in our graphics samples to see this code in action.
In Part #2, we will discuss how to deal with “Color Washout,’’ which happens when you try to display 10-bit content on an 8-bit TextureView, and how to resolve this issue.
Recommend
About Joyk
Aggregate valuable and interesting links.
Joyk means Joy of geeK