

How to Delete List rows from SwiftUI List
source link: https://sarunw.com/posts/swiftui-list-ondelete/
Go to the source link to view the article. You can view the picture content, updated content and better typesetting reading experience. If the link is broken, please click the button below to view the snapshot at that time.

How to Delete List rows from SwiftUI List
Table of Contents
SwiftUI List has many built-in features equipped. The way we enable these features is by attach a view modifier in a view hierarchy.
The view modifier that enable the delete function is onDelete(perform:).
You can easily support sarunw.com by checking out this sponsor.

Sponsor sarunw.com and reach thousands of iOS developers.
How to Delete List rows from SwiftUI List
To enable the delete function in SwiftUI List, you need to do the following steps.
The onDelete modifier only works with ForEach, so you need to change how you populate your List view to use ForEach.
Create Data Source
Since you want to delete an item in a List view, your data source must be mutable.
I use a @State variable as a data source in this example.
@State private var contacts = [
    "John",
    "Alice",
    "Bob",
    "Foo",
    "Bar"
]
Create a List view with ForEach
The onDelete modifier only works with ForEach, so we need to populate our List view using ForEach.
struct ContentView: View {
    @State private var contacts = [
        "John",
        "Alice",
        "Bob",
        "Foo",
        "Bar"
    ]

var body: some View {
        List {
            ForEach(contacts, id: \.self) { contact in
                Text(contact)
            }
        }
    }
}
Apply onDelete modifier on ForEach
Apply onDelete modifier on ForEach to enable the delete function.
struct ContentView: View {
    @State private var contacts = [
        "John",
        "Alice",
        "Bob",
        "Foo",
        "Bar"
    ]

var body: some View {
        List {
            ForEach(contacts, id: \.self) { contact in
                Text(contact)
            }.onDelete { indexSet in
                // TODO: delete items
            }
        }
    }
}
Delete items from the Data Source
The onDelete modifier doesn't automatically delete an item from your data source. You have to do it yourselves.
The onDelete perform action pass IndexSet as an argument. This is the set of indices of items about to be deleted.
.onDelete { deleteOffsets: IndexSet in

}
We use the passing indices to remove the item from our data source. Swift Array already has a remove(atOffsets:) method that takes an IndexSet as an argument.
struct ContentView: View {
    @State private var contacts = [
        "John",
        "Alice",
        "Bob",
        "Foo",
        "Bar"
    ]

var body: some View {
        List {
            ForEach(contacts, id: \.self) { contact in
                Text(contact)
            }.onDelete { indexSet in
                contacts.remove(atOffsets: indexSet)
            }
        }
    }
}
What does onDelete do
Adding an onDelete(perform:) modifier will enable the ability to delete items in that List view.
Users can delete the List item in two ways.
Swipe to delete
Users can swipe from right to left on any list row to delete that particular row.
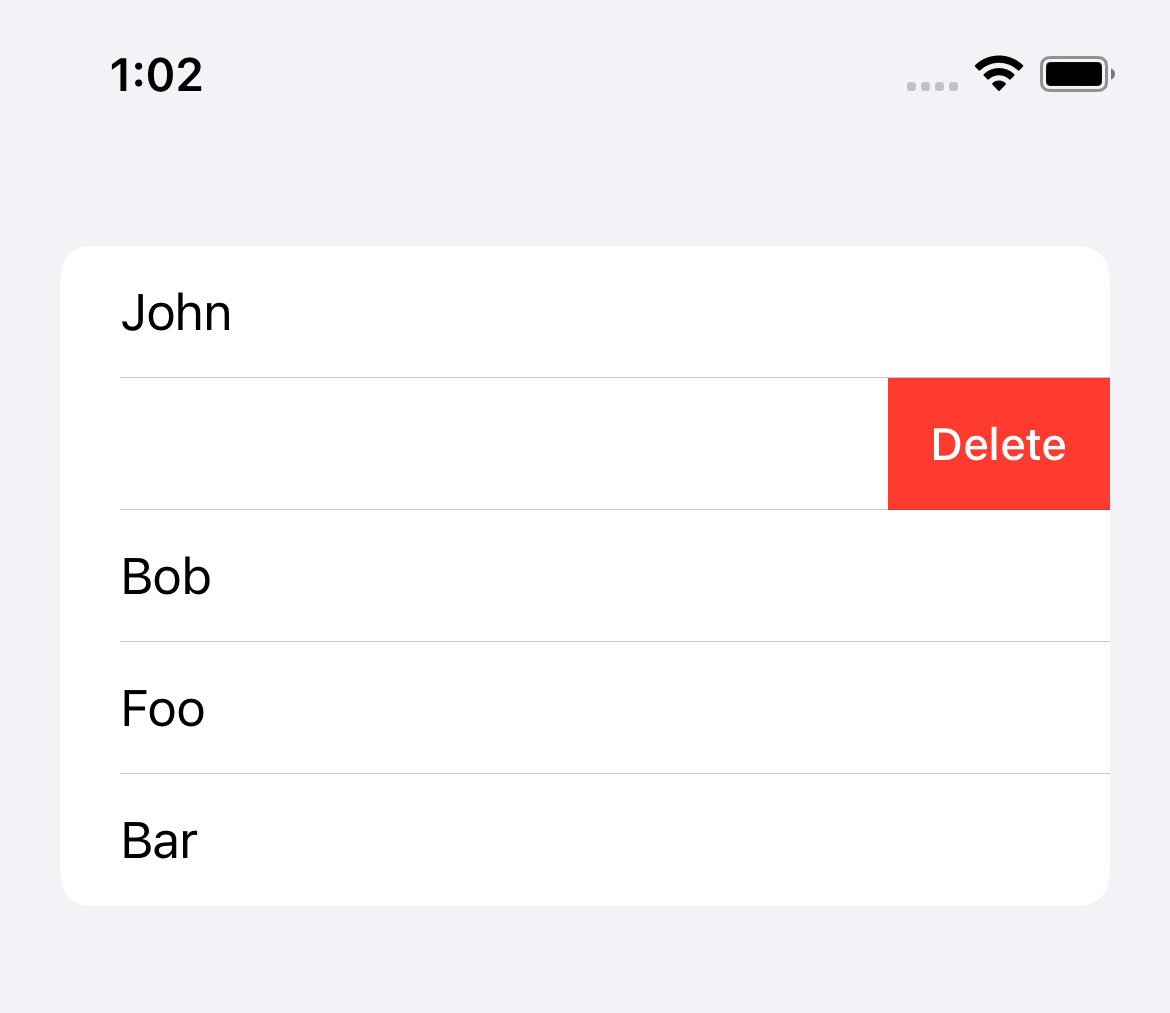
Swipe to delete
Deleting items in EditMode
Another way to delete the list item is in the edit mode.
There are two options to enter the edit mode.
- Using the
EditButton - Setting the
.editModeenvironment value
I will use EditButton in this case.
struct ContentView: View {
    @State private var contacts = [
        "John",
        "Alice",
        "Bob",
        "Foo",
        "Bar"
    ]

var body: some View {
        // 1
        NavigationView {
            List {
                ForEach(contacts, id: \.self) { contact in
                    Text(contact)
                }.onDelete { indexSet in
                    contacts.remove(atOffsets: indexSet)
                }
            }
            .toolbar {
                // 2
                EditButton()
            }
        }
    }
}
I wrap the List view inside NavigationView` 1 and add the Edit button there 2.
Once you enter the Edit mode by tapping the "Edit" button, you will see the delete button in front of each row.

Edit Mode.
You can easily support sarunw.com by checking out this sponsor.
Sponsor sarunw.com and reach thousands of iOS developers.
How to conditionally Disable the Delete ability
If you want to disable the delete ability based on some condition, you can do that by passing nil to the onDelete.
ForEach(contacts, id: \.self) { contact in
    Text(contact)
}
.onDelete(perform: nil)
Here is an example where we control reorder ability from the boolean value, enableDelete.
struct DeleteExample: View {
    @State private var contacts = [
        "John",
        "Alice",
        "Bob",
        "Foo",
        "Bar"
    ]

// 1
    @State private var enableDelete = true

var body: some View {
        NavigationView {
            List {
                Toggle("Enable Delete", isOn: $enableDelete)
                ForEach(contacts, id: \.self) { contact in
                    Text(contact)
                }
                // 2
                .onDelete(perform: enableDelete ? delete: nil)
            }
            .toolbar {
                EditButton()
            }
        }

}

// 3
    func delete(at offsets: IndexSet) {
        contacts.remove(atOffsets: offsets)
    }
}
1 A state variable use to control delete ability.
2 We use enableDelete to conditionally enable/disable the delete ability. We disable it by set perform closure as nil.
3 We extract a delete logic out as a separate function to improve readability.
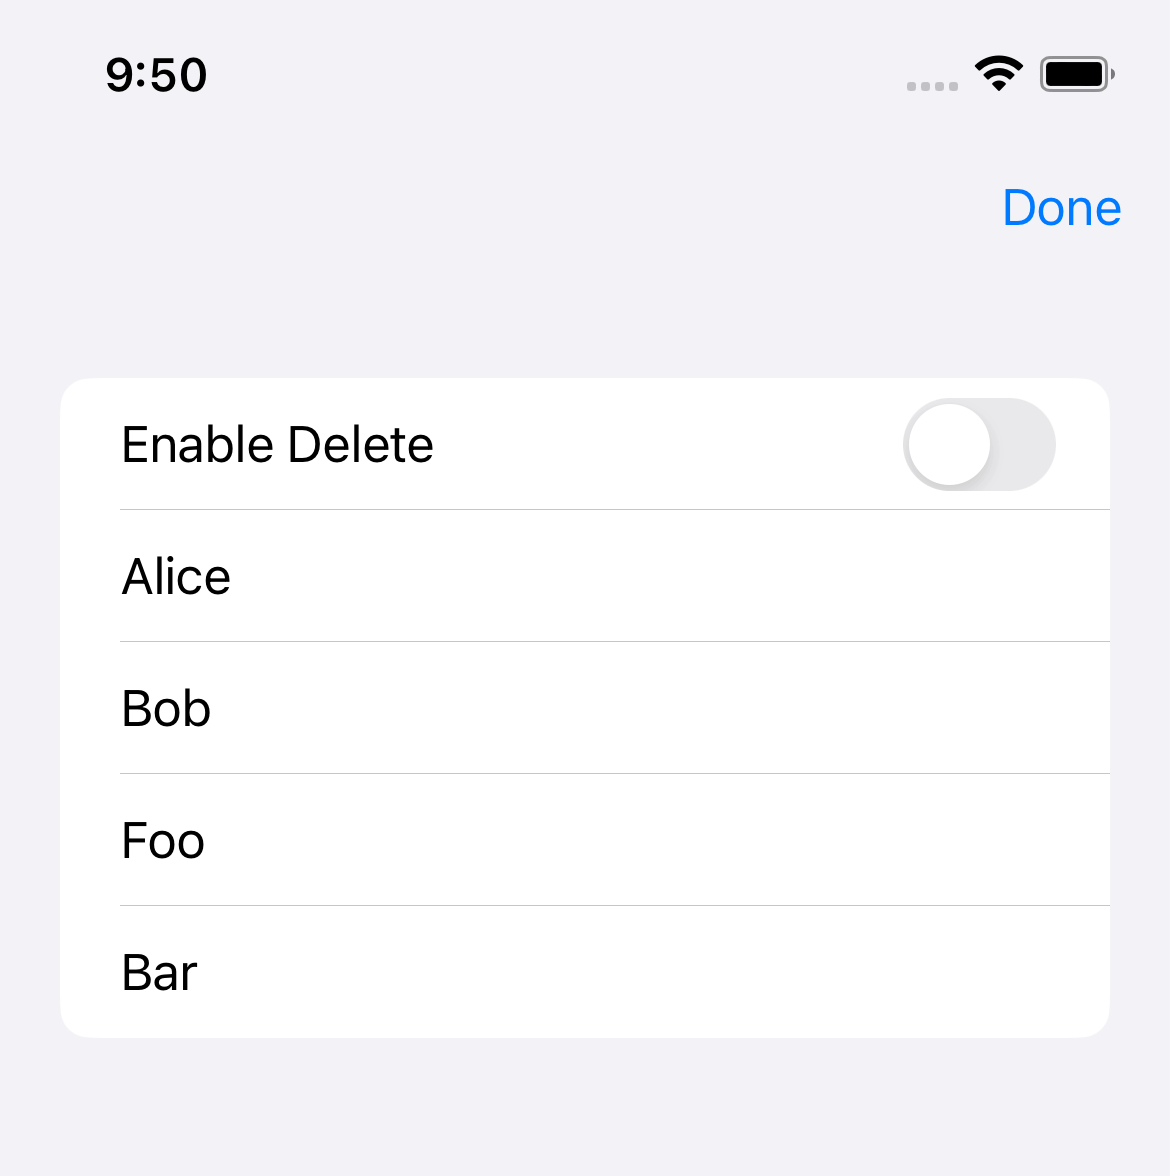
Disable the delete ability by passing nil to the onDelete.
Recommend
-
54
Inside a Table View the rows can be manipulated by user actions. In this tutorial we will delete a row from a Table View using the "swipe-to-delete" gesture. The row will be deleted in the data model(an array) and also in...
-
16
Kicking the habit of WM_CONCAT for a delimited list of rows, with LISTAGG Posted on May 2...
-
12
How do I delete a Discussion List? Overview This article explains how to delete a Discussion List within your DreamHost panel. Deleting the list Navigate to th...
-
9
Bash - Delete rows that do not end with a number advertisements I need to remove all lines (in text file) not ending with a number. Bef...
-
8
How to Delete Rows from a NumPy Array In this article, we will learn how to remove single or multiple rows from a 2D NumPy Array in Python. Table of Contents Given a 2D NumPy ar...
-
9
May 3, 2022 /
-
4
SwiftUI List view has many built-in styles and functions. With few lines of code, we can easily add multiple rows selection support in a SwiftUI...
-
7
How to Reorder List rows in SwiftUI List 12 Dec 2022 ⋅ 4 min read ⋅ SwiftUI...
-
15
Enable and Disable SwiftUI List rows deletion on a specific row 26 Dec 2022 ⋅ 2 min read ⋅
-
11
Enable and Disable SwiftUI List rows reordering on a specific row 02 Jan 2023 ⋅ 2 min read ⋅
About Joyk
Aggregate valuable and interesting links.
Joyk means Joy of geeK