

在 iOS16 中用 SwiftUI 图表定制一个线图
source link: https://www.51cto.com/article/740118.html
Go to the source link to view the article. You can view the picture content, updated content and better typesetting reading experience. If the link is broken, please click the button below to view the snapshot at that time.


在 iOS 16 中引入的 SwiftUI 图表,可以以直观的视觉格式呈现数据,并且可以使用 SwiftUI 图表快速创建。本文演示了几种定制折线图并与区域图结合来展示数据的方法。
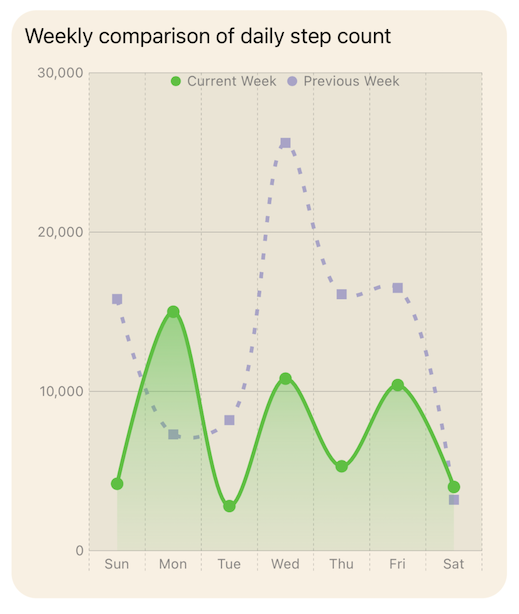
默认折线图
从在 iOS 16 中用 SwiftUI Charts 创建一个折线图中使用 SwiftUI Charts[1]创建默认折线图开始。这显示了两个不同星期的步数数据,比较了每个工作日的步数。
struct ChartView1: View {
    var body: some View {
        VStack {
            GroupBox ( "Line Chart - Daily Step Count") {
                Chart {
                    ForEach(stepData, id: \.period) { steps in
                        ForEach(steps.data) {
                            LineMark(
                                x: .value("Week Day", $0.shortDay),
                                y: .value("Step Count", $0.steps)
                            )
                            .foregroundStyle(by: .value("Week", steps.period))
                            .accessibilityLabel("\($0.weekdayString)")
                            .accessibilityValue("\($0.steps) Steps")
                        }
                    }
                }
                .frame(height:400)
            }
            .padding()

            Spacer()
        }
    }
}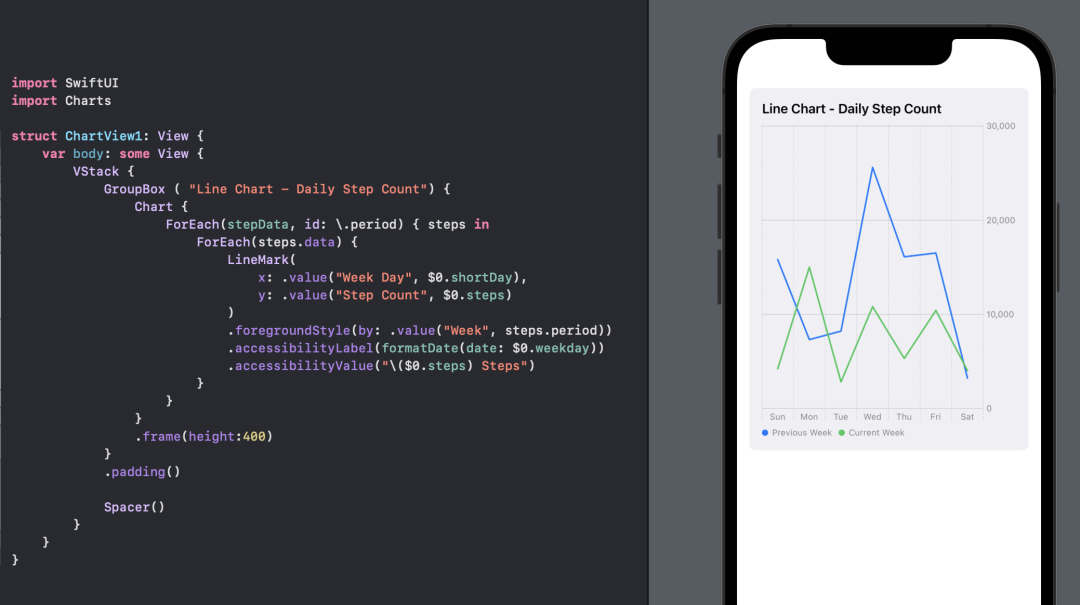
使用 SwiftUI 图表创建的默认折线图。
改变图表背后的背景
技术上讲,这与图表无关,但 GroupBox 的背景可以用颜色或 GroupBoxStyle[2] 来设置。
struct YellowGroupBoxStyle: GroupBoxStyle {
    func makeBody(configuration: Configuration) -> some View {
        configuration.content
            .padding(.top, 30)
            .padding(20)
            .background(Color(hue: 0.10, saturation: 0.10, brightness: 0.98))
            .cornerRadius(20)
            .overlay(
                configuration.label.padding(10),
                alignment: .topLeading
            )
    }
}
struct ChartView2: View {
var body: some View {
VStack {
GroupBox ( "Line Chart - Daily Step Count") {
Chart {
ForEach(stepData, id: \.period) { steps in
ForEach(steps.data) {
LineMark(
x: .value("Week Day", $0.shortDay),
y: .value("Step Count", $0.steps)
)
.foregroundStyle(by: .value("Week", steps.period))
.accessibilityLabel("\($0.weekdayString)")
.accessibilityValue("\($0.steps) Steps")
}
}
}
.frame(height:400)
}
// Add a style to the GroupBox
.groupBoxStyle(YellowGroupBoxStyle())
.padding()
Spacer()
}
}
}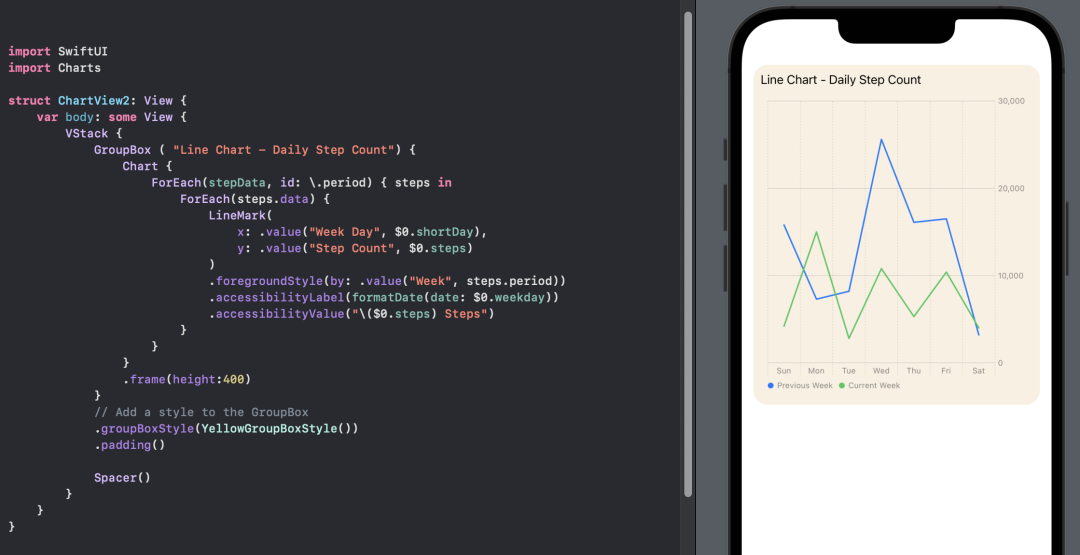
为 GroupBox 背景设置样式。
设置绘图或图表的背景
可以使用 chartPlotStyle[3] 为图表绘图区域设置背景,或者使用 chartBackground[4] 为整个图表设置一个背景。
设置绘图区域背景
GroupBox ( "Line Chart - Plot Background") {
    Chart {
        ForEach(stepData, id: \.period) { steps in
            ForEach(steps.data) {
                LineMark(
                    x: .value("Week Day", $0.shortDay),
                    y: .value("Step Count", $0.steps)
                )
                .foregroundStyle(by: .value("Week", steps.period))
                .accessibilityLabel("\($0.weekdayString)")
                .accessibilityValue("\($0.steps) Steps")
            }
        }
    }
    .chartPlotStyle { plotArea in
        plotArea
            .background(.orange.opacity(0.1))
            .border(.orange, width: 2)
    }
    .frame(height:200)
}
.groupBoxStyle(YellowGroupBoxStyle())
设置图表背景
GroupBox ( "Line Chart - Chart Background") {
    Chart {
        ForEach(stepData, id: \.period) { steps in
            ForEach(steps.data) {
                LineMark(
                    x: .value("Week Day", $0.shortDay),
                    y: .value("Step Count", $0.steps)
                )
                .foregroundStyle(by: .value("Week", steps.period))
                .accessibilityLabel("\($0.weekdayString)")
                .accessibilityValue("\($0.steps) Steps")
            }
        }
    }
    .chartBackground { chartProxy in
        Color.red.opacity(0.1)
    }
    .frame(height:200)
}
.groupBoxStyle(YellowGroupBoxStyle())
设置绘图区域和图表的背景
GroupBox ( "Line Chart - Plot & Chart Backgroundt") {
    Chart {
        ForEach(stepData, id: \.period) { steps in
            ForEach(steps.data) {
                LineMark(
                    x: .value("Week Day", $0.shortDay),
                    y: .value("Step Count", $0.steps)
                )
                .foregroundStyle(by: .value("Week", steps.period))
                .accessibilityLabel("\($0.weekdayString)")
                .accessibilityValue("\($0.steps) Steps")
            }
        }
    }
    .chartBackground { chartProxy in
        Color.red.opacity(0.1)
    }
    .chartPlotStyle { plotArea in
        plotArea
            .background(.orange.opacity(0.1))
            .border(.orange, width: 2)
    }

    .frame(height:200)
}
.groupBoxStyle(YellowGroupBoxStyle())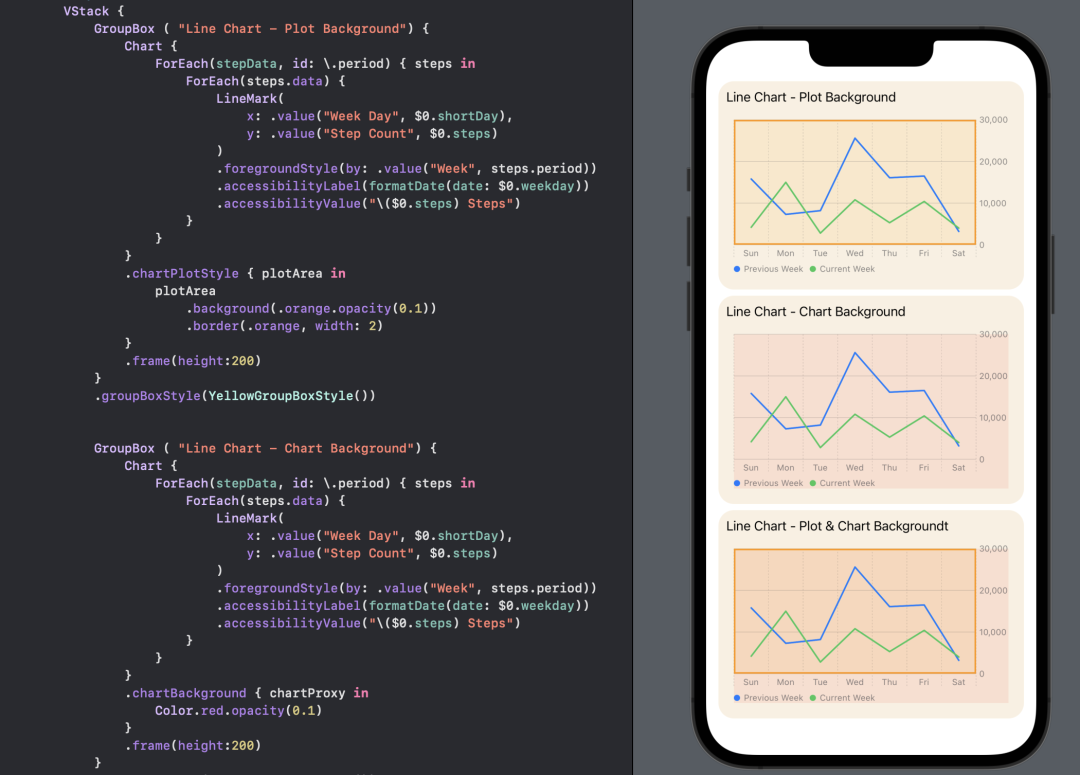
使用 SwiftUI Charts 在绘图区域和全图表上设置背景。
将 Y 轴移至左侧
将 Y 轴移至左侧边缘(leading)。
可以隐藏坐标轴或调整坐标轴的位置,比如将 Y 轴放在图表的左侧(leading)。y 轴默认显示在图表的右方(trailing)。可以使用 chartYAxis 的 AxisMarks[5] 将其放置在左侧。也可以通过设置可见性属性为隐藏来完全隐藏轴。
struct ChartView4: View {
    var body: some View {
        VStack {
            GroupBox ( "Line Chart - Y-axis on leading edge") {
                Chart {
                    ForEach(stepData, id: \.period) { steps in
                        ForEach(steps.data) {
                            LineMark(
                                x: .value("Week Day", $0.shortDay),
                                y: .value("Step Count", $0.steps)
                            )
                            .foregroundStyle(by: .value("Week", steps.period))
                            .accessibilityLabel("\($0.weekdayString)")
                            .accessibilityValue("\($0.steps) Steps")
                        }
                    }
                }
                .chartPlotStyle { plotArea in
                    plotArea
                        .background(Color(hue: 0.12, saturation: 0.10, brightness: 0.92))
                }
                // Place the y-axis on the leading side of the chart
                .chartYAxis {
                   AxisMarks(position: .leading)
                }
                .frame(height:400)
            }
            .groupBoxStyle(YellowGroupBoxStyle())
            .padding()

            Spacer()
        }
    }
}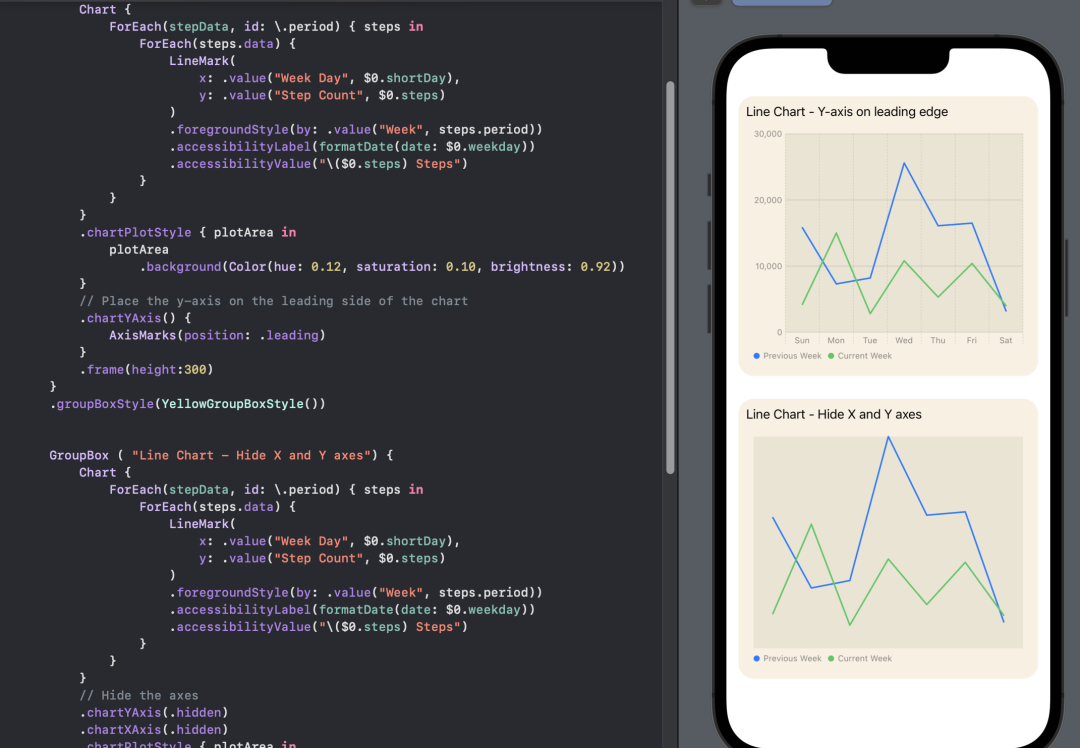
使用 SwiftUI 图表将 Y 轴置于图表的左侧。
移动图表的图例
图表图例默认显示在图表的底部。图例可以放在图表的任何一面,也可以放在图表的多个位置上。
GroupBox ( "Line Chart - legend overlay on top center") {
    Chart {
        ForEach(stepData, id: \.period) { steps in
            ForEach(steps.data) {
                LineMark(
                    x: .value("Week Day", $0.shortDay),
                    y: .value("Step Count", $0.steps)
                )
                .foregroundStyle(by: .value("Week", steps.period))
                .accessibilityLabel("\($0.weekdayString)")
                .accessibilityValue("\($0.steps) Steps")
            }
        }
    }
    // Position the Legend
    .chartLegend(position: .overlay, alignment: .top)
    .chartPlotStyle { plotArea in
        plotArea
            .background(Color(hue: 0.12, saturation: 0.10, brightness: 0.92))
    }
    .chartYAxis() {
        AxisMarks(position: .leading)
    }
    .frame(height:200)
}
.groupBoxStyle(YellowGroupBoxStyle())
GroupBox ( "Line Chart - legend trailing center") {
Chart {
ForEach(stepData, id: \.period) { steps in
ForEach(steps.data) {
LineMark(
x: .value("Week Day", $0.shortDay),
y: .value("Step Count", $0.steps)
)
.foregroundStyle(by: .value("Week", steps.period))
.accessibilityLabel("\($0.weekdayString)")
.accessibilityValue("\($0.steps) Steps")
}
}
}
// Position the Legend
.chartLegend(position: .trailing, alignment: .center, spacing: 10)
.chartPlotStyle { plotArea in
plotArea
.background(Color(hue: 0.12, saturation: 0.10, brightness: 0.92))
}
.chartYAxis() {
AxisMarks(position: .leading)
}
.frame(height:200)
}
.groupBoxStyle(YellowGroupBoxStyle())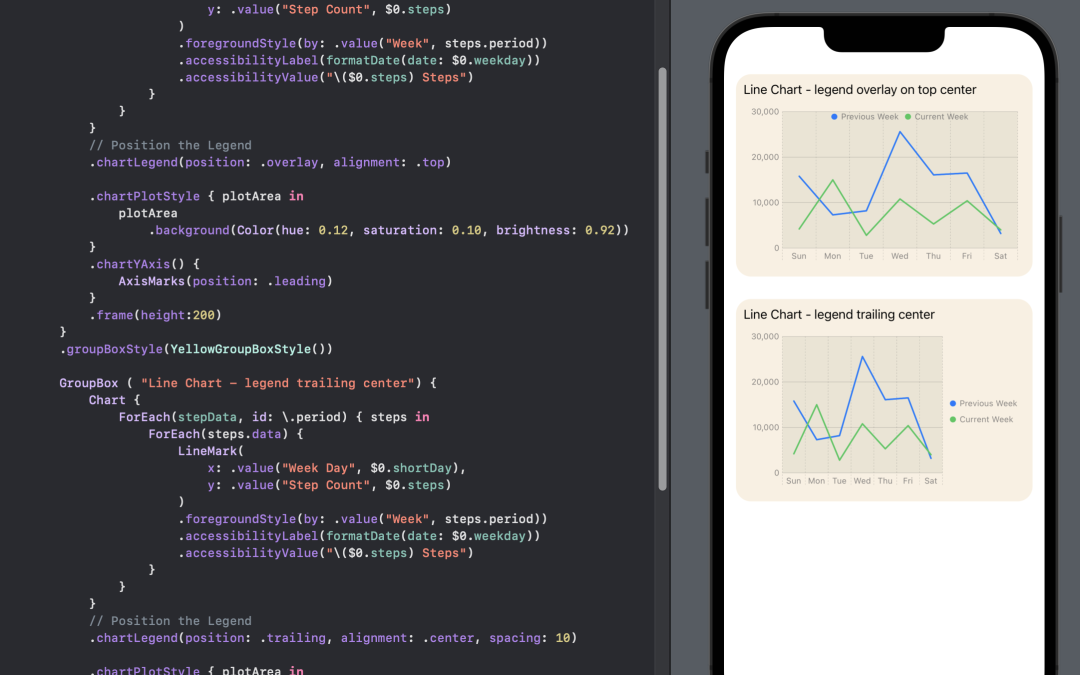
改变折线线型
折线图用一条直线将图表上的数据点连接起来。插值方法(interpolationMethod[6])函数可以用各种方式将数据点通过曲线连接。
struct ChartView6: View {
    var body: some View {
        VStack(spacing:30) {
            GroupBox ( "Line Chart - Curved line connector") {
                Chart {
                    ForEach(stepData, id: \.period) { steps in
                        ForEach(steps.data) {
                            LineMark(
                                x: .value("Week Day", $0.shortDay),
                                y: .value("Step Count", $0.steps)
                            )
                            .foregroundStyle(by: .value("Week", steps.period))
                            // Use curved line to join points
                            .interpolationMethod(.catmullRom)
                            .accessibilityLabel("\($0.weekdayString)")
                            .accessibilityValue("\($0.steps) Steps")
                        }
                    }
                }
                .chartLegend(position: .overlay, alignment: .top)
                .chartPlotStyle { plotArea in
                    plotArea
                        .background(Color(hue: 0.12, saturation: 0.10, brightness: 0.92))
                }
                .chartYAxis() {
                    AxisMarks(position: .leading)
                }
                .frame(height:300)
            }
            .groupBoxStyle(YellowGroupBoxStyle())

            GroupBox ( "Line Chart - Step line connector") {
                Chart {
                    ForEach(stepData, id: \.period) { steps in
                        ForEach(steps.data) {
                            LineMark(
                                x: .value("Week Day", $0.shortDay),
                                y: .value("Step Count", $0.steps)
                            )
                            .foregroundStyle(by: .value("Week", steps.period))
                            // Use step line to join points
                            .interpolationMethod(.stepCenter)
                            .accessibilityLabel("\($0.weekdayString)")
                            .accessibilityValue("\($0.steps) Steps")
                        }
                    }
                }
                .chartLegend(position: .overlay, alignment: .top)
                .chartPlotStyle { plotArea in
                    plotArea
                        .background(Color(hue: 0.12, saturation: 0.10, brightness: 0.92))
                }
                .chartYAxis() {
                    AxisMarks(position: .leading)
                }
                .frame(height:300)
            }
            .groupBoxStyle(YellowGroupBoxStyle())


            Spacer()
        }
        .padding()
    }
}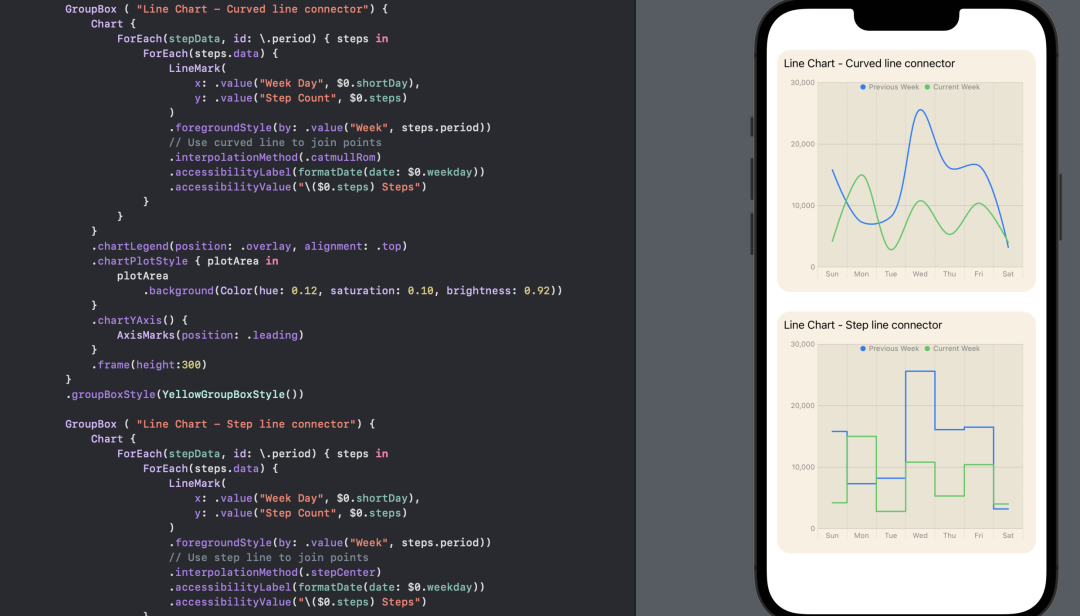
在 SwiftUI 图表中更改将数据点连接线型。
改变折线的颜色
可以使用chartForegroundStyleScale[7]来设置线形图中线条的默认颜色。
struct ChartView7: View {
    var body: some View {
        VStack() {
            GroupBox ( "Line Chart - Custom line colors") {
                Chart {
                    ForEach(stepData, id: \.period) { steps in
                        ForEach(steps.data) {
                            LineMark(
                                x: .value("Week Day", $0.shortDay),
                                y: .value("Step Count", $0.steps)
                            )
                            .foregroundStyle(by: .value("Week", steps.period))
                            .interpolationMethod(.catmullRom)
                            .symbol(by: .value("Week", steps.period))
                            .symbolSize(30)
                            .accessibilityLabel("\($0.weekdayString)")
                            .accessibilityValue("\($0.steps) Steps")
                        }
                    }
                }
                // Set color for each data in the chart
                .chartForegroundStyleScale([
                    "Current Week" : Color(hue: 0.33, saturation: 0.81, brightness: 0.76),
                    "Previous Week": Color(hue: 0.69, saturation: 0.19, brightness: 0.79)
                ])
                .chartLegend(position: .overlay, alignment: .top)
                .chartPlotStyle { plotArea in
                    plotArea
                        .background(Color(hue: 0.12, saturation: 0.10, brightness: 0.92))
                }
                .chartYAxis() {
                    AxisMarks(position: .leading)
                }
                .frame(height:400)
            }
            .groupBoxStyle(YellowGroupBoxStyle())

            Spacer()
        }
        .padding()
    }
}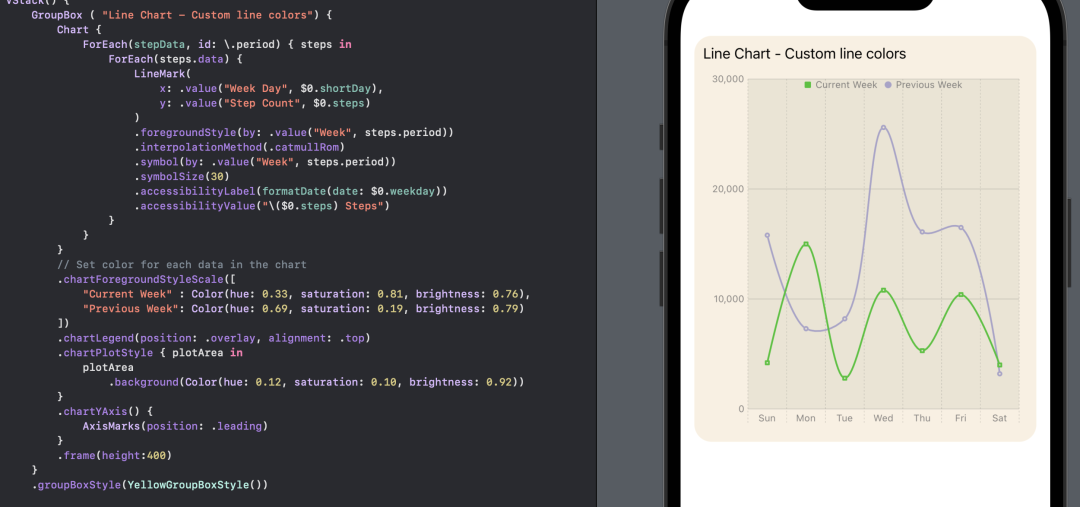
为 SwiftUI 图表中的线条设置自定义颜色。
改变折线风格
线形图上的线条可以通过使用StrokeStyle[8]设置 lineStyle 来修改。在步骤数据中使用了两种不同的风格,以区分前一周的数据和当前的数据。此外,还为图表上的数据点设置了一个自定义符号。
struct ChartView8: View {
    let prevColor = Color(hue: 0.69, saturation: 0.19, brightness: 0.79)
    let curColor = Color(hue: 0.33, saturation: 0.81, brightness: 0.76)
    var body: some View {
        VStack() {
            GroupBox ( "Line Chart - Line color and format") {
                Chart {
                    ForEach(previousWeek) {
                        LineMark(
                            x: .value("Week Day", $0.shortDay),
                            y: .value("Step Count", $0.steps)
                        )
                        .interpolationMethod(.catmullRom)
                        .foregroundStyle(prevColor)
                        .foregroundStyle(by: .value("Week", "Previous Week"))
                        .lineStyle(StrokeStyle(lineWidth: 3, dash: [5, 10]))
                        .symbol() {
                            Rectangle()
                                .fill(prevColor)
                                .frame(width: 8, height: 8)
                        }
                        .symbolSize(30)
                        .accessibilityLabel("\($0.weekdayString)")
                        .accessibilityValue("\($0.steps) Steps")
                    }
                    ForEach(currentWeek) {
                        LineMark(
                            x: .value("Week Day", $0.shortDay),
                            y: .value("Step Count", $0.steps)
                        )
                        .interpolationMethod(.catmullRom)
                        .foregroundStyle(curColor)
                        .foregroundStyle(by: .value("Week", "Current Week"))
                        .lineStyle(StrokeStyle(lineWidth: 3))
                        .symbol() {
                            Circle()
                                .fill(curColor)
                                .frame(width: 10)
                        }
                        .symbolSize(30)
                        .accessibilityLabel("\($0.weekdayString)")
                        .accessibilityValue("\($0.steps) Steps")
                    }
                }
                // Set the Y axis scale
                .chartYScale(domain: 0...30000)
                .chartForegroundStyleScale([
                    "Current Week" : curColor,
                    "Previous Week": prevColor
                ])
                .chartLegend(position: .overlay, alignment: .top)
                .chartPlotStyle { plotArea in
                    plotArea
                        .background(Color(hue: 0.12, saturation: 0.10, brightness: 0.92))
                }
                .chartYAxis() {
                    AxisMarks(position: .leading)
                }
                .frame(height:400)
            }
            .groupBoxStyle(YellowGroupBoxStyle())
            Spacer()
        }
        .padding()
    }
}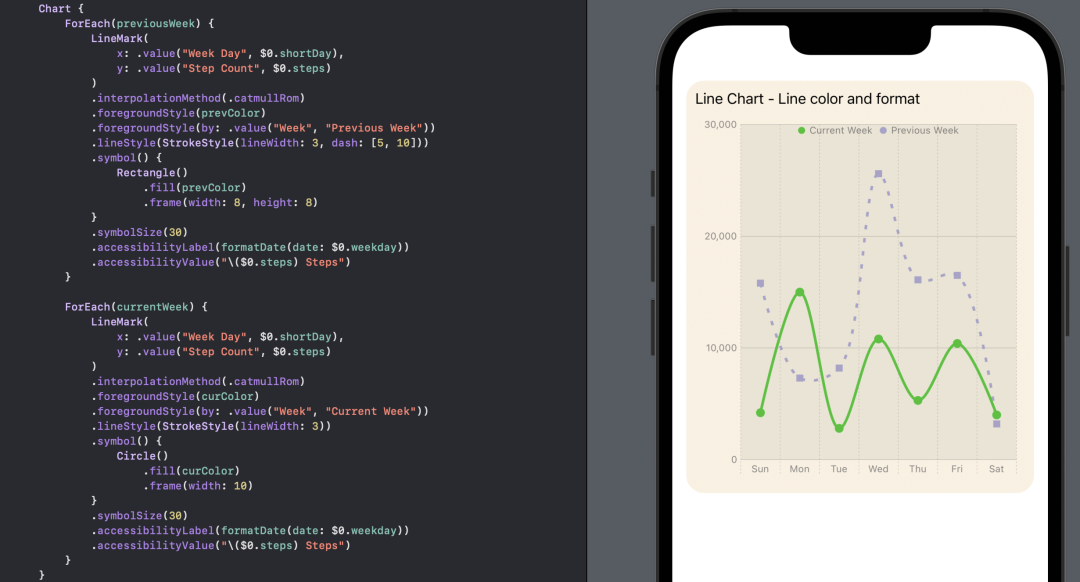
为 SwiftUI 图表中的一个数据集设置自定义线型。
结合面积图和折线图
最后,将折线图与面积图结合起来,帮助区分一个数据集与另一个数据集。区域图只为当前一周的数据添加,并且区域的颜色被设置为渐变的线下。
struct ChartView9: View {
    var body: some View {
        let prevColor = Color(hue: 0.69, saturation: 0.19, brightness: 0.79)
        let curColor = Color(hue: 0.33, saturation: 0.81, brightness: 0.76)
        let curGradient = LinearGradient(
            gradient: Gradient (
                colors: [
                    curColor.opacity(0.5),
                    curColor.opacity(0.2),
                    curColor.opacity(0.05),
                ]
            ),
            startPoint: .top,
            endPoint: .bottom
        )
        VStack() {
            GroupBox ( "Line Chart - Combine LIne and Area chart") {
                Chart {
                    ForEach(previousWeek) {
                        LineMark(
                            x: .value("Week Day", $0.shortDay),
                            y: .value("Step Count", $0.steps)
                        )
                        .interpolationMethod(.catmullRom)
                        .foregroundStyle(prevColor)
                        .foregroundStyle(by: .value("Week", "Previous Week"))
                        .lineStyle(StrokeStyle(lineWidth: 3, dash: [5, 10]))
                        .symbol() {
                            Rectangle()
                                .fill(prevColor)
                                .frame(width: 8, height: 8)
                        }
                        .symbolSize(30)
                        .accessibilityLabel("\($0.weekdayString)")
                        .accessibilityValue("\($0.steps) Steps")
                    }
                    ForEach(currentWeek) {
                        LineMark(
                            x: .value("Week Day", $0.shortDay),
                            y: .value("Step Count", $0.steps)
                        )
                        .interpolationMethod(.catmullRom)
                        .foregroundStyle(curColor)
                        .foregroundStyle(by: .value("Week", "Current Week"))
                        .lineStyle(StrokeStyle(lineWidth: 3))
                        .symbol() {
                            Circle()
                                .fill(curColor)
                                .frame(width: 10)
                        }
                        .symbolSize(30)
                        .accessibilityLabel("\($0.weekdayString)")
                        .accessibilityValue("\($0.steps) Steps")

                        AreaMark(
                            x: .value("Week Day", $0.shortDay),
                            y: .value("Step Count", $0.steps)
                        )
                        .interpolationMethod(.catmullRom)
                        .foregroundStyle(curGradient)
                        .foregroundStyle(by: .value("Week", "Current Week"))
                        .accessibilityLabel("\($0.weekdayString)")
                        .accessibilityValue("\($0.steps) Steps")
                    }
                }
                // Set the Y axis scale
                .chartYScale(domain: 0...30000)

                .chartForegroundStyleScale([
                    "Current Week" : curColor,
                    "Previous Week": prevColor
                ])
                .chartLegend(position: .overlay, alignment: .top)
                .chartPlotStyle { plotArea in
                    plotArea
                        .background(Color(hue: 0.12, saturation: 0.10, brightness: 0.92))
                }
                .chartYAxis() {
                    AxisMarks(position: .leading)
                }
                .frame(height:400)
            }
            .groupBoxStyle(YellowGroupBoxStyle())
            Spacer()
        }
        .padding()
    }
}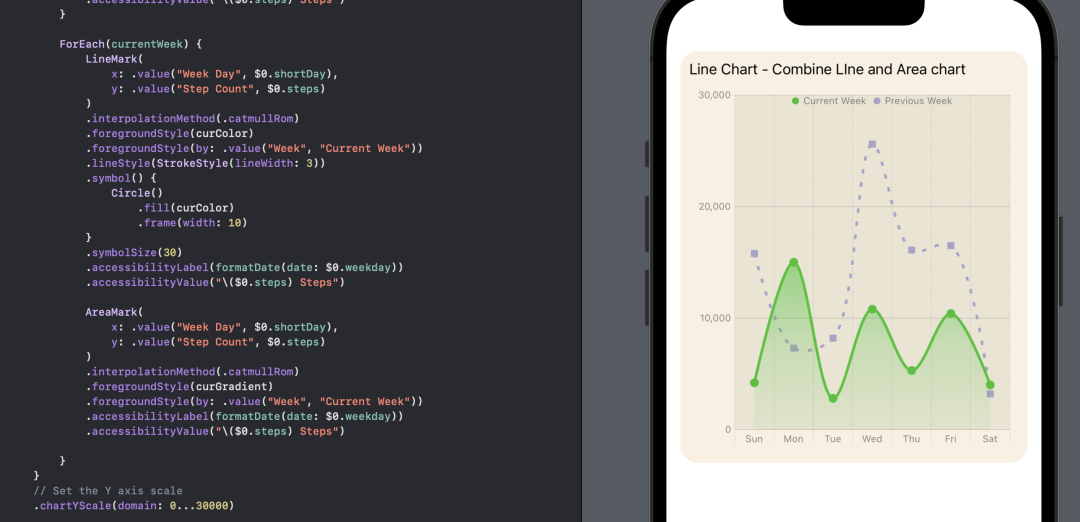
在SwiftUI图表中使用自定义颜色将折线图与面积图结合起来。
SwiftUI Charts目前处于测试阶段,在Xcode性能和编译一些图表选项方面可能会有一些问题,但它很容易就能开始使用图表。帮助文档是可用的,而且很好,但我希望看到更多的代码示例。它是有很大的潜力来定制图表然后以直观的方式向应用程序的用户展示数据。
[1]Charts: https://developer.apple.com/documentation/charts。
[2]GroupBoxStyle: https://developer.apple.com/documentation/swiftui/groupboxstyle。
[3]chartPlotStyle: https://developer.apple.com/documentation/swiftui/view/chartplotstyle(content:)。
[4]chartBackground: https://developer.apple.com/documentation/swiftui/view/chartplotstyle(content:)。
[5]AxisMarks: https://developer.apple.com/documentation/swiftui/view/chartyaxis(content:)。
[6]interpolationMethod: https://developer.apple.com/documentation/charts/chartcontent/interpolationmethod(_:)。
[7]chartForegroundStyleScale: https://developer.apple.com/documentation/swiftui/view/chartforegroundstylescale(_:)?changes=_10。
[8]StrokeStyle: https://developer.apple.com/documentation/swiftui/strokestyle。
Recommend
-
65
-
61
| 导语 贴图压缩是游戏开发中常见的一个问题,不过说到法线图的压缩,其实里面就有一些特殊的问题要处理。前段时间做了一次贴图通道的优化,打算用两个通道表示法线图并且和其他通道合并到一张图里,以
-
69
导读 众所周知,让我们的 Linux 系统保持最新状态会用到多种包管理器。比如说,在 Ubuntu 中,你无法使用 sudo apt update 和 sudo apt upgrade 命令升级所有软件。 此命令仅升级使用 APT 包管理器...
-
14
萤火之森Unity 中用有限状态机来实现一个 AI发表于 2018-06-22|更新于 2022-02-16|游戏开发 字数总...
-
6
SwiftUI 4.0 中原生图表(Charts)实现超长内容滚动功能 ...
-
4
V2EX › iPhone iOS16 一个 Bug 导致无线充电过热而无法充电
-
8
在 iOS 16 中用 SwiftUI Charts 创建一个折线图 作者:Swift君 2022-11-07 08:42:50 本文展示了如何用比以前从头开始创建同样的折线图少得多的代码轻松创建折线图。此外,自定义图表的外观和感觉以及使图表中的信...
-
7
SwiftUI 提供了强大的布局能力,不过这些布局操作都是在视图之间进行的。当我们想在 Text 中进行图文混排时,需要采用与视图布局不同的思路与操作方式。本文将首先介绍一些与 Text 有关的知识,并通过一个实际案例,为大家梳理出在 SwiftUI 中用 Text 实现图文混排的...
-
4
本文将对 SwiftUI 的 zIndex 修饰符做以介绍,包括:使用方法、zIndex 的作用域、通过 zIndex 避免动画异常、为什么 zIndex 需要设置稳定的值以及在多种布局容器内使用 zIndex 等内容。zIndex 修饰符在 SwiftUI 中,开发者使用 z...
-
3
在可访问性方面,图表是复杂的事物之一。iOS 15 引入了一项名为“音频图表”的新功能。下面我们将学习如...
About Joyk
Aggregate valuable and interesting links.
Joyk means Joy of geeK