

Running Rust in AWS Lambda with SAM (Serverless App Model) — Part 1
source link: https://medium.com/@shyamsundarb/running-rust-in-aws-lambda-with-sam-part-1-2b7a6963a2ef
Go to the source link to view the article. You can view the picture content, updated content and better typesetting reading experience. If the link is broken, please click the button below to view the snapshot at that time.

Running Rust in AWS Lambda with SAM (Serverless App Model) — Part 1

Rust and AWS Lambda
In this blog series, we will look at how the power of Rust can be utilised to build server-less functions in AWS.
Introduction
This is a series on how to build, test and deploy Rust to AWS Lambda with AWS SAM. This is Part 1. We will look at how to create a simple rust lambda that responds with “Hello, World!” when invoked.
Rust for the unfamiliar. Rust is programming language that is used to build “BLAZINGLY FAST” applications. It has a unique memory management model which eliminates the need of a GC.
Serverless is a cloud computing application development and execution model that enables developers to build and run application code without provisioning or managing servers or backend infrastructure.
AWS Lambda is the serverless compute service offered by AWS.
Prerequisites
- Rust (1.60+)
- AWS CLI (Set environment variables with Access and Secret keys)
- SAM CLI
- Docker
Reference Links
Installing Rust: https://www.rust-lang.org/tools/install
Installing and Configuring AWS CLI: https://docs.aws.amazon.com/cli/latest/userguide/getting-started-install.html
Install SAM CLI: https://docs.aws.amazon.com/serverless-application-model/latest/developerguide/install-sam-cli.html
Install Docker: https://docs.docker.com/engine/install/
Initialise the project with SAM
Once all our dependencies installed and configured. We will utilise the SAM CLI cookie cutter template to create a new rust lambda project.
The cookie cutter can be found in this link.
Run the following command in a folder in which you want to create a new lambda project in.
sam init --location gh:aws-samples/cookiecutter-aws-sam-rust
After you have executed the above command, you should key values similar to:

SAM Init
If all went well you should have a project created. Now let us explore the project.
There are three files that are of interest to us.
Please note that the lambda function created by the cookie cutter is outdated. The dependencies will be updated and the test function for the purpose of this blog is removed.
Cargo.toml
For the AWS Lambda code to integrate with the AWS Lambda runtime and respond to HTTP requests the crate lambda_http is used and the excellent tokio is used for handling the async piece.

Cargo.toml
src/main.rs
Let us look at it in parts.
The lambda_http crate is being utilized as such:
./src/main.rsuse lambda_http::{run, service_fn, Error, IntoResponse, Request, Response};
There are 6 items which we will be using from lambda_http crate.
lambda_http:
First is the the run method which starts the lambda runtime and begins polling for events on the Lambda runtime API and pass it on the handler we specify.
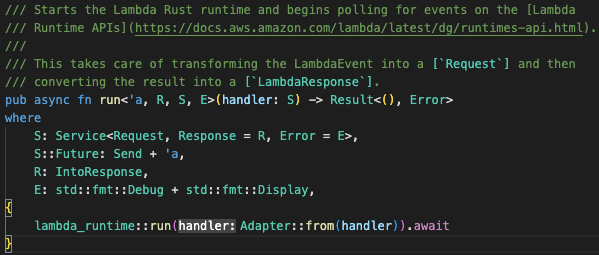
run
Second is the service_fn function to which we abstract our handler. The service_fn function returns a Struct ServiceFn<T>. Here the T is a generic which in this case would be our handler function.

service_fn
Third is the Error type that lambdas may result in.
lambda_runtime — Error
The IntoResponse is a trait that has one function into_Response and returns a ResponseFuture. Notice that this Response is actually from the http crate.
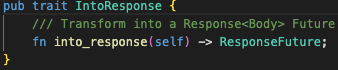
IntoResponse
The ResponseFuture is a future which contains the response body.
Response Future
The Request is a http Request of type Body straight out of the http crate.
Request
The Response is here is actually the trait IntoResponse. Hence, the response should be something that implements the IntoResponse trait.
Response
Now that we have map of what the lambda_runtime crate has to offer us.
Let us go the main function:
./src/main.rs#[tokio::main]
async fn main() -> Result<(), Error> {
   run(service_fn(hello)).await?;
   Ok(())
}
The function is quite simple. This would be an async function which uses the lambda_runtime crate’s run and service_fn function. We pass the handler function, in this case “hello”.
The handler function:
./src/main.rs
async fn hello(_: Request, _context: Context) -> Result<impl IntoResponse, Error> {
   Ok(Response::builder()
   .status(200)
   .header("Content-Type", "text/plain")
   .body("Hello, World!".to_string())?)
}
The hello function, which in this case is the handler function that will get invoked whenever a request is received by the lambda function.
In the initial template setup the Request struct is not being utilised. We are simply responding “Hello, World!” to any request that comes in as plain text.
The entire main.rs:
./src/main.rsuse lambda_http::{run, service_fn, Error, IntoResponse, Request, Response};#[tokio::main]
async fn main() -> Result<(), Error> {
   run(service_fn(hello)).await?;
   Ok(())
}
/// Sample pure Lambda function
async fn hello(_: Request) -> Result<impl IntoResponse, Error> {
    Ok(Response::builder()
   .status(200)
   .header("Content-Type", "text/plain")
   .body("Hello, World!".to_string())?)
}
Now that we a gone through what main.rs has, the last important file that we have to go through is the Template.yaml file.
Template.yaml file
The Template.yaml file is SAM template file. It contains specifications about that we are deploying, how should it be deployed and what resources would have to provisioned for it.
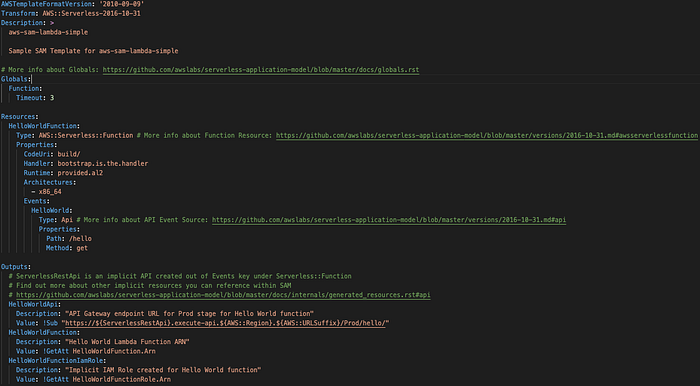
tempate.yaml
There are 4 sections to go through here:
- Version and Transform Declaration
- Globals section
- Resources section
- Outputs section
Version and Transform Declaration
The AWSTemplateFormatVersion section (optional) identifies the capabilities of the template. The latest template format version is 2010-09-09 and is currently the only valid value.
The declaration Transform: AWS::Serverless-2016-10-31 is required for AWS SAM template files. This declaration identifies an AWS CloudFormation template file as an AWS SAM template file.
Globals section
The Globals section defines properties that are common to all your serverless functions and APIs. All the resources inherit the properties that are defined in the Globals section.
In this case we have used global to declare the timeout for functions.
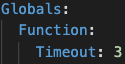
Globals Section
Resources section
Resources section can contain a combination of AWS CloudFormation resources and AWS SAM resources. The following serverless resources can be declared by SAM
For this case, we are going to utilise only AWS::Serverless::Function.
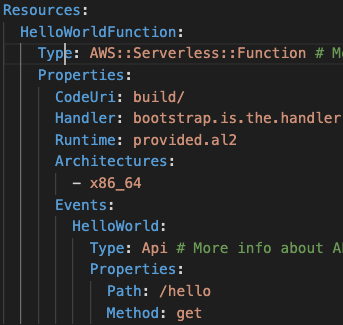
Resources Section
Output Section (Optional)
The Output section has the values that are returned whenever you view your stack’s properties. The purpose of Output section is that, post deployment, we can use the Output section to clearly give information about our deployment.
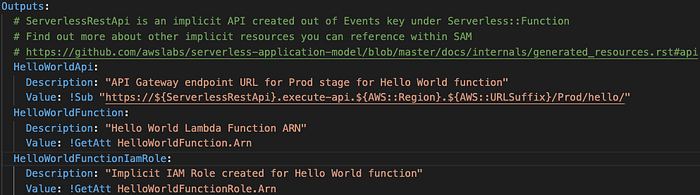
Output Section
Deploying the application
Now that we have a clear understanding about all the working pieces, it is time to deploy. We will use AWS SAM CLI command to deploy to AWS.
Before everything we need to build our project. Since we initiated our project the cokkiecutter, the make file will contain build commands.
In order to build that we need a tool called cross. Cross helps us build a linux-gnu binary.
To install cross simply run (Can be run anywhere)
cargo install cross
Once that is install, run the following to build the project (Must be run in the project directory)
make
Depending on your system config it might take a while. So sit back and relax.
If all went well then you should be seeing the file build/bootstrap folder in the target folder.
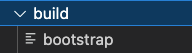
Bootstrap
It’s time to validate our SAM template using the following command(Must be run in the project directory)
sam validate
If everything went well then you should something similar to

sam validate
Now we are all set. Deploy to AWS with(Must be run in the project directory)
sam deploy --guided
Since we are passing the --guided flag, we will be prompted by the CLI to enter the required information.
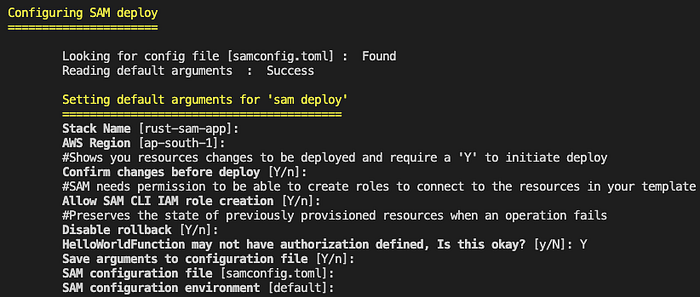
sam deploy — guided
Once the deployment is complete. You should see the output printed along with the URL:
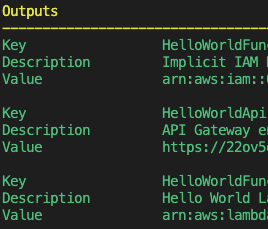
Output

Successful deployment
This indicates a successful deployment. Let us the test the API with URL printed in the Output section.
You should be seeing
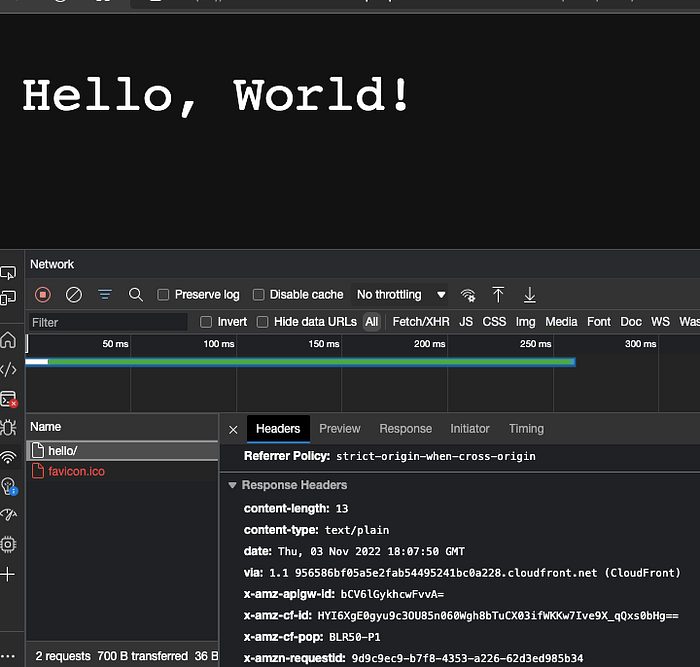
Execute Lambda
Voila! We have just deployed a rust program to AWS Lambda using AWS SAM.
Clean Up
Now that we are done with our work. It’s time to clean up. With AWS SAM it is quite easy to do so. Just run (Must be run in the project directory):
sam delete
Once the command runs, whatever resources were created will get cleaned up.
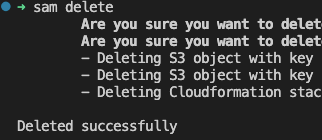
sam delete
This concludes this blog. I will be posting more on Rust with Lambda and AWS in the subsequent parts. So stay tuned.
If you liked this post, please share and like this in social media.
References
AWS SAM resource and property reference — AWS Serverless Application Model (amazon.com)
AWS SAM template anatomy — AWS Serverless Application Model (amazon.com)
Recommend
About Joyk
Aggregate valuable and interesting links.
Joyk means Joy of geeK