

Markdown博客文章写作最佳体验,hugo+Obisidian+Vscode
source link: https://ttzz.eu.org/posts/2022-09-11-hugo-obisidian-vscode/
Go to the source link to view the article. You can view the picture content, updated content and better typesetting reading experience. If the link is broken, please click the button below to view the snapshot at that time.
hugo 博客搭建后,博客写作和发布流程较为复杂,因为是静态博客,每次都需要重新编译。不过,通过 GitHub action,我们已经把这步交给 GitHub 去做了。我们只需提交即可触发自动编译并发布到你部署的平台,我目前托管在 GitHub pages,vercel,render,netlify 这四个平台上,不过 8 月下旬起 vercel 提供 *.vercel.app 域名已经被墙,我开启了独立域名 https://zhjin.eu.org 。
现在我们的整体写作流程如下:
- 通过命令
hugo new posts/文章名.md新建一篇文章。 - 用 Markdown 编辑器进行写作,图片资源本地存储或引入图床
- 上传文章,自动发布
这个过程稍微还是繁琐了一些,因此,怎么优化这个这个流程,把写作体验提升变得尤为重要。
obisidian
1.obisidian 简介
Markdown 编辑器,市面上口碑不错的有 typora,vscode,obisidian。不过 typora 从 2021-11-23 号起已经开始收费。obisidian 也是最近才发现的一款神奇,使用体验下来也非常不错。
obisidian 是什么,这里简单介绍一下。
- 一款离线的笔记软件(现在也推出收费云服务)
- markdown 编辑工具,实时预览
- 文件都在本地存储
- 文件夹式管理
它可以智能生成文档关系图谱,记忆保存你上次打开的文件位置,界面简洁,文件夹式管理,不同文件可以链式关联,拥有丰富的插件。如果想要跨设备云同步,可以借助第三方云盘,比如坚果云。
2. 新建文章
借助 obisidian 的插件 QuickAdd,我们可以把新建文章的步骤进行优化,做成一个快捷指令。
- 在博客根目录,新建文件夹
obs_sctipts,里面添加新建脚本NewBlog.js,内容如下:
const util = require("util");
const child_process = require("child_process");
const exec = util.promisify(child_process.exec);

//新建博客命名,这里以年月日时分秒命名,可自定义修改
function getCreateTimeAsFileName() {
  var d = new Date();
  var year = d.getFullYear();
  var month = d.getMonth() + 1;
  var day = d.getDate();
  var hour = d.getHours();
  var minute = d.getMinutes();
  var second = d.getSeconds();
  var time =  year + "-" + month +"-" + day +  "day" + hour +  "h" + minute +  "m" + second +  "s";

  return time;
}


// execute command function

async function executeCommand() {
  const fileName = getCreateTimeAsFileName() + ".md";
  const { stdout, stderr } = await exec("hugo new posts/" + fileName, {
    cwd: app.fileManager.vault.adapter.basePath,
  });
  console.log("stdout:", stdout);
  console.log("stderr:", stderr);
  if (stdout) {
    new Notice("New Blog Created[" + fileName + "]");
  } else {
    new Notice("New Blog Create Faild. " + stderr);
  }
}

module.exports = async function (context, req) {
  await executeCommand();
};
进入 设置 - 第三方插件 - 关闭安全模式,浏览插件,安装 QuickAdd 插件。

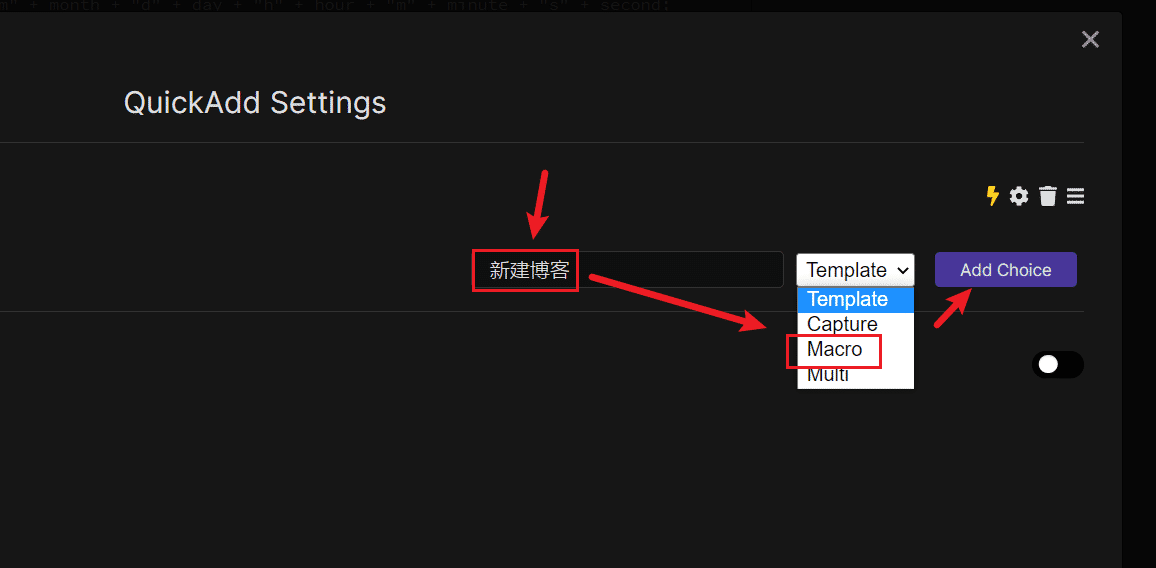
QuickAdd 插件,点击它的设置,新增一个宏定义,输入框输入【新建博客】-Macro-add Choice,这时你就可以看见增加了新建博客的宏定义,闪电符号点击勾选,这里是创建命令的意思。
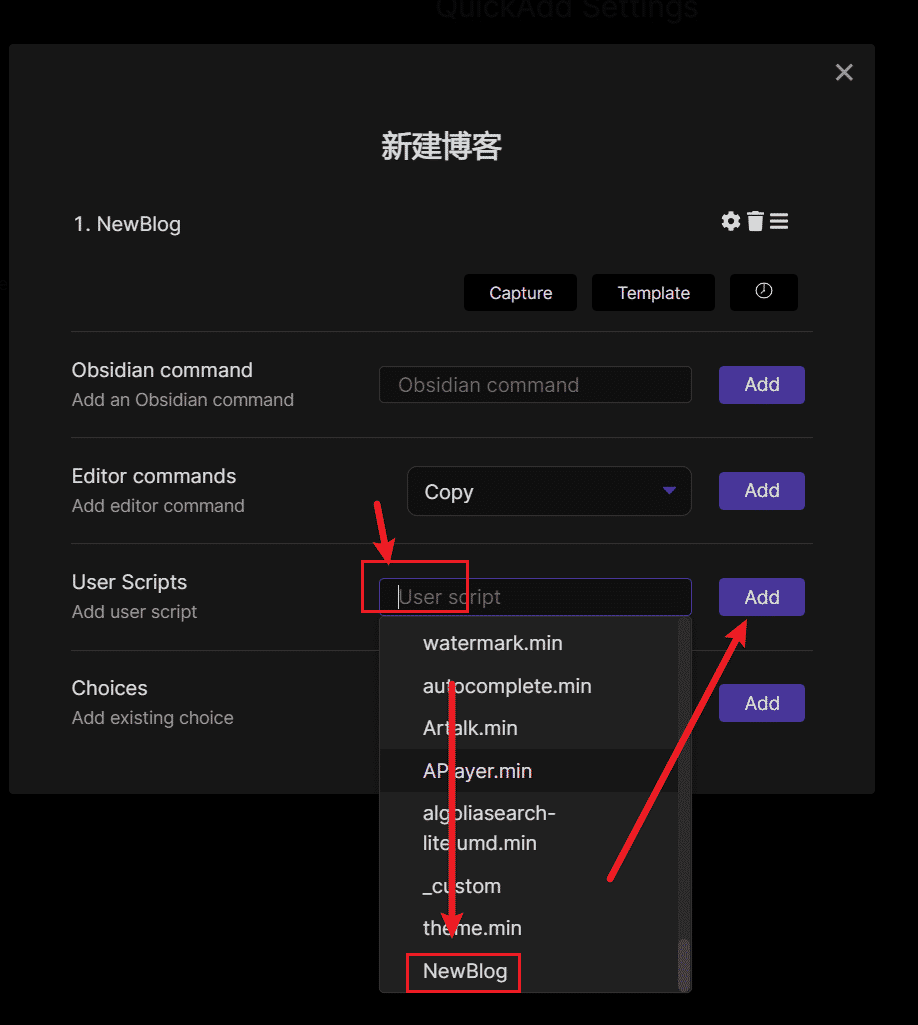
创建完【新建博客】的宏定义后,点击下面
Manage Macros-Configure进行设置,User Scripts找到脚本NewBlog脚本,add 添加。完成。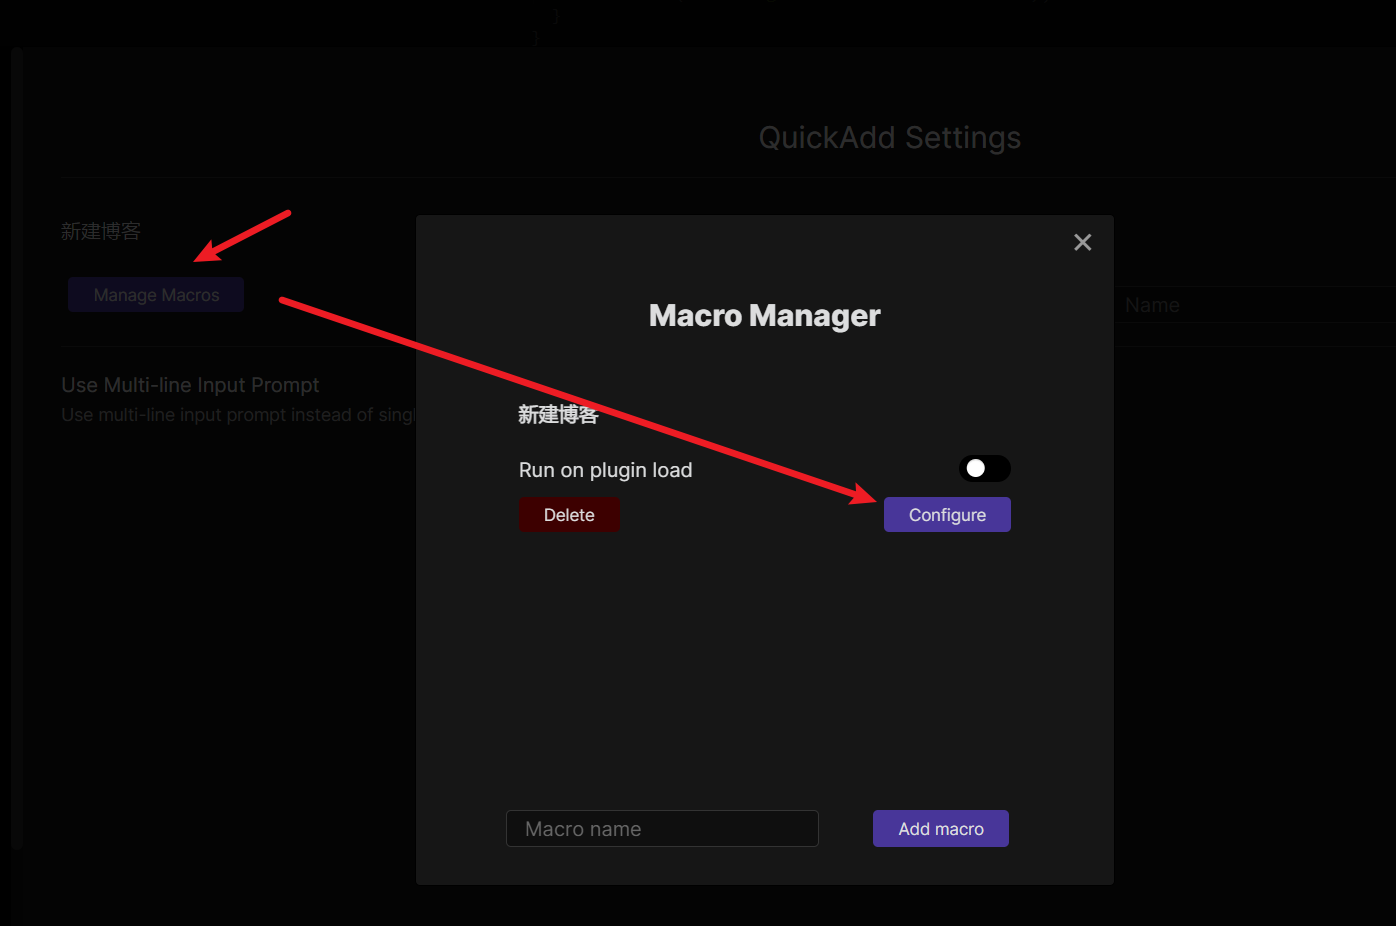
通过以上设定,你已经完成新建文章的快捷方式配置,按快捷键 ctrl+p,调起命令面板,输入 quickadd,就能看到新建博客的快捷按钮,我这里截图的两个都一样,步骤 1 中勾选闪电符号,就是在这里创建这个快捷命令
QuickAdd:新建博客,点击就可看到新建博客成功。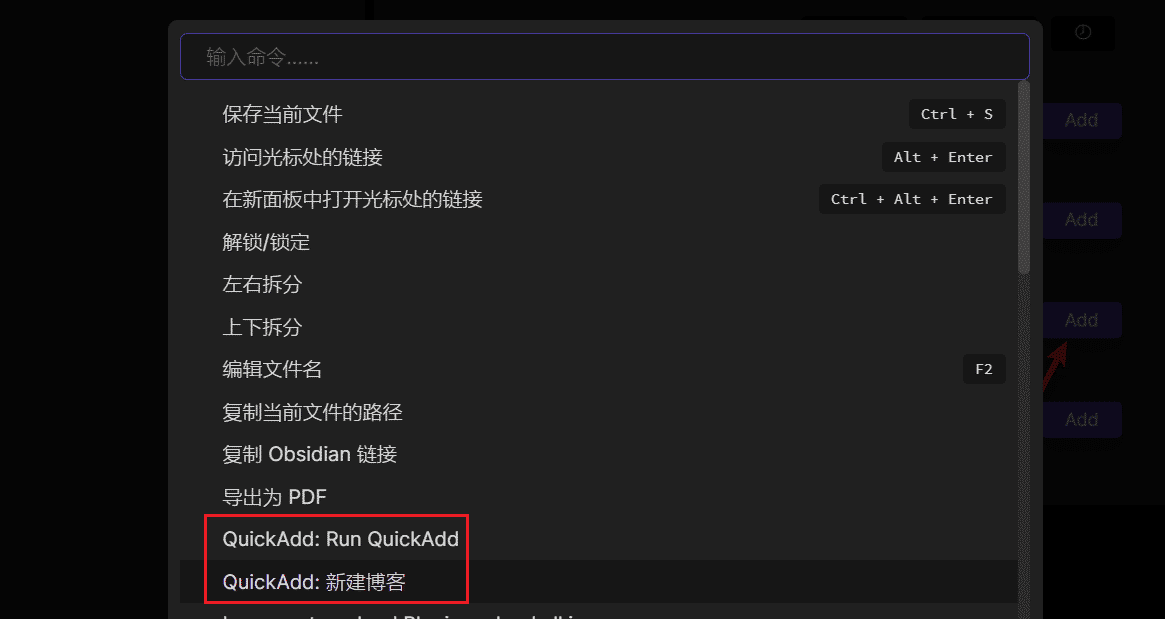

3. 图床配置
Hugo 博客写作最佳实践 https://zhuanlan.zhihu.com/p/497671233
 公众号
公众号 微信打赏
微信打赏
 支付宝打赏
支付宝打赏Recommend
About Joyk
Aggregate valuable and interesting links.
Joyk means Joy of geeK