

linux—— 使用gcc解析程序四个阶段
source link: https://blog.51cto.com/u_15787387/5765379
Go to the source link to view the article. You can view the picture content, updated content and better typesetting reading experience. If the link is broken, please click the button below to view the snapshot at that time.
一、gcc
1.gcc的安装
yum -y install gcc-c++ autoconf pcre pcre -devel  make automake
yum -y install wget httpd-tools vim
2.gcc 的默认使用
[yzq@VM-8-8-centos ~]$ cat test1.c
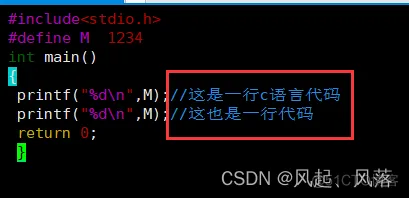
#include<stdio.h>
int main()
{
printf("hello world!");
return 0;
}
[yzq@VM-8-8-centos ~]$ gcc test1.c
[yzq@VM-8-8-centos ~]$ ls
a.out install.sh lesson5 mk test1.c
[yzq@VM-8-8-centos ~]$ ./a.out
hello world!
通过使用 gcc +文件名,默认产生了一个a.out的可执行程序,再通过
./
打印出结果
3. 创建一个可命名的可执行程序
[yzq@VM-8-8-centos ~]$ cat test1.c
#include<stdio.h>
int main()
{
 printf("hello world!");
 return 0;
 }
[yzq@VM-8-8-centos ~]$  gcc test1.c -o mybin
[yzq@VM-8-8-centos ~]$ ./mybin
hello world!
gcc +文件名 -o +自己命名的可执行程序
gcc test1.c -o mybin ——把test.c文件编译形成一个可执行程序mybin
运行./mybin即可运行程序
4.程序执行过程
1. 预处理阶段
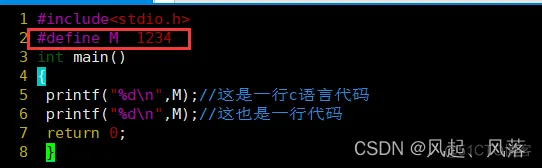
1. test.c文件
#include<stdio.h>
#define M 1234
int main()
{
printf("%d\n",M);//这是一行c语言的代码
printf("%d\n",M);//这也是一行c语言的代码
return 0;
}
使用 vim test.c ,进入test.c文件
2. test.i 文件
gcc -E
完成预处理阶段
gcc -E test.c -o test.i
把test.c文件 完成预处理阶段的临时内容 写入test.i文件中
使用
vim test.i进入 test.i文件,同时在插入模式下输入vs test.c就会导致分为 test.c (左)和test.i(右)两个,使两者分屏

3.宏的替换
在
test.c文件中,是有宏的存在
而在右边的
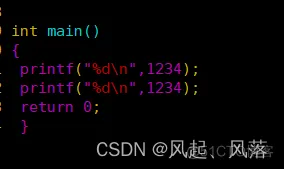
test.i文件中,已经完成了对宏的替换
4. 注释的消除
在
test.c文件中,注释是存在的。
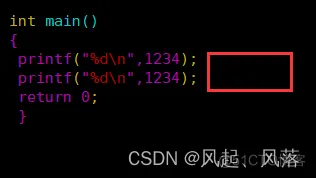
在
test.i文件中,发现注释已经被消除。
5.头文件的展开

在
test.c文件中,包含头文件 stdio.h
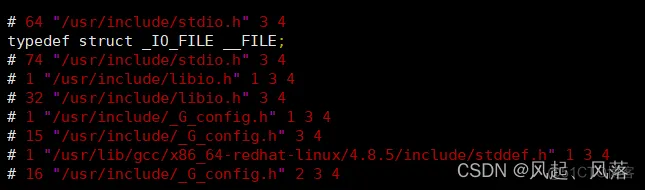
在
test.i文件中,引入了stdio.h,并将所有头文件都展开以及相关头文件的内容都拷贝进来。
2.编译阶段
gcc -S
完成编译阶段
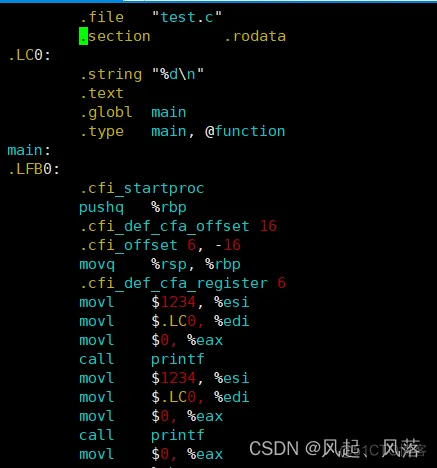
gcc -S test.i -o test.s
这里使用,test.i而不是使用test.c的原因,是因为我们想要调查预处理阶段完成到编译阶段完成这段
把test.i文件完成编译的临时内容 写入 test.s文件中
vim test.s
在test.s文件中出现了汇编语言。
3.汇编阶段
gcc -c
完成汇编阶段
gcc -c test.s -o test.o
从test.s开始,是因为已经完成了遇到护理阶段和编译阶段
完成编译阶段,把临时内容放入test.o文件中
vim test.o
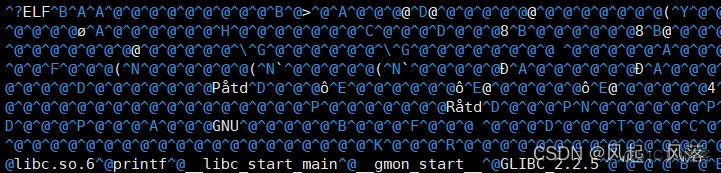
在
test.o文件中,出现了一堆看不懂的东西,实际上是 二进制文件
汇编阶段: 汇编语言到 obj目标二进制文件
汇编阶段 (二进制)不可执行
[yzq@VM-8-8-centos lesson5]$  ./test.o
-bash: ./test.o: Permission denied
正常情况下执行
[yzq@VM-8-8-centos lesson5]$ chmod u+x test.o
[yzq@VM-8-8-centos lesson5]$  ./test.o
-bash: ./test.o: cannot execute binary file
将文件的拥有者加上执行的权限 也不可以执行
原因:此时还没有将第三方库引入,如调用printf、scanf的c语言标准库
4.链接阶段
本质是引入我们在代码中使用的第三方库,如c语言标准库
yzq@VM-8-8-centos lesson5]$ gcc test.o -o mybin
[yzq@VM-8-8-centos lesson5]$  ./mybin
1234
1234
gcc根据文件,会默认连接(由编译器和文件共同决定的)第三方库
执行程序,并命名为mybin
Recommend
About Joyk
Aggregate valuable and interesting links.
Joyk means Joy of geeK