
4

【精品】seata综合示例:订单-库存-扣款
source link: https://blog.51cto.com/lianghecai/5762847
Go to the source link to view the article. You can view the picture content, updated content and better typesetting reading experience. If the link is broken, please click the button below to view the snapshot at that time.
【精品】seata综合示例:订单-库存-扣款
推荐 原创有关seata的安装,请参看博客: https://blog.51cto.com/lianghecai/5759100
业务需求:下单—减库存—扣钱—改订单状态
当用户下单时,会在订单服务中创建一个订单,然后通过远程调用库存服务来扣减下单商品的库存;再通过远程调用账户服务来扣减用户账户里面的余额;最后订单服务中修改订单状态。
需要涉及到三个模块:
| 模块名 | 数据库名 | port | Context-path | Application-name |
|---|---|---|---|---|
| fafu-account | seata_account | 3001 | fafu | Fafu-account-3001 |
| fafu-storage | seata_storage | 4001 | fafu | Fafu-storage-4001 |
| fafu-order | seata_order | 5001 | fafu | Fafu-order-5001 |
可以看出:该操作需要跨域三个数据库,有两次远程调用,需要用到分布式事务技术。
数据库准备
创建seata_order数据库,然后在其中创建表tb_order:
CREATE TABLE `tb_order`  (
  `id` bigint UNSIGNED NOT NULL COMMENT '订单编号',
  `user_id` bigint UNSIGNED NULL DEFAULT NULL COMMENT '用户编号',
  `sku_id` bigint UNSIGNED NULL DEFAULT NULL COMMENT '商品编号',
  `count` int UNSIGNED NULL DEFAULT NULL COMMENT '数量',
  `money` decimal(10, 3) UNSIGNED NULL DEFAULT NULL COMMENT '金额',
  `state` int UNSIGNED NULL DEFAULT NULL COMMENT '状态',
  PRIMARY KEY (`id`) USING BTREE
) ENGINE = InnoDB CHARACTER SET = utf8mb4 COLLATE = utf8mb4_0900_ai_ci ROW_FORMAT = Dynamic;
上面表的设计只是模拟性质的,大概对应的是拼多多的业务,一个订单中只能购买1种商品,但这种商品可以购买多个。
创建seata_storage数据库,然后在其中创建表tb_storage
CREATE TABLE `tb_storage`  (
  `id` bigint UNSIGNED NOT NULL COMMENT '编号',
  `sku_id` bigint UNSIGNED NULL DEFAULT NULL COMMENT '商品编号',
  `total` int UNSIGNED NULL DEFAULT NULL COMMENT '总库存',
  `used` int UNSIGNED NULL DEFAULT NULL COMMENT '已用库存',
  PRIMARY KEY (`id`) USING BTREE
) ENGINE = InnoDB CHARACTER SET = utf8mb4 COLLATE = utf8mb4_0900_ai_ci ROW_FORMAT = Dynamic;
创建seata_account数据库,然后在其中创建表tb_account:
CREATE TABLE `tb_account`  (
  `id` bigint UNSIGNED NOT NULL COMMENT '编号',
  `total` decimal(11, 3) UNSIGNED NULL DEFAULT NULL COMMENT '总额度',
  `used` decimal(11, 3) UNSIGNED NULL DEFAULT NULL COMMENT '已用额度',
  PRIMARY KEY (`id`) USING BTREE
) ENGINE = InnoDB CHARACTER SET = utf8mb4 COLLATE = utf8mb4_0900_ai_ci ROW_FORMAT = Dynamic;
依次在三个数据库创建undo_log 表,用于保存需要回滚的数据:
CREATE TABLE `undo_log`  (
  `id` bigint NOT NULL AUTO_INCREMENT,
  `branch_id` bigint NOT NULL,
  `xid` varchar(100) CHARACTER SET utf8 COLLATE utf8_general_ci NOT NULL,
  `context` varchar(128) CHARACTER SET utf8 COLLATE utf8_general_ci NOT NULL,
  `rollback_info` longblob NOT NULL,
  `log_status` int NOT NULL,
  `log_created` datetime NOT NULL,
  `log_modified` datetime NOT NULL,
  `ext` varchar(100) CHARACTER SET utf8 COLLATE utf8_general_ci NULL DEFAULT NULL,
  PRIMARY KEY (`id`) USING BTREE,
  UNIQUE INDEX `ux_undo_log`(`xid` ASC, `branch_id` ASC) USING BTREE
) ENGINE = InnoDB CHARACTER SET = utf8 COLLATE = utf8_general_ci ROW_FORMAT = Dynamic;
注:每个服务对应的业务数据库都需要创建这个日志表。
项目共同部分
Nacos中
在Nacos添加给客户端加载使用的配置seata-client-demo.yml:
- Data Id:seata-client-demo.yml
- Group:SEATA_GROUP
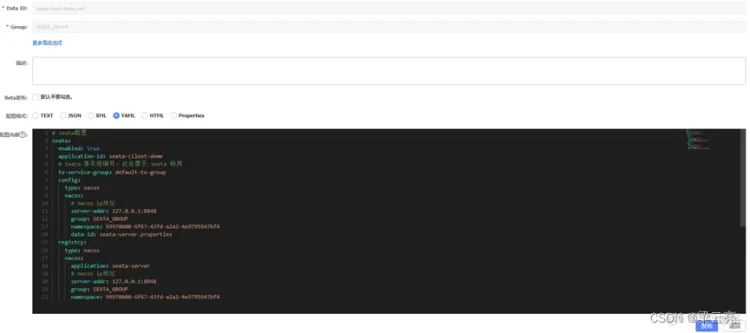
注意:上面配置中的group和nampespace都是在Nacos中创建命名空间时创建的。
上面配置的具体内容如下:
# seata配置
seata:
  enabled: true
  application-id: seata-cilent-deme
  # Seata 事务组编号,此处需于 seata 相同
  tx-service-group: default-tx-group
  config:
    type: nacos
    nacos:
      # nacos ip地址
      server-addr: 127.0.0.1:8848
      group: SEATA_GROUP
      namespace: 99970600-6f67-43fd-a2a2-4e9795947bf4
      data-id: seata-server.properties
  registry:
    type: nacos
    nacos:
      application: seata-server
      # nacos ip地址
      server-addr: 127.0.0.1:8848
      group: SEATA_GROUP
      namespace: 99970600-6f67-43fd-a2a2-4e9795947bf4
<dependency>
    <groupId>org.projectlombok</groupId>
    <artifactId>lombok</artifactId>
</dependency>

<dependency>
    <groupId>org.springframework.boot</groupId>
    <artifactId>spring-boot-starter-web</artifactId>
</dependency>
<dependency>
    <groupId>org.springframework.boot</groupId>
    <artifactId>spring-boot-starter-actuator</artifactId>
</dependency>
<dependency>
    <groupId>org.springframework.boot</groupId>
    <artifactId>spring-boot-devtools</artifactId>
    <scope>runtime</scope>
    <optional>true</optional>
</dependency>

<dependency>
    <groupId>org.springframework.boot</groupId>
    <artifactId>spring-boot-starter-test</artifactId>
    <scope>test</scope>
</dependency>

<!-- 持久层相关 -->
<dependency>
    <groupId>mysql</groupId>
    <artifactId>mysql-connector-java</artifactId>
</dependency>
<dependency>
    <groupId>com.alibaba</groupId>
    <artifactId>druid-spring-boot-starter</artifactId>
</dependency>
<dependency>
    <groupId>com.baomidou</groupId>
    <artifactId>mybatis-plus-boot-starter</artifactId>
</dependency>

<dependency>
    <groupId>org.springframework.cloud</groupId>
    <artifactId>spring-cloud-starter-openfeign</artifactId>
</dependency>
<!--  nacos自从2020版本之后不再整合的是Netflix,也就没有ribbon了 -->
<dependency>
    <groupId>org.springframework.cloud</groupId>
    <artifactId>spring-cloud-starter-loadbalancer</artifactId>
</dependency>
<dependency>
    <groupId>com.alibaba.cloud</groupId>
    <artifactId>spring-cloud-starter-alibaba-nacos-discovery</artifactId>
</dependency>
<dependency>
    <groupId>com.alibaba.cloud</groupId>
    <artifactId>spring-cloud-starter-alibaba-sentinel</artifactId>
</dependency>
<!-- sentinel配置持久化到Nacos -->
<dependency>
    <groupId>com.alibaba.csp</groupId>
    <artifactId>sentinel-datasource-nacos</artifactId>
</dependency>

<dependency>
    <groupId>io.seata</groupId>
    <artifactId>seata-spring-boot-starter</artifactId>
    <version>1.5.2</version>
</dependency>
<dependency>
    <groupId>com.alibaba.cloud</groupId>
    <artifactId>spring-cloud-starter-alibaba-seata</artifactId>
    <exclusions>
        <exclusion>
            <groupId>io.seata</groupId>
            <artifactId>seata-spring-boot-starter</artifactId>
        </exclusion>
    </exclusions>
</dependency>
Result
@Getter
@ToString
public class Result<T> {
    /**
     * 请求响应状态码
     */
    private int code;
    /**
     * 请求结果描述信息
     */
    private String msg;
    /**
     * 请求结果数据
     */
    private T data;
    public Result<T> setCode(int code) {
        this.code = code;
        return this;
    }

    public Result<T> setMsg(String msg) {
        this.msg = msg;
        return this;
    }

    public Result<T> setData(T data) {
        this.data = data;
        return this;
    }

    public static void main(String[] args) {
        Result<Object> result = new Result<>().addData("a", "aaa", "b", 123, "c", new Date());
        System.out.println(result);
    }

    /**
     * 将key-value形式的成对出现的参数转换为JSON
     *
     * @param objs
     * @return
     */
    public Result<T> addData(Object... objs) {
        if (objs.length % 2 != 0) {
            throw new RuntimeException("参数个数不对");
        }
        for (int i = 0; i < objs.length; i += 2) {
            if (!(objs[i] instanceof String)) {
                throw new RuntimeException("奇数参数必须为字符串");
            }
        }

        Map<String, Object> map = new HashMap<>();
        for (int i = 0; i < objs.length; i += 2) {
            map.put((String) objs[i], objs[i + 1]);
        }

        this.data = (T) map;
        return this;
    }
}
ResultUtil
public class ResultUtil {
    public static <T> Result<T> success() {
        Result<T> result = new Result<>();
        result.setCode(200);
        result.setMsg("成功");
        return result;
    }

    public static <T> Result<T> success(Integer code, String msg) {
        Result<T> result = new Result<>();
        result.setCode(code);
        result.setMsg(msg);
        return result;
    }

    public static <T> Result<T> success(T data) {
        Result<T> result = new Result<>();
        result.setCode(200);
        result.setMsg("成功");
        result.setData(data);
        return result;
    }

    public static <T> Result<T> error() {
        Result<T> result = new Result<>();
        result.setCode(500);
        result.setMsg("失败");
        return result;
    }

    public static <T> Result<T> error(Integer code, String msg) {
        Result<T> result = new Result<>();
        result.setCode(code);
        result.setMsg(msg);
        return result;
    }


    public static void main(String[] args) {
        Result error = ResultUtil.error().addData("a", "aaaa", "b", LocalDateTime.now(), "c", true);
        System.out.println(error);

        //ResultBean res = ResultBeanUtil.success(DataUtil.build(UserVO.class));
        //System.out.println(res);
    }
}
druid数据源代理配置
- MyBatis版本
@Configuration
public class DataSourceProxyConfig {
    @Bean
    @ConfigurationProperties(prefix = "spring.datasource")
    public DataSource druidDataSource() {
        DruidDataSource druidDataSource = new DruidDataSource();
        return druidDataSource;
    }
    @Bean
    public SqlSessionFactory sqlSessionFactory(DataSource dataSource) throws Exception {
        SqlSessionFactoryBean factoryBean = new SqlSessionFactoryBean();
        factoryBean.setDataSource(dataSource);
        factoryBean.setMapperLocations(new PathMatchingResourcePatternResolver()
                .getResources("classpath*:/mapper/*.xml"));
        return factoryBean.getObject();
    }
}
- MyBatisPlus版本
@Configuration
public class DataSourceProxyConfig {
    @Bean
    @ConfigurationProperties(prefix = "spring.datasource.druid")
    public DataSource druidDataSource() {
        DruidDataSource druidDataSource = new DruidDataSource();
        return druidDataSource;
    }
}
在2.2.0.RELEASE及以后,数据源代理自动实现了,不需要再手动去配置一个代理类。
seata-account-3001
第一步;创建项目,添加依赖,修改application.yml文件:
server:
  port: 3001
  servlet:
    context-path: /seata

spring:
  application:
    name: seata-account-3001
  #配置数据源
  datasource:
    type: com.alibaba.druid.pool.DruidDataSource
    druid:
      driver-class-name: com.mysql.cj.jdbc.Driver
      url: jdbc:mysql://127.0.0.1:3306/seata_account?useSSL=false&serverTimezone=GMT%2B8&useUnicode=true&characterEncoding=UTF8&autoReconnect=true&failOverReadOnly=false
      username: root
      password: root
      # 连接池的配置信息:初始化大小,最小,最大
      initial-size: 8
      min-idle: 1
      max-active: 20
      # 配置获取连接等待超时的时间
      max-wait: 60000
      # 配置间隔多久才进行一次检测,检测需要关闭的空闲连接,单位是毫秒
      time-between-eviction-runs-millis: 60000
      # 配置一个连接在池中最小生存的时间,单位是毫秒
      min-evictable-idle-time-millis: 300000
      #验证库是否正常sql
      validation-query: select 'x' from dual
      #空闲时验证,防止连接断开
      test-while-idle: true
      test-on-borrow: false
      test-on-return: false
      # 打开PSCache,并且指定每个连接上PSCache的大小
      pool-prepared-statements: true
      max-open-prepared-statements: 20
      max-pool-prepared-statement-per-connection-size: 20
      # 配置监控统计拦截的filters,去掉后监控界面sql无法统计,'wall'用于防火墙
      filters: stat,wall,slf4j
      # 通过connectProperties属性来打开mergeSql功能;慢SQL记录
      connection-properties: druid.stat.mergeSql=true;druid.stat.slowSqlMillis=5000
      # 合并多个DruidDataSource的监控数据
      use-global-data-source-stat: true
  cloud:
    nacos:
      discovery:
        server-addr: 127.0.0.1:8848 # 配置nacos地址
    sentinel:
      transport:
        # 配置sentinel dashboard地址
        dashboard: 127.0.0.1:8080
        # 默认端口8719,假如被占用会自动从8719开始依次+1扫描,直至找到未被占用的端口
        port: 8719
  config:
    import:
      - optional:nacos:seata-client-demo.yml

seata:
  service:
    vgroup-mapping:
      default_tx_group: default
    grouplist:
      default: 127.0.0.1:8091

management:
  endpoints:
    web:
      exposure:
        include: '*' #暴露出所有的端点

#MyBatisPlus相关配置
mybatis-plus:
  #mapper映射文件位置,多个目录用逗号或者分号分隔(告诉 Mapper 所对应的 XML 文件位置)
  mapper-locations: classpath:mapper/*.xml
  #实体扫描,多个package用逗号或者分号分隔
  typeAliasesPackage: com.seata.account.domain
  #  以下配置均有默认值,可以不设置
  global-config:
    db-config:
      #主键类型
      id-type: auto

      table-underline: true

      #数据库大写下划线转换
      capital-mode: true
  configuration:
    # 是否开启自动驼峰命名规则映射:从数据库列名到Java属性驼峰命名的类似映射
    map-underscore-to-camel-case: true

    cache-enabled: false
    #配置JdbcTypeForNull
    jdbc-type-for-null: 'null'
    # 如果查询结果中包含空值的列,则 MyBatis 在映射的时候,不会映射这个字段
    call-setters-on-nulls: true
    # 将执行的sql打印出来,在开发或测试的时候可以用
    log-impl: org.apache.ibatis.logging.stdout.StdOutImpl
第二步:项目主启动类:
@EnableDiscoveryClient
@SpringBootApplication
public class SeataAccountApplication {
    public static void main(String[] args) {
        SpringApplication.run(SeataAccountApplication.class, args);
    }
}
第三步:利用MyBatisCodeHelperPro生成Account表对应的实体类、Mapper、Service代码。
第四步:控制器AccountController
@RestController
@RequestMapping("/account")
public class AccountController {
    @Resource
    private AccountService accountService;

    @PostMapping("/decrease")
    Result decrease(@RequestParam("userId") Long userId, @RequestParam("money") BigDecimal money) {
        //模拟异常,全局事务回滚
        // System.out.println(3/0);      //--------------------①
        accountService.update(Wrappers.<Account>lambdaUpdate()
                .eq(Account::getId, userId)
                .setSql("used = used + " + money)
        );
        return ResultUtil.success().setMsg("扣款成功");
    }
}
启动项目,在Nacos中会看到:

post方式请求: http://localhost:3001/seata/account/decrease?userId=1&money=15
能够正常访问。
seata-storage-4001
第一步;创建项目,添加依赖,修改application.yml文件:
server:
  port: 4001
  servlet:
    context-path: /seata

spring:
  application:
    name: seata-storage-4001
  #配置数据源
  datasource:
    type: com.alibaba.druid.pool.DruidDataSource
    druid:
      driver-class-name: com.mysql.cj.jdbc.Driver
      url: jdbc:mysql://127.0.0.1:3306/seata_storage?useSSL=false&serverTimezone=GMT%2B8&useUnicode=true&characterEncoding=UTF8&autoReconnect=true&failOverReadOnly=false
      username: root
      password: root
      # 连接池的配置信息:初始化大小,最小,最大
      initial-size: 8
      min-idle: 1
      max-active: 20
      # 配置获取连接等待超时的时间
      max-wait: 60000
      # 配置间隔多久才进行一次检测,检测需要关闭的空闲连接,单位是毫秒
      time-between-eviction-runs-millis: 60000
      # 配置一个连接在池中最小生存的时间,单位是毫秒
      min-evictable-idle-time-millis: 300000
      #验证库是否正常sql
      validation-query: select 'x' from dual
      #空闲时验证,防止连接断开
      test-while-idle: true
      test-on-borrow: false
      test-on-return: false
      # 打开PSCache,并且指定每个连接上PSCache的大小
      pool-prepared-statements: true
      max-open-prepared-statements: 20
      max-pool-prepared-statement-per-connection-size: 20
      # 配置监控统计拦截的filters,去掉后监控界面sql无法统计,'wall'用于防火墙
      filters: stat,wall,slf4j
      # 通过connectProperties属性来打开mergeSql功能;慢SQL记录
      connection-properties: druid.stat.mergeSql=true;druid.stat.slowSqlMillis=5000
      # 合并多个DruidDataSource的监控数据
      use-global-data-source-stat: true
  cloud:
    nacos:
      discovery:
        server-addr: 127.0.0.1:8848 # 配置nacos地址
    sentinel:
      transport:
        # 配置sentinel dashboard地址
        dashboard: 127.0.0.1:8080
        # 默认端口8719,假如被占用会自动从8719开始依次+1扫描,直至找到未被占用的端口
        port: 8719
  config:
    import:
      - optional:nacos:seata-client-demo.yml

seata:
  service:
    vgroup-mapping:
      default_tx_group: default
    grouplist:
      default: 127.0.0.1:8091

management:
  endpoints:
    web:
      exposure:
        include: '*' #暴露出所有的端点

#MyBatisPlus相关配置
mybatis-plus:
  #mapper映射文件位置,多个目录用逗号或者分号分隔(告诉 Mapper 所对应的 XML 文件位置)
  mapper-locations: classpath:mapper/*.xml
  #实体扫描,多个package用逗号或者分号分隔
  typeAliasesPackage: com.seata.storage.domain
  #  以下配置均有默认值,可以不设置
  global-config:
    db-config:
      #主键类型
      id-type: auto

      table-underline: true

      #数据库大写下划线转换
      capital-mode: true
  configuration:
    # 是否开启自动驼峰命名规则映射:从数据库列名到Java属性驼峰命名的类似映射
    map-underscore-to-camel-case: true

    cache-enabled: false
    #配置JdbcTypeForNull
    jdbc-type-for-null: 'null'
    # 如果查询结果中包含空值的列,则 MyBatis 在映射的时候,不会映射这个字段
    call-setters-on-nulls: true
    # 将执行的sql打印出来,在开发或测试的时候可以用
    log-impl: org.apache.ibatis.logging.stdout.StdOutImpl
第二步:项目主启动类添加注解
@EnableFeignClients
@EnableDiscoveryClient
@SpringBootApplication(exclude = DataSourceAutoConfiguration.class)//取消数据源自动创建
public class SeataStorageApplication {
    public static void main(String[] args) {
        SpringApplication.run(SeataStorageApplication.class, args);
    }
}
第三步:利用MyBatisCodeHelperPro生成Storage表对应的实体类、Mapper、Service代码。
第四步:控制器StorageController
@RestController
@RequestMapping("/storage")
public class StorageController {
    @Resource
    private StorageService storageService;

    @PostMapping("/decrease")
    Result decrease(@RequestParam("skuId") Long skuId, @RequestParam("count") Integer count) {
        storageService.update(Wrappers.<Storage>lambdaUpdate()
                .eq(Storage::getSkuId, skuId)
                .setSql("used= used+" + count)
        );
        return ResultUtil.success().setMsg("库存扣减成功");
    }
}
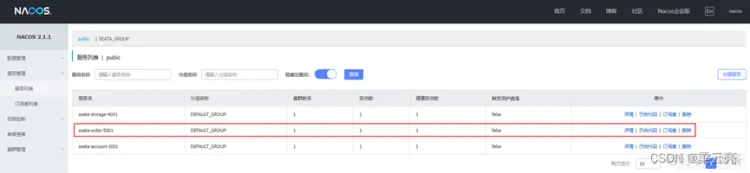
启动项目,在Nacos中会看到:
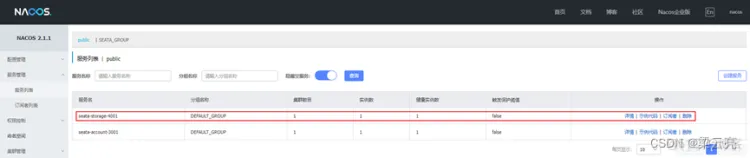
能够正常访问。
seata-order-5001
第一步;创建项目,添加依赖,修改application.yml文件:
server:
  port: 5001
  servlet:
    context-path: /seata

spring:
  application:
    name: seata-order-5001
  #配置数据源
  datasource:
    type: com.alibaba.druid.pool.DruidDataSource
    druid:
      driver-class-name: com.mysql.cj.jdbc.Driver
      url: jdbc:mysql://127.0.0.1:3306/seata_order?useSSL=false&serverTimezone=GMT%2B8&useUnicode=true&characterEncoding=UTF8&autoReconnect=true&failOverReadOnly=false
      username: root
      password: root
      # 连接池的配置信息:初始化大小,最小,最大
      initial-size: 8
      min-idle: 1
      max-active: 20
      # 配置获取连接等待超时的时间
      max-wait: 60000
      # 配置间隔多久才进行一次检测,检测需要关闭的空闲连接,单位是毫秒
      time-between-eviction-runs-millis: 60000
      # 配置一个连接在池中最小生存的时间,单位是毫秒
      min-evictable-idle-time-millis: 300000
      #验证库是否正常sql
      validation-query: select 'x' from dual
      #空闲时验证,防止连接断开
      test-while-idle: true
      test-on-borrow: false
      test-on-return: false
      # 打开PSCache,并且指定每个连接上PSCache的大小
      pool-prepared-statements: true
      max-open-prepared-statements: 20
      max-pool-prepared-statement-per-connection-size: 20
      # 配置监控统计拦截的filters,去掉后监控界面sql无法统计,'wall'用于防火墙
      filters: stat,wall,slf4j
      # 通过connectProperties属性来打开mergeSql功能;慢SQL记录
      connection-properties: druid.stat.mergeSql=true;druid.stat.slowSqlMillis=5000
      # 合并多个DruidDataSource的监控数据
      use-global-data-source-stat: true
  cloud:
    nacos:
      discovery:
        server-addr: 127.0.0.1:8848 # 配置nacos地址
    sentinel:
      transport:
        # 配置sentinel dashboard地址
        dashboard: 127.0.0.1:8080
        # 默认端口8719,假如被占用会自动从8719开始依次+1扫描,直至找到未被占用的端口
        port: 8719
  config:
    import:
      - optional:nacos:seata-client-demo.yml

seata:
  service:
    vgroup-mapping:
      default_tx_group: default
    grouplist:
      default: 127.0.0.1:8091

management:
  endpoints:
    web:
      exposure:
        include: '*' #暴露出所有的端点

#MyBatisPlus相关配置
mybatis-plus:
  #mapper映射文件位置,多个目录用逗号或者分号分隔(告诉 Mapper 所对应的 XML 文件位置)
  mapper-locations: classpath:mapper/*.xml
  #实体扫描,多个package用逗号或者分号分隔
  typeAliasesPackage: com.seata.order.domain
  #  以下配置均有默认值,可以不设置
  global-config:
    db-config:
      #主键类型
      id-type: auto

      table-underline: true

      #数据库大写下划线转换
      capital-mode: true
  configuration:
    # 是否开启自动驼峰命名规则映射:从数据库列名到Java属性驼峰命名的类似映射
    map-underscore-to-camel-case: true

    cache-enabled: false
    #配置JdbcTypeForNull
    jdbc-type-for-null: 'null'
    # 如果查询结果中包含空值的列,则 MyBatis 在映射的时候,不会映射这个字段
    call-setters-on-nulls: true
    # 将执行的sql打印出来,在开发或测试的时候可以用
    log-impl: org.apache.ibatis.logging.stdout.StdOutImpl
第二步:项目主启动类上添加注解:
@EnableFeignClients
@EnableDiscoveryClient
@SpringBootApplication(exclude = DataSourceAutoConfiguration.class)//取消数据源自动创建
public class SeataOrderApplication {
    public static void main(String[] args) {
        SpringApplication.run(SeataOrderApplication.class, args);
    }
}
第三步:利用MyBatisCodeHelperPro生成Order表对应的实体类、Mapper、Service代码。
第四步:在feign包下创建:
- AccountFeignService.java
@FeignClient(name = "seata-account-3001", path = "/seata")
@RequestMapping("/account")
public interface AccountFeignService {
    /**
     * 将skuId对应的商品的库存减少count
     * @param userId
     * @param money
     * @return
     */
    @PostMapping("/decrease")
    Result decrease(@RequestParam("userId") Long userId, @RequestParam("money") BigDecimal money);
}
- StorageFeignService.java
@FeignClient(name = "seata-storage-4001", path = "/seata")
@RequestMapping("/storage")
public interface StorageFeignService {
    /**
     * 将skuId对应的商品的库存减少count
     * @param skuId
     * @param count
     * @return
     */
    @PostMapping("/decrease")
    Result decrease(@RequestParam("skuId") Long skuId, @RequestParam("count") Integer count);
}
第五步:修改OrderServiceImpl的代码如下所示:
@Service
public class OrderServiceImpl extends ServiceImpl<OrderMapper, Order> implements OrderService {
    @Resource
    private OrderMapper orderMapper;
    @Resource
    private StorageFeignService storageFeignService;
    @Resource
    private AccountFeignService accountFeignService;

    @Override
    //  @GlobalTransactional(rollbackFor = Exception.class)  //全局异常   //----------------②
    public void create(Order order) {
        System.out.println("user建订单");
        orderMapper.insert(order);

        System.out.println("扣减库存");
        storageFeignService.decrease(order.getSkuId(),order.getCount());

        System.out.println("账户余额扣减");
        accountFeignService.decrease(order.getUserId(),order.getMoney());

        System.out.println("修改订单的状态");
        //1表示完成状态
        orderMapper.updateStateByUserId(order.getUserId(),1);

        System.out.println("下单结束");
    }
}
第六步:控制器OrderController
@RestController
@RequestMapping("/order")
public class OrderController {
    @Resource
    private OrderService orderService;

    @GetMapping("/create")
    public Result create(Order order){
        orderService.create(order);
        return ResultUtil.success().setMsg("下单成功!");
    }
}
启动项目:
url: http://localhost:5001/seata/order/create?userId=1&skuId=1&count=10&money=30
- 保持编号①和编号②处于注释状态:请求url,tb_order表增加了一条记录,用户账户用掉30,库存用掉10。
- 保持编号②处于注释状态,去掉编号①前的注释:请求url,tb_order表增加了一条记录但状态值为null,用户账户没有发生变化,库存用掉10。没有能够保证数据的完整性
- 去掉编号①和编号②前的注释:请求url,三个表的数据都没有发生变化。
结论:
微服务中使用alibaba的seata技术实现全局事务控制只需要在相应的Service实现类中添加@GlobalTransactional注解就可以了。
- 打赏
- 赞
- 收藏
- 1评论
- 分享
- 举报
上一篇:Redis6 主从复制
Recommend
About Joyk
Aggregate valuable and interesting links.
Joyk means Joy of geeK