
HarmonyOS - 基于ArkUI(JS)实现彩带飘动特效
source link: https://www.51cto.com/article/718733.html
Go to the source link to view the article. You can view the picture content, updated content and better typesetting reading experience. If the link is broken, please click the button below to view the snapshot at that time.

HarmonyOS - 基于ArkUI(JS)实现彩带飘动特效

最近在网上购物是经常看到一个彩带飘动的特效,又恰逢最近在学习HarmonyOS开发的知识,便想着自己能否用HarmonyOS相关的知识也做一个类似的东西,于是就自己动手尝试了一下。

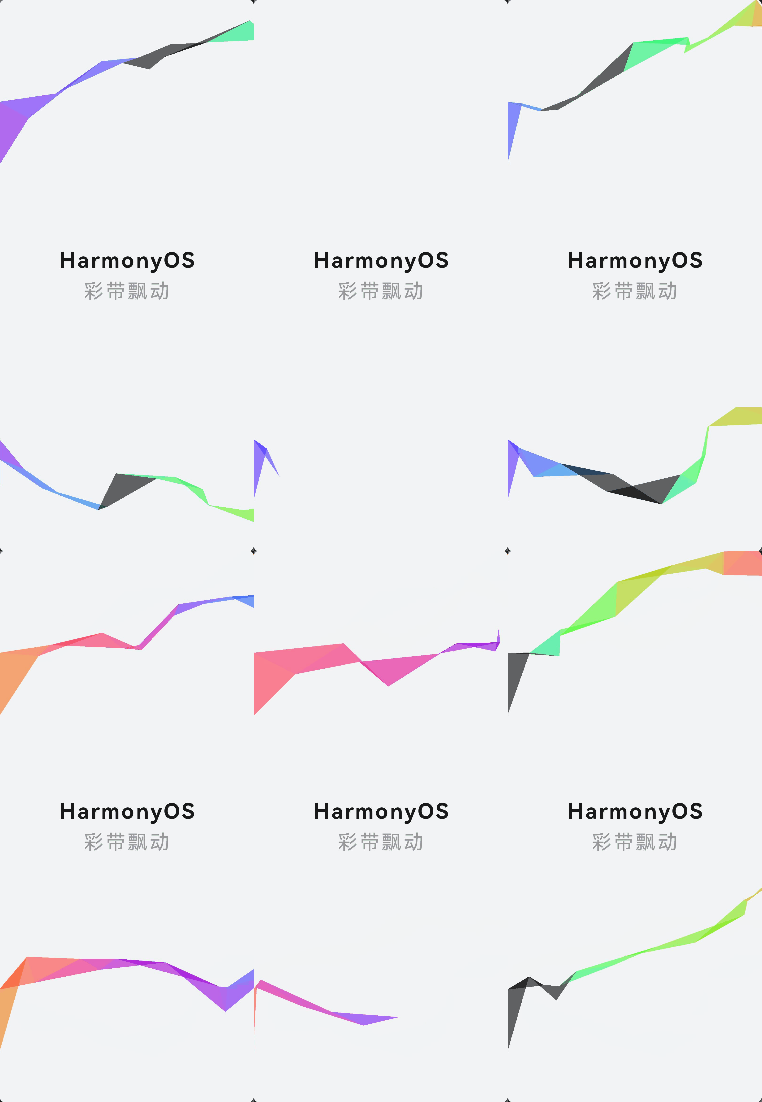
彩带飘动特效,主要是使用canvas来实现的,设置三角形的两个初始的点,在随机生成第三个点,并绘制三角形,生成随机颜色,填充三角形。然后在循环调用这个方法,直到三角形的点的x轴的值大于画布的宽度加上三角形的宽度。
1、hml
<div class="container" >
    <div class="wrapper">
        <text class="title">HarmonyOS</text>
        <text class="author">彩带飘动</text>
    </div>
    <canvas width="1920" height="917" ref="streamer" @click="clickBtn" @touchmove="clickBtn"></canvas>
</div>
2、css
.container {
    display: flex;
    flex-direction: column;
    justify-content: center;
    align-items: center;
    left: 0px;
    top: 0px;
    width: 100%;
    height: 100%;
}
.wrapper{
    width: 100%;
    text-align: center;
    display: flex;
    flex-direction: column;
    justify-content: center;
}
.title {
    width: 100%;
    font-size: 60px;
    font-weight: 700;
    letter-spacing: 6px;
}
.author{
    width: 100%;
    font-size: 56px;
    font-weight: normal;
    color: #999;
    letter-spacing: 6px;
    margin-top: 20px;
}
canvas {
    position: absolute;
    top: 0;
    left: 0;
    z-index: 0;
    width: 100%;
    height: 100%;
    pointer-events: none;
}
3、js实现
(1)获取canvas元素,设置canvas 元素的宽高,以及canvas 2d 的缩放比例,圆形透明度,窗口宽高。
(2)擦除之前的绘制内容,然后设置初始的三角形的两个角的位置坐标,将坐标放进path数组里,然后调用绘制方法draw(),将path的数值传进draw()里,然后就调用draw方法,一直到图形宽度等于或者大于窗口宽度时结束。第二个彩带同理。
(3)绘制方法实现,将path里的两个点作为起始点和终点,然后再生成一个随机的点,将该点作为三角形的第三个点,绘制成三角形。然后随机生成颜色,将颜色填充进三角形中,再然后将path里的终点作为下一次的起始点,将随机生成的点作为下一次的终点,放进path数组里。需要注意的是随机生成的点的,y轴坐标要大于0小于画布的高度。
(4)生成随机的颜色填充图形,使用cos函数乘以128再加上128,随机生成一个0-256之间的数,然后向左移动16位,在用同样的方法生成2个0-256之间的数,一个向左移动8位,最后将三个随机值拼接在一起转为16进制即可。
export default {
    data: {
        title: "",
        height: 0,
        width: 0,
        RIBBON_WIDE: 90,//彩带宽度
        r: 0,
        dpr: 1,//像素值
        path: null,
    },
    onInit() {
        this.title = "Hello World";
    },
    onShow(){
        this.clickBtn();
        setInterval(() => {
            this.clickBtn();
        }, 2000);
    },
    clickBtn() {
        const el = this.$refs.streamer;
        const ctx = el.getContext("2d"); // 获取canvas 2d上下文
        this.width = 780; // 设置窗口的文档显示区的宽高
        this.height = 1600;

        el.width = this.width * this.dpr;
        el.height = this.height * this.dpr;
        ctx.scale(this.dpr, this.dpr); // 水平、竖直方向缩放
        ctx.globalAlpha = 0.6; // 图形透明度
        this.init(ctx);
    },
    init(ctx) {
        ctx.clearRect(0, 0, this.width, this.height); // 擦除之前绘制内容
        this.path = [
            {
                x: 0, y: this.height * 0.7 + this.RIBBON_WIDE
            },
            {
                x: 0, y: this.height * 0.7 - this.RIBBON_WIDE
            },
            {
                x: 0, y: this.height * 0.2 + this.RIBBON_WIDE
            },
            {
                x: 0, y: this.height * 0.2 - this.RIBBON_WIDE
            },

        ];
        setInterval(() => {
            if ((this.path[1].x < this.width + this.RIBBON_WIDE)) {
                this.draw(this.path[0], this.path[1], ctx);
            }
        }, 300);
        setInterval(()=>{
            if ((this.path[3].x < this.width + this.RIBBON_WIDE)) {
                this.draw(this.path[2], this.path[3], ctx);
            }
        },500);
    },
    draw(start, end, ctx) {
        ctx.beginPath(); // 创建一个新的路径
        ctx.moveTo(start.x, start.y); // path起点
        ctx.lineTo(end.x, end.y); // path终点
        var nextX = end.x + (Math.random() * 2 - 0.25) * this.RIBBON_WIDE,
            nextY = this.geneY(end.y);
        ctx.lineTo(nextX, nextY);
        ctx.closePath();
        this.r=this.r-(Math.PI * 2 / (-50));
        // 随机生成并设置canvas路径16进制颜色
        ctx.fillStyle =
        "#" +
        (
            ((Math.cos(this.r) * 127 + 128) << 16) |
            ((Math.cos(this.r + (Math.PI*2) / 3) * 127 + 128) << 8) |
            (Math.cos(this.r + ((Math.PI*2) / 3) * 2) * 127 + 128)
        ).toString(16);

        ctx.fill(); // 根据当前样式填充路径
        this.path[0] = this.path[1]; // 起点更新为当前终点
        this.path[1] = {
            x: nextX, y: nextY
        }; // 更新终点
    },
    geneY(y) {
        var temp = y + (Math.random() * 2 - 1.1) * this.RIBBON_WIDE;
        return temp > this.height || temp < 0 ? this.geneY(y) : temp;
    }
}
以上就是我实现签名效果的全部内容,最终效果如动图所示。虽然样式、逻辑以及功能上可能比较简陋,但是目前已经实现了彩带特效的基本功能,后续我会继续做出更多的特效。希望本次内容能够对大家有所帮助。
Recommend
About Joyk
Aggregate valuable and interesting links.
Joyk means Joy of geeK