

Deploying an ASP.NET Core Web Application using the Document Editor with Docker
source link: https://www.textcontrol.com/blog/2022/09/02/deploying-an-aspnet-core-application-with-docker/
Go to the source link to view the article. You can view the picture content, updated content and better typesetting reading experience. If the link is broken, please click the button below to view the snapshot at that time.

Deploying an ASP.NET Core Web Application using the Document Editor with Docker
A Docker container image is a lightweight, standalone, executable package of software that includes everything needed to run an application: code, runtime, system tools, system libraries and settings.
Windows Base Image
This tutorial shows how to deploy an ASP.NET Core web application that uses the document editor together with the TCP Service is that required to synchronize the document rendering. The Dockerfile creates an image based the standard Microsoft Windows base image which is essentially a Windows Server 2019. Instead of using one of the Core images, a full server installation is recommended to include a full set of usable fonts and a printer spooler in case, you want to provide a specific printer driver for the rendering.
Want to use Core images?
Not a problem. TX Text Control can be also used on a hosting system without any printer spooler. A unique feature of TX Text Control is the true WYSIWYG (what-you-see-is-what-you-get) rendering. TX Text Control uses a printer or a screen device to render text which results in a 100% accurate display of documents.
Preparing the Image
A Docker image is created automatically based on a Dockerfile by reading the instructions. The following steps are required to prepare a build process:
- Preparing Folders
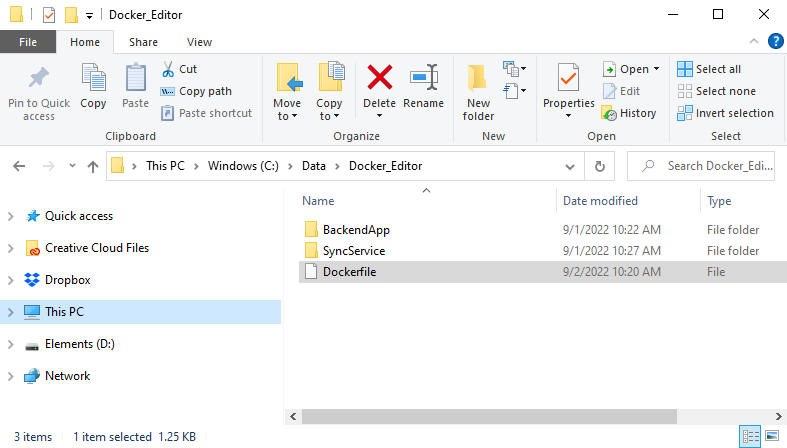
Create a new folder named Docker_Editor that contains the following sub-folders and files:
-
Folder named BackendApp
This folder contains all your published files of the ASP.NET Core web application. -
Folder named SyncService
This folder contains all required files of the TCP synchronization service. -
A text file named Dockerfile (no extension)
The Docker description file.
-
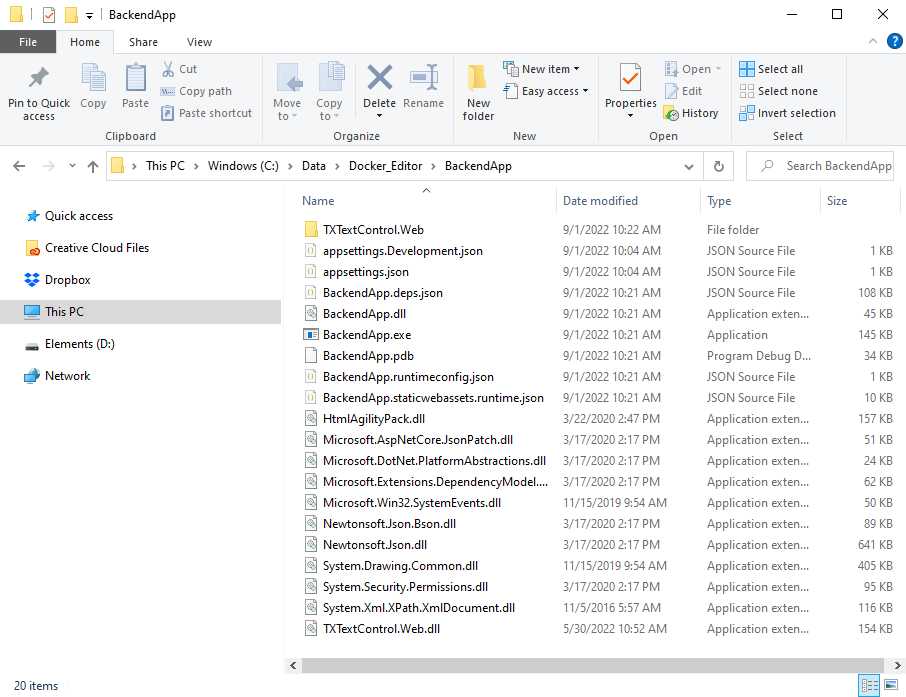
- Copy ASP.NET Core Web Application
Into the folder BackendApp, copy all files required for your ASP.NET Core web application that uses the document editor. If you are using the Publish method of Visual Studio, copy the content of the publish target directory into the BackendApp folder. A similar deployment would look like the structure in the following screenshot:
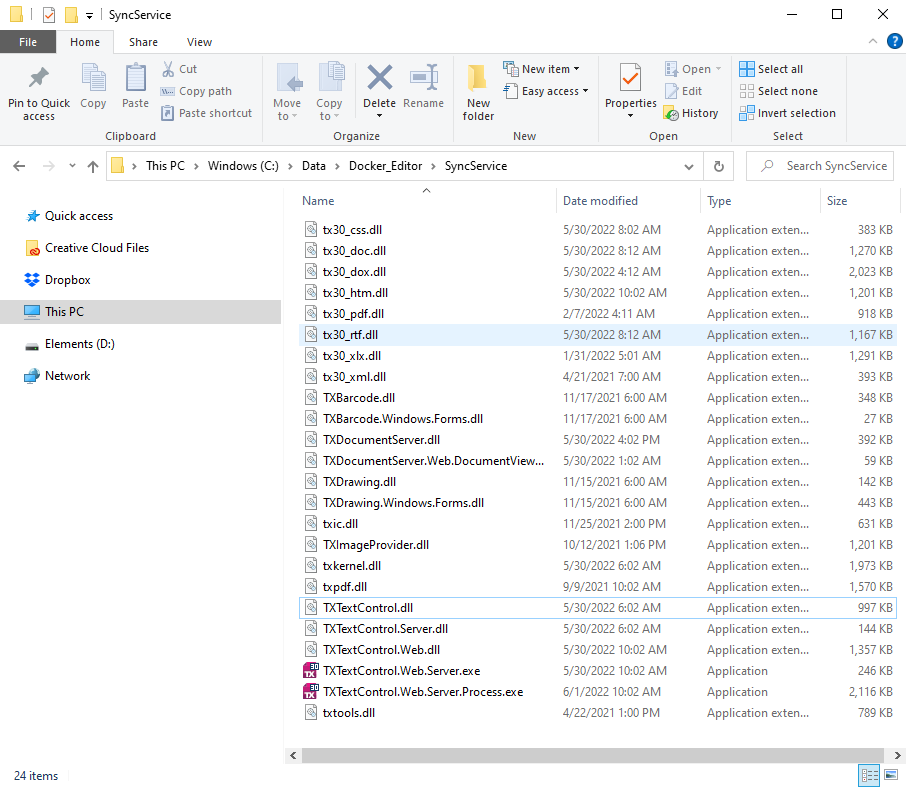
- Copy TCP Synchronization Service
Into the folder SyncService, copy all redistributable files required to deploy the TX Text Control TCP Synchronization Service. Based on the components you are deploying, the folder should look similar to this screenshot:
- Dockerfile
The Dockerfile should have the following content:
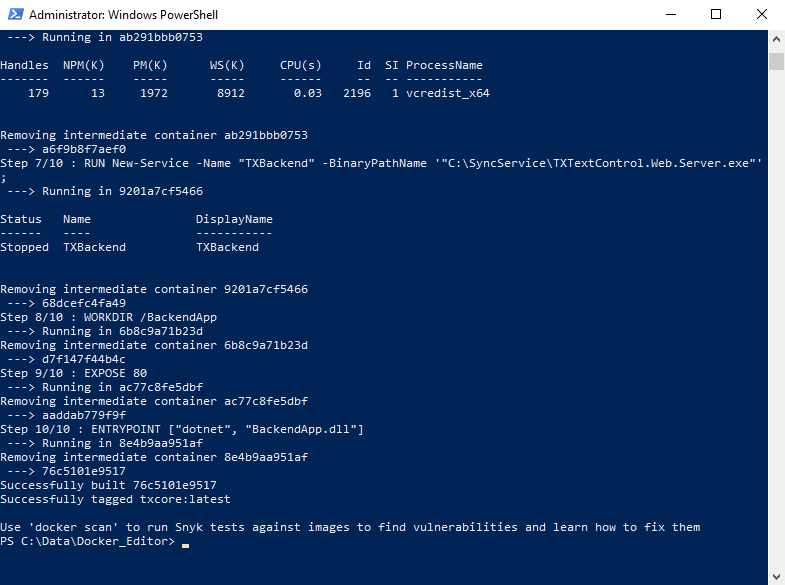
Creating the Image
In order to create the image, use the following commands:
-
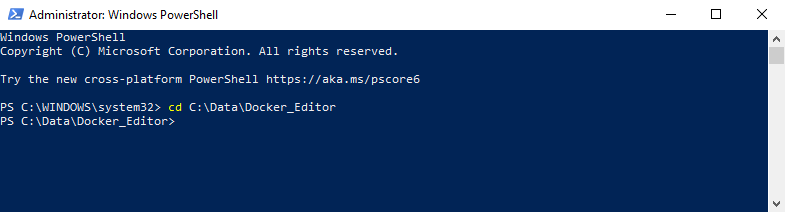
Assume that you have installed Docker for Windows, open a PowerShell command window with explicit administrator rights and change to the directory where you created the folder Docker_Editor.
-
Type in and execute the following command to build the Docker image based on the Dockerfile in the same directory:
docker build -t txcore .
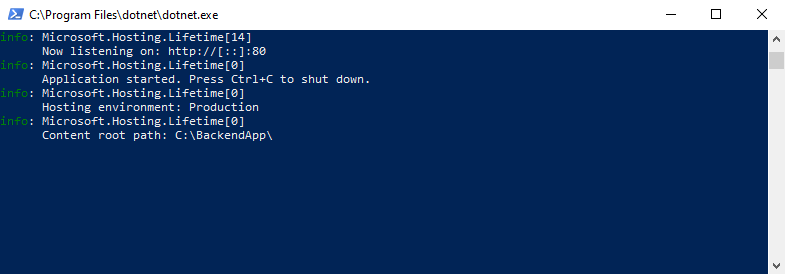
Creating and Testing the Container
-
Create and start a container based on the created image with the following command:
docker run -it --rm -p 5000:80 -e ASPNETCORE_URLS=http://+:80 --name aspnetcore_sample txcore
-
Open any browser and open the exposed location http://localhost:5000/.
Recommend
About Joyk
Aggregate valuable and interesting links.
Joyk means Joy of geeK