
3

【MyBatis】MyBatis配置、使用MyBatis操作数据库、开启SQL日志打印
source link: https://blog.51cto.com/panyujie/5611410
Go to the source link to view the article. You can view the picture content, updated content and better typesetting reading experience. If the link is broken, please click the button below to view the snapshot at that time.

【MyBatis】MyBatis配置、使用MyBatis操作数据库、开启SQL日志打印
推荐 原创1. MyBatis是什么?
MyBatis 是一个优秀的 ORM(对象关系映射) 持久层框架.
- 它⽀持⾃定义 SQL、存储过程以及⾼级映射。
- MyBatis 去除了⼏乎所有的 JDBC 代码以及设置参数和获取结果集的⼯作。
- MyBatis 可以通过简单的 XML 或注解来配置和映射原始类型、接⼝和 Java POJO(Plain Old Java Objects,普通⽼式 Java 对象)为数据库中的记录。
简单来说 MyBatis 是更简单完成程序和数据库交互的⼯具,也就是更简单的操作和读取数据库⼯具,特点就是很灵活.
学习 MyBatis 主要学习两部分:
1. 配置 MyBatis 开发环境
2. 使用 MyBatis 模式和语法操作数据库
2. 创建 MyBatis 项目
2.1 准备工作,创建数据库和数据表
mybatis 测试数据库:
-- 创建数据库
drop database if exists mycnblog;
create database mycnblog DEFAULT CHARACTER SET utf8mb4;

-- 使用数据数据
use mycnblog;

-- 创建表[用户表]
drop table if exists  userinfo;
create table userinfo(
    id int primary key auto_increment,
    username varchar(100) not null,
    password varchar(32) not null,
    photo varchar(500) default '',
    createtime datetime default now(),
    updatetime datetime default now(),
    `state` int default 1
) default charset 'utf8mb4';

-- 创建文章表
drop table if exists  articleinfo;
create table articleinfo(
    id int primary key auto_increment,
    title varchar(100) not null,
    content text not null,
    createtime datetime default now(),
    updatetime datetime default now(),
    uid int not null,
    rcount int not null default 1,
    `state` int default 1
)default charset 'utf8mb4';

-- 创建视频表
drop table if exists videoinfo;
create table videoinfo(
  	vid int primary key,
  	`title` varchar(250),
  	`url` varchar(1000),
		createtime datetime default now(),
		updatetime datetime default now(),
  	uid int
)default charset 'utf8mb4';

-- 添加一个用户信息
INSERT INTO `mycnblog`.`userinfo` (`id`, `username`, `password`, `photo`, `createtime`, `updatetime`, `state`) VALUES
(1, 'admin', 'admin', '', '2021-12-06 17:10:48', '2021-12-06 17:10:48', 1);

-- 文章添加测试数据
insert into articleinfo(title,content,uid)
    values('Java','Java正文',1);

-- 添加视频
insert into videoinfo(vid,title,url,uid) values(1,'java title','http://www.baidu.com',1);
MySQL 5.7 以下版本 需要去掉 default now()

2.2 添加 MyBatis 相关依赖

添加完后不要急着启动项目测试:
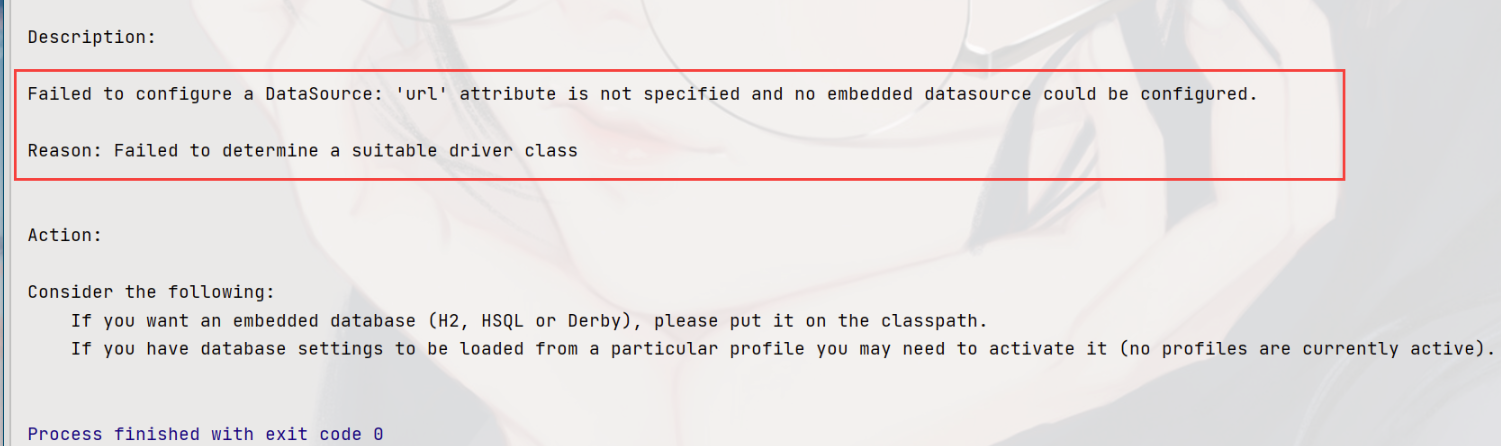
因为我们还没有连接数据库,他是找不到路径的
2.3 配置数据库连接字符串 和 MyBatis(保存的 XML 的目录)
2.3.1 配置数据库的连接信息
这里一般我们会用多个配置文件,以便之后在多个平台运行(最少一般都会有两个)

像这种常用的,自己可以把它保存在能够经常拿到的地方,下次直接粘贴就好了
# 配置数据库连接
spring:
  datasource:
    url: jdbc:mysql://127.0.0.1:3306/mycnblog?userUnicode=true&characterEncoding=utf8&useSSL=false&allowPublicKeyRetrieval=true
    username: 你的用户名
    password: 你的密码
    driver-class-name: com.mysql.cj.jdbc.Driver
# 当前运行的环境 (配置文件)
spring:
  profiles:
    active: dev
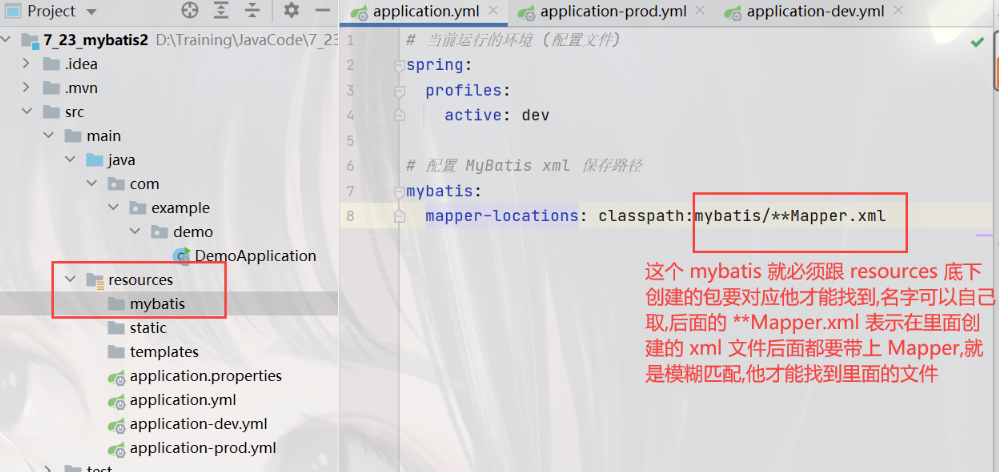
2.3.2 配置 MyBatis 的 XML 保存路径
# 配置 MyBatis xml 保存路径
mybatis:
  mapper-locations: classpath:mybatis/**Mapper.xml
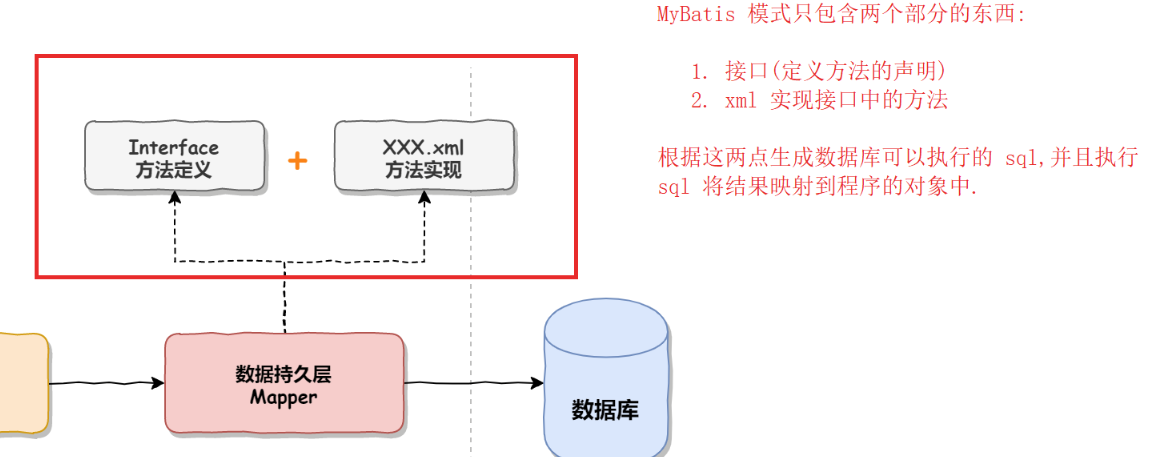
2.4 使用 MyBatis 的操作模式操作数据库
我们可以先看一下 MyBatis 整体流程:

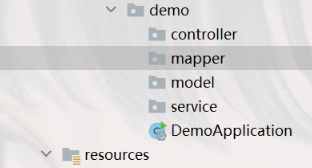
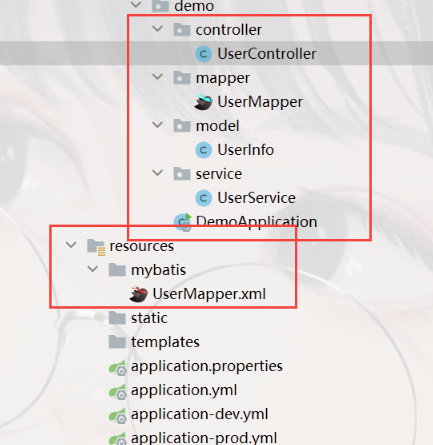
2.4.1 添加代码
提前创好对应的包:
① model 包下添加实体类
对应数`据库添加:
import lombok.Data;

/**
 * 用户实体类
 */
@Data
public class UserInfo {
    private Integer id;
    private String username;
    private String password;
    private String photo;
    private String createtime;
    private String updatetime;
    private int state;

}
② 在 mapper 包下定义接口(普通的接口)
import com.example.demo.model.UserInfo;
import org.apache.ibatis.annotations.Mapper;

@Mapper //添加后才能跟 xml 文件对应起来
public interface UserMapper {
    //根据 id 查询用户
    public UserInfo getUserById(@Param("id") Integer id);
}
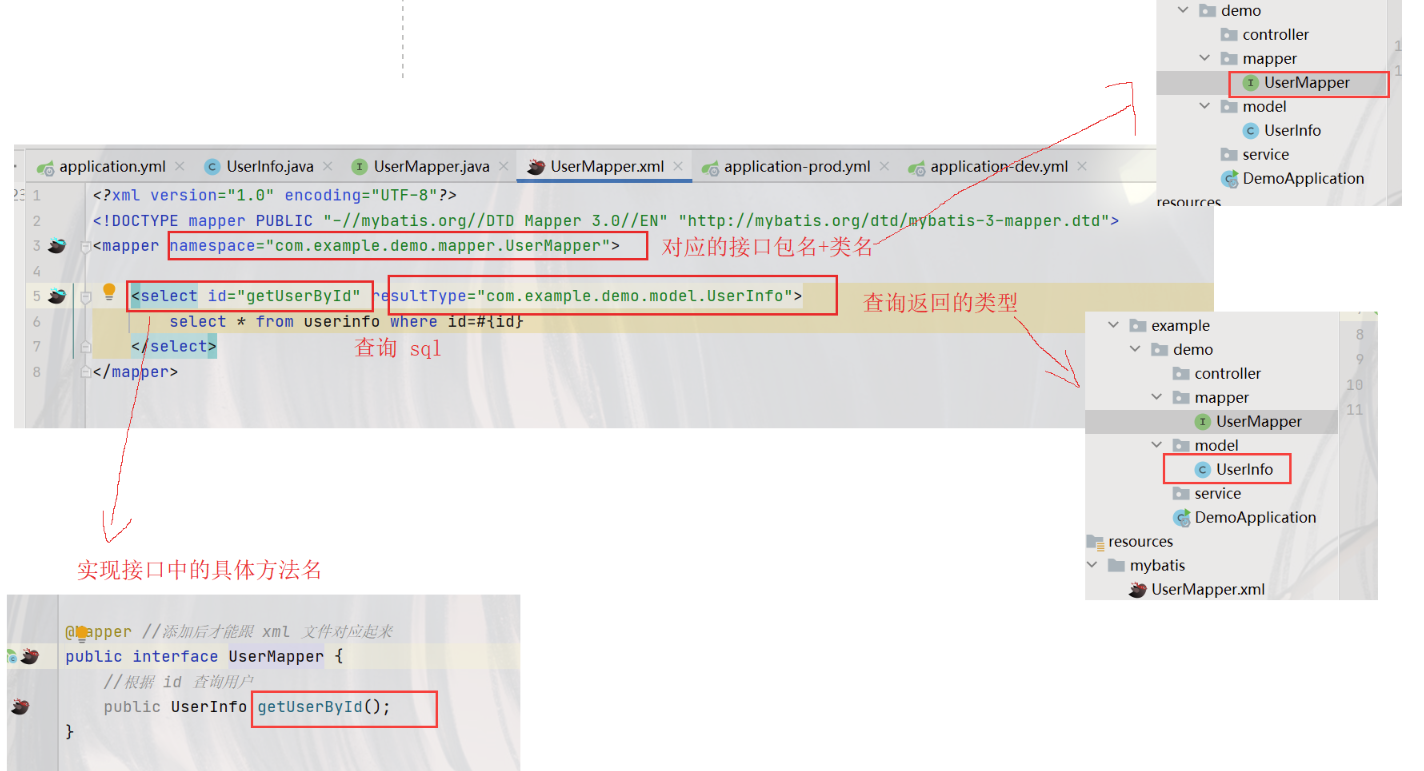
③ 创建 XML 实现上面的接口
固定的格式,自己也可以先保存在能经常拿到的地方:
<?xml version="1.0" encoding="UTF-8"?>
<!DOCTYPE mapper PUBLIC "-//mybatis.org//DTD Mapper 3.0//EN" "http://mybatis.org/dtd/mybatis-3-mapper.dtd">
<mapper namespace="com.example.demo.mapper.UserMapper">

</mapper>
在 resources 的 mybatis 底下新建 UserMapper.xml:(xml 里的名字建议跟 mapper 包下的名字对应一样,这样容易我们观察)
MyBatis 执行过程:
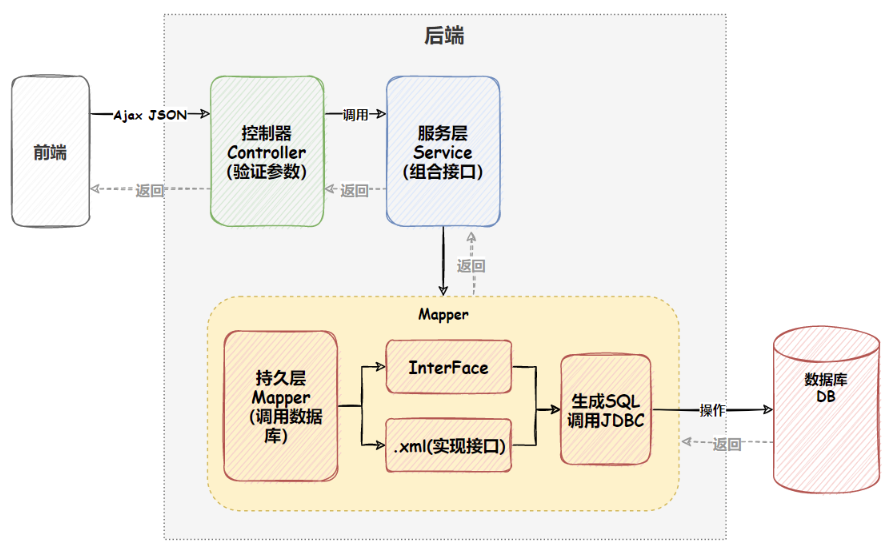
MyBatis 是基于 JDBC 的
④ 添加 Service 层代码
import com.example.demo.mapper.UserMapper;
import com.example.demo.model.UserInfo;
import org.springframework.stereotype.Service;

import javax.annotation.Resource;

@Service
public class UserService {

    @Resource
    private UserMapper userMapper;

    public UserInfo getUserById(Integer id) {
        return userMapper.getUserById(id);
    }

}
⑤ 添加 Controller 层代码
import com.example.demo.model.UserInfo;
import com.example.demo.service.UserService;
import org.springframework.beans.factory.annotation.Autowired;
import org.springframework.web.bind.annotation.RequestMapping;
import org.springframework.web.bind.annotation.RestController;

@RestController
@RequestMapping("/user")
public class UserController {

    @Autowired
    private UserService userService;

    @RequestMapping("/getuserbyid")
    public UserInfo getUserById(Integer id){
        if(id == null) return null;
        return userService.getUserById(id);
    }
}
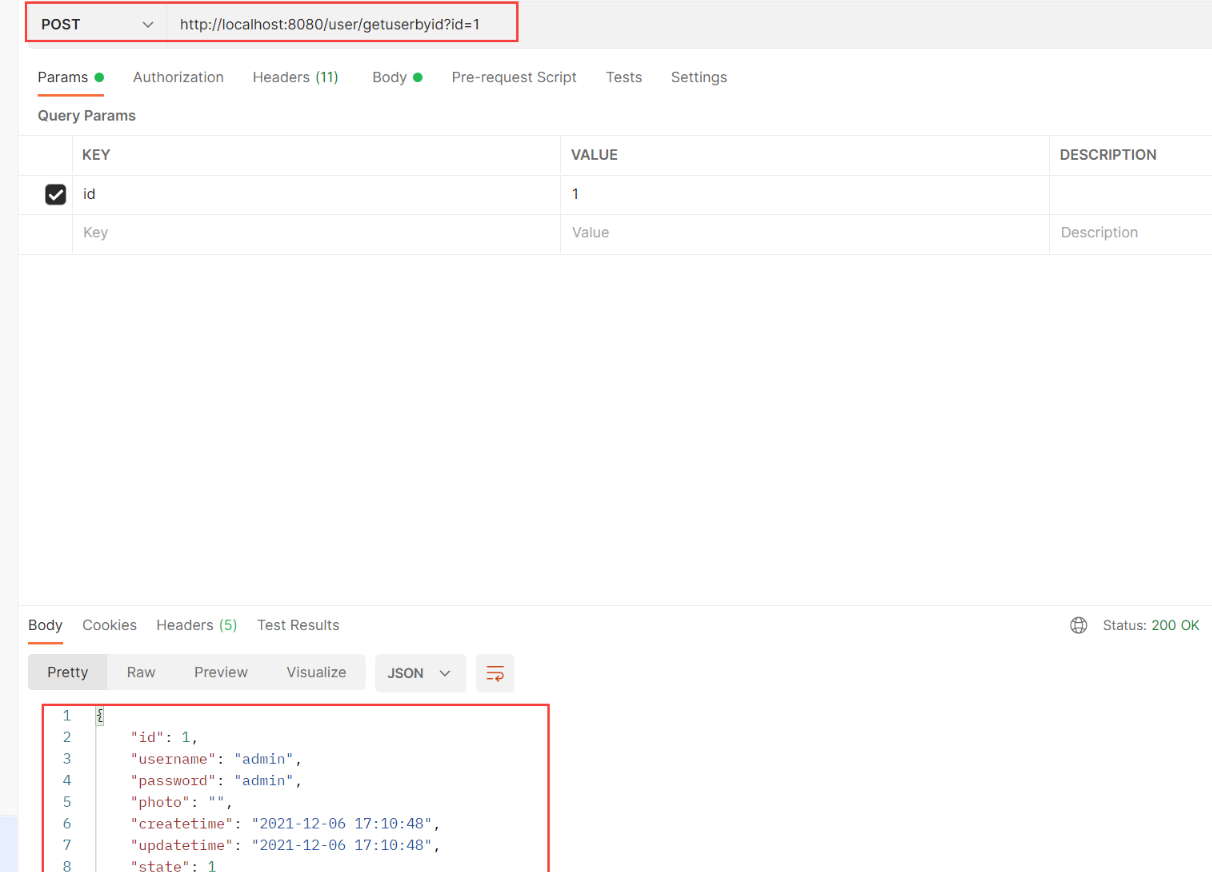
2.5 测试数据
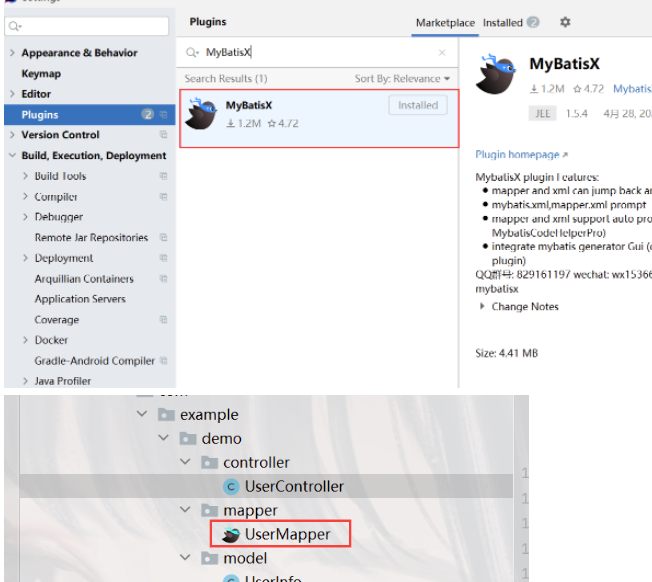
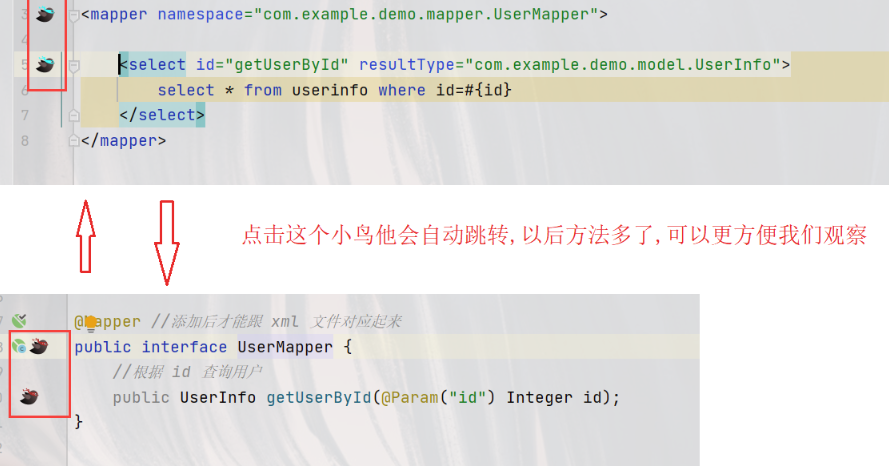
2.6 添加插件 MyBatisX
左侧出现的小鸟是我添加的插件,点击小鸟他会自动帮我们找到对应的方法,非常的方便
2.7 添加SQL日志打印
我们可以
添加日志文件以便于我们操作之后排查错误
# 开启 MyBatis SQL 打印
logging:
  level:
    com:
      example:
        demo: debug
mybatis:
  configuration:
    log-impl: org.apache.ibatis.logging.stdout.StdOutImpl

- 打赏
- 赞
- 收藏
- 评论
- 分享
- 举报
Recommend
About Joyk
Aggregate valuable and interesting links.
Joyk means Joy of geeK