So you want to reverse and patch an iOS application? I got you >_<
This blog is focused on reversing an iOS application I built for the purpose of showing beginners how to reverse and patch an iOS app. No fancy tools are required (IDA O.o), it's just you, me & a debugger <3
The app is a simple, unencrypted Objective-C application that just takes in a password and the goal of this is to bypass the password mechanism and get the success code. This blog post will focus on reversing/debugging the application and will not cover aspects of static analysis. The reason I wanted to write this is because I realised this topic is confusing for a lot of people and I wanted to try and write a blog that attempts to explain it in a more beginner-friendly way.
Originally, I planned this content to be a TikTok video, but I am sick of TikTok’s community guidelines and rules against any “offensive” security content. So… as a result, I’m probably going to be writing more blogs now.
The screenshot below shows you what my cute app looks like – it is called “breakmedaddy” and the left shows you attempting to put in passwords – and the right shows you the desired bypass screen.
Why did I build this in Objective-C and not Swift? Because your girl is a qt and a masochist :)! But also because Objective-C allows you to modify methods during run time which means it’s easier to hook into functions than if the app was built in Swift.
If you want to follow along with this blog post, the app is available on my GitHub (the first thing I’ve ever uploaded publicly because I am shy >_<):
To make this as easy to understand as possible, I have broken the blog into three parts so you can skip to whatever part you are interested in:
- High level steps we will take (this is to demonstrate the logic behind how to perform something like this)
- Tools we will use for the analysis
- Reverse engineering and patching the application
HIGH-LEVEL STEPS
This is the logic we are going to follow in this tutorial:
- Jailbreak an iOS device (I am using an old phone I had around which is running iOS 14.1).
- Upload the application onto the jailbroken device via SSH and SFTP by unzipping the IPA file into the /Applications directory.
- Restart Springboard (you can do this via CLI through SSH or through Respring which you can find in Cydia).
- Open the application and keep it in the foreground with your phone unlocked
- Using SSH find the PID of the application.
- Hook into the running app process by using Cycript to allow you to look at instances from the runtime.
- Use otool to review libraries present in the application.
- Use pagestuff to review the structure of a Mach-o file (this will show you segments, headers, code signatures, symbol tables etc).
- Locate any interesting method names and variable names.
- Reverse and debug the Mach-O file through running debugserver on the iOS device and connecting to the running application process via LLDB.
TOOLS WE'LL USE
There are a lot of tools you can use to perform this, however, for the purpose of keeping this walkthrough lean, here are the analysis tools we will use:
REVERSE ENGINEERING IOS GUIDE
Step 1: Jailbreak an iOS device and set up SSH,SFTP
I am not going to cover how to jailbreak a device as there are plenty of write-ups and videos about it. The phone I tested this on and built the application for was running iOS 14.1 and I used the unc0ver jailbreak here: https://unc0ver.dev/. The website for unc0ver explains in detail how to perform the jailbreak :)
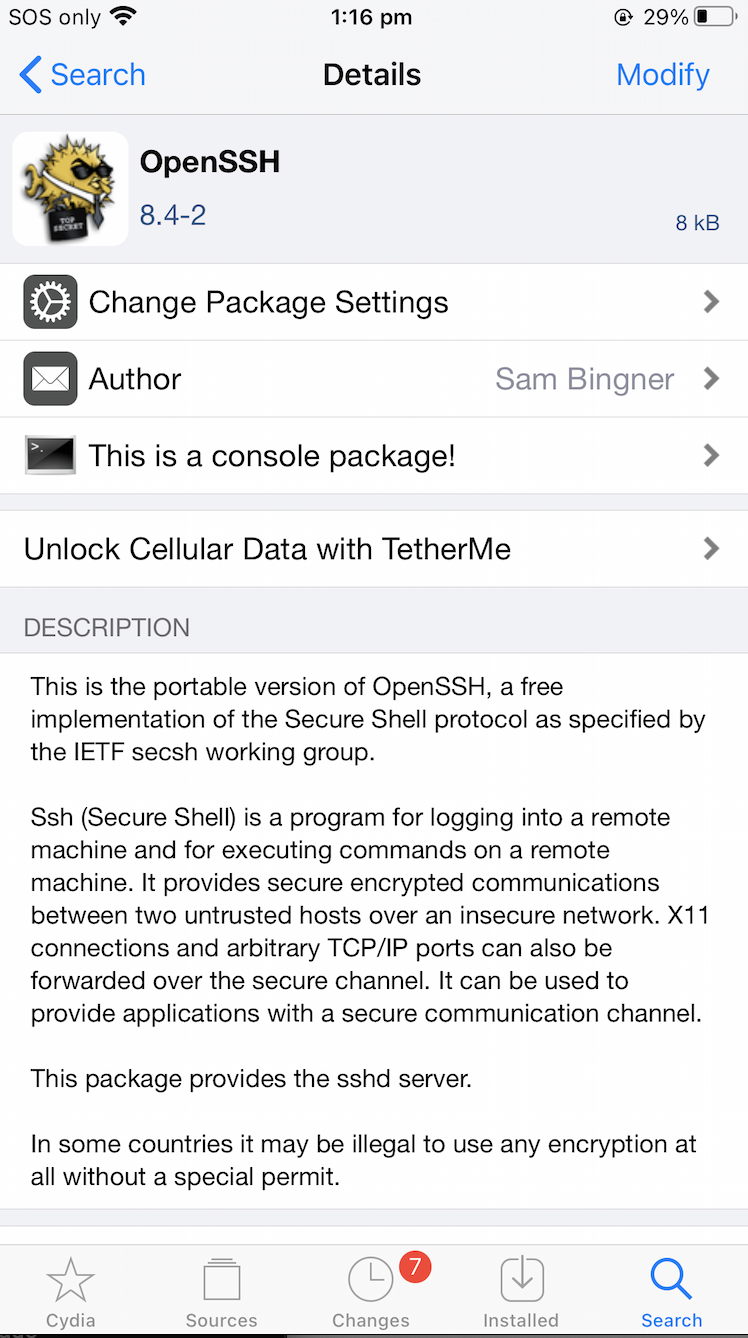
Once the jailbreak is completed, go into Cydia and set up SSH. This is as simple as performing a search for “openssh” and installing it.
Step 2: Upload the application onto the jailbroken device via SFTP and unzip it into the Applications directory
You can do this by SFTPing the file into your iOS device /Applications directory and then unzipping it. The format of the file is a “.ipa” file which has been built in XCode. The .ipa file is a zipped file which you can unzip directly onto the phone. Just download the IPA file from my Github and don’t peep the source code because you are not a cheater!
The result is something like this:
Step 3: Restart Springboard to make the app appear
You can do this one of two ways – either kill SpringBoard via the CLI, or you can download ReSpring in Cydia and run it that way. For some context, the application isn’t showing on your home screen because SpringBoard hasn’t refreshed it. SpringBoard is an application that’s used to manage what’s showing on your iPhone’s home screen :)
You can run the following line in your terminal:
Step 3: Check that the application is loaded and functioning
At this point you should see the “breakmedaddy” application loaded on your home screen. You should also be able to interact with it and put in various passwords. This is what the application should look like:
Step 4: Hook the application with Cycript
To do this step, you SSH into your iOS device and look for the PID of the “breakmedaddy” application. It’s extremely important that this application is OPEN in the foreground of your iOS device. This application cannot be “closed” or backgrounded.
As you can see from the screenshot – the PID for my application is “1795”. The next step is to hook into this using Cycript which is as simple as running the following command:
If we review the source code for my app (below) – you can see here the main function returns the UIApplicationMain passing in four parameters – the main one to note is the delegateClassName parameter which is “appDelegateClassName” variable which points to the AppDelegate class. This class defines how to “react” to certain events that are triggered in the application i.e. how iOS will handle important “triggers” related to the application.
The purpose of running Cycript is to get a stronger understanding of the internals of the application and how it runs so we know how to “bypass” the password check. What we will do here is to focus on understanding the “hierarchy” or “layout” of the application code. We will be approaching this as a black-box without looking at the source code.
For example, to figure out the name of the delegate class – you can run “UIApp.delegate” and as you can see below, it’s returned the name of the delegate class “AppDelegate” which is what it’s called in my application.
The next step is to figure out the class that manages what is rendering on your application window screen right now. This is stored in the variable “rootViewController”. The output below shows that the name of the class is “ViewController”.
If you look at the application files – you can see that this is the case as the name of the rootViewController is indeed “ViewController”.
This is important, as now we know that what is rendered in this current window is managed and defined in the ViewController class and header files!
Step 5: Analyse the application using otools and pagestuff
Now that we know the current keyWindow is defined in the “ViewController” class – our next step is to have a look at the class and figure out key things like:
- Can we manipulate any interesting methods/functions
- Are there any interesting variables we should take notes on
All these pieces of information will define how we proceed with the debugging of the application.
The first command-line tool we will run is pagestuff – this allows us to have a peek at the internals of the Mach-O file. As mentioned above, pagestuff is a great tool to give us insight into the following things:
- File headers
- Sections
- Segments
- Symbol tables
- Code signatures
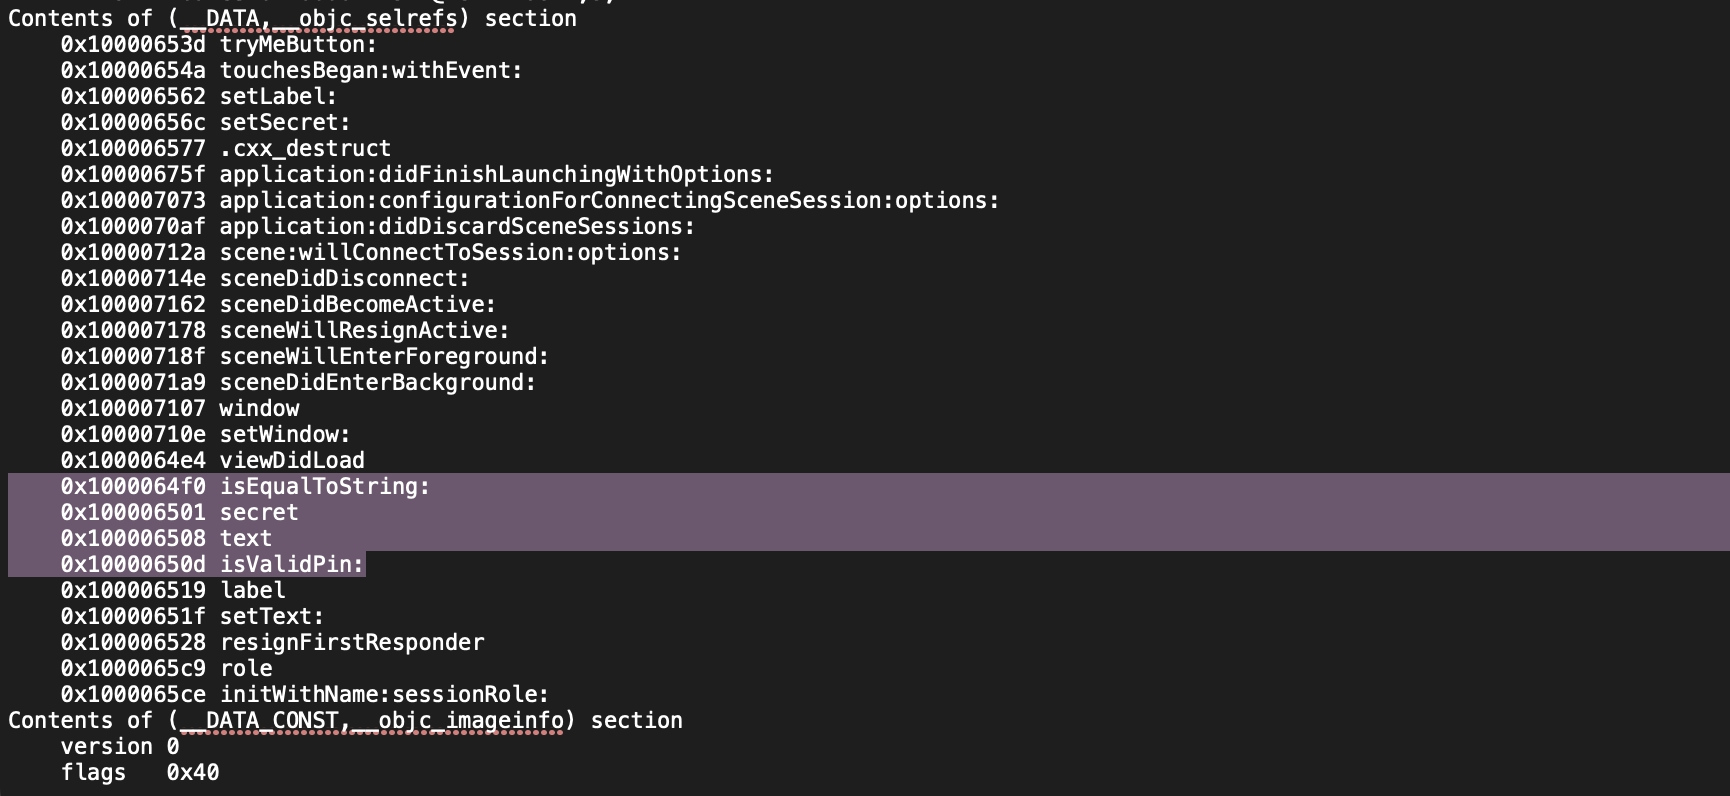
Running the command below, we can see straight away variable and method names in the “ViewController” class that we are interested in. iOS developers are encouraged by Apple to give “meaningful” names to methods, classes and variables that allow you to understand what they are. I’m sure most developers are taught that regardless of the language :P
However, straight away we can see variable definitions in the ViewController class named:
And perhaps more interestingly a method named “isValidPin”.
To carry on some of this analysis, let’s take a look at the otools output. To run otools, you can write the following command:

Step 6: Set up the debug server and LLDB ready for debugging
We are going to use FREE tools to do this debugging. For this, we will be using debugserver and also LLDB. You can set this up by installing “debugserver” via SSH or via Cydia. The way that this works is, we will remotely connect to the breakmedaddy application process via LLDB to perform remote debugging of the application.
The screenshot below shows you how to perform this set-up. The screen on the left is my iOS device and the screen on my right is my Mac terminal where I am remotely connecting to the process.
Step 7: Set a breakpoint on the interesting method we have identified “isValidPin”
Previously from the otools and pagestuff output, we identified an interesting function named “isValidPin”. Let’s examine this deeper by setting a breakpoint on this function. The method of how to perform this in LLDB is as captured in the screenshot below. Basically, you pass in the name of the class (ViewController) followed by the name of the method “isValidPin”.
Step 8: Type in a password into the application to trigger the breakpoint
Now we need to manually interact with the application to trigger the breakpoint at the function where the check occurs.
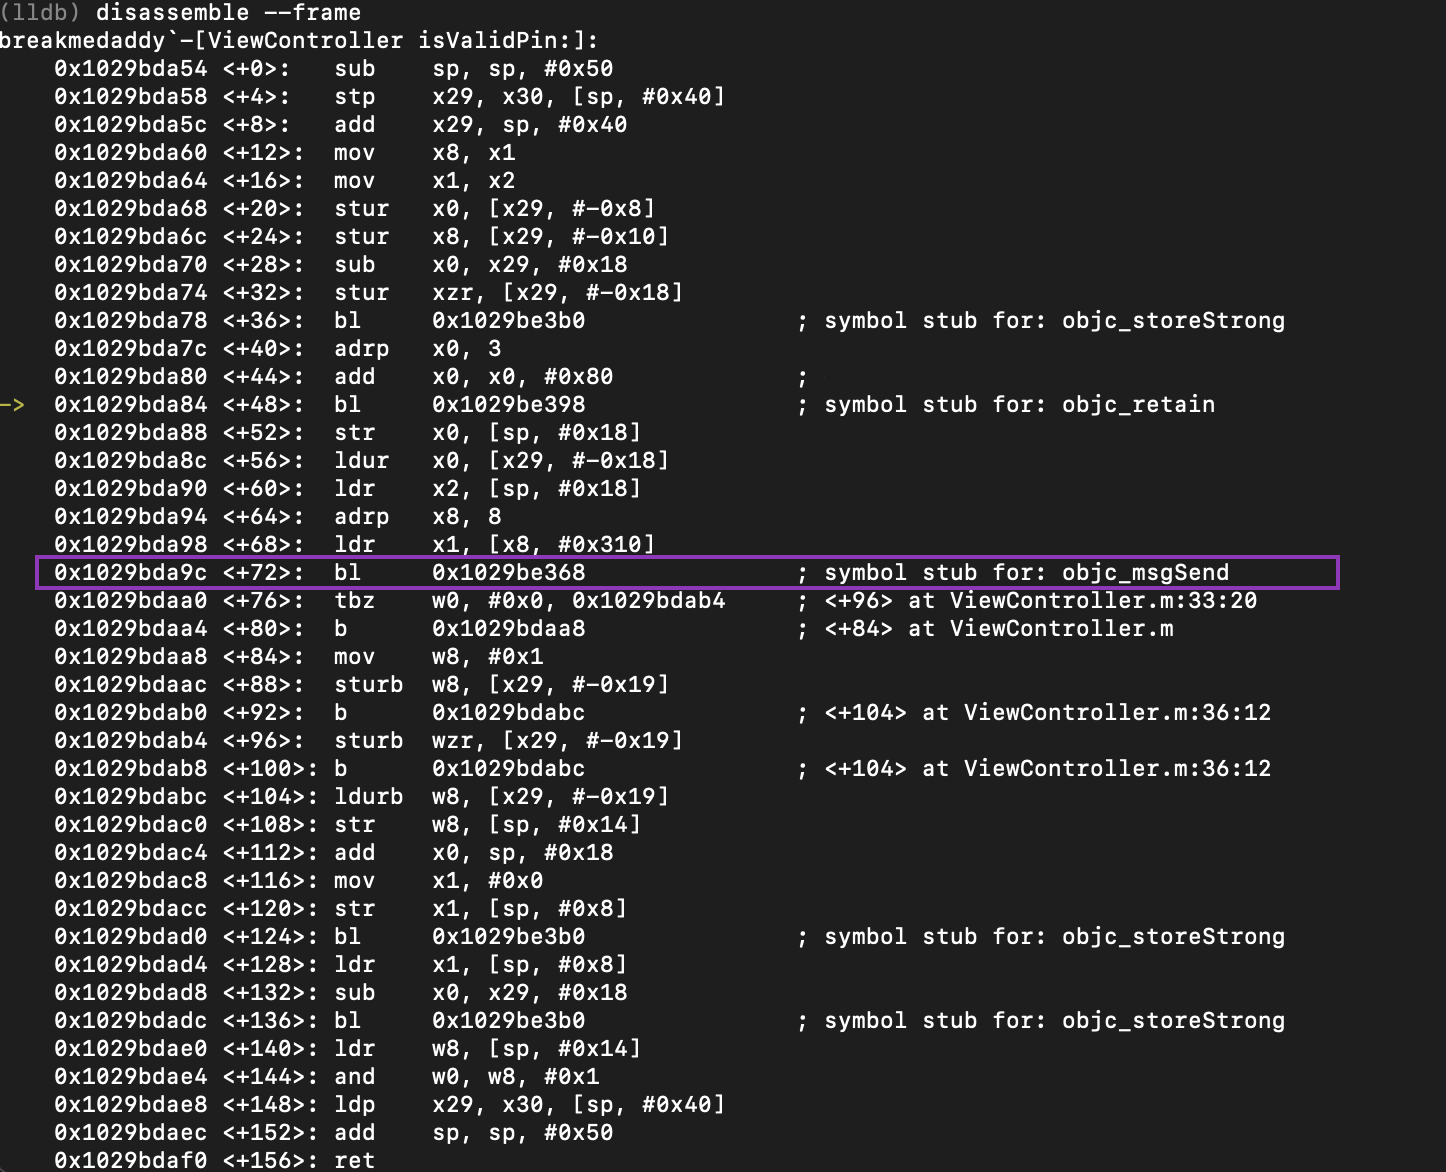
Step 9: Go through the assembly code and identify function calls of interest
Now that we hit our breakpoint, let’s look at the assembly output and figure out what’s going on!
The output above shows that we have hit the breakpoint at the address where the yellow arrow is. I have highlighted in purple the one line which is very interesting for us. As you can see – coming up, there is a call to a function called “objc_msgSend”
https://developer.apple.com/documentation/objectivec/1456712-objc_msgsend. This function is used in Objective C to send a message to an instance of a class.
The reason why this line is interesting is because when you are in reversing something, what’s important is to understand the flow of data in a program. This function is coming up and it interacts with the current password we have just entered into the application before hitting the breakpoint on “isValidPin”. The flow of data is important as the whole point of reversing in this instance is to modify how the data we enter is “seen” or “responded” to by various methods and functions within the application. In our instance, we don’t really care what the password is, we just want to patch and bypass the password check. Therefore, it’s important that we set a breakpoint on this line so we can understand what is being done to our input.
As such, let’s place a breakpoint on this function call and continue the process until we hit that function call to “objc_msgSend”.
Step 10: Check out what’s being stored in the registers
As we reviewed the “objc_msgSend” function in the iOS documentation, we can see that it takes in three function parameters:
- a pointer to the instance of the class that receives the message
- selector of the method that handles the message
- an argument list that contains the arguments to the method
These three parameters are stored in the x0, x1, x2 in corresponding order.
To further drill down this point, let’s take a closer look at exactly what is being stored in each register.
As you can see above these are the three parameters being passed into the “objc_msgSend” function:
- $x0 – The password we put into the application “isthmus the password :)"
- $x1 – A call to the method “isEqualToString” where a comparison is going to be made between the strings stored in x0 and x2
- $x2 – The actual password that the program is expecting “babiesareevil”
At this point you can just stop LLDB and the debug server and just use the real password. But let’s just take this a final step further and patch the program!
Step 11: Patch the application and check it works
Jumping back into the program assembly, we can see that we are still at the breakpoint of “objc_msgSend”.
As above from the screenshot, you can deduce that from the “objc_msgSend” function, the method “isEqualToString” will return a “0” if the strings don’t match, and a “1” if they do match. In our stance, it will be set to “0” because our password is not the real password. However, if we entered the correct password “babiesareevil” this would be set to 1.
Let’s set the breakpoint at the next line highlighted in the screenshot above at the TBZ instruction. Here we should expect to see that the register is set to 0 because our password is incorrect.
After we continue the process, let’s look at the register again as we should have reached this breakpoint. As you can see below, x0 has the value of “0” as expected.
Step 12: Patch the app! Voila!
Home run time. Now we know exactly where to patch this application. We know that if $x0 is “0”, the password will fail as it fails the “isEqualToString” method call and we know that if $x1 is “1”, the password will be successful. So let’s patch $x0 to hold the value of 1:
Finally, let’s look at our application and now it’s rendering as SUCCESSFULLL regardless of whatever password we inputted hahah! :)
FURTHER LEARNING LINKS
This blog was meant to be an introductory walkthrough of reversing an iOS application and patching it. Please let me know if this is helpful so I can figure out if I should spend more time writing content like this!
Below are some helpful links for your further learning: