

How I Revamped And Officially Launched My First Chrome Extension
source link: https://medium.com/@ajay_613/how-i-revamped-and-officially-launched-my-first-chrome-extension-5571a45296e4
Go to the source link to view the article. You can view the picture content, updated content and better typesetting reading experience. If the link is broken, please click the button below to view the snapshot at that time.
How I Revamped And Officially Launched My First Chrome Extension
I NEVER complete personal projects that I start.
In fact, most of of my pet projects never see the light of day. At best, I’d work on the concept itself, and then I’d simply abandon the project and move onto something else.
That in itself is a problem I NEED to fix before I do anything else.

A Refresher…
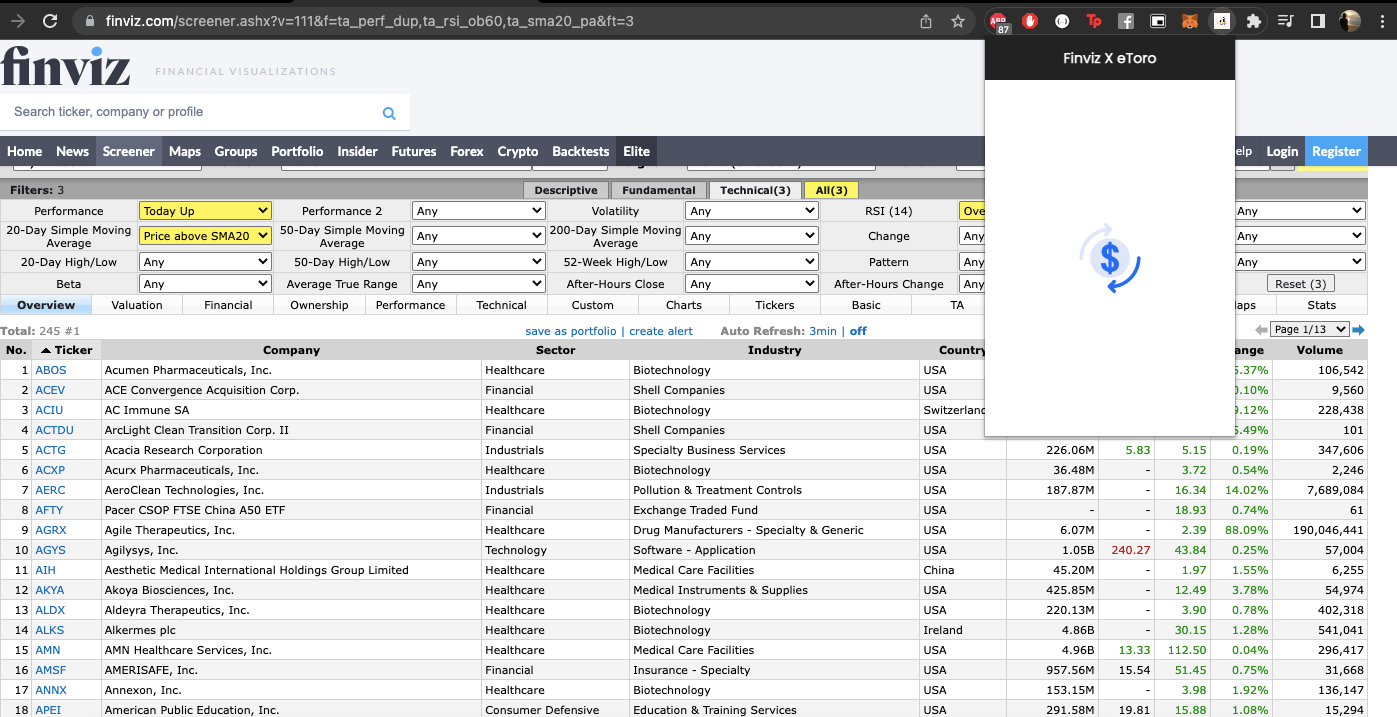
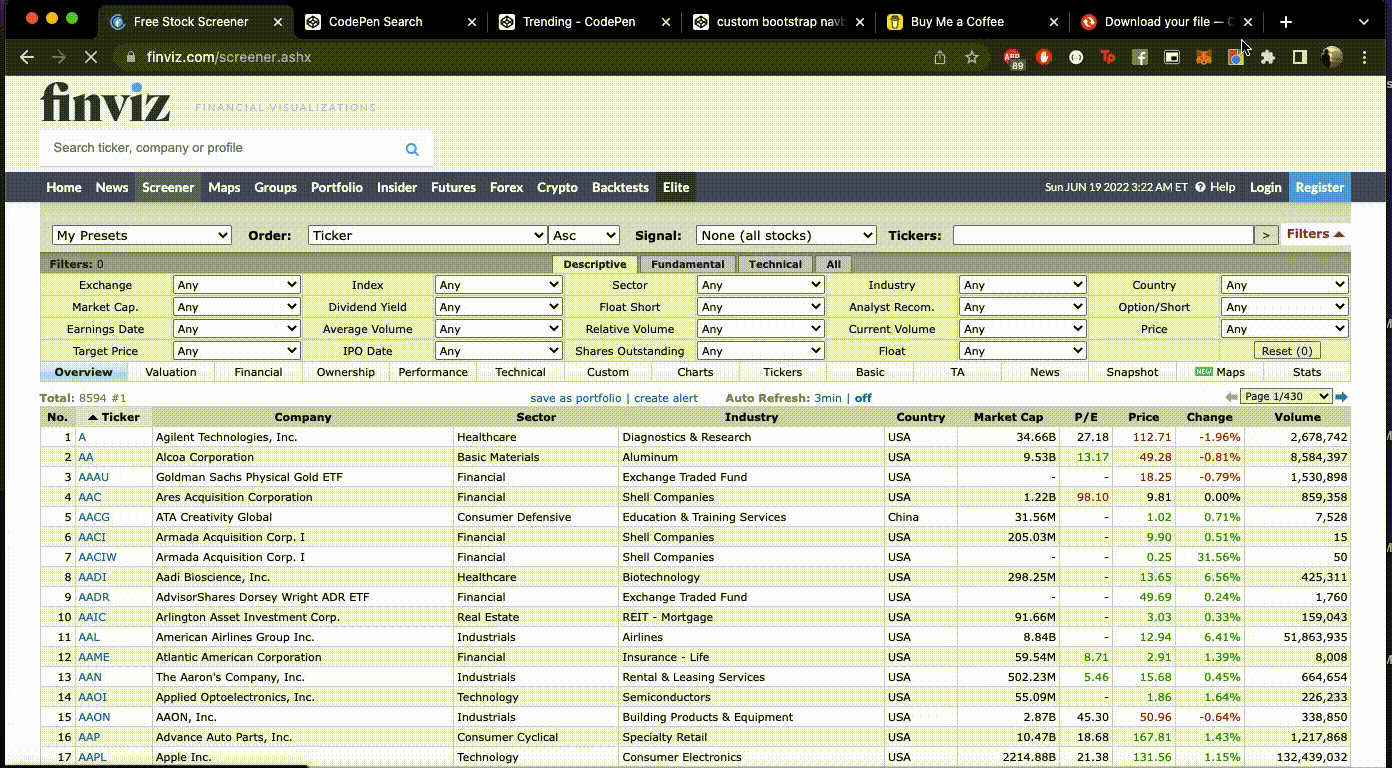
On the 2nd of June, I published an article on Medium called “I Built a Chrome Extension to Instantly Find eToro’s Stocks on FINVIZ’s Stock Screener.”
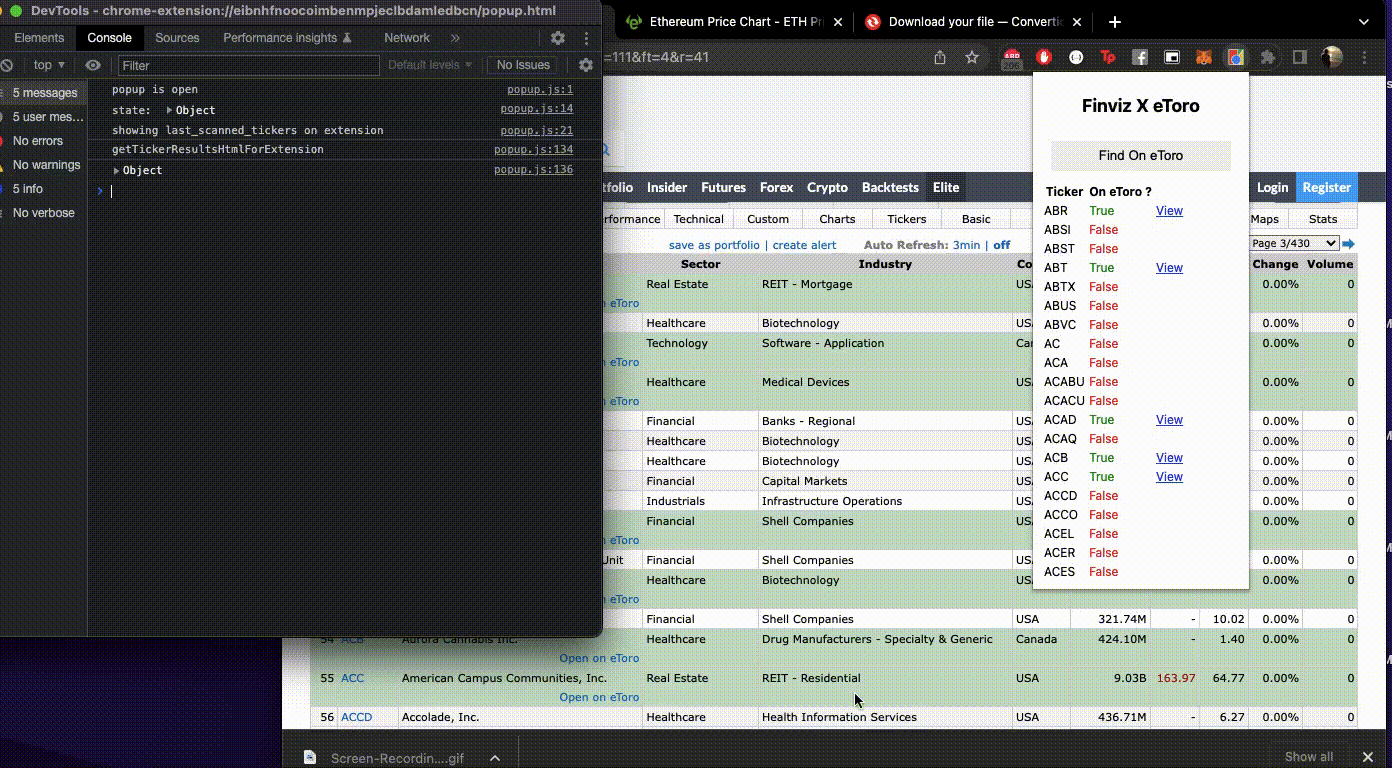
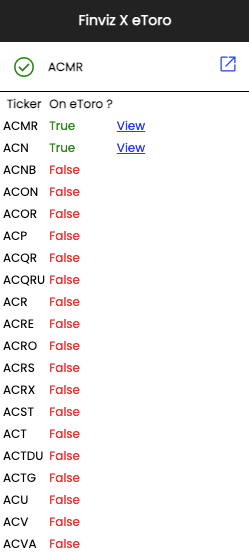
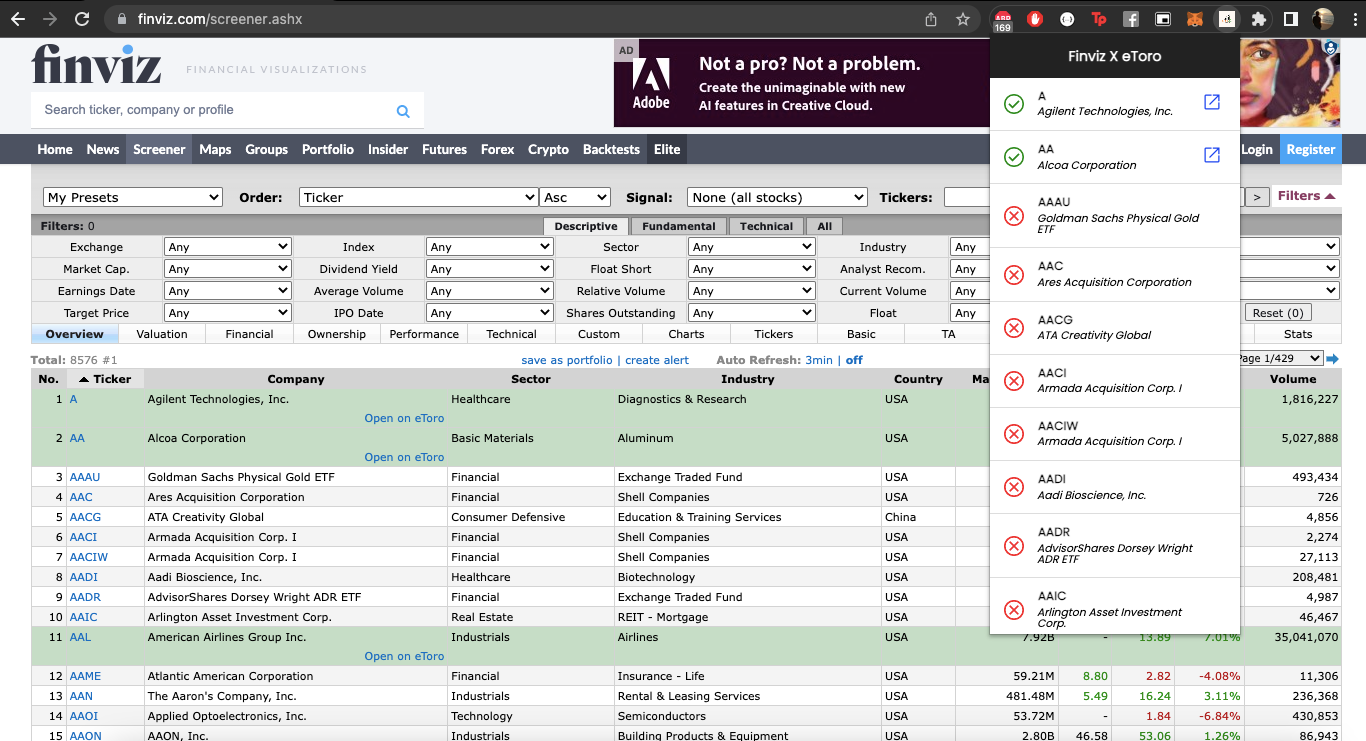
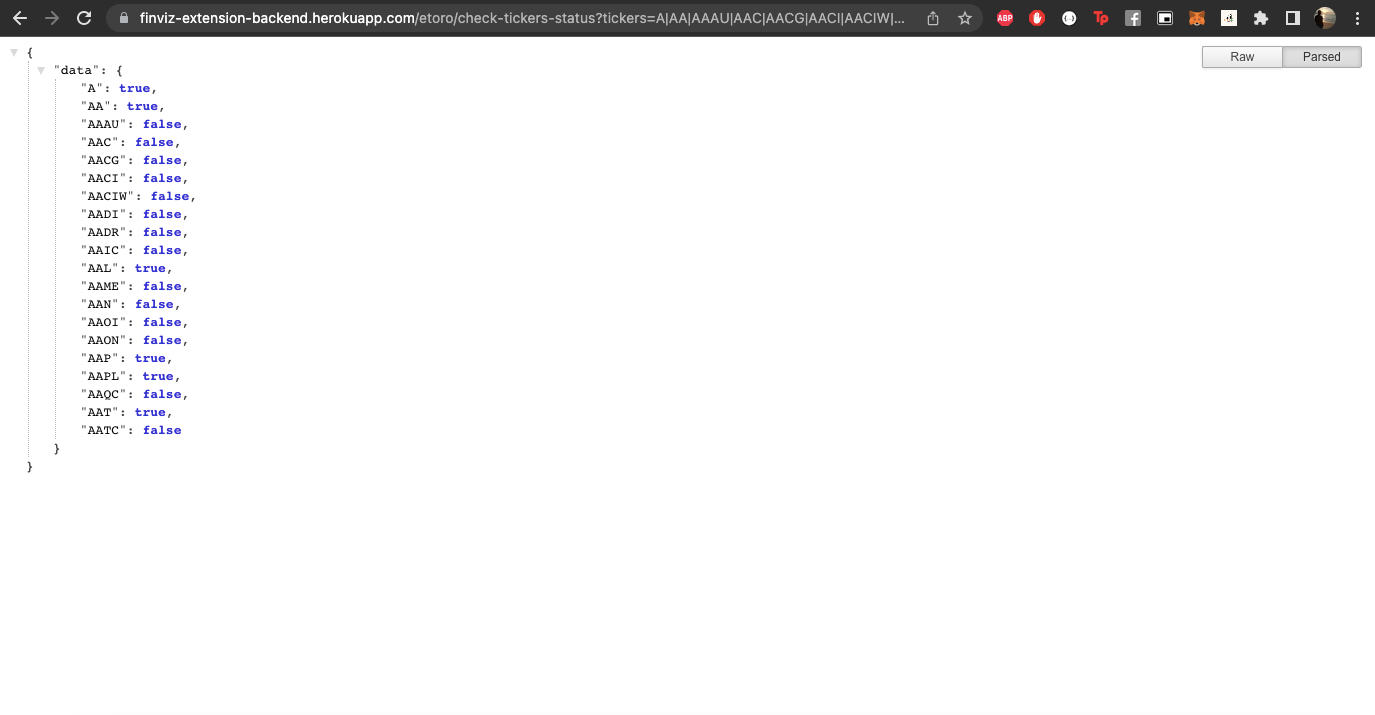
The chrome extension would scan the tickers from the Finviz, pass it over to the backend to check if the ticker actually exists on eToro or not.
Then I would relay the info from the backend to the user like so…
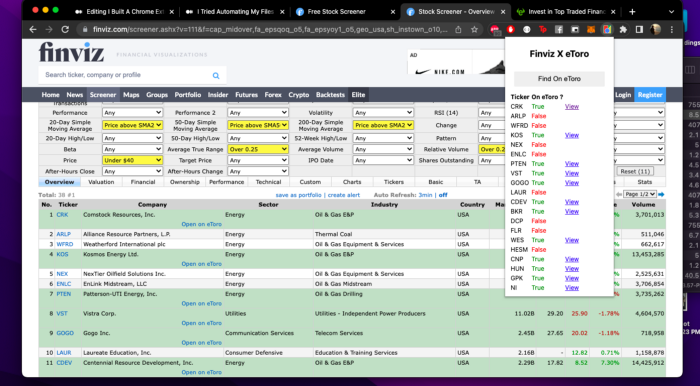
The concept
It was a decent enough effort for a BMVP (barely a minimum viable product)…
But it wasn’t decent enough to be released as an official extension. I initially thought of polishing it and releasing it onto the Chrome Web Store but then I fell victim to my own character traits.
I shelved the Finviz x eToro extension, and I started brainstorming the next app that I wanted to build.

And then it hit me. I’m forever going to be stuck in this infinite loop of starting projects, and never releasing them.
At the end of it all, I would’ve made 0 impact, and I’d have nothing to show for the time I spend solving my issues.
I had to change.
I decided to properly complete the Finviz X eToro extension, and launch it officially on the Chrome Web Store.
Here’s how it went.
Game Plan

- Squash all the bugs — make the extension 100% functional
- CSS, icons & fonts — make the extension presentable
- Make it production ready
- Deploy the damn thing
Squashing bugs & making the extension functional
Even though I had a high level game plan, I didn’t really have a solid execution plan when it came down to squashing bugs VS enhancing the functionality.
I basically relied quite heavily on my gut-feel to get things working. Maybe there’s a better way to go about it (Let me know how you guys split your time when it comes to this…).
1. Enhancement: The first thing that I wanted to do was to store the results of each scan.
Anytime I opened up the extension on a different tab, the extension would go blank because I wasn’t storing the results of the previous scan.
This meant that I had to keep going back to Finviz just to rescan the same items all over again.
Annoying AF.
I thought this would be as complex as working with IndexedDB. Surprisingly (and thankfully), it wasn’t.
All I had to do was to call the set method from the Chrome Storage API when I made a HTTP request to the backend. Like so…
chrome.storage.sync.set({
      'last_scanned_tickers': tickersStatuses,
    }, function () {
      console.log('Value is set to ' + tickersStatuses);
      resolve();
    });
And then I could just call the corresponding get method to retrieve the stored results back…
// defined a global object that I can call anywhere from the file
const extensionState = {
  'last_scanned_tickers': {},
}; // get the results from the chrome store
chrome.storage.sync.get([
  'last_scanned_tickers'
], function (result) {
  // console.log('last_scanned_tickers on load ', result.last_scanned_tickers);  extensionState.last_scanned_tickers = result.last_scanned_tickers ?? {};   console.log('state: ', extensionState.last_scanned_tickers);
});
Now the user could simply scan a page of Finviz results, go to another tab, and still have access to the results of the previous scan.
Result
2. Bug Fix: Fixing the ‘View’ hyperlinks
I initially thought an anchor tag would get the job done but turns out I was wrong.
Anchor tags don’t actually work in a chrome extension cause of the whole isolated environment thing.
Bug 🐞:
Fix 🔧:
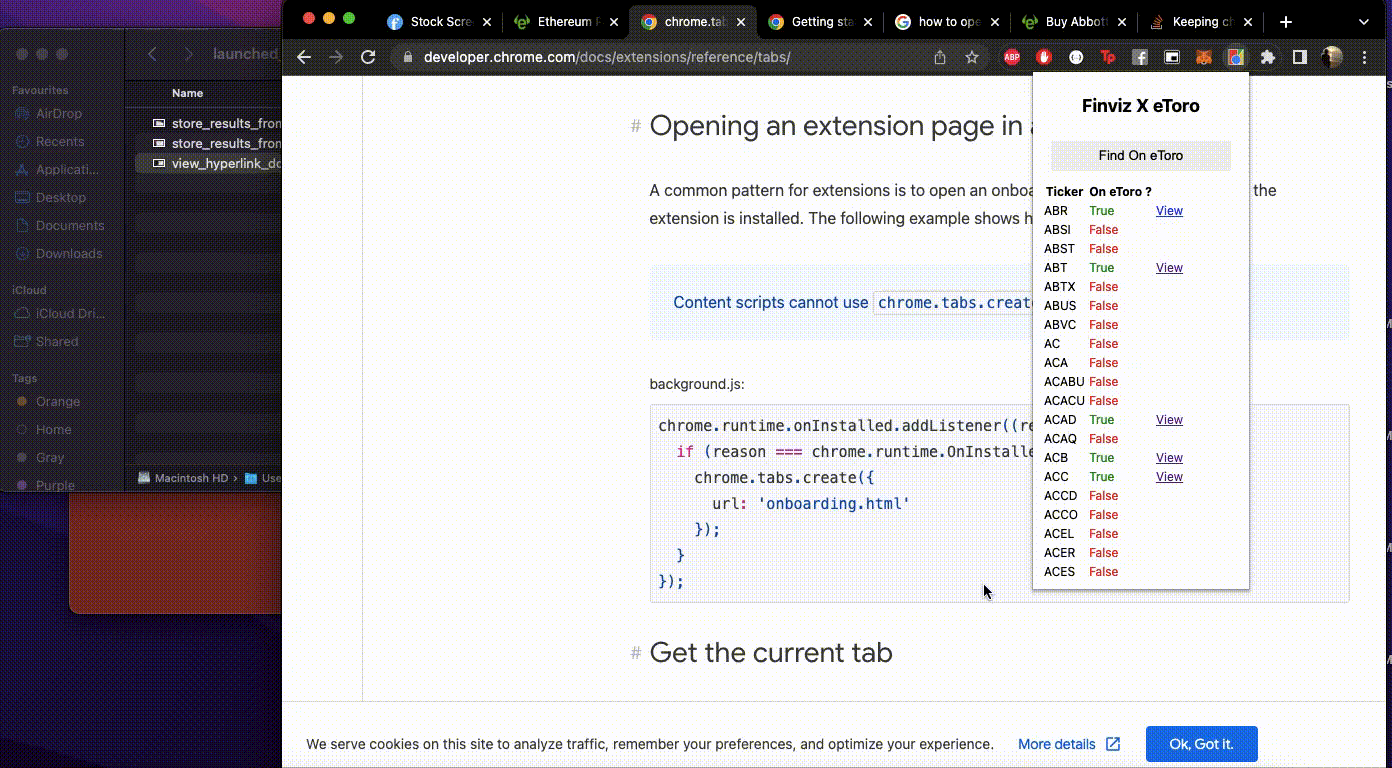
After digging around for a while, I found that I’d had to use the chrome.tabs API to programmatically create a new tab when a hyperlink is pressed.
Here’s the high level logic:
- Add a click event to each of the dynamically created hyperlinks
- When a user clicks a link, programmatically create a new tab using the new chrome.tabs.create() method
Code:
// add the event listener to each of the hyperlinks
let etoroAssetViewLinks = document.querySelectorAll('.etoro__asset--hyperlink');   Array.from(etoroAssetViewLinks).map(viewLink => {
    viewLink.addEventListener('click', handleEtoroAssetViewLinkClickEvent);
  });// handling the click event
function handleEtoroAssetViewLinkClickEvent (e) {  console.log('handleEtoroAssetViewLinkClickEvent', e);   let linkHref = e.srcElement.href;   chrome.tabs.create({
    url: linkHref,
    active: false // setting the active flag to false, makes sure the popup stays open
  });
}
Great. Solved this quite quickly. 😀
Result:
3. Bug Fix: Prevent the content script from being injected when the user is on other tabs.
Not a show stopper but I thought it would be weird to allow the user to click the “Find on eToro” button when they’re not on the Finviz screener page.
Reason being, when they click the button, the extension would inject a content script into the page to scrape the tickers out. Logically, this shouldn’t happen cause the user might be on a completely different tab.
Bug 🐞:
Fix 🔧:
Quite straightforward. I used the chrome.tabs API to get the active tab object, did a string search, and then dynamically added the button in if it was a match like so:
let queryOptions = {
    active: true,
    lastFocusedWindow: true
  };  // `tab` will either be a `tabs.Tab` instance or `undefined`.
  let [tab] = await chrome.tabs.query(queryOptions);  console.log('tab: ', tab);if (
    tab.url.includes('finviz') &&
    tab.url.includes('screener')
  ) {changeColorButtonWrapper.innerHTML = `<button id="changeColor">Find On eToro</button>`;}
Result:
The button only shows up when the user is on the Screener page. But if they open up the extension on any other page, the button is hidden.
Think I resolved most of the show-stopper bugs. Now, moving onto step 2.
The UI.
Giving the extension a face lift
Unlike Steve Jobs, I don’t have an eye for design. Matter of fact, I’m terrible at it.
Plus I’m not flush enough to hire a designer for a pet project either. So I’m gonna have to make this work.
I scoured through Dribble and Uplabs for inspiration, and I eventually decided to just go with a black and white theme 😆
Probably throw in some fonts & icons to make things slightly more appealing.
- Building out the black navbar
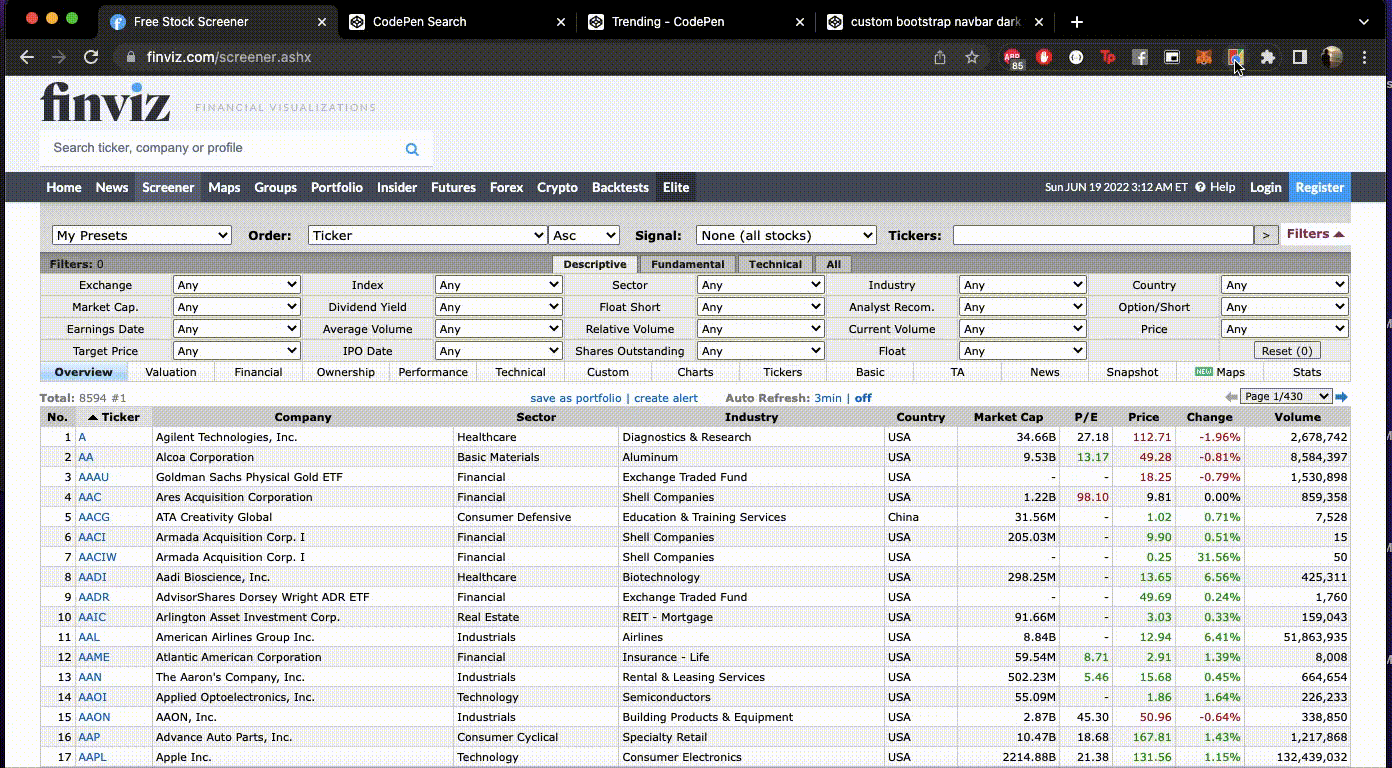
To speed things up on my end, I headed over to CodePen to see if I could find a pen that had a black navbar. I found one here: https://codepen.io/sukhsingh2729/pen/zbGJOM
I just copied over the HTML and the classes that I needed to get things up and running.
2. Adding in the Fonts & Icons
Relied on Google’s Fonts & Icons for this.
I used the Poppins font instead of the default one I was using: https://fonts.google.com/specimen/Poppins
And for the icons: https://fonts.google.com/icons
The instructions on Google fonts were quite straightforward so it didn’t take too much time to get things up and running.
3. Adding in a Loader
For this, I headed over to Lottiefiles, searched for ‘money’, and I came across an animation I liked. I downloaded that as a gif, and I added that to my html. Also used Flexbox to center the gif in the extension.
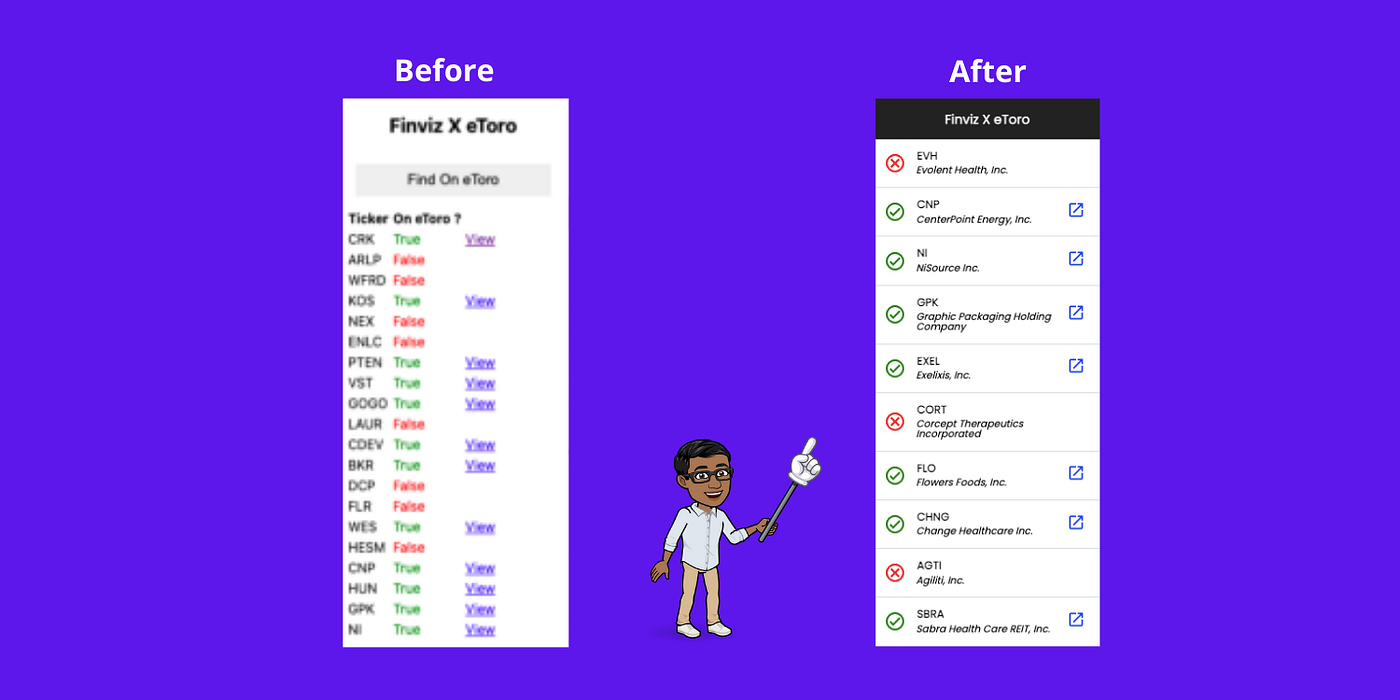
4. Styling the list item
Previously, I was just displaying the tickers in a table form like so:

With the help of Flexbox, I managed to mock out the html for a decent looking list item element for one of the tickers.
Looks decent enough.
Next, I had to dynamically generate the html on the popup.js file instead of hardcoding things on the html page.
Here’s how I managed to do it:
// generate the html for list items
let listItemsHtml = '';for (let key in results) {
	listItemsHtml += `<div class="list__wrapper-item">//content</div>`
} let listWrapperHtml = `<div class="list__wrapper">${listItemsHtml}</div>`
Result
Great! Looks much better. Don’t you think so?
I Broke the extension
Just when I thought I was ready to go ahead and deploy the extension, I realised that I ended up breaking everything I built.
Bug 🐞 #1: I ended up breaking everything I did in point 1.
Bug 🐞 #2: Also ended up breaking the logic for the loader.
Bug 🐞 #3: Plus I also created a new bug. Basically, when you press the button it highlights the items correctly on Finviz the first time around.
The second time you open it up, it highlights a bunch of other items that are not supposed to be highlighted in the first place.
I’ll save you the trouble of reading through my struggle of fixing each bug in detail, and I’ll just summarise the main solutions for each.
Bug #1’s Solution 🔧: Basically, I was rendering 2 sets of HTML tags dynamically from 2 different places of my JS code. I just had to extract the correct HTML into a method, and then reference that method in both places.
Bug #2’s Solution 🔧: Had to rework the logic here. I kept it simple, I extracted the HTML to a JS method, and I’d just call the method whenever I wanted to display the loader.
Bug #3’s Solution 🔧: Probably the easiest fix so far. I was referencing one of eToro’s classes on the hyperlink, and this messed with one of the querySelectorAll methods I was referencing. Extract the styling from the CSS to in-line, and everything worked as expected 😀

Wrapping Up
Ok, everything is functional, and things look pretty enough. Time to get the extension ready for production.
1. Make the CSS assets production ready
In simple terms, package the assets together with the extension instead of making a call to a third-party URL (in this case Google Fonts).
The benefit? Works offline and the icons and fonts load much quicker.
I found this guide here to help me self host the fonts: https://support.google.com/webdesigner/answer/6163074?hl=en
I followed this guide here to self-host the icons:
https://www.angularfix.com/2022/02/how-to-host-material-icons-offline.html
2. Adding in the full names of the tickers
When I opened up the extension after a few days, I realised that I didn’t know what each of the tickers meant.
To provide more context to the user, I decided to go ahead and display the company name for each ticker as well.
I created a hashmap of tickers and the company names (scrapped from the Finviz Screener page as well via the content script), and passed it up the chain.
Content Script
let tickersToFullNames = Array.from(document.querySelectorAll('.screener-link-primary'))
  .reduce((tickersHashMap, tickerElement) => {    let ticker = tickerElement.innerHTML.replace('Open on eToro', '');    let nextSiblingText = tickerElement.parentElement.nextElementSibling.innerText.replace('Open on eToro', '');     tickersHashMap[ticker] = nextSiblingText;     return tickersHashMap;
  }, {});
Result
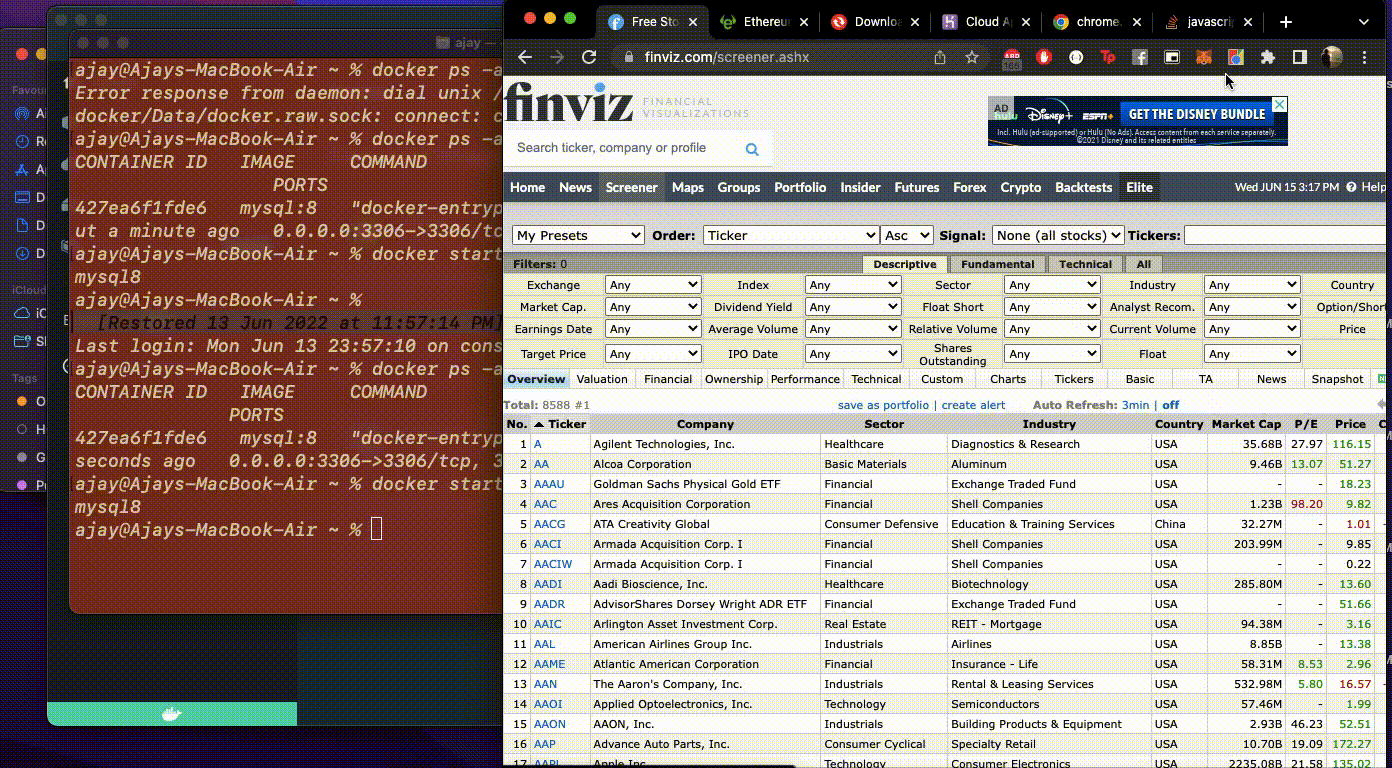
3. Hosting the backend for FREE
Usually, I would have just used Fortrabbit (costs me about USD$5 per app) but for this extension I decided to go with Heroku instead (since they have a free tier, and I’m not making any $$$ yet).

I have a Laravel backend so should be pretty straightforward to get things moving.
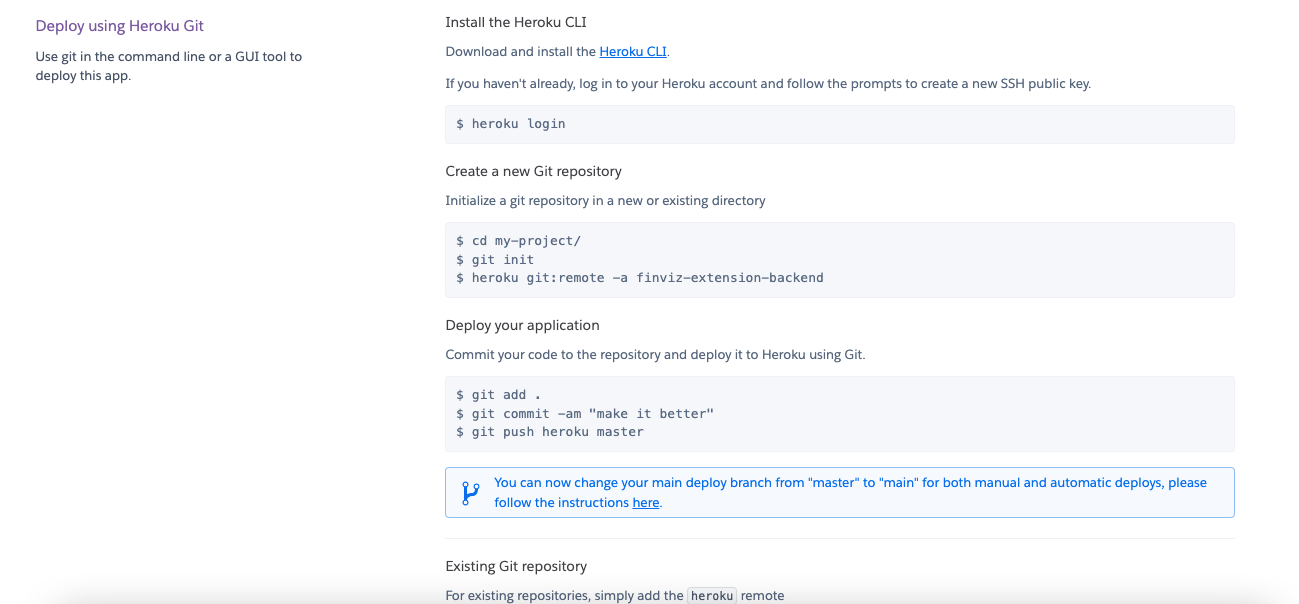
I went ahead and created a new app on Heroku, and followed the steps written here:
And in true developer fashion I was welcomed with this error:
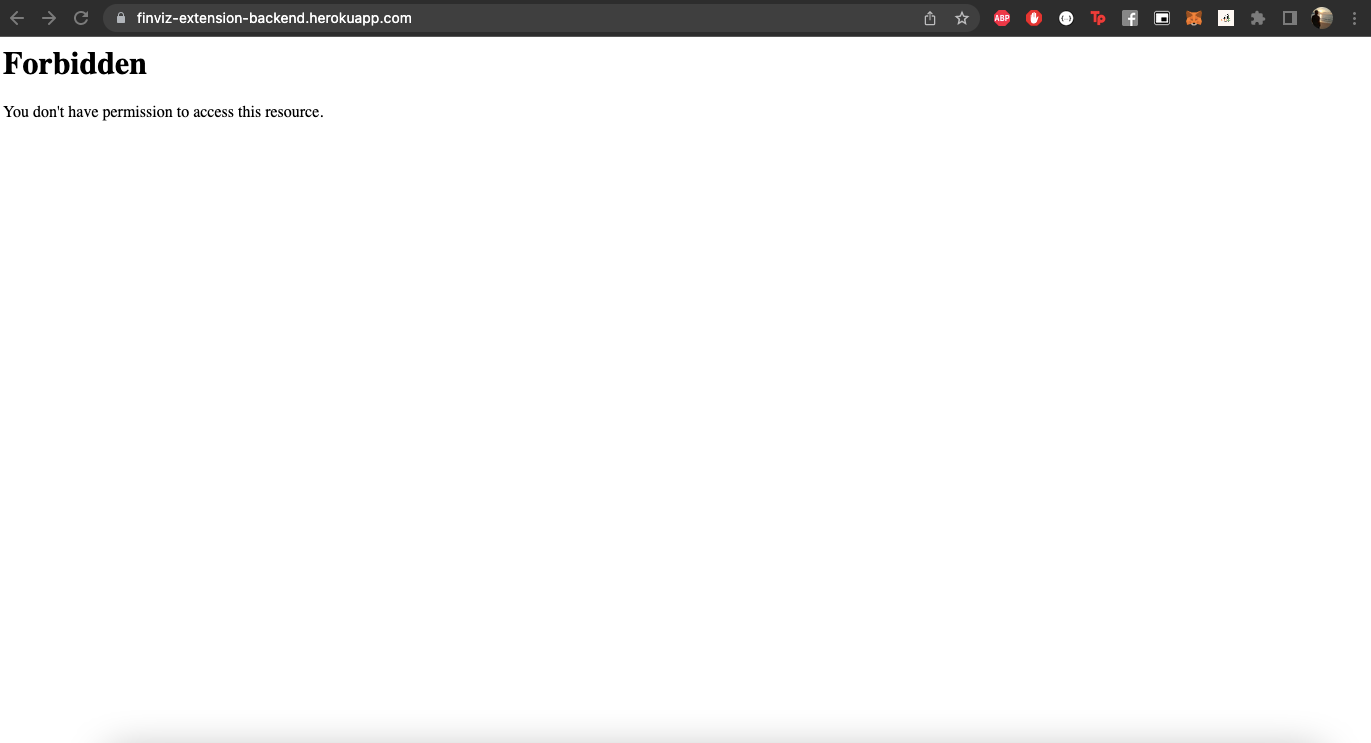
After a few minutes of frantic googling, I found the solution for the error in this tutorial here:
https://appdividend.com/2022/03/01/how-to-deploy-laravel-project-on-heroku/
Turns out I had to add a Procfile (Step 3 in the tutorial), and I had to manually add in the config values in Heroku’s console, and things finally started working.
Then I had to migrate the database. (I can see the finish line)
This took me a bit of trial-and-error to figure out. Here’s how I finally got it working:
- In the Heroku dashboard, clicked on the Resources tab, clicked the “Find more add-ons” button, and selected JawsDB MySQL
- Connected to the MySQL Workbench, and did a data import from a SQL dump
- On the Settings tab (Heroku), I clicked on the “Reveal Config Vars” button and added each of the database variables one by one.
Boom the backend endpoint is alive!
Result
Final step, hook up the extension to the newly deployed backend.
To do this, I had to add the url to the manifest.json file, and I also changed the hardcoded references in the popup.js file.
Everything works as expected. Moving on…
Publishing the chrome extension
The instructions for this was quite well documented. Link: https://developer.chrome.com/docs/webstore/publish/
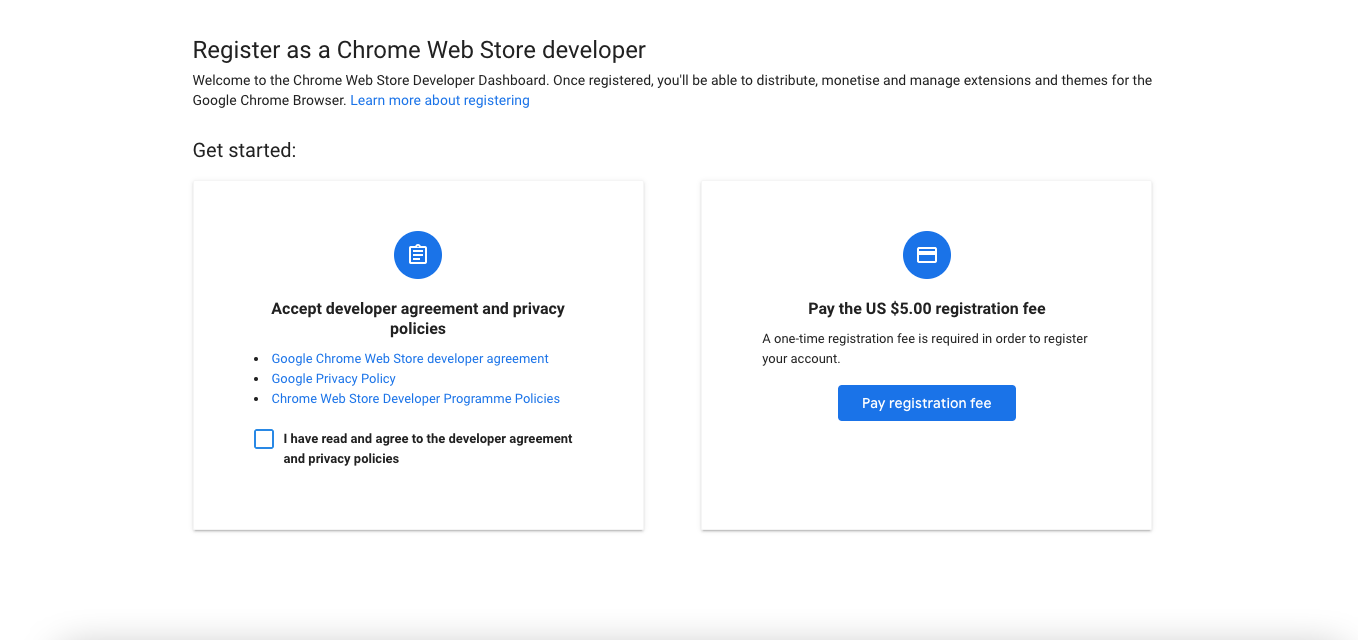
One of the first things I had to do was to create a developer account for myself, and this costed me a one time fee of USD$5. Tough.
I just kept clicking next (without reading any T&Cs) until I landed on the dashboard.
I clicked on the Items option on the left, and clicked the New Item button.
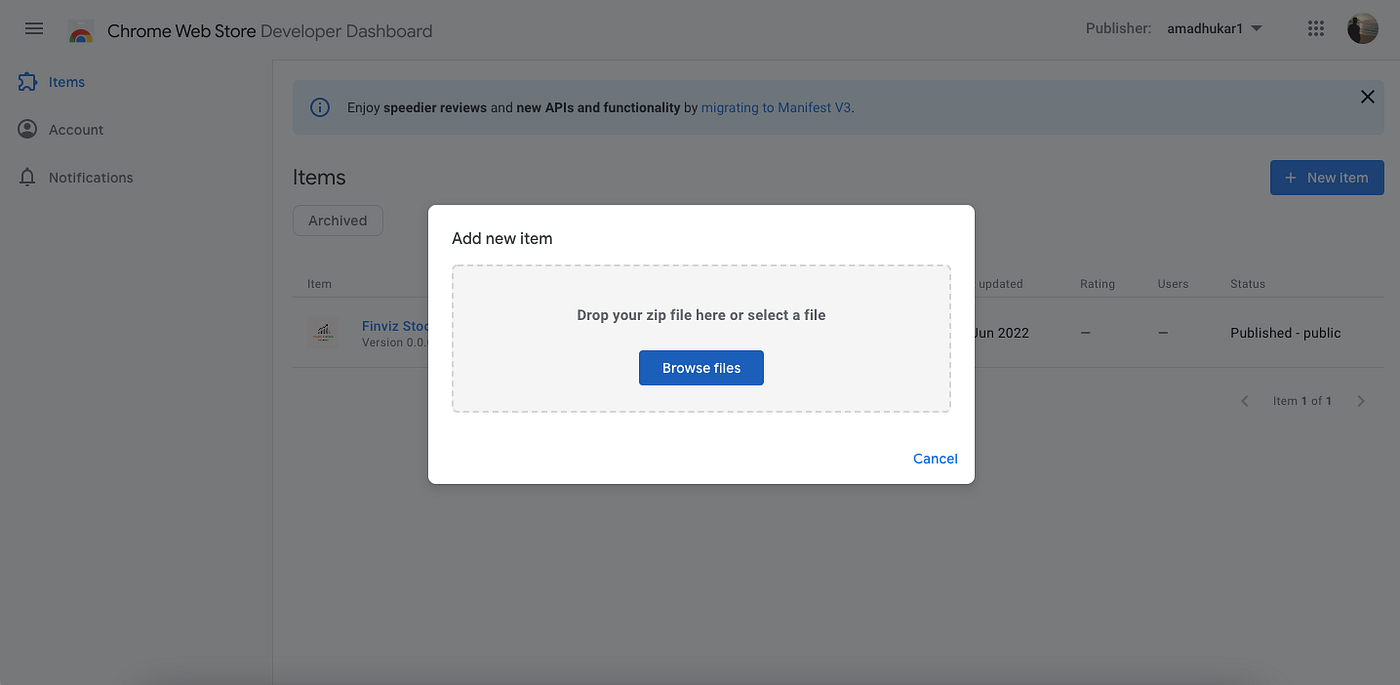
I simply zipped the entire codebase for the chrome extension, and I uploaded it.
The next step was to complete the store listing form.
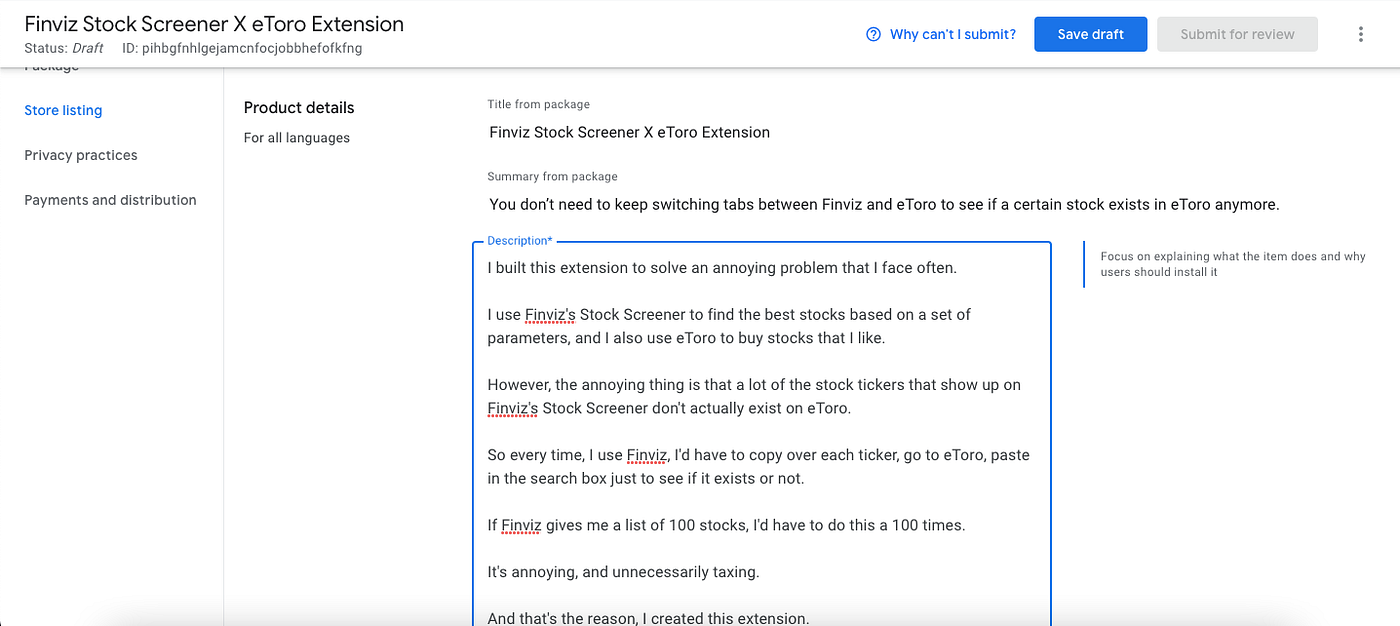
This was tough. The only thing worse than coding is writing descriptions about the code.
I also had to upload an official icon in different dimensions in the store listing form.
Great. Another bottleneck given that I’m disabled when it comes to design.
I headed over to Canva, found a logo template, a trading icon, a magnifying glass icon, and I grouped everything together 😂
End Result:
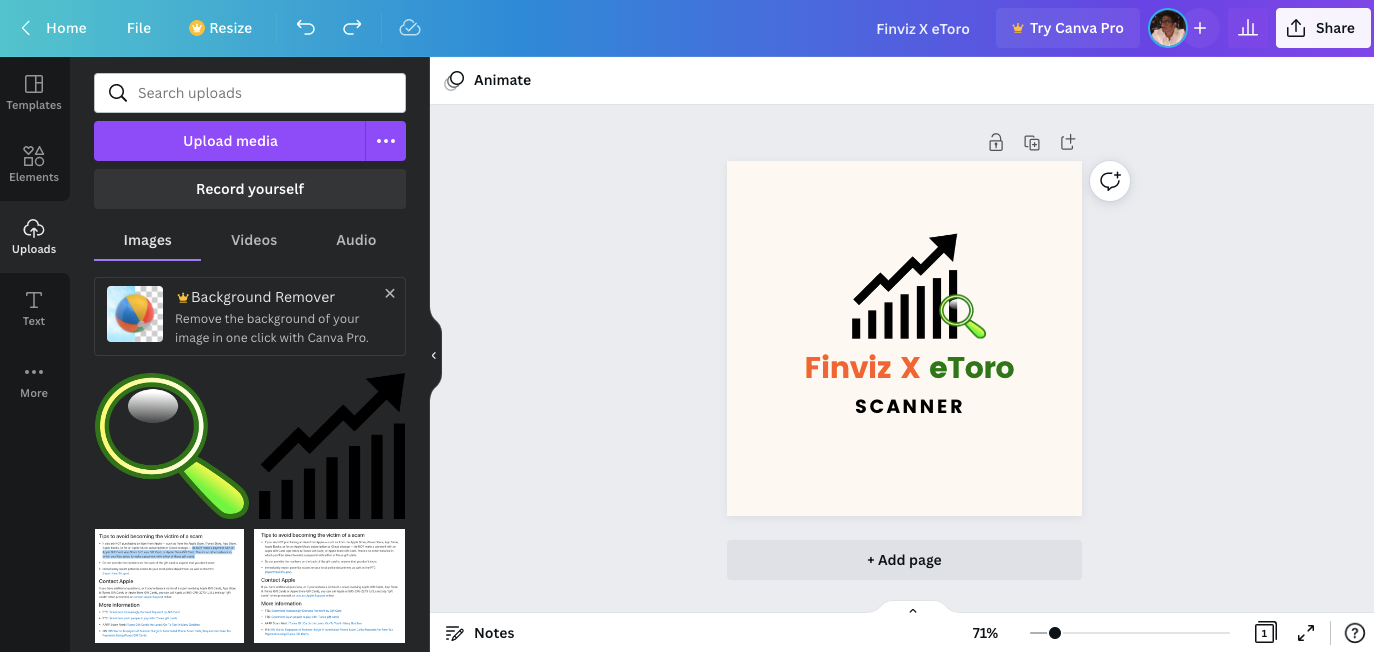
Looks horrendous. But this would have to do.
Next I had to download the icon in different dimensions as per Google’s requirement (16x16, 32x32, 48x48, 128x128).
Unfortunately, I didn’t know how to do this on Canva itself so I downloaded the 128x128 version from Canva, and then resized them into the different dimensions at https://onlinepngtools.com/resize-png
Once I completed the store listing, the privacy practices form, and the payments and distribution form (yea they are pretty thorough), I was able to submit the extension for review.
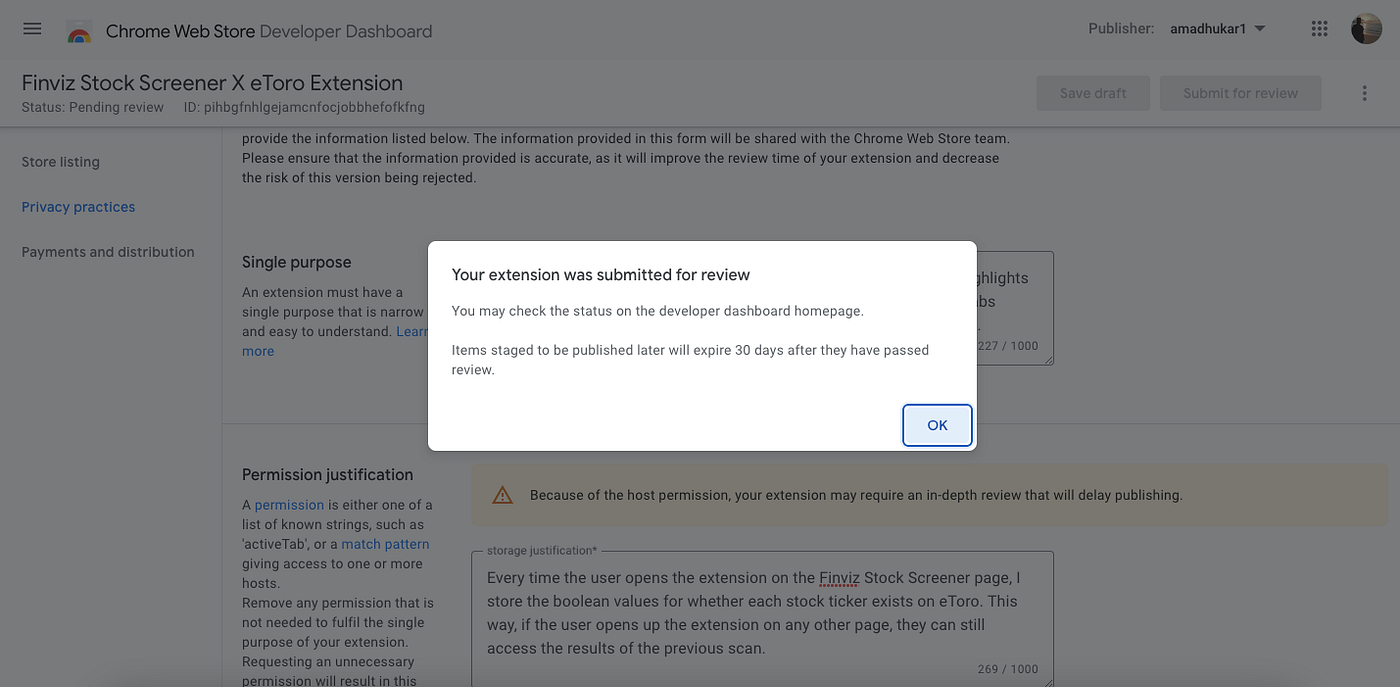
Officially Published!
I checked in a few days later, and my chrome extension has been officially published on Chrome’s Web Store.
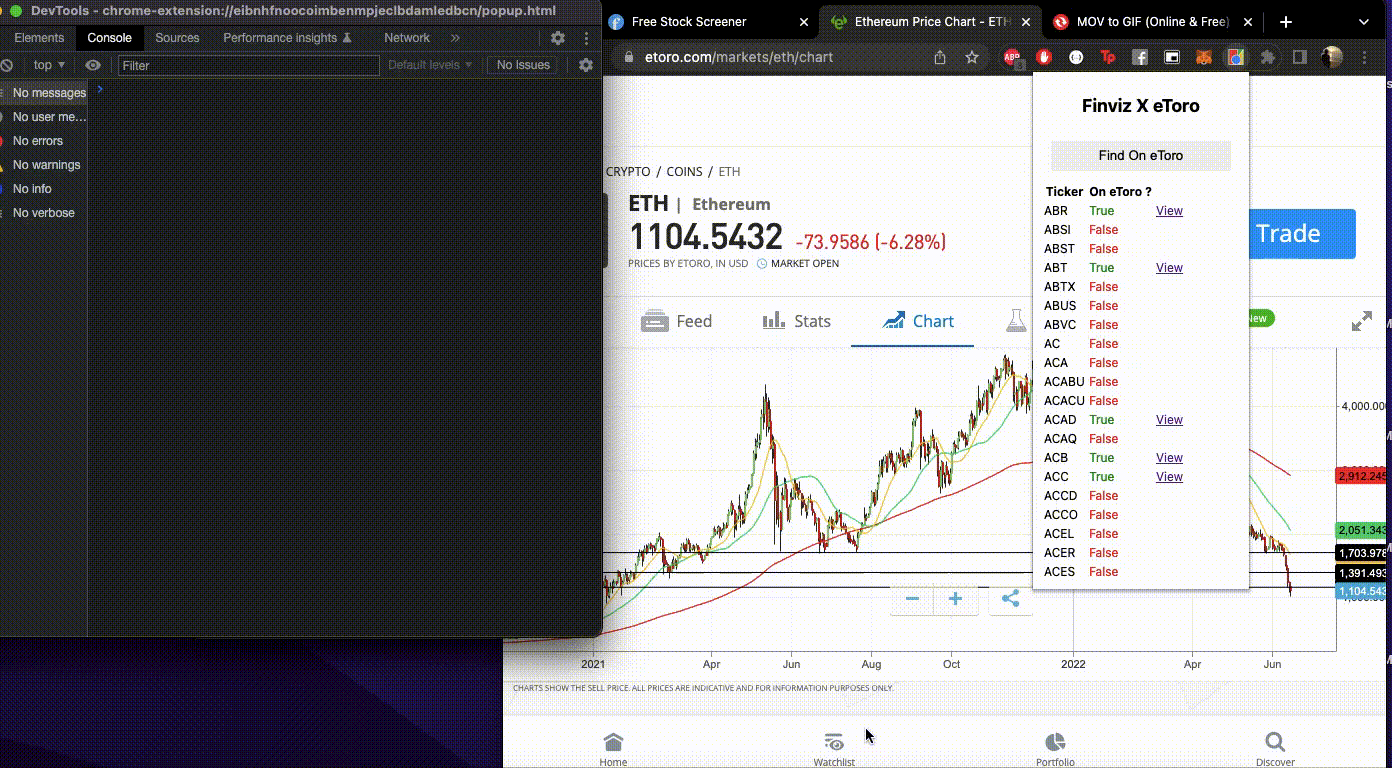
You can take the extension out for a spin by clicking this link: https://chrome.google.com/webstore/detail/finviz-stock-screener-x-e/pihbgfnhlgejamcnfocjobbhefofkfng
Challenges
The worst thing about this experience was confronting the lack of discipline (and resolve) I had for my own projects.
Don’t get me wrong. I’m very dedicated when it comes to my day job (probably cause I have a boss) but I tend to slack a lot when it comes time to complete my own personal projects.
And this time was no different.

I wasted days procrastinating, worrying about best practices, “resting”, and literally doing anything else except to work on completing things.
That being said, I’m definitely pleased that even though it took me a whole month (instead of a weekend like it was supposed to), I still managed to get across the finish line.
I can proudly say that I’ve officially launched my first chrome extension. Now, this may not be a huge accomplishment for you but it definitely has been a great ordeal for me, and I’m glad that I saw it through.
On a personal note, I decided to always launch the work I do to the public. This way, I can rewire myself to always complete pet projects that I start.
Also Read: I Tried Automating My Files & Folders With PHP For The First Time
Want to read about what I build next? Well, do follow me on Medium, and you’ll most likely get notified the next time I publish an article.
Also if you enjoy my work and you’d like to support what I do, you could consider buying me a coffee here.
Recommend
About Joyk
Aggregate valuable and interesting links.
Joyk means Joy of geeK