

How to Install phpMyAdmin on Ubuntu 22.04
source link: https://www.howtoforge.com/tutorial/ubuntu-apache-phpmyadmin-installation/
Go to the source link to view the article. You can view the picture content, updated content and better typesetting reading experience. If the link is broken, please click the button below to view the snapshot at that time.
How to Install phpMyAdmin on Ubuntu 22.04
phpMyAdmin is a free and open-source tool for managing and administering MySQL servers. It can be used to manage even multiple MySQL servers in different locations. phpMyAdmin is a web-based application written in PHP, and it can be run under the LAMP (Linux, Apache2, MariaDB/MySQL, PHP) or LEMP (Linux, Nginx, MariaDB/MySQL, PHP-FPM) Stack. the phpMyAdmin is a very powerful application and become a widely-used application for managing MySQL servers, it provides extensive documentation and wikis.
phpMyAdmin allows you to manage MySQL data from a web browser, you can manage databases, tables, columns, indexes, relations, users, permissions, etc from a single dashboard UI on your web browser. the phpMyAdmin also allows you to import and export data to the MySQL server. You can import CSV and SQL data to your MySQL, and also export your data to multiple formats such as CSV, SQL, XML, Latex, XML, PDF, and OpenDocument text and Spreadsheet.
In this tutorial, we will show you how to install and configure the phpMyAdmin on the latest Ubuntu 22.04 server. This tutorial also covers some additional configurations for securing the phpMyAdmin installation.
Prerequisites
- An Ubuntu 22.04 machine - you can use the Ubuntu server or desktop version.
- A non-root user with root administrator privileges.
- A LAMP Stack is installed on the machine. This example uses the basic LAMP Stack installation (Linux, Apache2, MariaDB, and PHP).
Installing phpMyAdmin
In the latest ubuntu 22.04 version, the phpMyAdmin package is available on the official Ubuntu Universe repository. So before installing the phpMyAdmin, make sure the Ubuntu universe repository is enabled on your system.
At the current status, the Ubuntu provides the phpMyAdmin v5.x, which is the latest stable version of phpMyAdmin.
Before start installing packages, run the following command to update and refresh your Ubuntu repositories.
sudo apt update
Be sure the Ubuntu APT Universe repository is enabled on your system.
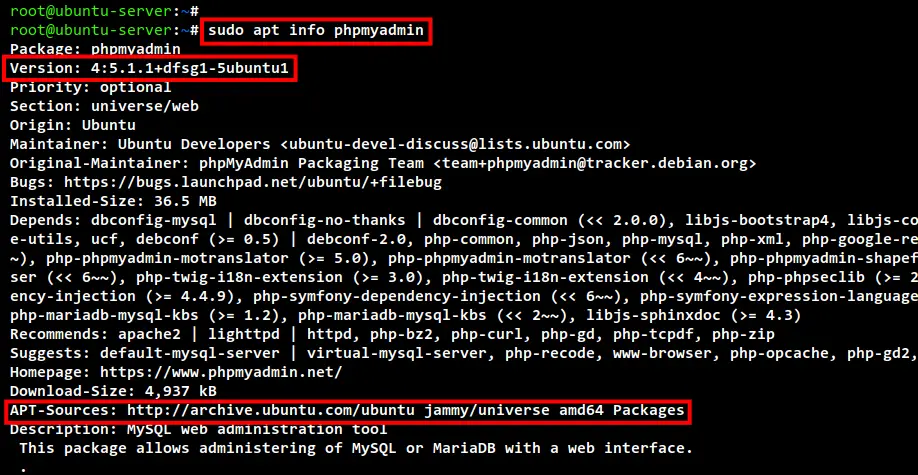
Now check the phpmyadmin package using the following command.
sudo apt info phpmyadmin
As you can see on the following screenshot, the Ubuntu APT repository provides the phpMyAdmin v5.x, and it is available on the Ubuntu Universe repository.
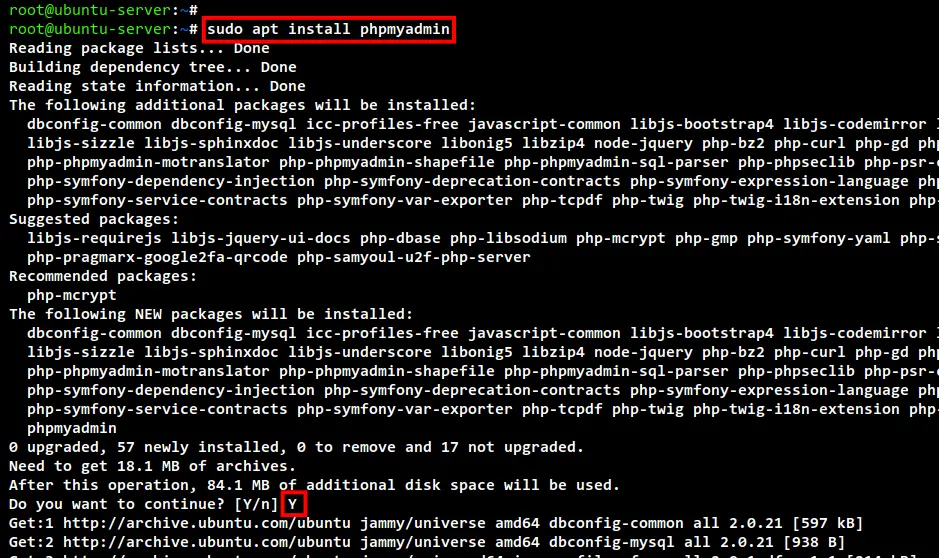
Next, you can install the phpMyAdmin package using the below command.
sudo apt install phpmyadmin
Input Y to confirm the installation and press ENTER to start. Now the phpMyAdmin installation is in process.
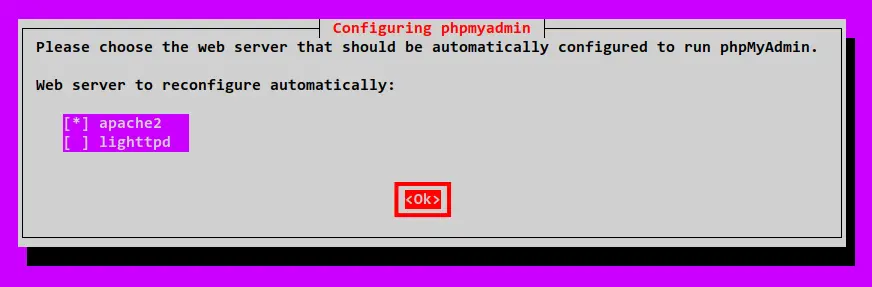
During the phpMyAdmin installation, you will be asked for the following configurations:
Choose the web server for the phpMyAdmin. In this example the web server is apache2, then select OK.
Now select Yes to start configuring the phpMyAdmin with the dbconfig-common. This will automatically all database configurations for phpMyAdmin.

For the phpMyAdmin database password, you can leave it blank or you can just input your own password and then select OK. If you leave it blank, the dbconfig-common will automatically generate the password for your phpMyAdmin.

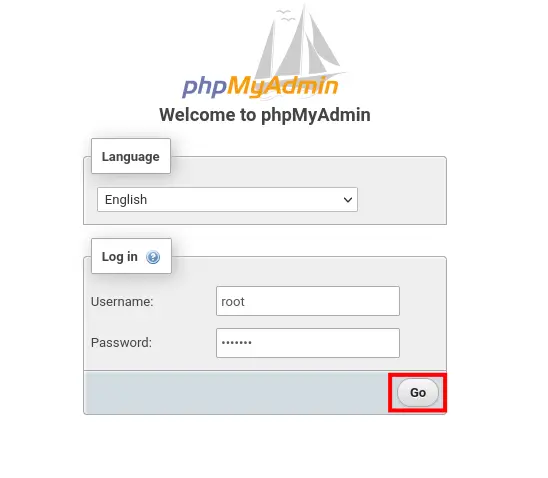
Lastly, open your web browser and visit the server IP address with URL path /phpmyadmin (e.g: http://192.168.10.15/phpmyadmin). And now you will get the login page of phpMyAdmin.
Input your MariaDB server user and password, then click Go to log in.
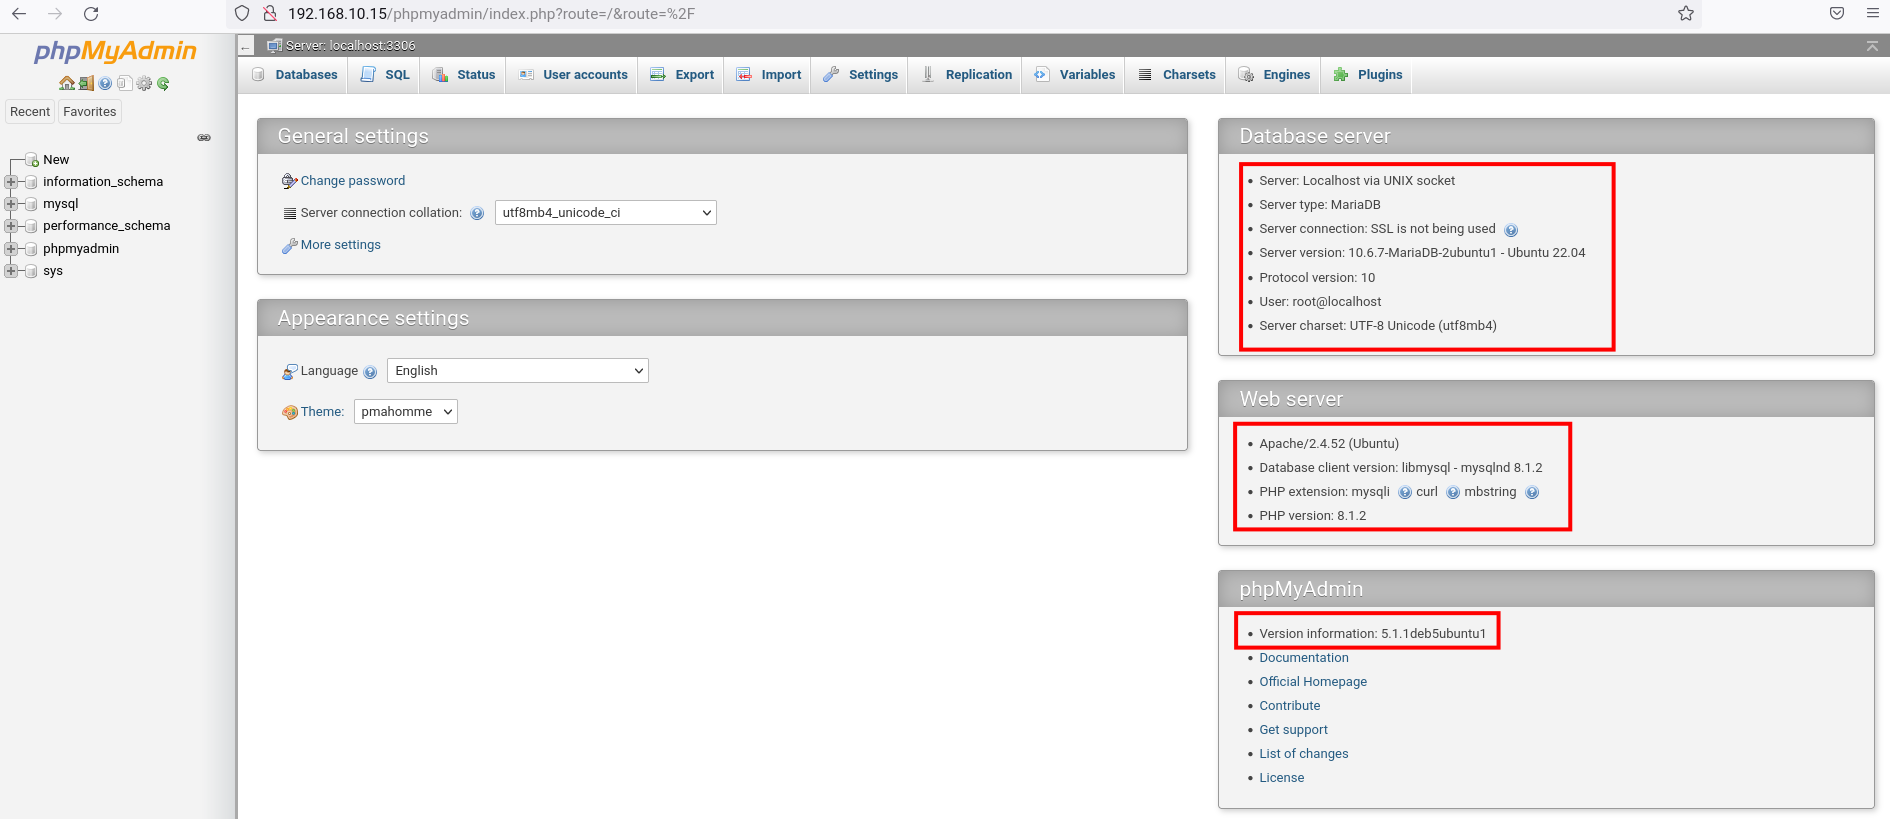
Once you have logged in, you will see the phpMyAdmin dashboard below. As you can see, the phpMyAdmin 5.x is installed on the Ubuntu 22.04 machine with Apache2, MariaDB 10.x, and PHP 8.1.
Securing phpMyAdmin Installation
After you have installed the phpMyAdmin. next, you will learn how to secure the phpMyAdmin installation.
Below you will learn three methods for securing the phpMyAdmin installation on your Ubuntu system:
- Change Path URL of the phpMyAdmin Installation: The default phpMyAdmin installation is available at the URL path /phpmyadmin, which is easy to guess for attackers. You can change the default path to your custom path URL.
- Additional Authentication using Apache2 Basic Auth: In this scenario, users will be shown the Apache2 basic authentication before showing the phpMyAdmin login page. This will add additional authentication, so only users on the Apache2 basic auth list will be shown the phpMyAdmin login page and be able to log in to the phpMyAdmin.
- Blocking phpMyAdmin Login Attempt with Fail2ban Jail: You will need the fail2ban installed and configured on your Ubuntu machine. This will ban the IP address of malicious login attempts to the phpMyAdmin. Also, you can set up the max login attempt on the Fail2ban jail.
Now, let's start to begin to secure the phpMyAdmin using three different methods.
Change Path URL of the phpMyAdmin Installation
The default phpMyAdmin installation comes with additional configuration for apache2 web server, the configuration is file /etc/phpmyadmin/apache.conf. To change the default path URL installation of phpMyAdmin, you will need to edit the configuration /etc/phpmyadmin/apache2.conf and restart the Apache2 service.
Edit the configuration file /etc/phpmyadmin/apache.conf using nano editor.
sudo nano /etc/phpmyadmin/apache.conf
Change the "Alias /phpmyadmin" option to your new path of ULR. In the below example, the phpMyAdmin will be available at the path URL /padm.
Alias /padm /usr/share/phpmyadmin
Save and close the file when you are done.
Next, check and verify the Apache2 configuration using the below command. If your configuration is correct, you will get the output message such as "Syntax OK".
sudo apchectl configtest
Now restart the Apache2 service to apply new changes on the file /etc/phpmyadmin/apache.conf.
sudo systemctl restart apache2
Back to your web browser and visit the phpMyAdmin with the new path URL /padm (e.g http://192.168.10.15/padm). You will get the phpMyAdmin dashboard in the following screenshot.
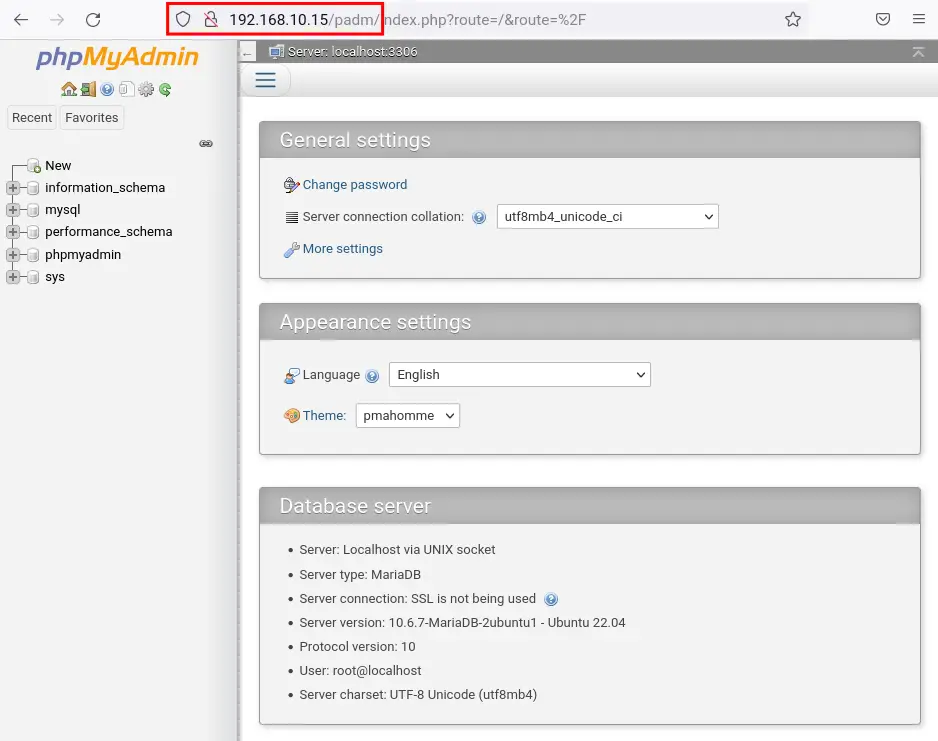
You have now successfully changed the default path URL installation of phpMyAdmin to the new path URL /padm.
Securing phpMyAdmin with Apache2 Basic Auth
The Apache2 basic auth is an authentication method provided by the Apache module mod_basic_auth. To set up the Apache2 basic auth, you will need to generate the password file and set up the .htaccess file on the phpMyAdmin document root directory.
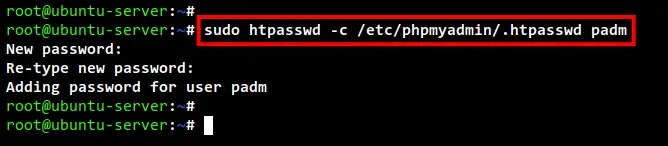
Now run the below command to generate a new Apache2 basic auth file /etc/phpmyadmin/.htpasswd with the new user named padm. If you don't have the htpasswd command, you will need to install the apache2-utils package to your system.
sudo htpasswd -c /etc/phpmyadmin/.htpasswd padm
Now input the password for the Apache2 basic auth user padm and repeat the password. This will generate a new password file /etc/phpmyadmin/.htpasswd.
Next, edit the configuration /etc/phpmyadmin/apache.conf using nano editor.
sudo nano /etc/phpmyadmin/apache.conf
Add the configuration inside the "<Directory /usr/share/phpmyadmin>" as below.
<Directory /usr/share/phpmyadmin>
...
...
AllowOverride All
Save and close the file when you are done.
Next, run the below command to enable the Apache2 module mod_rewrite.
sudo a2enmod rewrite
Create a new file /usr/share/phpmyadmin/.htaccess using nano editor.
sudo nano /usr/share/phpmyadmin/.htaccess
Add the following configuration to the file.
AuthType Basic
AuthName "Restricted Files"
AuthUserFile /etc/phpmyadmin/.htpasswd
Require valid-user
Save and close the file when you are done.
Now restart the Apache2 service to apply new changes.
sudo systemctl restart apache2
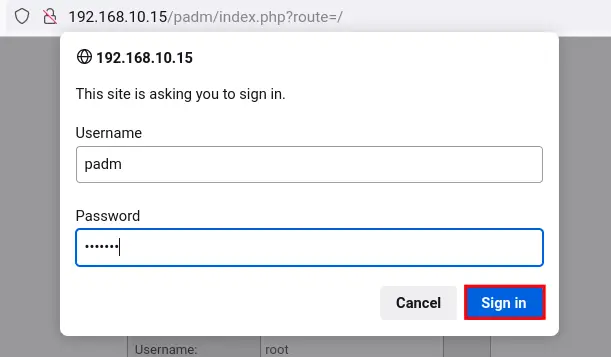
Lastly, back to your web browser and refresh the phpMyAdmin URL (e.g http://192.168.10.15/padm). Now you will be prompted to the Apache2 basic authentication.
Input the user padm with your password and click Sign in. If your user and password are matched with the configuration /etc/phpmyadmin/.htpasswd file, then you will be able to get the phpMyAdmin dashboard, otherwise, you will get the error message such as "421 Unauthorized".
Now you have secured the phpMyAdmin with Apache2 basic authentication. This method is recommended to use with SSL certificates on your Apache2 web server.
Blocking phpMyAdmin Login Attempt with Fail2ban Jail
In this scenario, you will need the Fail2ban to be installed and configured on your ubuntu machine. Using the Fail2ban jail, will limit the authentication failure against the phpMyAdmin and limit the brute-force attack. The Fail2ban will be blocking any detected malicious login attempts to the phpMyAdmin.
The Failban works by checking the log file of the application, so you will need to enable the log file for phpMyAdmin.
Edit the phpMyAdmin configuration /etc/phpmyadmin/config.inc.php using nano editor.
sudo nano /etc/phpmyadmin/config.inc.php
Add the following configuration to the end of the line. This will log all authentication of phpMyAdmin to Syslog file /var/log/auth.log.
...
...
...
$cfg['AuthLog'] = 'syslog';
Save and close the file when you are done.
Next, edit the Fail2ban jail configuration /etc/fail2ban/jail.local using nano editor.
sudo nano /etc/fail2ban/jail.local
Search the jail named "phpmyadmin-syslog" and add the option "enabled = true" to enable the jail.
[phpmyadmin-syslog]
enabled = true
port    = http,https
logpath = %(syslog_authpriv)s
backend = %(syslog_backend)s
Save and close the file when you are completed.
Now restart the Fail2ban service using the below command to apply the new jail configuration.
sudo systemctl restart fail2ban
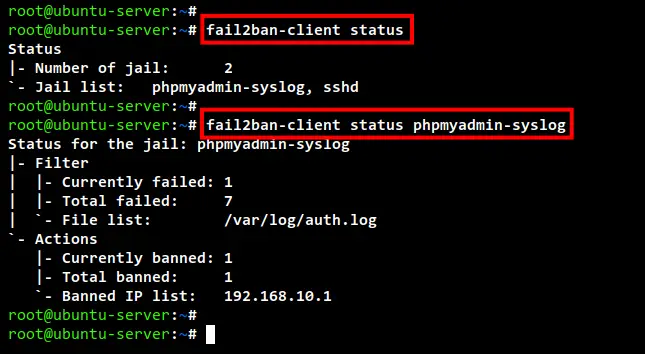
To verify the jail "phpmyadmin-syslog", run the fail2ban-client commands below.
Checking the list of enabled Fail2ban jail.
sudo fail2ban-client status
Checking details of Fail2ban jail phpmyadmin-syslog.
sudo fail2ban-client status phpmyadmin-syslog
Below you can see the detailed status of the phpmyadmin-syslog jail. In the below screenshot, you can see one IP address "192.168.10.1" is blocked by Fail2ban.
If you check the log file /var/log/auth.log using the below command.
cat /var/log/auth.log
You will see the logs from phpMyAdmin authentication below. You can see the IP address "192.168.10.1" is detected as a malicious login because of the use of the incorrect user and password.

At this point, you have secured the phpMyAdmin using multiple different methods, another consideration is by using SSL on every virtual host on your server. This makes your phpMyAdmin is more even safer because the SSL will encrypt connections between your web browser to the server.
Conclusion
Congratulation! You have now learned how to install and configure the phpMyAdmin on the latest Ubuntu 22.04. Also, you have learned multiple methods for securing the phpMyAdmin installation including changing the default path URL, adding authentication using Apache2 basic auth, and blocking malicious login attempts using Fail2ban Jail.
Recommend
About Joyk
Aggregate valuable and interesting links.
Joyk means Joy of geeK