

How to Install Jitsi Meet Video Conferencing Server on Ubuntu 22.04
source link: https://www.howtoforge.com/how-to-install-jitsi-meet-video-conferencing-server-on-ubuntu-22-04/
Go to the source link to view the article. You can view the picture content, updated content and better typesetting reading experience. If the link is broken, please click the button below to view the snapshot at that time.
How to Install Jitsi Meet Video Conferencing Server on Ubuntu 22.04
Jitsi is a free and open-source chat, telephony, and video conferencing tool. It is a very good alternative to other tools like Skype, Zoom, and Microsoft Teams. You can use Jitsi without registering or installing any software. You can access it directly via a web browser. Jitsi allows you to make free calls, chat, send files or share the screen using the SIP or XMPP protocol. If you are looking for an open-source video conferencing and calling tool then Jitsi is the best option for you.
In this post, we will show you how to install Jitsi Meet on Ubuntu 22.04 server.
Prerequisites
- A server running Ubuntu 22.04 with a minimum 4GB of RAM.
- A valid domain name pointed with your server IP.
- A root password is configured on the server.
Getting Started
Before starting, you will need to update all the software packages to the latest version. You can update them by running the following command:
apt-get update -y
Once all the packages are updated, you will also need to install some required dependencies to your server. You can install all of them by running the following command:
apt-get install wget curl gnupg2 apt-transport-https -y
Once all the packages are installed, you can proceed to the next step.
Install Jitsi Meet on Ubuntu 22.04
By default, Jitsi Meet software is not included in the Ubuntu default repository. So you will need to add its official repository to APT.
First, add the Jitsi repository to APT using the following command:
echo 'deb https://download.jitsi.org stable/' >> /etc/apt/sources.list.d/jitsi-stable.list
Next, download and add the Jitsi GPG key using the following command:
wget -qO - https://download.jitsi.org/jitsi-key.gpg.key | apt-key add -
Next, update the repository and install the Jitsi Meet using the following command:
apt-get update -y
apt-get install jitsi-meet -y
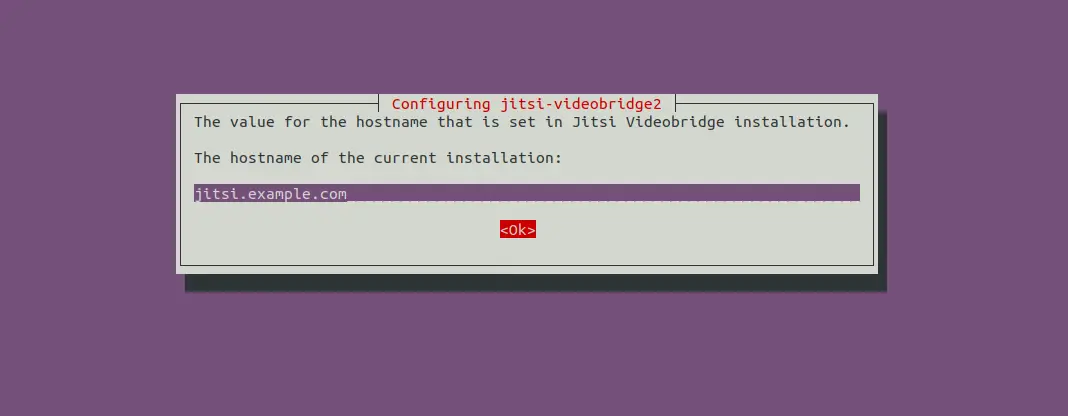
During the installation, you will be asked to provide your system fully qualified hostname as shown below:
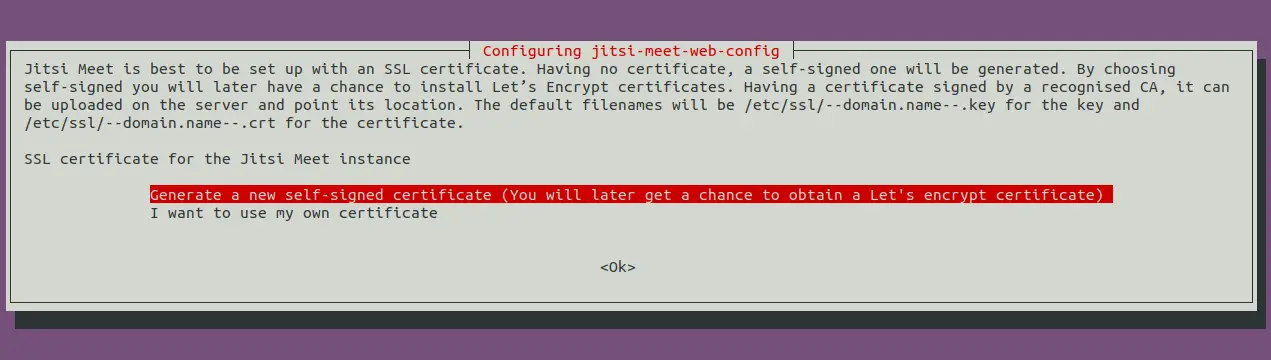
Provide your system hostname and click on the Ok button. You will be asked to install an SSL certificate:
Select "Generate a new Self-signed certificate" and press the Ok button to finish the installation.
Generate a Let’s Encrypt Certificate
For the production environment, the self-signed SSL certificate is not recommended. So you will need to install the Let's Encrypt SSL for Jitsi.
You can install the Let's Encrypt SSL with the following command:
/usr/share/jitsi-meet/scripts/install-letsencrypt-cert.sh
You will be asked to enter your email address to install the Let's Encrypt SSL:
-------------------------------------------------------------------------
This script will:
- Need a working DNS record pointing to this machine(for domain jitsi.example.com)
- Download certbot-auto from https://dl.eff.org to /usr/local/sbin
- Install additional dependencies in order to request Let’s Encrypt certificate
- If running with jetty serving web content, will stop Jitsi Videobridge
- Configure and reload nginx or apache2, whichever is used
- Configure the coturn server to use Let's Encrypt certificate and add required deploy hooks
- Add command in weekly cron job to renew certificates regularly

You need to agree to the ACME server's Subscriber Agreement (https://letsencrypt.org/documents/LE-SA-v1.1.1-August-1-2016.pdf)
by providing an email address for important account notifications
Enter your email and press [ENTER]: [email protected]

Saving debug log to /var/log/letsencrypt/letsencrypt.log
Plugins selected: Authenticator webroot, Installer None
Obtaining a new certificate
Performing the following challenges:
http-01 challenge for jitsi.example.com
Using the webroot path /usr/share/jitsi-meet for all unmatched domains.
Waiting for verification...
Cleaning up challenges
Running deploy-hook command: /etc/letsencrypt/renewal-hooks/deploy/0000-coturn-certbot-deploy.sh
Output from deploy-hook command 0000-coturn-certbot-deploy.sh:
Configuring turnserver


IMPORTANT NOTES:
- Congratulations! Your certificate and chain have been saved at:
/etc/letsencrypt/live/jitsi.example.com/fullchain.pem
Your key file has been saved at:
/etc/letsencrypt/live/jitsi.example.com/privkey.pem
Your cert will expire on 2022-09-27. To obtain a new or tweaked
version of this certificate in the future, simply run certbot
again. To non-interactively renew *all* of your certificates, run
"certbot renew"
- Your account credentials have been saved in your Certbot
configuration directory at /etc/letsencrypt. You should make a
secure backup of this folder now. This configuration directory will
also contain certificates and private keys obtained by Certbot so
making regular backups of this folder is ideal.
- If you like Certbot, please consider supporting our work by:

Donating to ISRG / Let's Encrypt: https://letsencrypt.org/donate
Donating to EFF: https://eff.org/donate-le
Configure Jitsi Meet
Next, you will need to edit the Jitsi meed configuration file and configure it to only allow registered users to create conference rooms.
nano /etc/prosody/conf.avail/jitsi.example.com.cfg.lua
Change the following lines:
authentication = "anonymous"
authentication = "internal_plain"
VirtualHost "guest.jitsi.example.com"
authentication = "anonymous"
c2s_require_encryption = false
Save and close the file then open other configuration file:
nano /etc/jitsi/meet/jitsi.example.com-config.js
Add the following line:
anonymousdomain: 'guest.jitsi.example.com',
Next, create a SIP configuration file with the following command:
nano /etc/jitsi/jicofo/sip-communicator.properties
Add the following line:
org.jitsi.jicofo.auth.URL=XMPP:jitsi.example.com
Save and close the file then create a user for Jitsi using the following command:
prosodyctl register user jitsi.example.com password
Restarting Jitsi Service
Next, you will need to restart all Jitsi services to apply the configuration changes. You can do it with the following command:
systemctl restart prosody.service jicofo.service jitsi-videobridge2.service
Now, check the status of the Prosody service using the following command:
systemctl status prosody.service
You should see the following output:
? prosody.service - Prosody XMPP Server
     Loaded: loaded (/lib/systemd/system/prosody.service; enabled; vendor preset: enabled)
     Active: active (running) since Sat 2022-06-25 16:15:58 UTC; 5s ago
       Docs: https://prosody.im/doc
   Main PID: 62561 (lua5.2)
      Tasks: 1 (limit: 4579)
     Memory: 9.3M
        CPU: 475ms
     CGroup: /system.slice/prosody.service
             ??62561 lua5.2 /usr/bin/prosody -F

Jun 25 16:15:58 ubuntu2204 systemd[1]: Started Prosody XMPP Server.
To check the status of the Jicofo service, run the following command:
systemctl status jicofo.service
You should see the following output:
? jicofo.service - LSB: Jitsi conference Focus
     Loaded: loaded (/etc/init.d/jicofo; generated)
     Active: active (running) since Sat 2022-06-25 16:15:58 UTC; 22s ago
       Docs: man:systemd-sysv-generator(8)
    Process: 62534 ExecStart=/etc/init.d/jicofo start (code=exited, status=0/SUCCESS)
      Tasks: 35 (limit: 4579)
     Memory: 177.4M
        CPU: 8.700s
     CGroup: /system.slice/jicofo.service
             ??62540 java -Xmx3072m -XX:+HeapDumpOnOutOfMemoryError -XX:HeapDumpPath=/tmp -Djdk.tls.ephemeralDHKeySize=2048 -Dconfig.file=/et>

Jun 25 16:15:58 ubuntu2204 systemd[1]: Starting LSB: Jitsi conference Focus...
Jun 25 16:15:58 ubuntu2204 jicofo[62534]: Starting jicofo: jicofo started.
Jun 25 16:15:58 ubuntu2204 systemd[1]: Started LSB: Jitsi conference Focus.
To check the Jitsi videobridge2 service, run the following command:
systemctl status jitsi-videobridge2.service
You should see the following output:
? jitsi-videobridge2.service - Jitsi Videobridge
     Loaded: loaded (/lib/systemd/system/jitsi-videobridge2.service; enabled; vendor preset: enabled)
     Active: active (running) since Sat 2022-06-25 16:15:58 UTC; 35s ago
    Process: 62564 ExecStartPost=/bin/bash -c echo $MAINPID > /var/run/jitsi-videobridge/jitsi-videobridge.pid (code=exited, status=0/SUCCESS)
   Main PID: 62563 (java)
      Tasks: 48 (limit: 65000)
     Memory: 171.4M
        CPU: 9.877s
     CGroup: /system.slice/jitsi-videobridge2.service
             ??62563 java -Xmx3072m -XX:+UseG1GC -XX:+HeapDumpOnOutOfMemoryError -XX:HeapDumpPath=/tmp -Djdk.tls.ephemeralDHKeySize=2048 -Dco>

Jun 25 16:15:58 ubuntu2204 systemd[1]: Starting Jitsi Videobridge...
Jun 25 16:15:58 ubuntu2204 systemd[1]: Started Jitsi Videobridge.
Configure UFW Firewall
Next, you will need to allow all Jitsi ports through the firewall so you can access it from the remote machine. You can allow them via UFW as shown below:
ufw allow 80/tcp
ufw allow 443/tcp
ufw allow 4443/tcp
ufw allow 10000/udp
ufw allow 22/tcp
ufw enable
You can also check the firewall rules using the following command:
ufw status
Once your UFW firewall is configured, you can proceed to the next step.
Access Jitsi Meet
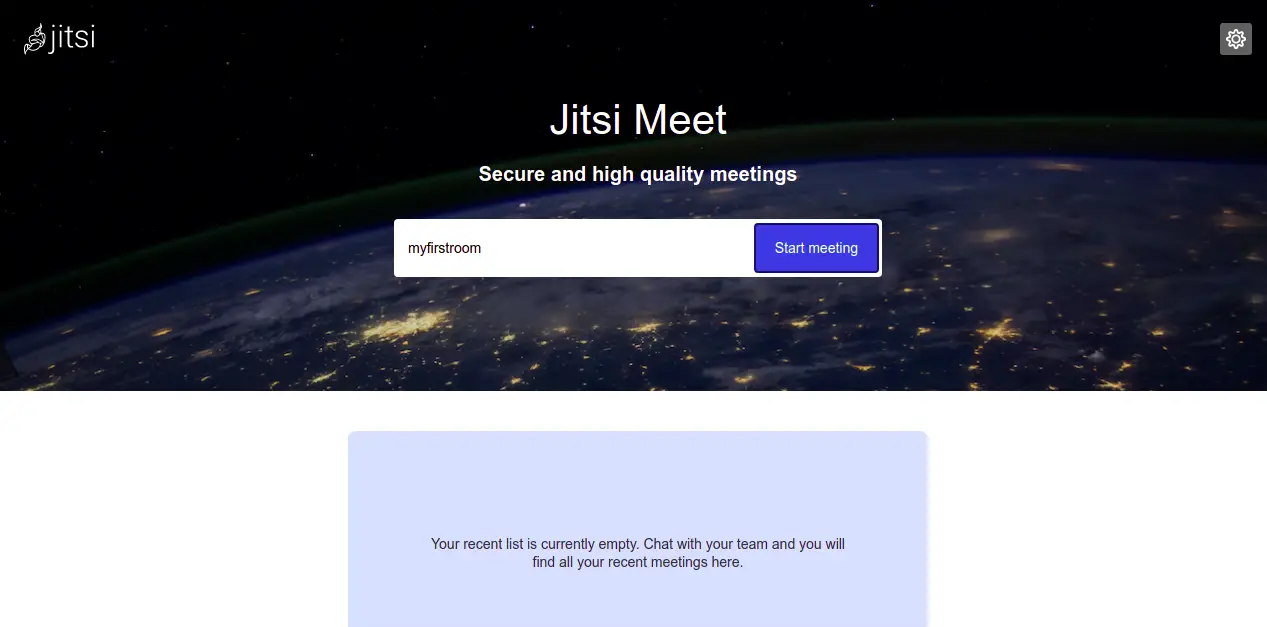
At this point, Jitsi Meet is installed and configured on your Ubuntu 22.04 server. You can now access its web interface using the URL https://jitsi.example.com. You should see the Jitsi Meet room creation page:
You can now provide your room name and start using Jitsi.
Conclusion
Congratulations! you have successfully installed Jitsi Meet with Let's Encrypt SSL on Ubuntu 22.04 server. You can now access Jitsi via a web browser or mobile application and start calling with other users. Feel free to ask me if you have any questions.
About Hitesh Jethva
Over 8 years of experience as a Linux system administrator. My skills include a depth knowledge of Redhat/Centos, Ubuntu Nginx and Apache, Mysql, Subversion, Linux, Ubuntu, web hosting, web server, Squid proxy, NFS, FTP, DNS, Samba, LDAP, OpenVPN, Haproxy, Amazon web services, WHMCS, OpenStack Cloud, Postfix Mail Server, Security etc.
Recommend
About Joyk
Aggregate valuable and interesting links.
Joyk means Joy of geeK