

How to Install Laravel PHP Framework with Apache 2 on Ubuntu 22.04
source link: https://www.howtoforge.com/tutorial/install-laravel-on-ubuntu-for-apache/
Go to the source link to view the article. You can view the picture content, updated content and better typesetting reading experience. If the link is broken, please click the button below to view the snapshot at that time.
How to Install Laravel PHP Web Framework on Ubuntu 20.04
Laravel is a widely used open-source PHP framework for web application development. The MVC (Model-View-Controller) architectural pattern is implemented in Laravel. Laravel project was started by Taylor Otwell in 2011 as a sophisticated alternative to the CodeIgniter (CI) framework.
Versions 1 and 2 of Laravel were published in 2011. Versioning scheme, support policy, Blade Component Tags & Improvements, Fluent String Operations, Route Model Binding Improvements, and other improvements have been added to the current version 8.x.
On Ubuntu 20.04 Server, this article will teach you how to install the newest Laravel version 8.x using the Apache webserver. We'll teach you how to install the Laravel web framework on Linux in two distinct methods.
Prerequisites
- Ubuntu 20.04 System
- 2 GB or more RAM
- Root privileges
- Understanding the Basic Usage of Debian/Ubuntu System
What will we do?
- Install Apache Web Server
- Install and Configure PHP 7.4
- Install Composer PHP Packages Management
- Install Laravel Web Framework
- Set Up Apache Virtual Host for Laravel Project
- Testing
Step 1 - Install Apache Web Server
First, we will install the Apache webserver on the Ubuntu 20.04 system and set up the UFW firewall that only allows incoming connections for some services, including the SSH, HTTP, and HTTPS.
Update all available repositories on your system and install the Apache webserver using the apt command below.
sudo apt update
sudo apt install apache2
Once all installation is completed, start the Apache service and add it to the system boot.
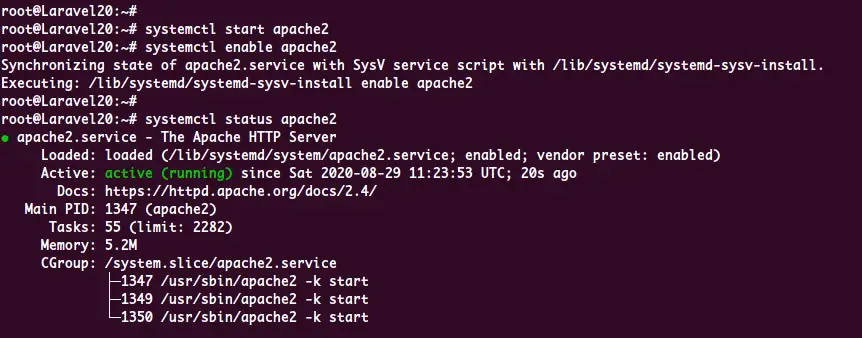
systemctl start apache2
systemctl enable apache2
Now check the Apache service status using the following command.
systemctl status apache2
Below is the result you will get.
As a result, the Apache service is up and running.
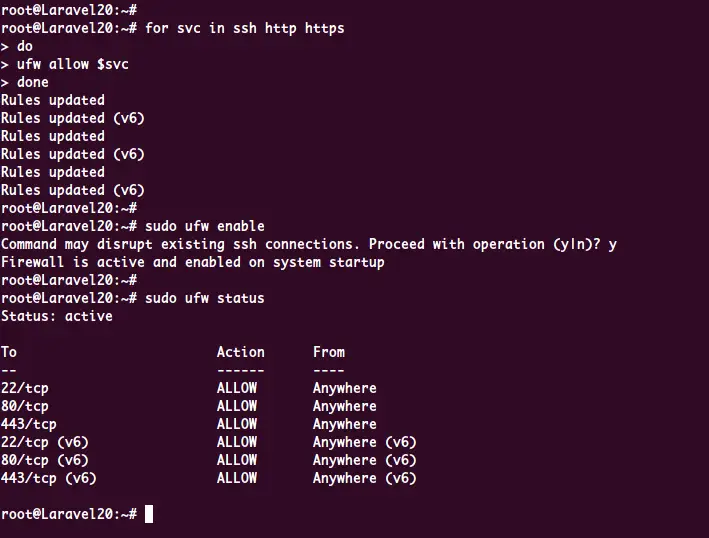
Next, add the SSH, HTTP, and HTTPS services to the UFW firewall using the following command.
for svc in ssh http https
do
ufw allow $svc
done
Now enable the UFW firewall services.
sudo ufw enable
Type 'y' to continue, and the UFW firewall has been enabled.
Next, open your web browser and type your server IP address on the address bar.
http://10.5.5.25/
And you will get the default Apache index.html page.
Advertisement
As a result, the Apache web server's installation and the UFW firewall configuration have been completed.
Step 2 - Install and Configure PHP 7.4
In this step, we will install and configure PHP 7.4 for our Laravel installation. To install the Laravel 8.x, at least you must have the PHP >= 7.2.5 on your system. And by default, the official Ubuntu 20.04 repository provides PHP 7.4 packages.
Install PHP 7.4 packages using the apt command below.
sudo apt install libapache2-mod-php php php-common php-xml php-gd php-opcache php-mbstring php-tokenizer php-json php-bcmath php-zip unzip
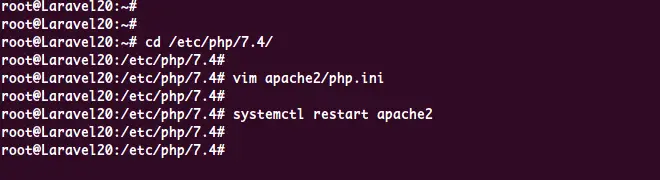
Once all installation is completed, go to the '/etc/php/7.4/' directory and edit the 'php.ini' configuration for the Apache2 web server.
cd /etc/php/7.4/
vim apache2/php.ini
Uncomment the 'cgi.fix_pathinfo' option and change the value to '0'.
cgi.fix_pathinfo=0
Save and close.
Next, restart the Apache service to apply the new 'php.ini' configuration.
systemctl restart apache2
As a result, the basic configuration of PHP 7.4 has been completed successfully.
Step 3 - Install Composer PHP Packages Management
Composer is a dependency manager for PHP. It's an application-level package manager for PHP that allows you to download additional PHP dependencies and libraries to your PHP project.
In this tutorial, we will be using the Composer for installing Laravel, and we will install the Composer by downloading the composer binary file from the official composer website.
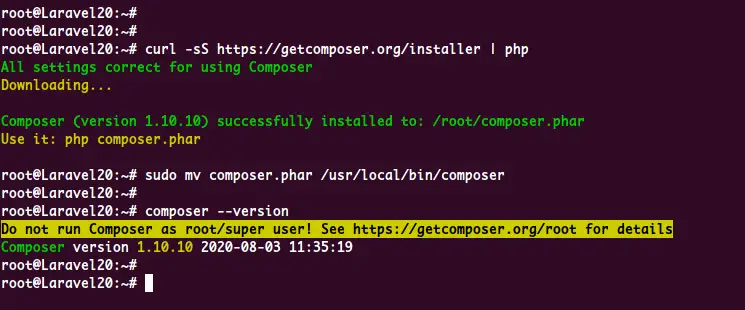
Download the binary file of the Composer and move the file to the '/usr/local/bin' directory.
curl -sS https://getcomposer.org/installer | php
sudo mv composer.phar /usr/local/bin/composer
After that, check the composer version using the following command.
composer --version
Below is the result you will get.
As can be seen, the Composer PHP Packages Management has been installed in the Ubuntu System.
Step 4 - Install Laravel 8.x on Ubuntu 20.04
For this step, we will show you two different ways of installing the Laravel web framework. We will install Laravel via the Laravel Installer and install it through the Composer.
- Install Laravel Via Laravel Installer
This type of installation is most suitable for Laravel Developer. Because when you're using the Laravel Installer, you can install Laravel everywhere with a non-root user.
This section will install the Laravel web framework with the non-root user named 'hakase'.
You can add the user and set up its password using the following command.
useradd -m -s /bin/bash hakase
passwd hakase
After that, log in to the 'hakase' user.
su - hakase
Next, install the Laravel Installer package using the composer command below.
composer global require laravel/installer
Once all installation is completed, you will get the following result.
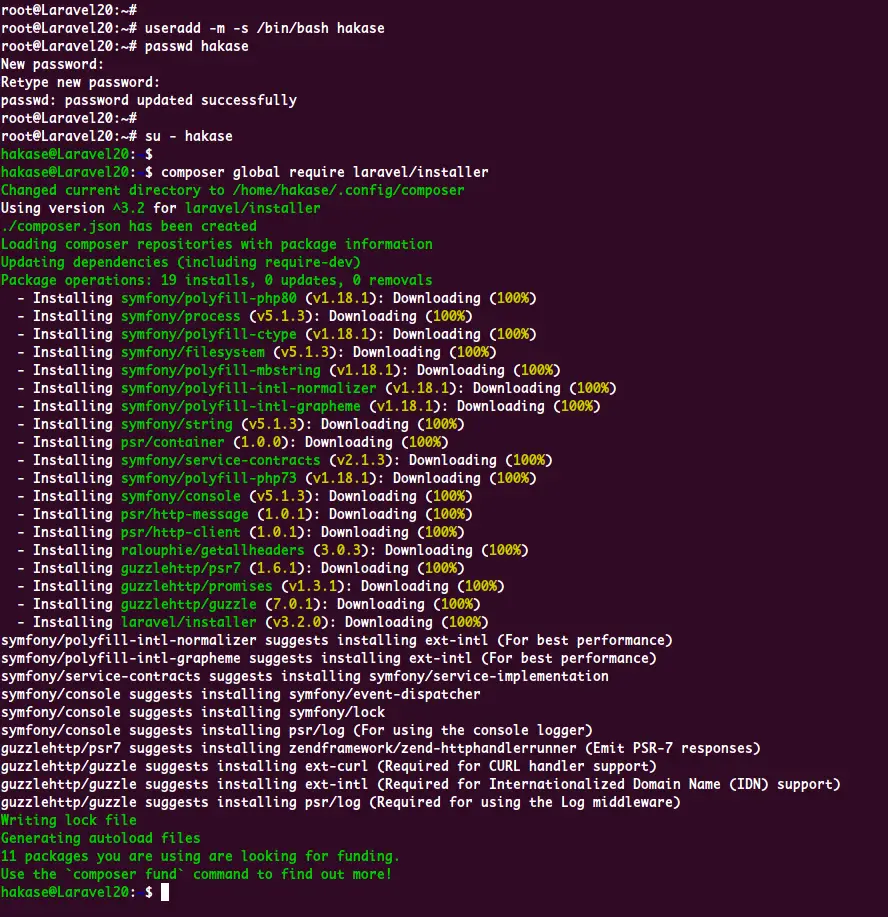
As can be seen, all packages have been installed on the '~/.config/composer' directory.
Next, we need to add the 'bin' directory to the PATH environment through the ~/.bashrc configuration.
Edit the ~/.bashrc configuration using vim editor.
vim ~/.bashrc
Paste the following configuration to the end of the line.
export PATH="$HOME/.config/composer/vendor/bin:$PATH"
Save and close.
Now load the new version of ~/.bashrc configuration and check the $PATH environment variable.
source ~/.bashrc
echo $PATH
Below is the result you will get.
The 'bin' directory for the composer packages has been added to the $PATH environment variable. And as a result, you can use the command 'laravel' to start and create a new project.
As a result, now you can use the command 'laravel' for creating a new project.
To create a new Laravel project named 'blog', run the laravel command below.
laravel new blog
Now you will get the 'blog' Laravel project directory.
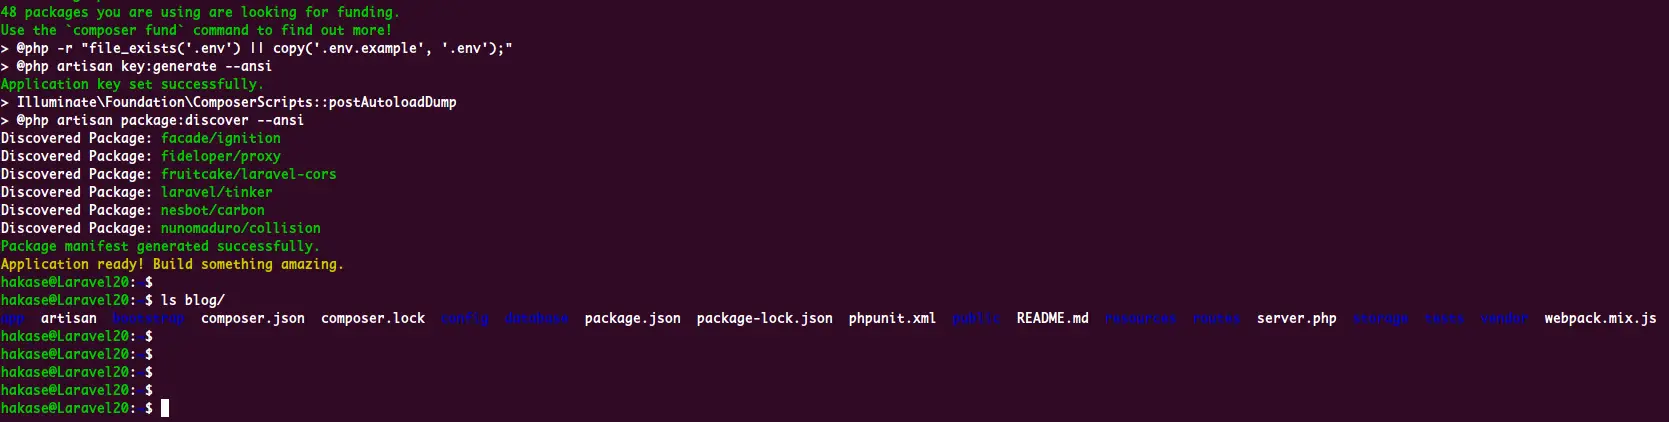
To make it accessible for the Apache webserver to access your Laravel project directory, change the project directory's group owner to the group 'www-data' and make the 'storage' directory writable.
sudo chgrp -R www-data /home/hakase/blog
sudo chmod -R 775 /home/hakase/blog/storage
As a result, the Laravel is installed using the Laravel installer, and you're ready to configure the Apache virtual host for your Laravel project.
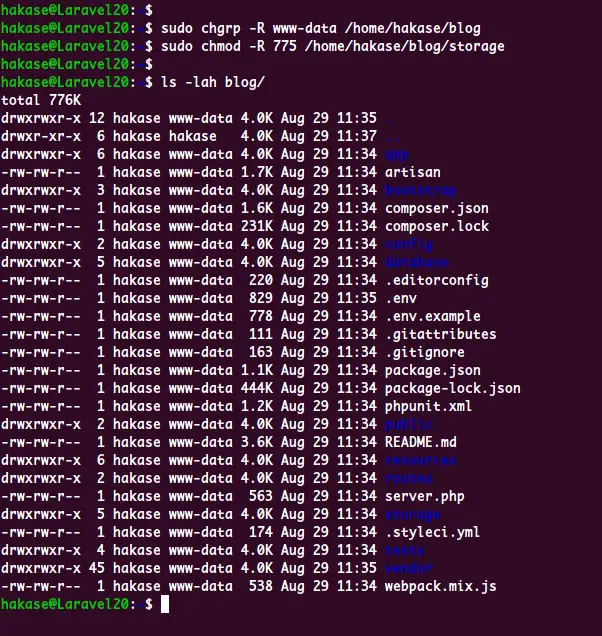
- Install Laravel Via Composer create-project
Another way to install the Laravel web framework is by using the Composer PHP Packages management.
Go to the '/var/www/' directory and create a new Laravel project named 'blog' using the 'composer' command below.
cd /var/www/
composer create-project --prefer-dist laravel/laravel blog
Now you will get the new project directory named 'blog'.
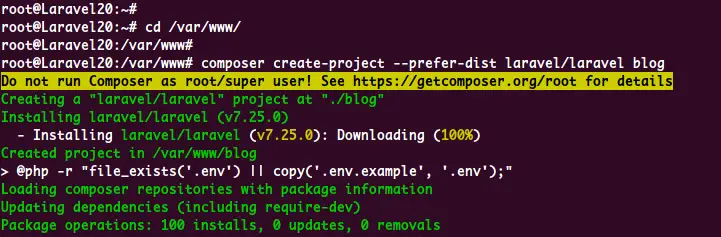
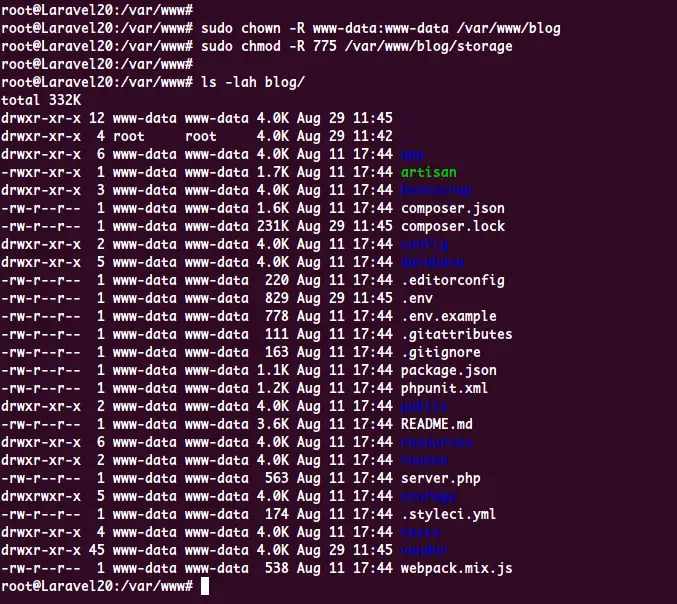
Next, change the ownership of the 'blog' project directory to the user 'www-data' and make the 'storage' directory writable.
sudo chown -R www-data:www-data /var/www/blog
sudo chmod -R 775 /var/www/blog/storage
As a result, you've installed the Laravel web framework using the Composer command.
Step 5 - Setup Apache for Laravel Project
In this step, we will set up the Apache virtual host for the Laravel project.
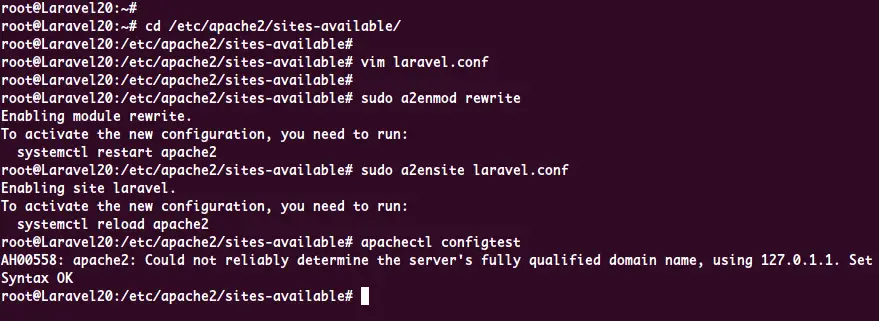
Now go to the '/etc/apache/sites-available' directory and create a new virtual host configuration 'laravel.conf' using vim editor.
cd /etc/apache2/sites-available/
vim laravel.conf
Change the domain name and the webroot directory with your own and paste the configuration into it.
<VirtualHost *:80>
    ServerName hakase-labs.io

ServerAdmin [email protected]
    DocumentRoot /home/hakase/blog/public

<Directory /home/hakase/blog>
    Options Indexes MultiViews
    AllowOverride None
    Require all granted
    </Directory>

ErrorLog ${APACHE_LOG_DIR}/error.log
    CustomLog ${APACHE_LOG_DIR}/access.log combined
</VirtualHost>
Save and close.
Next, activate the Apache rewrite module and Laravel virtual host configuration using the following command.
sudo a2enmod rewrite
sudo a2ensite laravel.conf
After that, test the Apache configuration, ensure there is no error, and restart the Apache service.
apachectl configtest
systemctl restart apache2
As a result, the Apache virtual host configuration for Laravel has been completed.
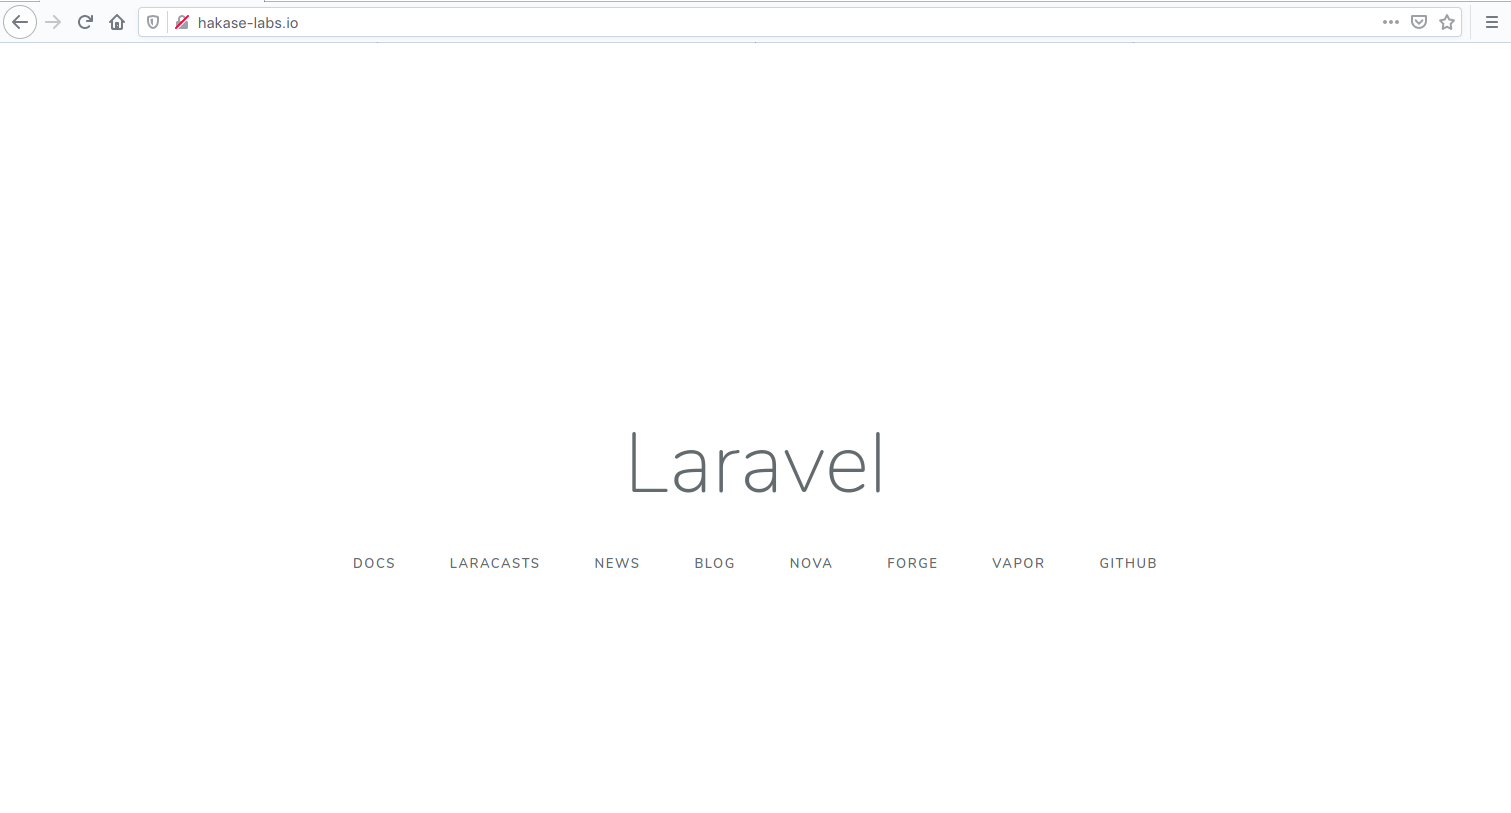
Step 6 - Testing
Open your web browser and type your server IP address or domain name on the address bar.
Below is the result you will get.
As a result, the installation and configuration of Laravel with Apache web server has been completed successfully.
Reference
Recommend
About Joyk
Aggregate valuable and interesting links.
Joyk means Joy of geeK