

如何在 React 解决竞态条件
source link: https://mebtte.com/how_to_resolve_race_condition_in_react
Go to the source link to view the article. You can view the picture content, updated content and better typesetting reading experience. If the link is broken, please click the button below to view the snapshot at that time.
如何在 React 解决竞态条件
2022-06-19
最近看了一篇文章「解决前端常见问题:竞态条件」(PDF), 解释了什么是竞态条件以及如何解决这个问题, 不过觉得例子不是很完美, 所以用自己的例子复述一遍.
blog
在上面这个博客中, 通过点击标题跳转到文章内容, 而文章内容需要发送网络请求才能拿到, 因为网络环境复杂, 所以请求成功与否与耗时都无法预估, 为了简化, 假设请求都会成功, 且获取「浏览器内存」内容需要 3s, 其他都是 1s.
大多数情况下上面的博客都没有问题. 如果点击「浏览器内存」后快速点击「monorepo 简介」, 就会发现展示「monorepo 简介」后变成了展示「浏览器内存」:


路由是文章 2, 展示的内容是文章 1
如上图所示, 路径和 ID 都是 monorepo, 展示的却是「浏览器内存」的内容. 如果我们把请求的时间线画出来可以很容易的发现问题:
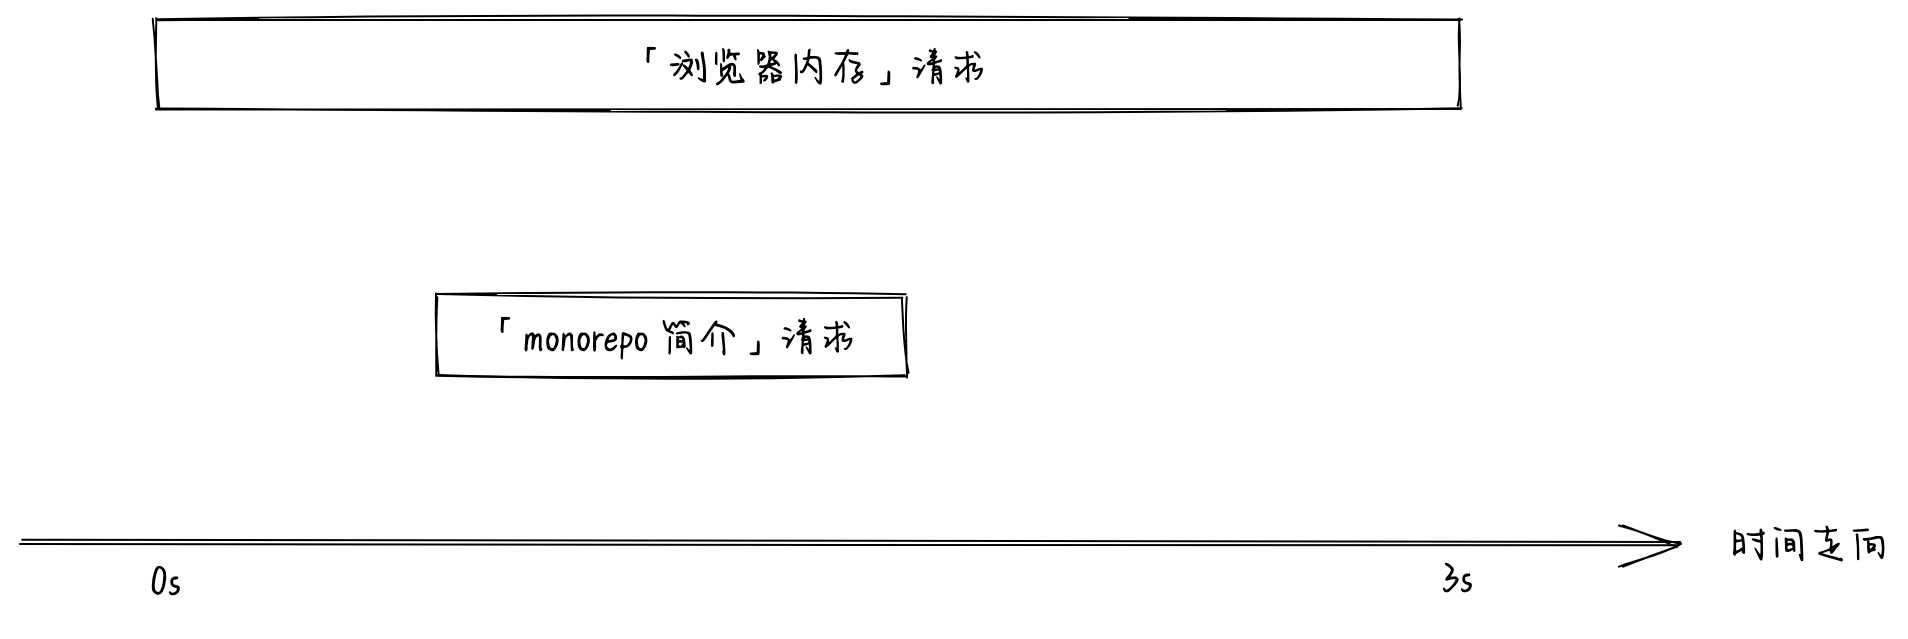
两次请求的时间线
因为在切换到「monerepo 简介」后, 「浏览器内存」请求没有被取消, 所以当请求响应时会把当前内容替换掉. 这就是前端的竞态条件问题.
在 React 中解决这个问题通常有以下几个方法:
我们知道在 React 中渲染列表每个列表项指定 key 值可以优化性能以及避免一些 bug, 其实 key 除了用在列表项外也可以用于普通节点, 节点添加 key props 后, key 值发生变化 React 会卸载旧的节点然后生成新的节点. 上面例子中导致问题的是两次请求的 setArticleContent 是同一个 state, 如果把 articleId 作为 ArticleContent 的 key, 那么每次请求的 setArticleContent 都是不同的 state, 就不会产生竞态条件问题.
function ArticleContentWrapper() {
  const { articleId } = useParams<{ articleId: string }>();
  return (
    <ArticleContent key={articleId} articleId={articleId!} />
  );
}
blog_with_key
setArticleContent 之前进行判断
如果能在请求响应后判断请求是否已经过时, 如果过时的话则跳过 setArticleContent. 一种可行的方法是通过 useRef:
const reqIdRef = useRef(0); // 永远指向最新的 reqId
const getArticleContent = useCallback(async () => {
  /** 每次请求都会生成一个 reqId */
  const reqId = Math.random();
  reqIdRef.current = reqId;

  setArticleContent({
    error: null,
    loading: true,
    content: null,
  });
  try {
    const content = await requestArticleContent(articleId);

    /** 如果 reqId 是最新的则更新 */
    if (reqIdRef.current === reqId) {
      setArticleContent({
        error: null,
        loading: false,
        content,
      });
    }
  } catch (error) {
    /** 如果 reqId 是最新的则更新 */
    if (reqIdRef.current === reqId) {
      setArticleContent({
        error: error as Error,
        loading: false,
        content: null,
      });
    }
  }
}, [articleId]);
blog_request_with_ref
每次发起请求都会生成一个 reqId, 然后赋值给外面的 reqIdRef, 这样 reqIdRef 永远指向最新的 reqId, 所以每当有新的请求发起, 旧的请求永远都符合 reqId !== reqIdRef.current 所以会跳过 setArticleContent.
通过 AbortController 取消请求
上面都是通过 hack 方式解决竞态条件问题的, 真正的解决方案应该是切换文章取消之前未完成的请求. 取消请求的话我们可以使用 AbortController:
const abortControllerRef = useRef(new window.AbortController());
const getArticleContent = useCallback(async () => {
  /** 发起新的请求之前取消上一次的请求 */
  abortControllerRef.current.abort();

  setArticleContent({
    error: null,
    loading: true,
    content: null,
  });
  try {
    const content = await window.fetch(
      `https://example.com/api/article?id=${articleId}`,
      {
        /** 将 AbortController 注入 fetch */
        signal: abortControllerRef.current.signal,
      },
    );

    setArticleContent({
      error: null,
      loading: false,
      content,
    });
  } catch (error) {
    setArticleContent({
      error: error as Error,
      loading: false,
      content: null,
    });
  }
}, [articleId]);
AbortController 同样支持 axios 之类的请求库.
进一步阅读
Recommend
About Joyk
Aggregate valuable and interesting links.
Joyk means Joy of geeK