

Three.js 之 11 Haunted House 恐怖鬼屋
source link: https://gaohaoyang.github.io/2022/06/19/three-haunted-house/
Go to the source link to view the article. You can view the picture content, updated content and better typesetting reading experience. If the link is broken, please click the button below to view the snapshot at that time.
Three.js 之 11 Haunted House 恐怖鬼屋
本系列为 Three.js journey 教程学习笔记。
本节将使用我们之前学习的内容来创建一个鬼屋。我们会创建一个房子,有门、屋顶、和一些灌木,我们也会创建一些墓碑,还有幽灵的光飘过并产生投影。
开始之前先约定一下关于长度单位的问题。
根据不同场景,我们可以认为1代表的长度不同,例如创建比较宏大的场景如陆地地图可以认为1代表1km,创建房屋可以认为1代表1m,创建小场景可以认为1代表1cm。接下来就开始吧
地面和墙壁
使用群组的方式来添加房屋,为了后续方便整体调整房屋大小
// house
const house = new THREE.Group()
scene.add(house)
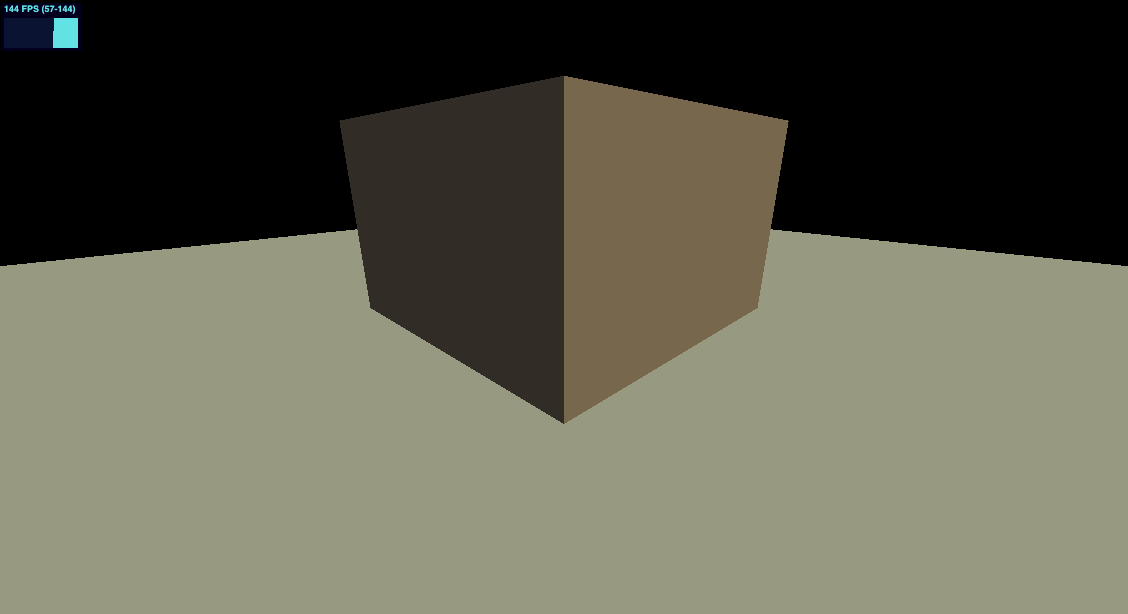
// walls
const walls = new THREE.Mesh(
new THREE.BoxGeometry(4, 2.5, 4),
new THREE.MeshStandardMaterial({ color: '#ac8e82' })
)
walls.position.y = 1.25
house.add(walls)
再调整一下地面大小、光的位置和相机位置,效果和完整代码如下
import * as THREE from 'three'
import './style.css'
import { OrbitControls } from 'three/examples/jsm/controls/OrbitControls'
import stats from '../common/stats'
import { listenResize } from '../common/utils'

// Canvas
const canvas = document.querySelector('#mainCanvas') as HTMLCanvasElement

// Scene
const scene = new THREE.Scene()

/**
 * Objects
 */
// Material
const material = new THREE.MeshStandardMaterial()
material.metalness = 0
material.roughness = 0.4

// Objects
const plane = new THREE.Mesh(new THREE.PlaneGeometry(20, 20), material)
plane.rotation.set(-Math.PI / 2, 0, 0)
plane.position.set(0, 0, 0)

scene.add(plane)

// house
const house = new THREE.Group()
scene.add(house)

// walls
const walls = new THREE.Mesh(
  new THREE.BoxGeometry(4, 2.5, 4),
  new THREE.MeshStandardMaterial({ color: '#ac8e82' })
)
walls.position.y = 1.25
house.add(walls)

/**
 * Lights
 */
const ambientLight = new THREE.AmbientLight('#ffffff', 0.3)
scene.add(ambientLight)

const directionalLight = new THREE.DirectionalLight('#ffffaa', 0.5)
directionalLight.position.set(1, 0.75, 0)
scene.add(directionalLight)

// Size
const sizes = {
  width: window.innerWidth,
  height: window.innerHeight,
}

// Camera
const camera = new THREE.PerspectiveCamera(75, sizes.width / sizes.height, 0.1, 100)
camera.position.set(4, 2, 4)

const controls = new OrbitControls(camera, canvas)
controls.enableDamping = true

// Renderer
const renderer = new THREE.WebGLRenderer({
  canvas,
})
renderer.setSize(sizes.width, sizes.height)
renderer.setPixelRatio(Math.min(window.devicePixelRatio, 2))

listenResize(sizes, camera, renderer)

// Animations
const tick = () => {
  stats.begin()

  controls.update()

  // Render
  renderer.render(scene, camera)
  stats.end()
  requestAnimationFrame(tick)
}

tick()
我们使用 ConeGeometry 来做屋顶
// roof
const roof = new THREE.Mesh(
  new THREE.ConeGeometry(3.25, 1, 4),
  new THREE.MeshStandardMaterial({ color: '#b35f45' })
)
roof.rotation.y = Math.PI / 4
roof.position.y = 2.5 + 0.5
house.add(roof)
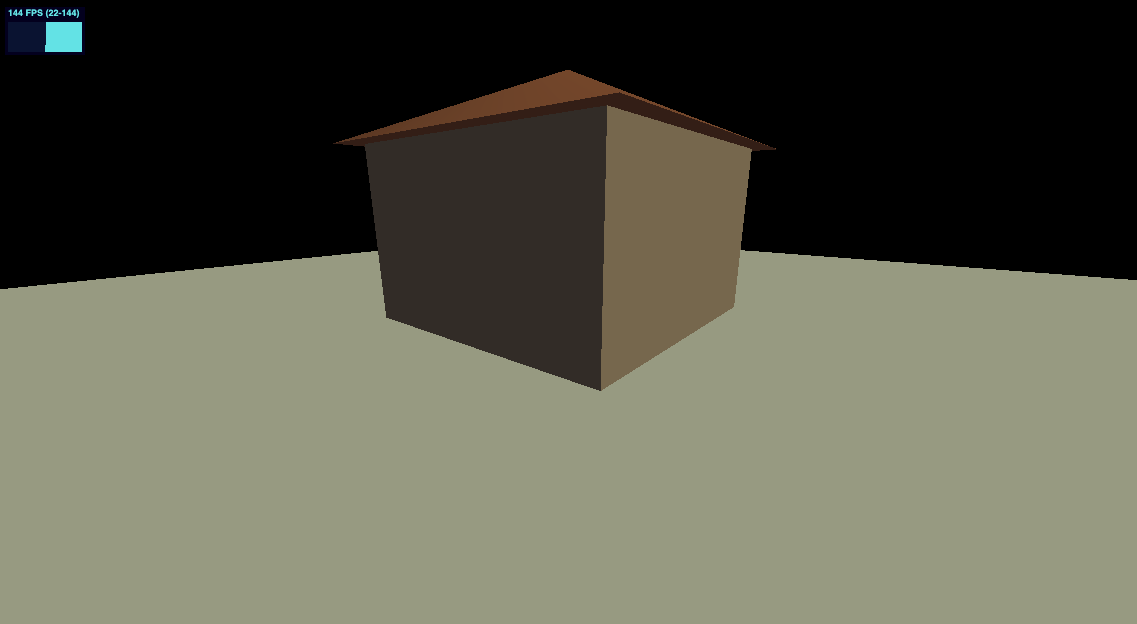
// door
const door = new THREE.Mesh(
  new THREE.PlaneGeometry(2, 2),
  new THREE.MeshStandardMaterial({
    color: '#FFE082',
  }),
)
door.position.y = 1
door.position.z = 2 + 0.001
house.add(door)
可以看到 z 轴我们增加了一点点位移,这是因为如果相同的两个平面,WebGL 可能会产生一个 z-fighting 的 bug,导致闪动。
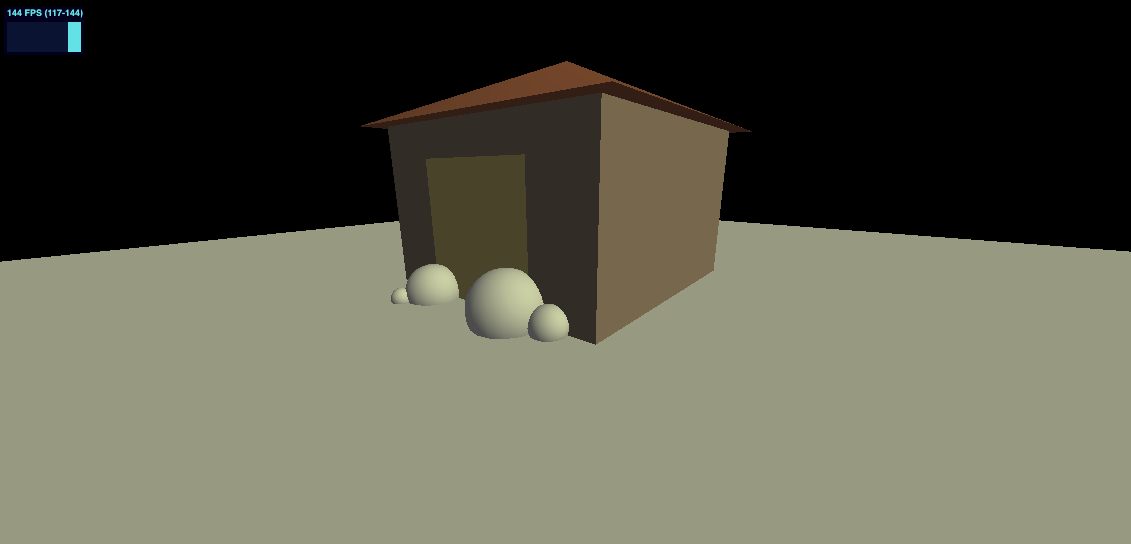
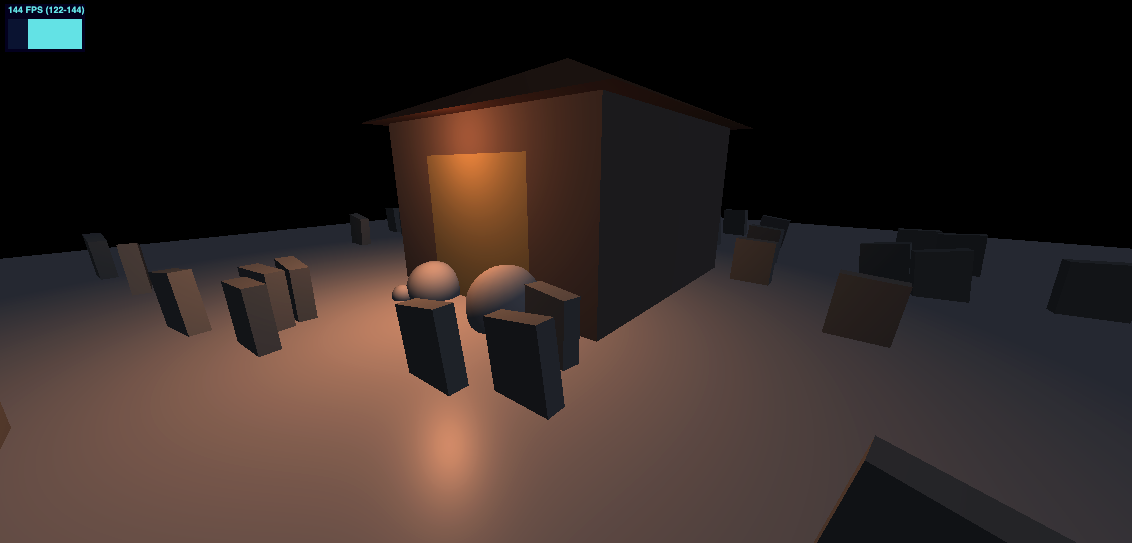
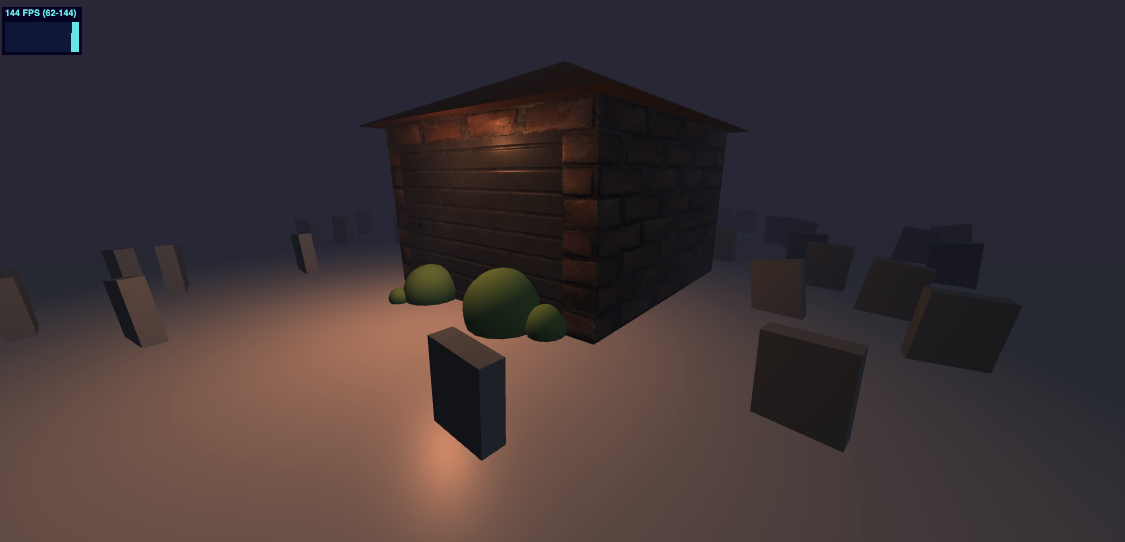
接下来在添加一些灌木丛,我们将使用球体,复用几何体和材质,只做放大和位移
// Bushes
const bushGeometry = new THREE.SphereGeometry(1, 16, 16)
const bushMaterial = new THREE.MeshStandardMaterial({ color: '#89c854' })
const bush1 = new THREE.Mesh(bushGeometry, bushMaterial)
bush1.scale.set(0.5, 0.5, 0.5)
bush1.position.set(0.8, 0.2, 2.2)

const bush2 = new THREE.Mesh(bushGeometry, bushMaterial)
bush2.scale.set(0.25, 0.25, 0.25)
bush2.position.set(1.4, 0.1, 2.1)

const bush3 = new THREE.Mesh(bushGeometry, bushMaterial)
bush3.scale.set(0.4, 0.4, 0.4)
bush3.position.set(-0.8, 0.1, 2.2)

const bush4 = new THREE.Mesh(bushGeometry, bushMaterial)
bush4.scale.set(0.15, 0.15, 0.15)
bush4.position.set(-1, 0.05, 2.6)

house.add(bush1, bush2, bush3, bush4)
我们使用代码实现墓碑的随机摆放
// graves
const graves = new THREE.Group()
scene.add(graves)

const graveGeometry = new THREE.BoxGeometry(0.6, 0.8, 0.2)
const graveMaterial = new THREE.MeshStandardMaterial({
  color: '#b2b6b1',
})

for (let i = 0; i < 50; i += 1) {
  const grave = new THREE.Mesh(graveGeometry, graveMaterial)
  const angle = Math.random() * Math.PI * 2
  const radius = 3 + Math.random() * 6
  const x = Math.cos(angle) * radius
  const z = Math.sin(angle) * radius
  grave.position.set(x, 0.3, z)
  grave.rotation.z = (Math.random() - 0.5) * 0.4
  grave.rotation.y = (Math.random() - 0.5) * 0.4
  graves.add(grave)
}
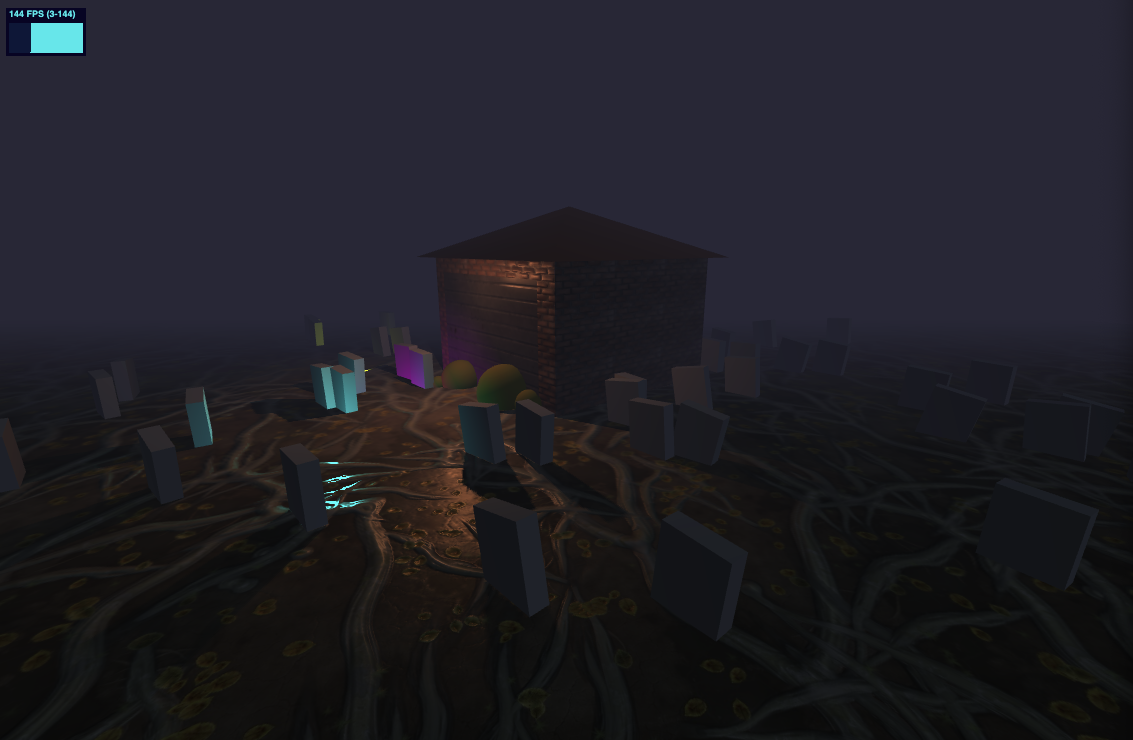
![https://gw.alicdn.com/imgextra/i4/O1CN01XyIkeC1KWoxANDv2k_!!6000000001172-2-tps-1128-542.png]
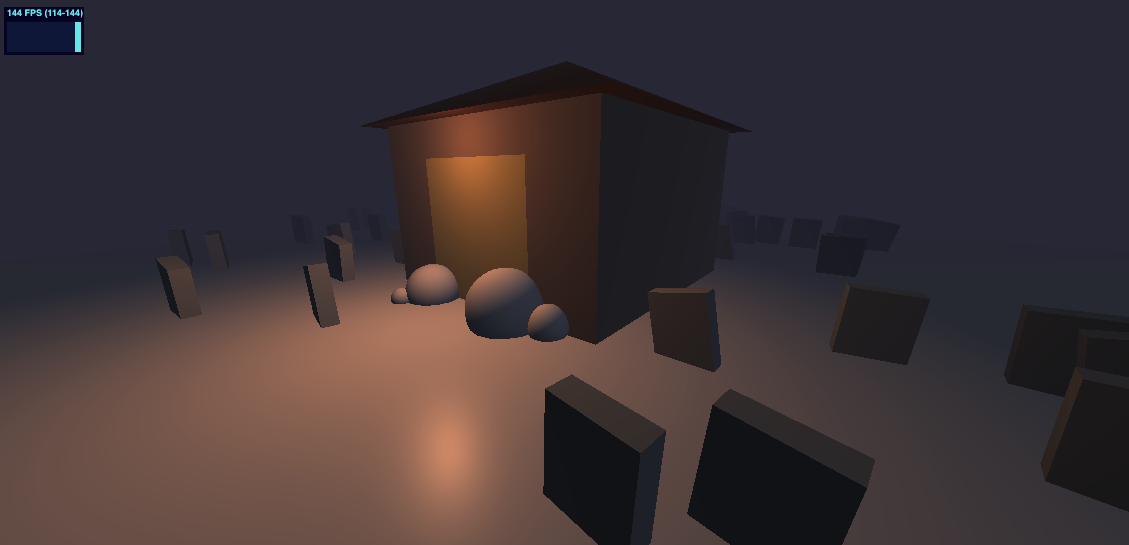
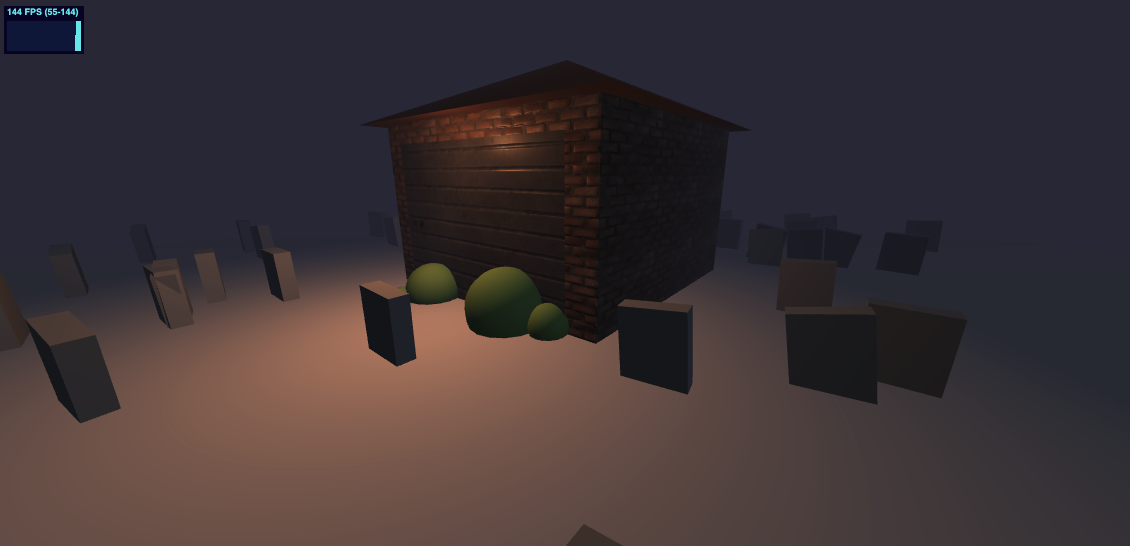
我们需要一些恐怖的光线效果,修改之前环境光和平行光,并增加大门顶部的点光源
/**
 * Lights
 */
const ambientLight = new THREE.AmbientLight('#b9d5ff', 0.12)
scene.add(ambientLight)

const directionalLight = new THREE.DirectionalLight('#b9d5ff', 0.12)
directionalLight.position.set(1, 0.75, 0)
scene.add(directionalLight)

// Door light
const doorLight = new THREE.PointLight('#ff7d46', 1, 7)
doorLight.position.set(0, 2.2, 2.7)
house.add(doorLight)
Three.js 中内置了雾的效果,参见 Fog 类
其构造函数
Fog( color : Integer, near : Float, far : Float )
- near 开始应用雾的最小距离。距离小于活动摄像机“near”个单位的物体将不会被雾所影响。
- far 结束计算、应用雾的最大距离,距离大于活动摄像机“far”个单位的物体将不会被雾所影响。默认值是1000。
const fog = new THREE.Fog('#262837', 1, 15)
scene.fog = fog
添加了 fog 后的效果
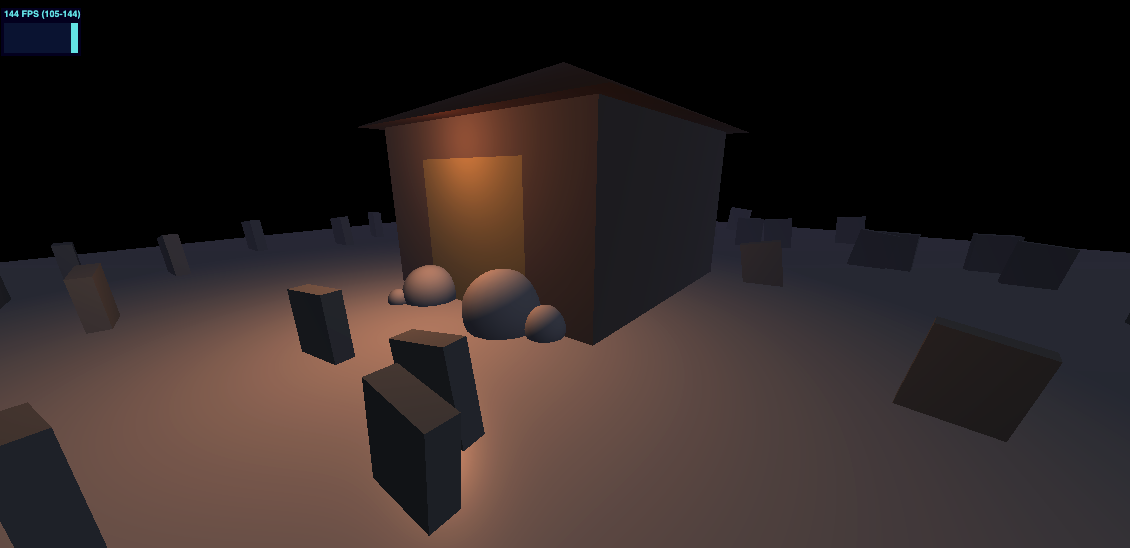
可以看到已经蒙上了一层雾,但画布的背景还是黑色的,我们需要改变画布背景色,将 renderer 的颜色设置为与雾相同
renderer.setClearColor('#262837')
接下来我们添加纹理贴图,使用之前学到到 material 中的内容
// door
const door = new THREE.Mesh(
  new THREE.PlaneGeometry(2, 2, 100, 100),
  new THREE.MeshStandardMaterial({
    map: doorColorTexture,
    transparent: true,
    alphaMap: doorAlphaTexture,
    aoMap: doorAmbientOcclusionTexture,
    displacementMap: doorHeightTexture,
    displacementScale: 0.01,
    normalMap: doorNormalTexture,
    metalnessMap: doorMetalnessTexture,
    roughnessMap: doorRoughnessTexture,
  }),
)
door.geometry.setAttribute('uv2', new THREE.Float32BufferAttribute(door.geometry.attributes.uv.array, 2))
door.position.y = 1
door.position.z = 2 + 0.001
house.add(door)
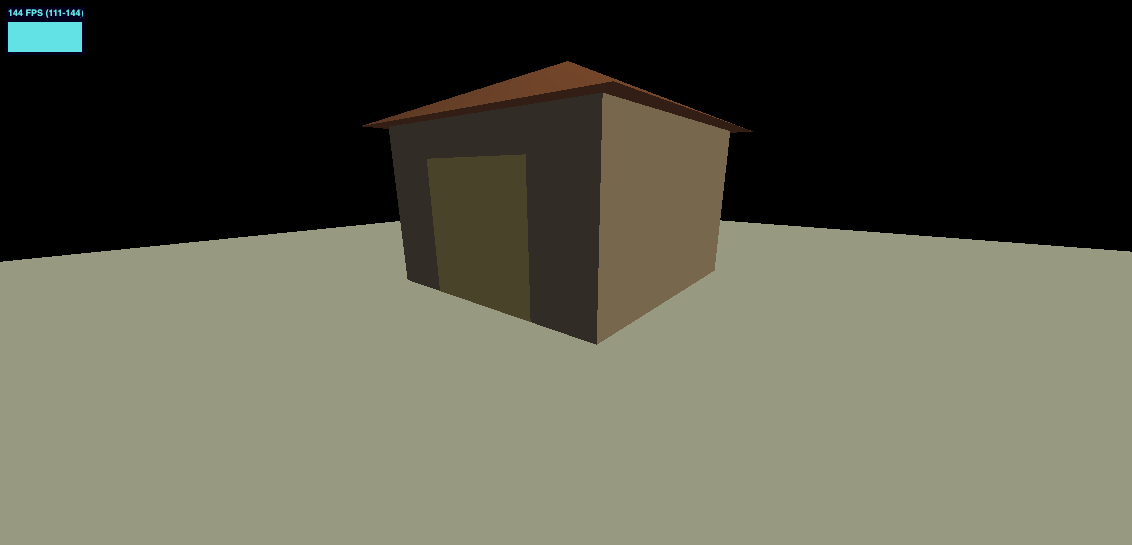
看到门的贴图效果还不错
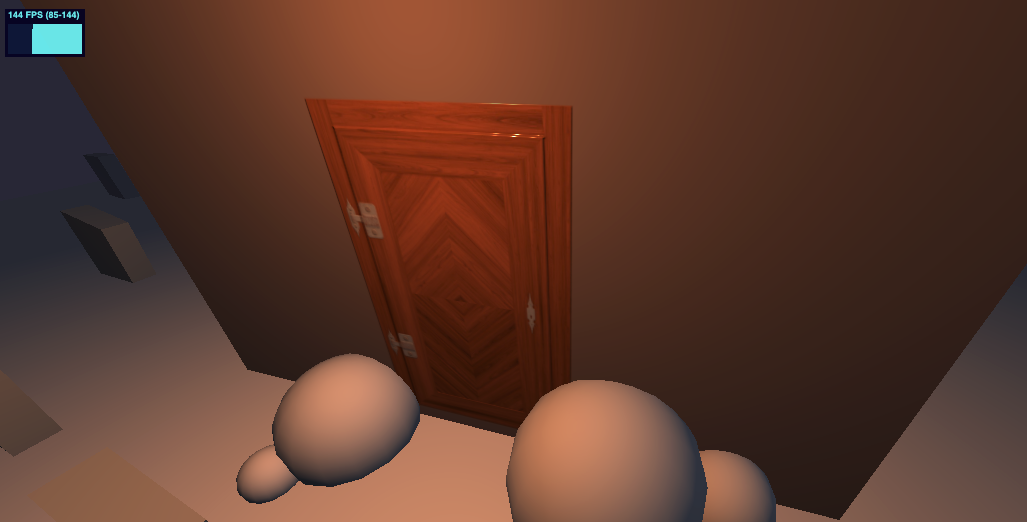
我们也可以尝试换一张贴图,并增加一些砖块
// Textures
const textureLoader = new THREE.TextureLoader()
const doorColorTexture = textureLoader.load('../assets/textures/door2/baseColor.jpg')
const doorAmbientOcclusionTexture = textureLoader.load(
  '../assets/textures/door2/ambientOcclusion.jpg'
)
const doorHeightTexture = textureLoader.load('../assets/textures/door2/height.png')
const doorNormalTexture = textureLoader.load('../assets/textures/door2/normal.jpg')
const doorMetalnessTexture = textureLoader.load('../assets/textures/door2/metalness.jpg')
const doorRoughnessTexture = textureLoader.load('../assets/textures/door2/roughness.jpg')

const brickColorTexture = textureLoader.load('../assets/textures/brick/baseColor.jpg')

const brickAmbientOcclusionTexture = textureLoader.load(
  '../assets/textures/brick/ambientOcclusion.jpg'
)
const brickHeightTexture = textureLoader.load('../assets/textures/brick/height.png')
const brickNormalTexture = textureLoader.load('../assets/textures/brick/normal.jpg')
const brickRoughnessTexture = textureLoader.load('../assets/textures/door2/roughness.jpg')

...

// walls
const walls = new THREE.Mesh(
  new THREE.BoxGeometry(4, 2.5, 4, 200, 200),
  new THREE.MeshStandardMaterial({
    map: brickColorTexture,
    aoMap: brickAmbientOcclusionTexture,
    displacementMap: brickHeightTexture,
    displacementScale: 0.001,
    normalMap: brickNormalTexture,
    roughnessMap: brickRoughnessTexture,
  })
)
walls.position.y = 1.25
house.add(walls)

// door
const door = new THREE.Mesh(
  new THREE.PlaneGeometry(2, 2, 100, 100),
  new THREE.MeshStandardMaterial({
    map: doorColorTexture,
    transparent: true,
    // alphaMap: doorAlphaTexture,
    aoMap: doorAmbientOcclusionTexture,
    displacementMap: doorHeightTexture,
    displacementScale: 0.04,
    normalMap: doorNormalTexture,
    metalnessMap: doorMetalnessTexture,
    roughnessMap: doorRoughnessTexture,
  })
)
door.geometry.setAttribute(
  'uv2',
  new THREE.Float32BufferAttribute(door.geometry.attributes.uv.array, 2)
)
door.position.y = 1
door.position.z = 2 + 0.001
house.add(door)
砖块可能太大了,我们可以将其 repeat,记得所有的纹理都要一起 repeat
brickColorTexture.repeat.set(3, 3)
brickAmbientOcclusionTexture.repeat.set(3, 3)
brickHeightTexture.repeat.set(3, 3)
brickNormalTexture.repeat.set(3, 3)
brickRoughnessTexture.repeat.set(3, 3)

brickColorTexture.wrapS = THREE.RepeatWrapping
brickAmbientOcclusionTexture.wrapS = THREE.RepeatWrapping
brickHeightTexture.wrapS = THREE.RepeatWrapping
brickNormalTexture.wrapS = THREE.RepeatWrapping
brickRoughnessTexture.wrapS = THREE.RepeatWrapping

brickColorTexture.wrapT = THREE.RepeatWrapping
brickAmbientOcclusionTexture.wrapT = THREE.RepeatWrapping
brickHeightTexture.wrapT = THREE.RepeatWrapping
brickNormalTexture.wrapT = THREE.RepeatWrapping
brickRoughnessTexture.wrapT = THREE.RepeatWrapping
增加一些地面的纹理
添加幽灵光
使用点光源作为幽灵光
/**
 * Ghosts
 */
const ghost1 = new THREE.PointLight('#ff00ff', 2, 3)
scene.add(ghost1)

const ghost2 = new THREE.PointLight('#00ffff', 2, 3)
scene.add(ghost2)

const ghost3 = new THREE.PointLight('#ffff00', 2, 3)
scene.add(ghost3)
增加一些动画
// Animations
const clock = new THREE.Clock()
const tick = () => {
  stats.begin()

  const elapsedTime = clock.getElapsedTime()

  // Ghosts
  const ghost1Angle = elapsedTime * 0.5
  ghost1.position.x = Math.cos(ghost1Angle) * 4
  ghost1.position.z = Math.sin(ghost1Angle) * 4
  ghost1.position.y = Math.sin(elapsedTime * 3)

  const ghost2Angle = -elapsedTime * 0.32
  ghost2.position.x = Math.cos(ghost2Angle) * 5
  ghost2.position.z = Math.sin(ghost2Angle) * 5
  ghost2.position.y = Math.sin(elapsedTime * 4) + Math.sin(elapsedTime * 2.5)

  const ghost3Angle = -elapsedTime * 0.18
  ghost3.position.x = Math.cos(ghost3Angle) * (7 + Math.sin(elapsedTime * 0.32))
  ghost3.position.z = Math.sin(ghost3Angle) * (7 + Math.sin(elapsedTime * 0.5))
  ghost3.position.y = Math.sin(elapsedTime * 4) + Math.sin(elapsedTime * 2.5)

  controls.update()

  // Render
  renderer.render(scene, camera)
  stats.end()
  requestAnimationFrame(tick)
}
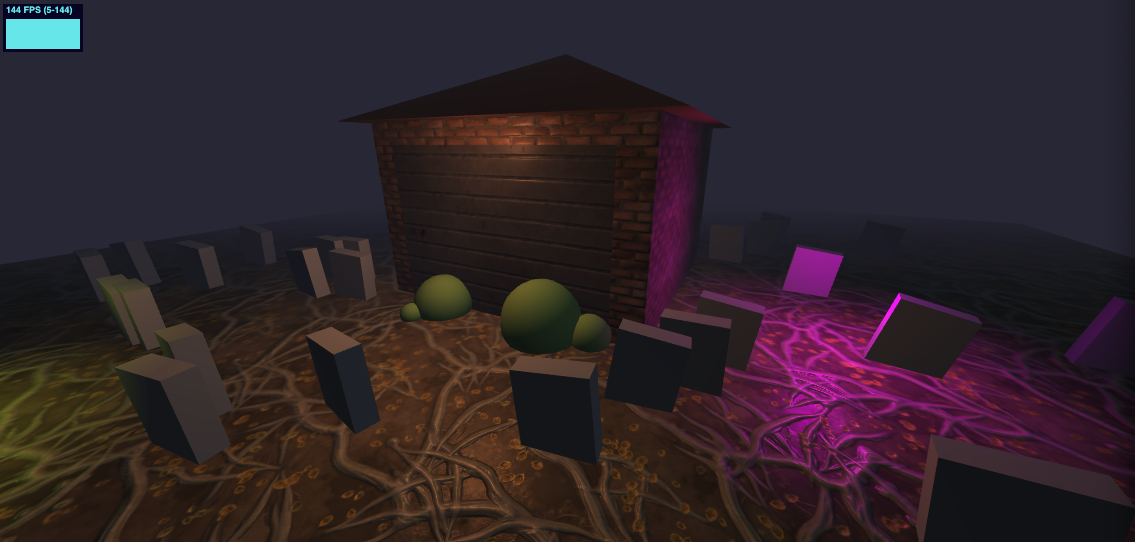
使用上一节学到的内容开启投影。
renderer 打开 shadowMap
renderer.shadowMap.enabled = true
并设置产生投影和接受投影的物体
directionalLight.castShadow = true
doorLight.castShadow = true
ghost1.castShadow = true
ghost2.castShadow = true
ghost3.castShadow = true

walls.castShadow = true
bush1.castShadow = true
bush2.castShadow = true
bush3.castShadow = true
bush4.castShadow = true

plane.receiveShadow = true
在 for 循环中为墓碑也打开投影
grave.castShadow = true

在线 demo 链接
可扫码访问

本节使用前面所学知识实现了一个完整的 demo,当然这个 demo 还有很多可以优化的地方,比如墓碑上的字,墓碑不重叠的算法,增加音效等。读者有兴趣可以试着添加深入研究,比如最后我又加了些恐怖的音效。
Recommend
About Joyk
Aggregate valuable and interesting links.
Joyk means Joy of geeK