

Deploying Server-Side Swift Apps With Docker on Heroku [FREE]
source link: https://www.raywenderlich.com/33010416-deploying-server-side-swift-apps-with-docker-on-heroku
Go to the source link to view the article. You can view the picture content, updated content and better typesetting reading experience. If the link is broken, please click the button below to view the snapshot at that time.
Deploying Server-Side Swift Apps With Docker on Heroku
In this tutorial, you’ll learn how to deploy server-side applications developed in Vapor as well as Docker images of your application into Heroku.
Version
For months, you’ve worked hard on building an API for your app. Now, you want to make it available over the internet. You’re not quite sure what the best option is — or even where to start. Rest assured, this tutorial shows the step-by-step instructions to deploy Server-Side Swift apps with Docker on Heroku.
Most developers with Swift experience come from an iOS or macOS development background, and deploying web apps might not be a trivial task for you. Managing servers, ensuring zero downtime, scaling servers or dealing with other DevOps-related tasks are all hard work. Recognizing this opportunity, some companies package these services and offer them in a developer-friendly way. Heroku is one of these cloud platform providers, and it can help you deploy, manage and scale your web app.
In this tutorial, you’ll learn how to:
- Create a new app in Heroku and set some basic configuration.
- Configure the Postgres database add-on.
- Build a Docker image of your Vapor app, and access the database provided by Heroku.
- Use Heroku’s Container Registry to upload your Docker image, and deploy the container.
- Automate the release process by making Heroku build and release your app’s Docker image on each push to your Git repository.
Getting Started
Start by clicking the Download Materials button at the top or bottom of this page. The materials contain the sample Vapor app you’ll use with this tutorial. It’s a familiar friend from the Server-Side Swift book and video course: the TIL app, a web app and API for searching and adding acronyms.
Unzip the file, and with Xcode or your favorite text editor, open the starter folder. You’ll build and run it soon, but for now, it’s worth familiarizing yourself with the code. The files inside the Controllers, Models and Migrations directories are the backbone of this app. Also very important, and the only Swift file you’ll modify in this tutorial, is the configure.swift file. Look at how it configures the app and also the contents of configureLocalDatabase().
Building the Docker Image
Before jumping straight into the deployment and Heroku sections, it’s important to do a quick recap on how to build and run a Docker image, so you can first run your app locally.
Using the Dockerfile
The Dockerfile is the recipe Docker uses to build your app images, which you can later deploy onto containers. If Docker is new to you, refer to Developing and Testing Server-Side Swift with Docker and Vapor, to learn more about it.
The starter sample project already includes a Dockerfile that’s ready for production deployments. This is basically the same file present in Vapor’s official template project.
Building the Image
After opening your preferred terminal application, navigate to the starter project folder. Then, run the command below:
docker build . --tag til-app
A few notes about this command:
- It tells Docker to build an image. The
.character represents the current directory, and it’s where Docker looks for the Dockerfile. - By default, Docker looks for a file named Dockerfile within that path. If you use a Dockerfile with a different name — as another file for development or testing — the
--fileparameter would be required. - The
--tagparameter helps Docker to identify this image. Docker uses this tag name when it needs to run a container based on this image.
Once you run this command, Docker starts by pulling the base Swift image. It then runs all the commands described in Dockerfile. This includes downloading the Swift package dependencies, building the app with the Swift compiler and then copying the app binary into a slimmer running image, ideal for deployments.
Running the Image Locally
After a few minutes, Docker will finish building your app image. Now, it’s time to run it locally to make sure everything looks good.
The only service the app needs is a PostgreSQL database available. You don’t have to install Postgres on your machine, create the database and configure access. Docker Compose can do all that. The starter project also provides the docker-compose.yml file, which can download the Postgres image and serve it to the app.
Run this command to make Docker Compose prepare the Postgres container:
docker compose run --rm start_dependencies
This ensures that the database container is up, running and ready to receive connections from the app. start_dependencies creates a temporary container, which won’t be needed after the database is up. Therefore, you use --rm to tell Docker to remove it after the command returns.
To start the app container using the image you built in the previous section, run the command below:
docker compose up app
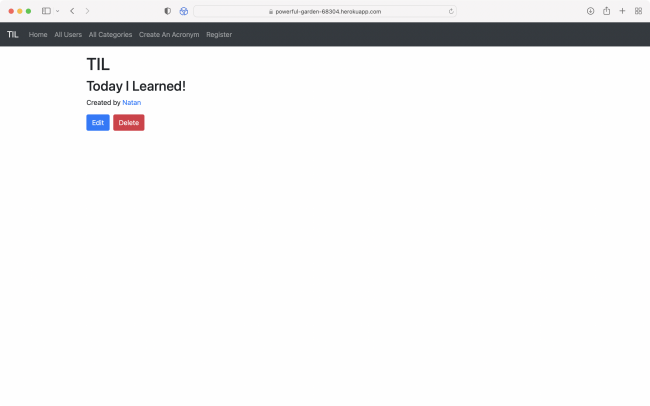
Now, visit http://localhost:8080 in your browser, and you’ll see the TIL home page:
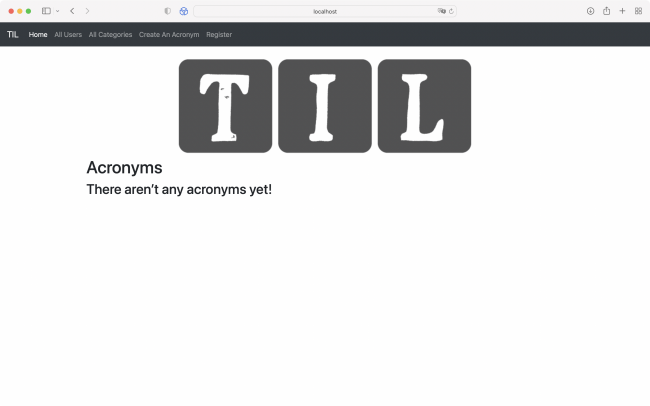
The TIL app running locally with Docker
Run the following call to get some server information, which ServerInfoController provides:
curl http://localhost:8080/server-info
The response contains three properties:
- Date the server started running.
- Platform — macOS or Linux.
- App environment.
Notice that the app responds with docker-local as the app environment. When later deploying the app to Heroku, you’ll learn how to change that without the need to modify the app code.
Fantastic! You’ve built and run the image on your local machine. In a later section, you’ll perform some changes to allow deployment. But first, a quick section about Heroku will introduce it to you or refresh your memory.
Getting to Know Heroku
Heroku is one of the most popular PAAS — platform as a service — providers. It also helps remove the need to manage hardware or virtual machines, servers and DNS. Heroku allows developers to deploy and scale web apps using containers. These containers deployed at Heroku are called dynos. You can scale your app to run on any specified number of dynos based on its resource demands.
Besides supplying you with the infrastructure to run your app containers, Heroku also provides add-ons. Add-ons are services that are necessary for your web apps. Web apps might need a PostgreSQL or MongoDB database, a CDN or a Redis cache — maybe even all of them, and more. With Heroku, setting up these resources is a breeze!
Logging in to the Heroku CLI
Before running the commands from this section and onward, you need to be logged in to Heroku in its command-line tool. To check if you’re already logged in — and with which user — run the following command:
heroku auth:whoami
If you’re not logged in yet, you’ll see an error message indicating so. To fix that, run the login command:
heroku login
Then, press any key to open the browser and finish the login process. After seeing the success page, return to Terminal, and you will see a success message there as well.
Creating the Heroku App
Now, you’re all set to create your own Heroku app using the apps command! Run the following command:
heroku apps:create <your-app-name>
A few notes about this command:
- Heroku enforces unique app names across all the platforms. If you pick a popular name someone has chosen before, you’ll receive an error when creating the app.
- If you omit the app name, Heroku chooses a random, unique app name.
- To learn the remote Git URL, or any other information about your Heroku app, you can run
heroku apps:info <your-app-name>. It will display detailed app information, including the URL.
Alternatively, if you use Heroku without Git, you must pass the
--app flag followed by your Heroku app name for every app-related command.
For now, you haven’t yet deployed the app. If you try to visit your app’s web URL, you’ll find a welcome page with a link with help to deploy it:

Open the Heroku dashboard in your browser. It displays a list of apps that belong to your account. Click the app you just created, and you’ll see more details about it:

Adding the Postgres Add-on
The next step is provisioning a database to read and write data. The sample project uses PostgreSQL, so you’ll need to make a database of this type available.
Instead of leaving the difficult task of maintaining Postgres instances to developers, Heroku provides many common services as fully managed add-ons. For this tutorial, you’ll use the Heroku Postgres add-on in the Hobby Dev tier. It’s free with some limitations, but more than enough to get started. For more information about Heroku Postgres, check out its documentation.
Back in the terminal, run the command below:
heroku addons:create heroku-postgresql:hobby-dev
After adding the add-on, the Heroku CLI will display a confirmation message and will also print the environment variable used at runtime. To access the database, use the value from: DATABASE_URL environment variable. To check out the full URL, run the following command:
heroku config
This prints all the app’s environment variables in key and value format, much like a dictionary object. Since the database URL value is accessible via environment variables, you don’t have to hardcode the database address in your app’s code.
Configuring Other Environment Variables
As the previous section mentioned, you should rely on environment variables rather than setting hardcoded URLs, secrets or other values that might change depending on where you deploy your app. You might also use it to specify if a server is designated for staging, testing or production.
The TIL app requires two environment variables to support Sign In With Apple. Because this feature isn’t in the scope of this tutorial, you’ll set two sample values for these keys that won’t work. However, they’re required for the app to launch correctly.
Additionally, ServerInfoController needs to know what the app environment is so it can provide the response.
Although you can edit the environment variables from the app settings in the browser, doing it with the CLI is faster. To do so, run the command below:
heroku config:set APP_ENVIRONMENT=heroku-prod WEBSITE_APPLICATION_IDENTIFIER=til-prod SIWA_REDIRECT_URL=https://sign-in-with-apple.example.com
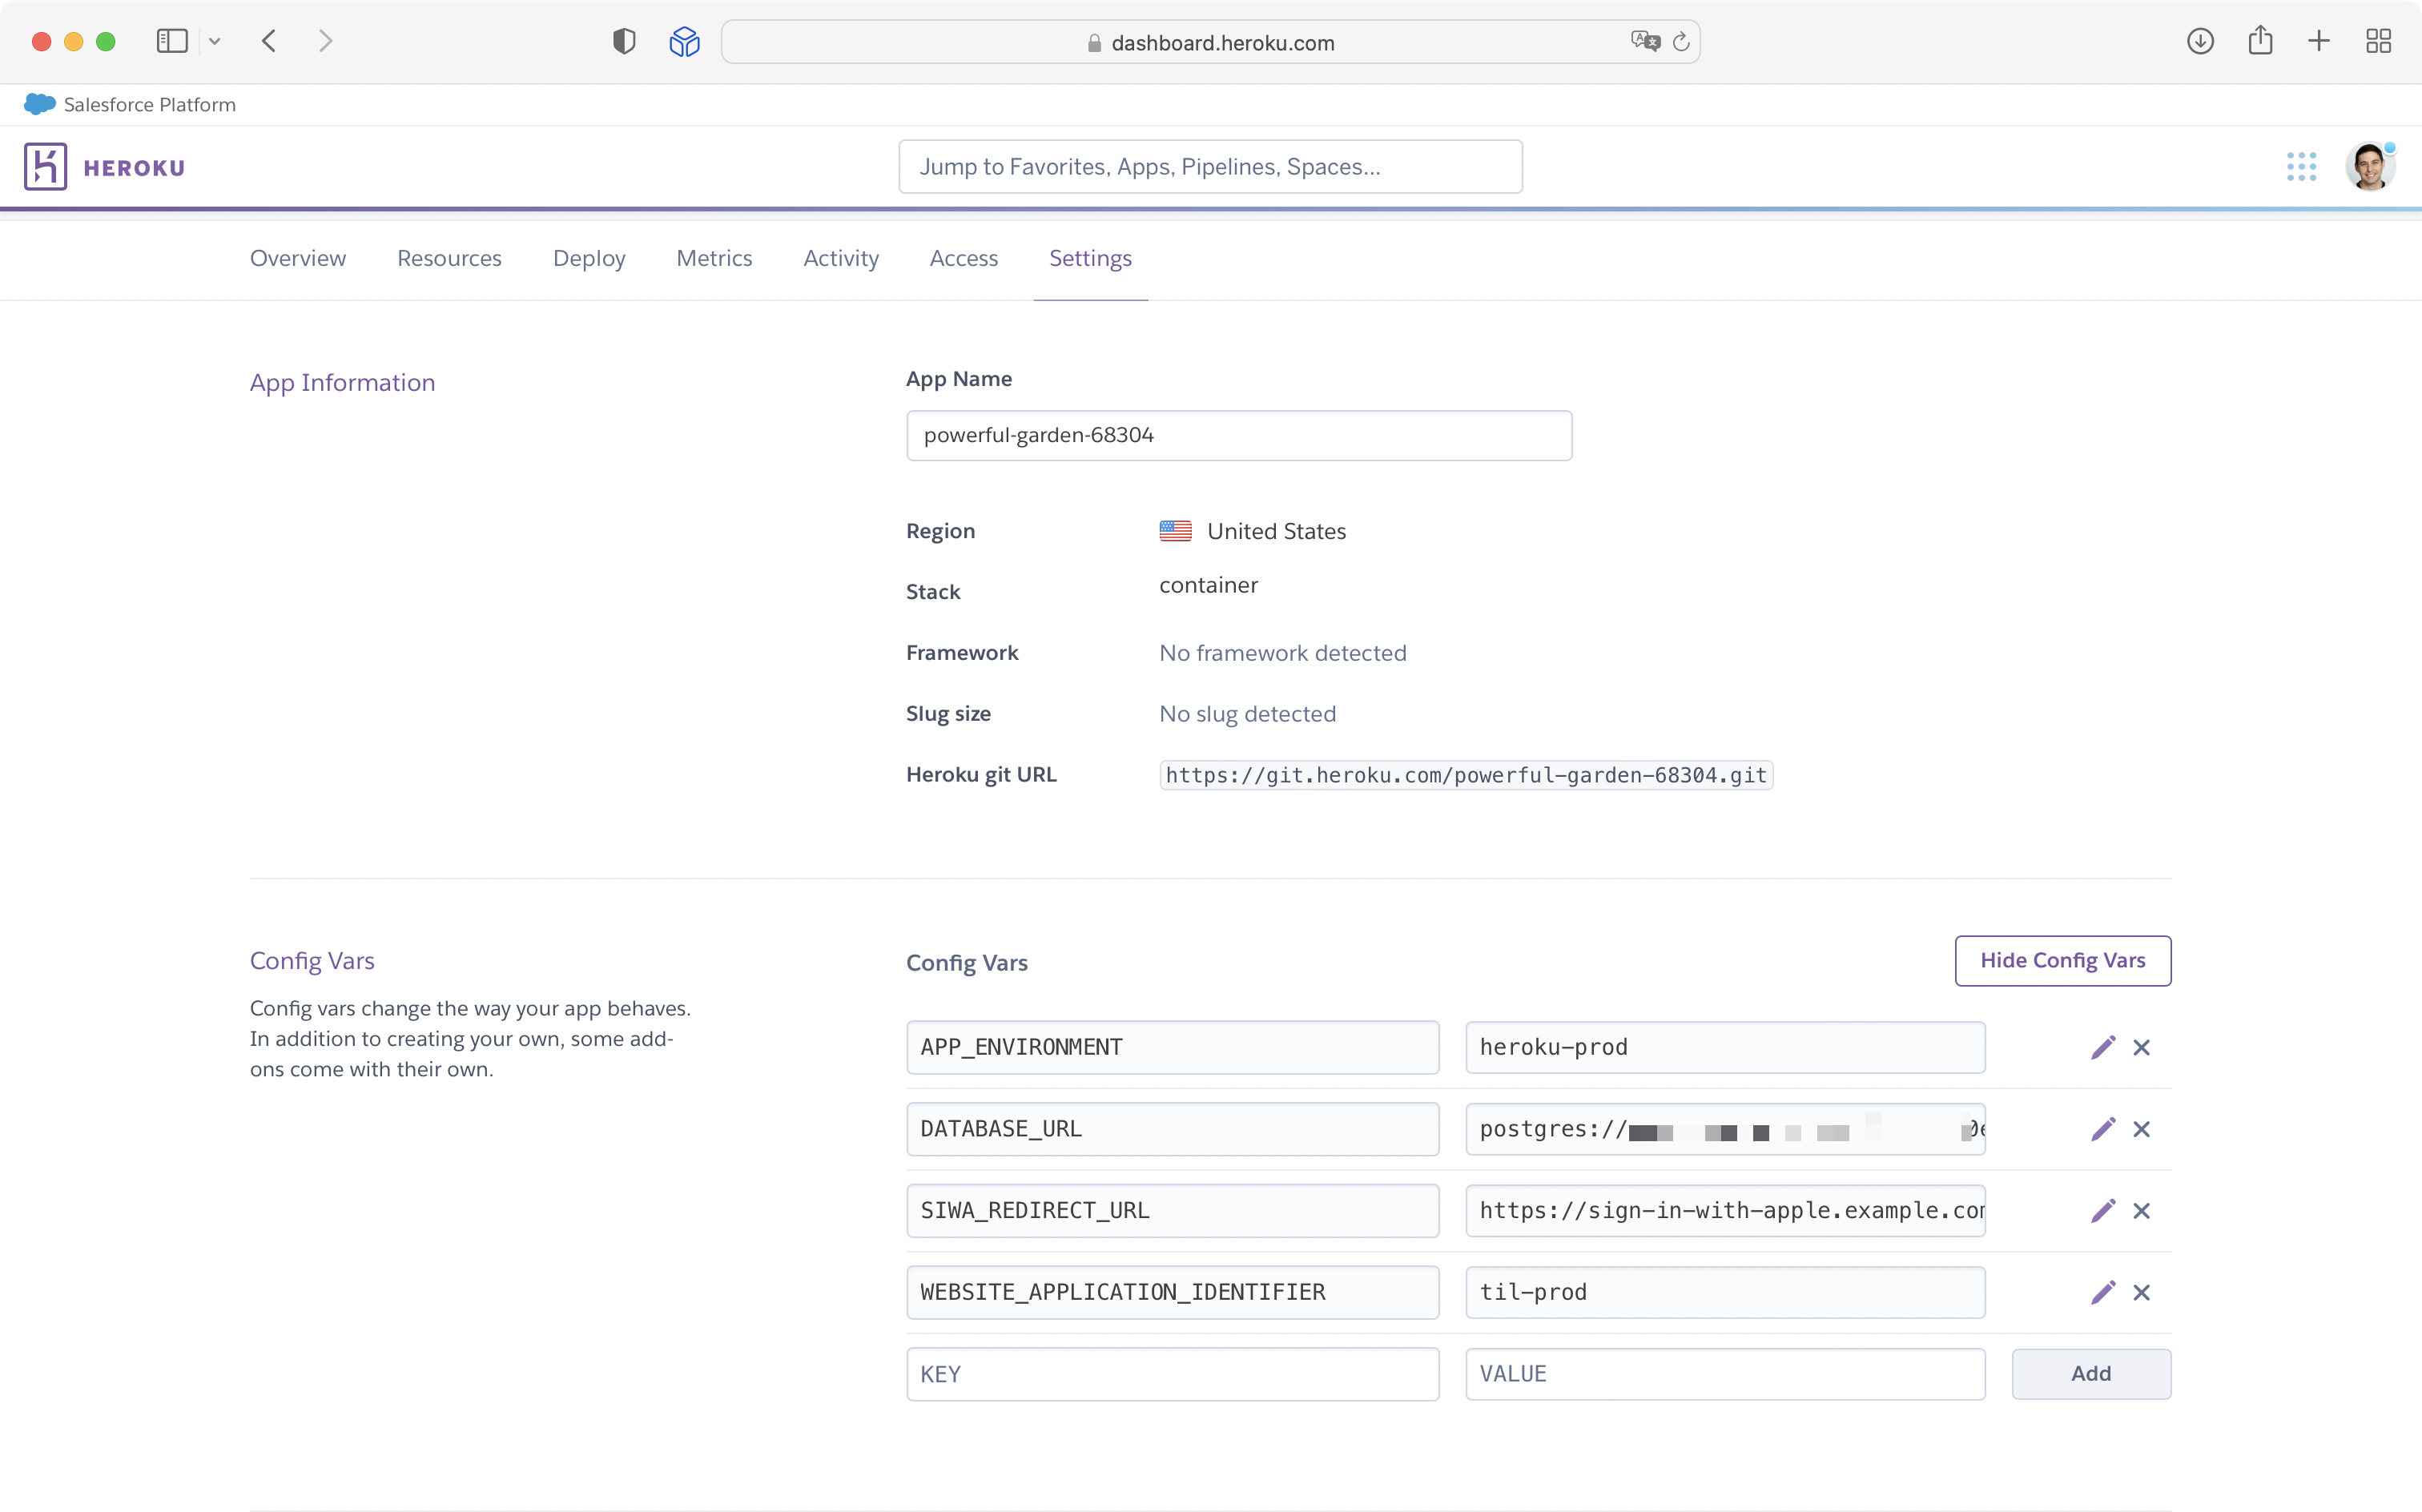
To confirm Heroku persisted these changes, run the heroku config command, just as previously, and see the result. Alternatively, open the app dashboard in Heroku, click Settings, and then scroll to the Config Vars section. Click the Reveal Config Vars button to see all the variables and their values:
Setting the Heroku App Stack
Now, the final configuration your Heroku app needs is to set the stack it will use. Stacks are operating system layer images that Heroku curates and maintains, providing operating system “building blocks” and the language runtimes.
In this case, you’ll build your own Docker images, which package every resource your app needs, so it doesn’t rely on Heroku’s default stacks. For that reason, setting the stack to container is necessary. To change the stack your app uses in the next deployment, use the heroku stack:set command:
heroku stack:set container
To confirm you successfully set the stack to container, run the following command:
heroku stack
Now, you should see that the selected stack is container, as shown below:

Heroku CLI displays the selected Heroku stack
The Heroku app configuration is ready. The next section covers the changes you’ll need to make in the Vapor app to get it ready for deployment.
Preparing the Vapor App for Deployment
You’ll need to make two changes to ensure the app launches correctly when running on Heroku. You’ve previously added the Postgres add-on to the Heroku app. Now, your app currently looks for a database in the localhost but it will need to connect to the Heroku database upon launch. The second change is the HTTP port the server binds to.
Configuring Heroku Postgres in the App
To add support for a remote Postgres database, open configure.swift. You can see there’s already a function that sets up the local database: configureLocalDatabase(). At the end of the file, paste the following global function:
// 1
func configureDatabase(with url: URL, for app: Application) {
  // 2
  guard let host = url.host,
        let user = url.user else {
          return
  }

  // 3
  var configuration = TLSConfiguration.makeClientConfiguration()
  configuration.certificateVerification = .none

  // 4
  let db = url.path.split(separator: "/").last.flatMap(String.init)
  app.databases.use(.postgres(configuration: .init(hostname: host,
                                                   username: user,
                                                   password: url.password,
                                                   database: db,
                                                   tlsConfiguration: configuration)), as: .psql)

  // 5
  if let db = db {
    app.logger.info("Using Postgres DB \(db) at \(host)")
  }
}
Here’s what you’re doing with this code:
- Declare a function that receives the database
URLand Vapor’sApplicationobject. - As the
hostanduserproperties of aURLare optional, use aguardto unwrap them. - Disable the TLS certificate verification, as it’s necessary when using the hobby plan in Heroku Postgres.
- Get the database name, extracting it from the URL’s
lastpath component. Along with all the other properties, initialize the database configuration and assign it to the app. - As this code is called on app launch, print a log containing database name and host. This way, you’ll be able to confirm the app is using the correct database by reading the logs.
Setting the Database Based on the Environment
So far, this function doesn’t have any callers. At the beginning of configure(_ app: Application), look for the line with the call to configureLocalDatabase(for: app), and replace it with the following code:
if let dbURLString = Environment.get("DATABASE_URL"),
   let url = URL(string: dbURLString) {
   configureDatabase(with: url, for: app)
} else {
  configureLocalDatabase(for: app)
}
This statement has one purpose: Detect if the app is running in an environment where the DATABASE_URL variable exists. If this is the case, convert its value from a string to URL, and call the function you just implemented. Otherwise, if no database URL is set, fall back to configuring a local database, just as before.
Binding to the Correct Port
The next change you need to make relates to how HTTP servers receive connections in Heroku. When a server starts up, it needs to bind to a specific port.
Because of the way Heroku works, it may assign a different port every time it launches a dyno of your app. This happens on every deployment, at restarts or when scaling up your app dynos. For this reason, as the port is dynamic between dynos, it sets the environment variable PORT containing the correct port app servers should bind to, regardless of the programming language or stack.
By default, Vapor listens on the 8080 port. To change that, still in configure.swift, add the following code anywhere inside configure(_ app: Application):
// 1
app.http.server.configuration.hostname = "0.0.0.0"

// 2
if let port = Environment.get("PORT").flatMap(Int.init(_:)) {
  app.http.server.configuration.port = port
}
A quick explanation of what these lines do:
- Set the server hostname to
0.0.0.0, as this is the IP address of the Docker container. - Check if the
PORTenvironment variable exists. If so, map theStringto anInt, unwrap it and set the server port.
0.0.0.0 is a placeholder IP address for the source host. The source host in this scenario is the container in itself. Docker automatically assigns this IP address to the containers it creates. This is a valid IP address syntax and is treated as a wildcard address. Also note that this is a non-routable IP address, as it can’t receive any TCP/IP connections.
These are the only changes in the Vapor app you’ll need to make for your server to conform to Heroku’s requirements and connect to the database. In the next section, you’ll see the last changes the Heroku app needs.
Building and Deploying the App Image
--platform linux/amd64 flag to your docker build command below. Be warned that this isn’t 100% reliable and may crash. If you encounter this, you can skip to the section on getting Heroku to build your container.
Both the Vapor and Heroku apps are now ready, although you still need to compile the changes above. Run the build command again to include them:
docker build . --tag til-app
While Docker rebuilds your app’s image, and before advancing to the stage where you’ll deploy it, it’s helpful to understand what a container registry is and how it works.
Container Registry
When working with Docker, it’s very common to build new images quite frequently. In the process of deploying them, or when there’s the need to roll back to a specific version, it’s essential to have them available in some sort of remote repository.
This is exactly the role a container registry plays: storing (pushing) and distributing (pulling) images. Docker, the company, provides its own registry as a service. And guess what: Heroku does as well, making it even easier to deploy your containers.
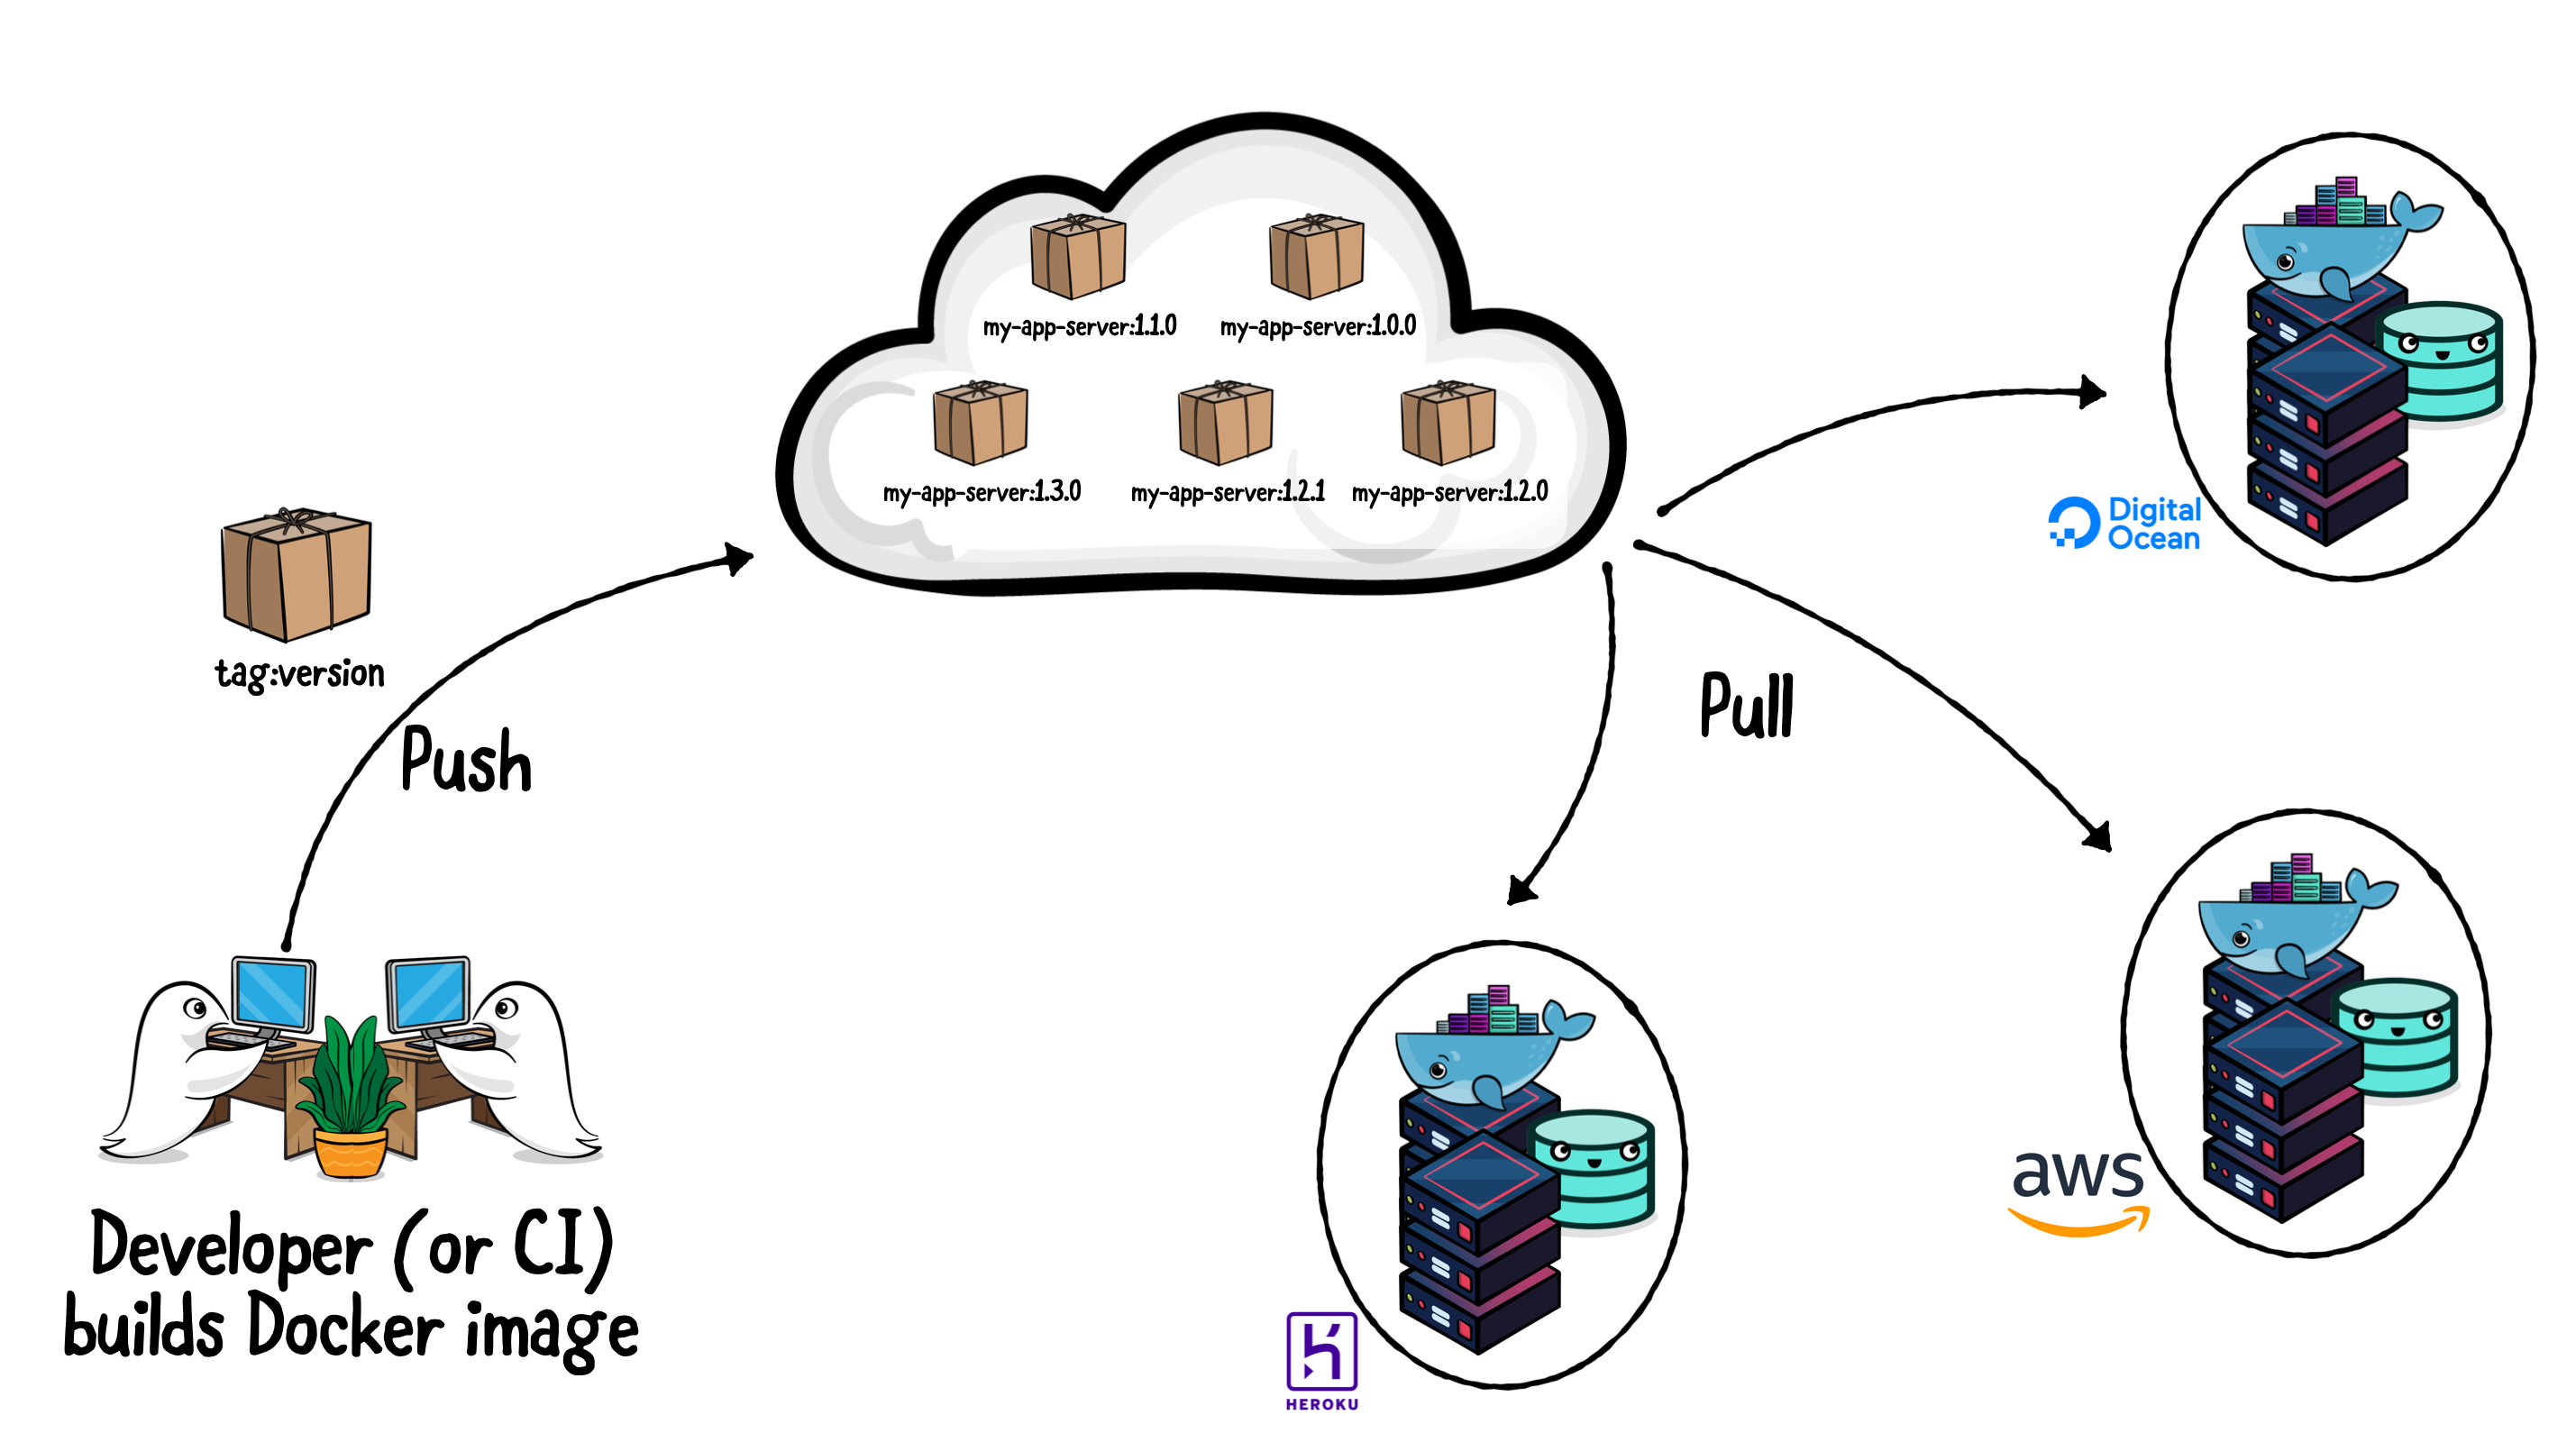
With a Docker Container Registry, you can push Docker images from your machine and pull them from your cloud providers to deploy
Logging in to Heroku’s Container Registry
The Heroku CLI provides the container command, and all its subcommands, to interact with the Heroku container registry, which is located at registry.heroku.com. These subcommands include building, pushing and pulling images, deleting, and also releasing them to Heroku applications. In fact, they work on top of Docker’s existing commands to interact with any container registry.
To use them, you’ll need to run a login command once again. This time, it’s faster and slightly different, as you’ve previously logged into the CLI.
heroku container:login
You’ll see a Login Succeeded message, confirming you can access Heroku’s container registry.
heroku containter command to work, Docker daemon must be running. To ensure Docker daemon is running in macOS, check if Docker Desktop is running in the menu bar.
Uploading and Releasing the App Image
You are now ready to push your image to the Heroku container registry and release the first version of the app.
Before pushing, run this command to associate a local image with the remote repository. Replace <your-app-name> with the Heroku app name.
docker tag til-app registry.heroku.com/<your-app-name>/web
Then, push it with this command:
docker push registry.heroku.com/<your-app-name>/web
This command uploads the image you built previously to the Heroku container registry. It might take a few minutes to complete depending on the upload speed of your internet connection.
Finally, after successfully uploading the image, release it by running the command below:
heroku container:release web
Now, visit the web URL of your app. As a reminder, it should follow this pattern: https://<your-app-name>.herokuapp.com. Replace your Heroku app name in the URL, and visit it in the browser. If you performed all the steps above correctly, you’ll see the same TIL homepage as when running it locally.
As you’ve previously configured the database, register a user and try to add an acronym. See the Postgres database in action for yourself!
TIL running in Heroku with the Postgres add-on
Run the server-info endpoint again, but this time calling the server you just deployed:
curl https://<your-app-name>.herokuapp.com/server-info
Notice how appEnvironment now equals the heroku-prod variable you set earlier through environment variables.
Reading Server Logs
If you’ve encountered any errors or want to see your app’s logs to troubleshoot or get more information, the logs command is very helpful. It displays logs from both Heroku and the Vapor app.
heroku logs
This displays the recent log output from your app. If you want to see live logs, pass the --tail flag:

heroku container:push web. Alternatively, you can also write a script that packages the instructions from this section to ease the deployment process.
Letting Heroku Build the Image for You
The process of building locally and uploading images to the registry can be tiring when deployments are frequent. But there’s good news, this task can be automated!
Creating the heroku.yml File
Heroku allows developers to add a yml configuration file at the root of the app repository. Amongst other things, this file defines how Heroku, not your machine, should perform the build and automatically release Docker images of your app.
In your text editor of choice, create a file named heroku.yml at the root of the project, and paste the three lines below:
build:
  docker:
    web: Dockerfile
This is enough to tell Heroku to use Docker to build an image, using the Dockerfile at the root of the project to build your app image and release it to the web process.
You must track this file in the app’s Git repository. To do so, run:
git add heroku.yml
git commit -a -m "Add heroku.yml"
To confirm the repository contains the Heroku Git remote, run git remote -v. You’ll see a remote URL in the https://git.heroku.com/<your-app-name>.git pattern.
After certifying the Heroku Git remote is present, perform a git push to it:
git push heroku master
As Heroku receives your new commit, it starts building the new image, and the git push operation logs the progress:

After a few minutes, you’ll see a confirmation that the app was deployed, this time with the image originating from Heroku’s builder machines rather than your own computer!
Sometimes, if the build process is long, the SSH connection might drop, and Git will display an error message unrelated to the build. If that happens, Heroku will continue building, and you can access the app dashboard in the browser. Click the Activity tab, and then look for the build in progress:

After a few minutes, the build will complete, and your app will run the latest code you just deployed.
Where to Go From Here?
Congratulations! You’ve reached the end of this tutorial, and now you know how to create Heroku apps, configure add-ons, and build and deploy Docker containers.
Download the completed project from this tutorial using the Download Materials button at the top and bottom of this page.
If you’re looking to learn more, here are some ideas and challenges:
- Add more add-ons, such as Heroku Redis for caching, or others available in the Heroku Marketplace.
- If you own a domain, set up a custom domain for your app, which allows you to hide the
*.herokuapp.comdomain. - Automate and set up continuous delivery, either with the Heroku CI and Pipelines or with GitHub Actions.
- Deploy different environments with pipelines. For example, enable a staging environment to test your web app and its API before deploying to production.
To learn more about Server-Side Swift, Vapor and other deployment techniques, check out:
If you have any questions or comments, please join the forum discussion below!
raywenderlich.com Weekly
The raywenderlich.com newsletter is the easiest way to stay up-to-date on everything you need to know as a mobile developer.
Get a weekly digest of our tutorials and courses, and receive a free in-depth email course as a bonus!
Recommend
About Joyk
Aggregate valuable and interesting links.
Joyk means Joy of geeK