
Open source edge detection with OpenCV and Pachyderm
source link: https://developers.redhat.com/articles/2022/06/01/open-source-edge-detection-opencv-and-pachyderm
Go to the source link to view the article. You can view the picture content, updated content and better typesetting reading experience. If the link is broken, please click the button below to view the snapshot at that time.

Open source edge detection with OpenCV and Pachyderm Skip to main content
Edge detection is central to image recognition, which is one of the most common applications of machine learning. This article introduces a Jupyter notebook for creating a Pachyderm pipeline that performs edge detection. For convenience, the article uses a Red Hat OpenShift cluster configuration described in an earlier Red Hat Developer article, How to install an open source tool for creating machine learning pipelines, but you can use the notebook on any Kubernetes cluster.
Edge detection with OpenCV
Edge detection with OpenCV
A good way to understand edge detection is to look at Figure 1. Compare the picture my son drew of the cartoon character Sherek, on the left, with the image produced by an edge detection algorithm on the right. Edge detection is one of the first steps in many machine learning processes that alter images or identify their content.
The most popular open source tool for image and video manipulation is OpenCV. I use its edge detection library along with Pachyderm to create the machine learning pipeline in the Jupyter notebook.
There are several advantages to using Pachyderm for this task. Like Git, Pachyderm's data versioning allows you to manage your data and iterate over it using repositories and commits. Pachyderm is not limited to text files and structured data, but can version any data (image, audio, video, text). Pachyderm's version control system is optimized to scale to large datasets of all types, providing consistent reproducibility.
Pachyderm's pipelines allow you to connect your code to data repositories. It can be used to automate many components of the machine learning lifecycle, such as data preparation, testing, model training, and more, by rerunning the pipeline when new data is committed. Pachyderm's pipelines and version control capabilities work together to visualize the end-to-end flow of your machine learning workflow.
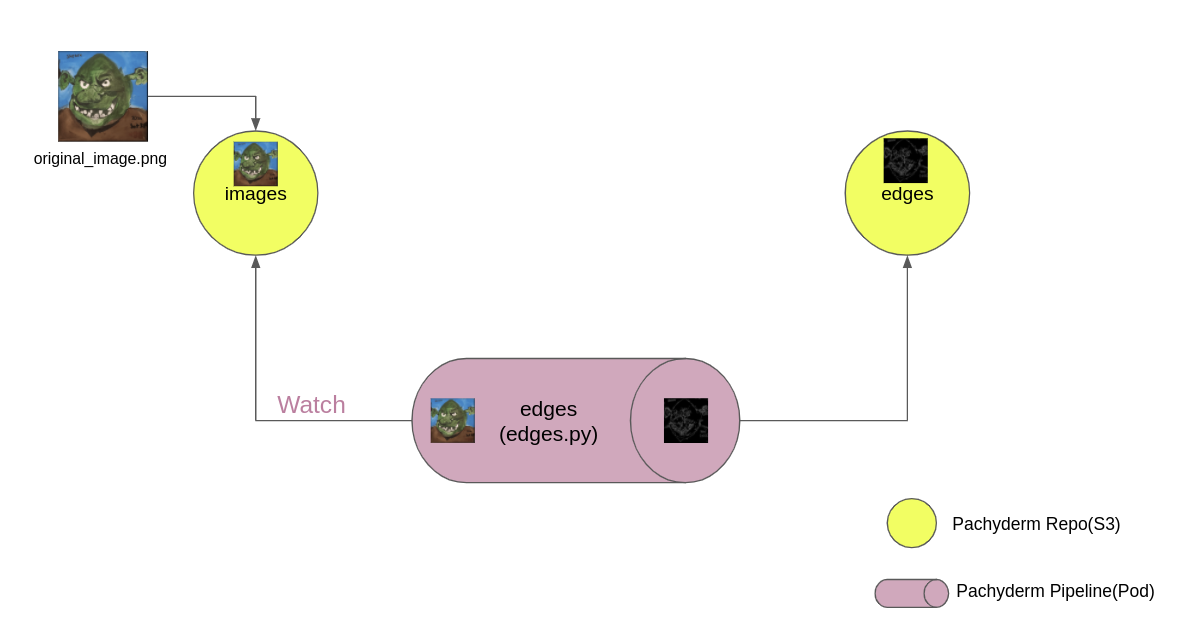
The notebook in this article creates two repositories. The first, named images, receives the input images. The second, named edges, stores the results of the Pachyderm pipeline (Figure 2). Once the flow is configured, execution of the pipeline is triggered by committing an image to the images source repository. The Python source code I use for edge detection is in a GitHub repository.
Pachyderm's pipeline monitors the images source repository and detects when a new image is pushed to it. Once the pipeline pod is running, you can reuse it by pushing other images to the source repository. The notebook includes detailed explanations for each of its cells.
Obtaining and running the Jupyter notebook
Obtaining and running the Jupyter notebook
The environment in my previous article went to Open Data Hub to download Pachyderm and JupyterHub on an OpenShift instance. The steps in this article start with that environment. Using Open Data Hub, you can also deploy Pachyderm and JupyterHub on any Kubernetes cluster you have.
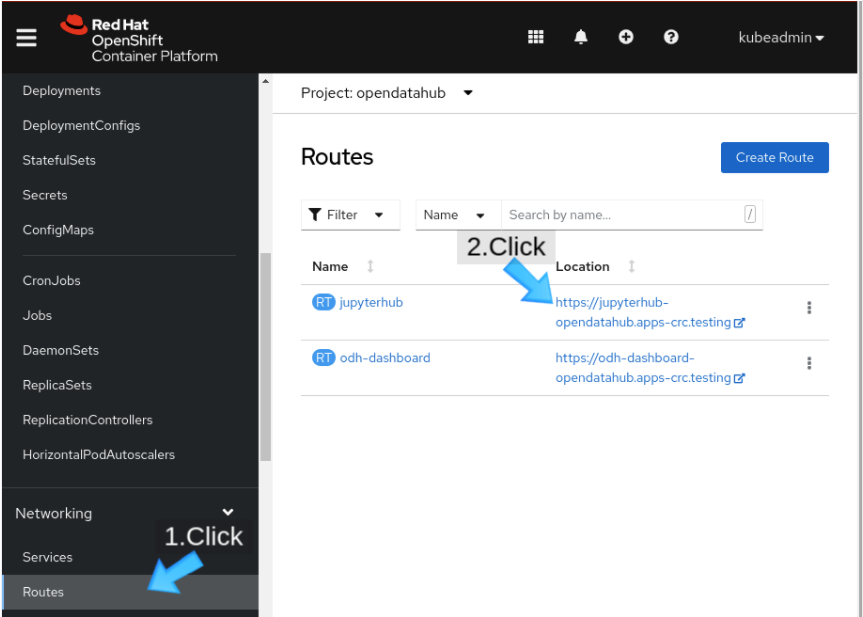
First, visit your installed instance of JupyterHub. If you installed JupyterHub through Open Data Hub, you can find a jupyterhub route in the Open Data Hub project (Figure 3).
OpenShift's OAuth proxy is integrated with JupyterHub, so you can get into JupyterHub after you enter your username and password in OpenShift (Figure 4). The web page prompts you to give JupyterHub access to your account (Figure 5).
Figure 5: Click "Allow selected permissions" to give JupyterHub access to your information.
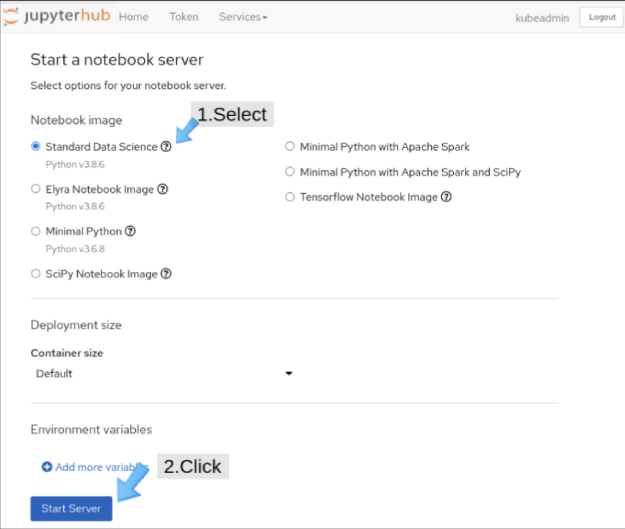
We turn now to the JupyterHub web interface, Swan. On the Start a notebook server page, choose the Standard Data Science notebook (Figure 6).
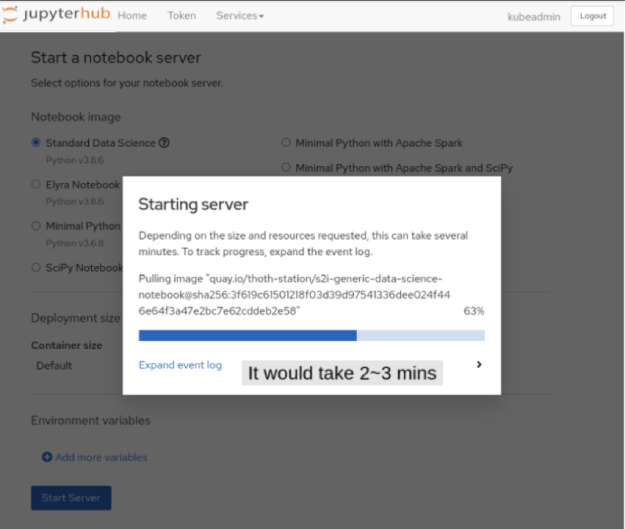
The image takes a few minutes to load (Figure 7).
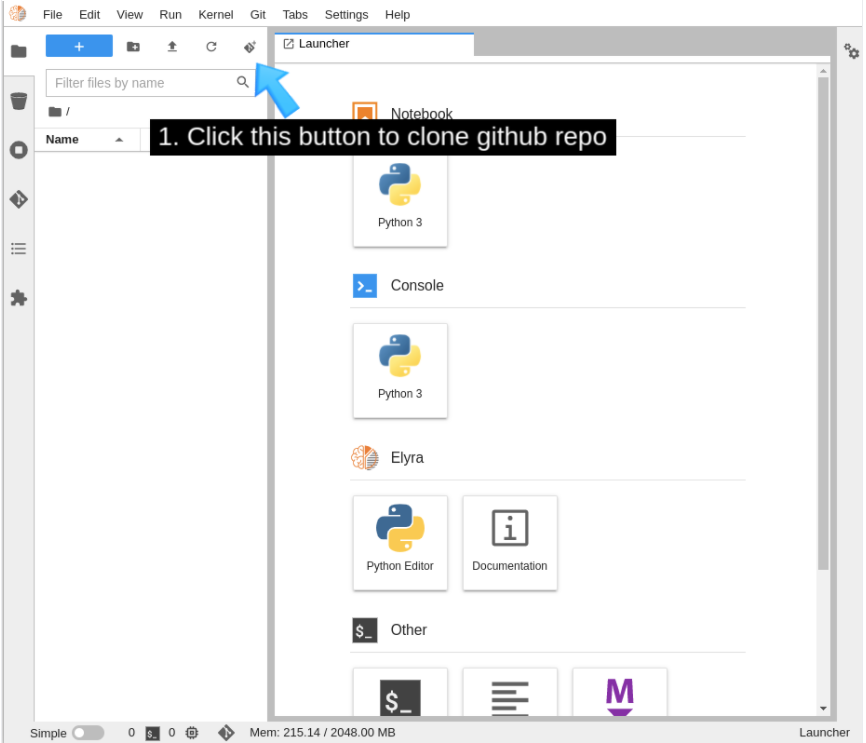
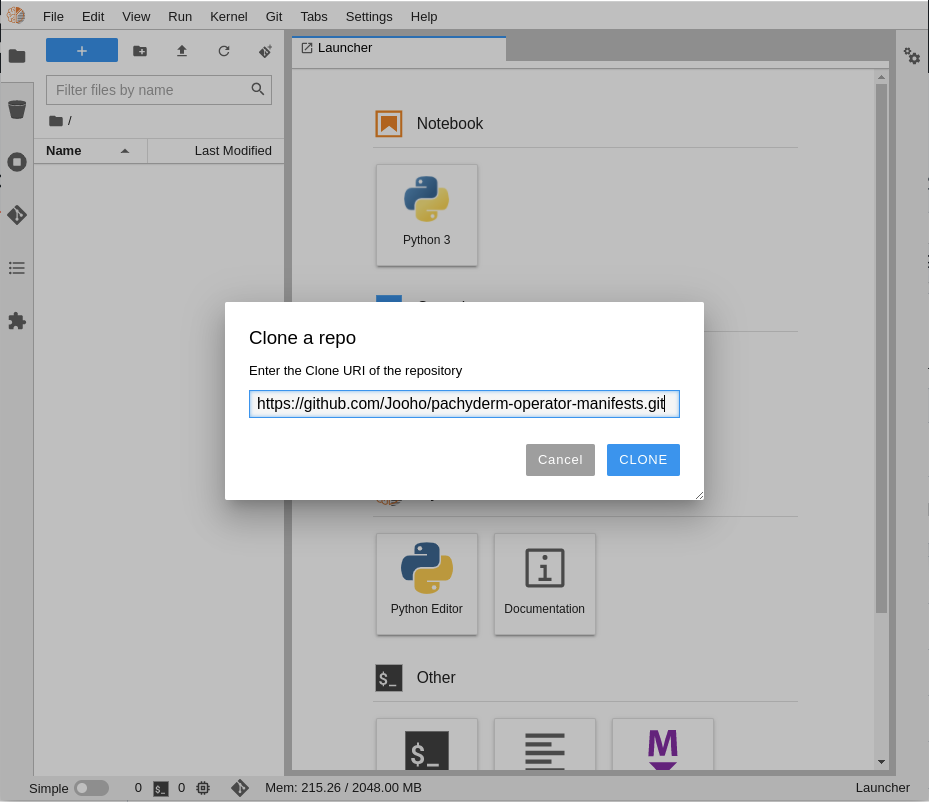
Using the menu at the top of the interface (Figure 8), clone the GitHub repository, which is named https://github.com/Jooho/pachyderm-operator-manifests.git (Figure 9).
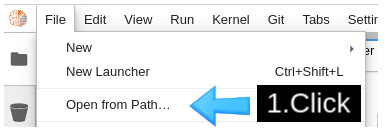
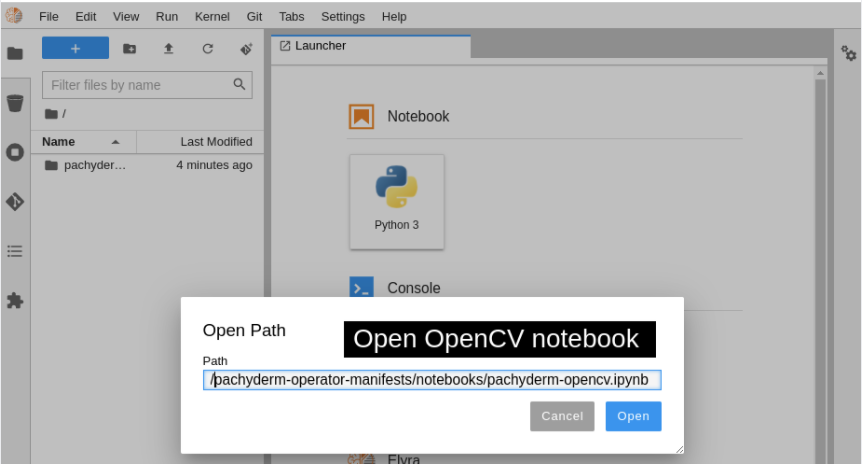
Run the notebook by opening the file on your system (Figure 10). The notebook is at /pachyderm-operator-manifests/notebooks/pachyderm-opencv.ipynb in the repository you downloaded from GitHub (Figure 11). You can now interact with the cells in the OpenCV Edge Detection Jupyter notebook.
Congratulations: You're now ready to start experimenting with image recognition, which has a number of use cases in machine learning. The following two-minute video outlines the steps in this article so you can see how it works in action!
</div
Recommend
About Joyk
Aggregate valuable and interesting links.
Joyk means Joy of geeK

