
Building a Budget Homelab NAS Server (2022 Edition)
source link: https://mtlynch.io/budget-nas/
Go to the source link to view the article. You can view the picture content, updated content and better typesetting reading experience. If the link is broken, please click the button below to view the snapshot at that time.
Building a Budget Homelab NAS Server (2022 Edition)
This year, I decided to build my first ever home storage server. It’s a 32 TB system that stores my personal and business data using open-source software.
The server itself cost $531, and I bought four disks for $732, bringing the total cost to $1,263. It’s similar in price to off-the-shelf storage servers, but it offers more power and customizability.
In this post, I’ll walk through how I chose the parts, what mistakes I made, and my recommendations for anyone interested in building their own.
Before and after of my 2022 homelab TrueNAS server build
If you’d prefer a video explanation, I recorded one on YouTube.
Background 🔗︎
Why build a NAS server? 🔗︎
NAS stands for network-attached storage. A NAS server’s primary job is storing data and making it available to other computers on your network.
So, why have a whole dedicated server for data? After all, every computer stores data.
I find it helpful to decouple data storage from my other systems. I upgrade my main workstation and laptop every two to three years, and migrating my data between computers was always a pain. A dedicated storage server eliminates most data migrations and facilitates sharing files between my systems.
I also have a lot of data. I’m a data hoarder, so I keep every digital photo I’ve ever taken, every email I’ve sent or received in the last 20 years, and source code for all of my personal projects. The total is currently 8.5 TB.
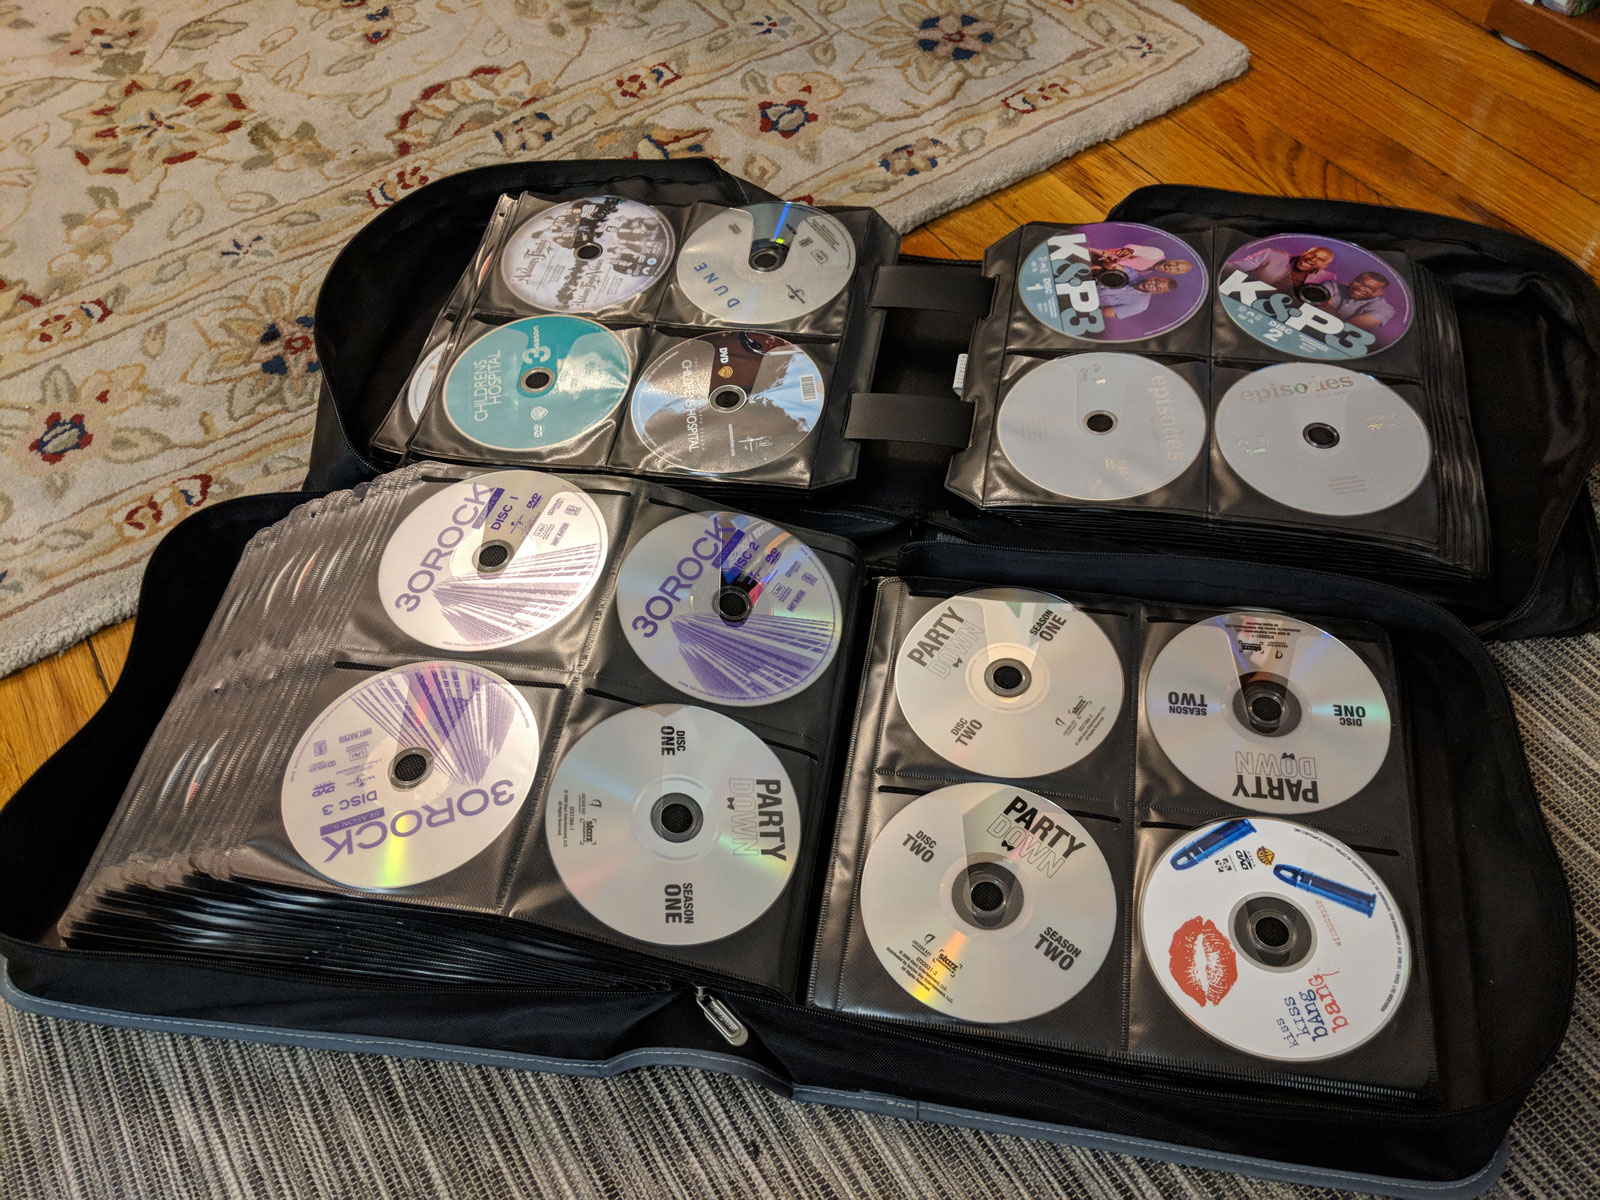
The biggest data source is my DVD and Blu-Ray collection. I don’t like relying on streaming services to keep my favorite content available, so I still buy physical copies of movies and TV shows. As soon as I get a new disc, I rip the raw image and make a streamable video file. Between the raw ISO copy and the streamable MP4s, a single disc can occupy 60 GB of disk space.
I still buy physical DVDs or Blu-Rays for anything I might watch a second time.
What’s a homelab? 🔗︎
“Homelab” is a colloquial term that’s grown in popularity in the last few years.
A homelab is a place in your home where you can experiment with IT hardware or software that you’d typically find in an office or data center. It can serve as a practice environment for new professional skills, or it can just be a place to play with interesting technology.
Why build your own NAS? 🔗︎
If you’re new to the homelab world or have no experience building PCs, I recommend that you don’t build your own NAS.
There are off-the-shelf solutions that offer similar functionality with a gentler learning curve.
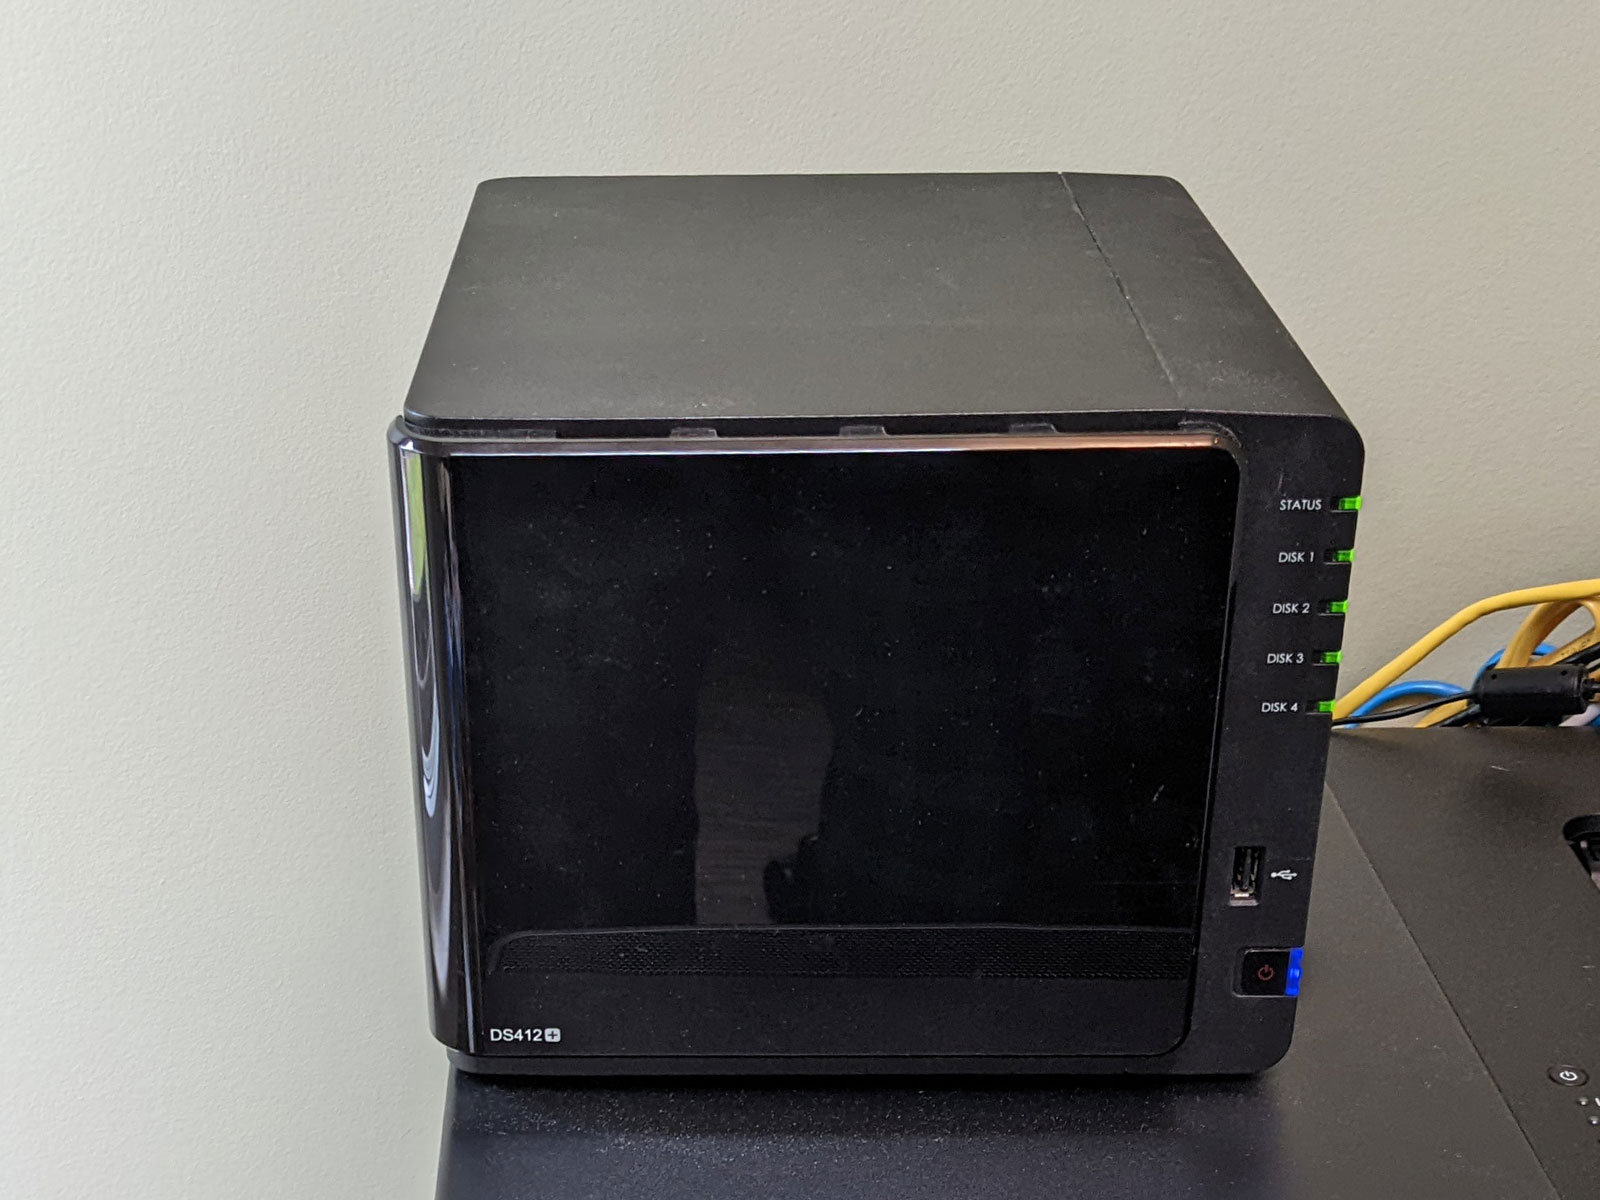
Before building my own homelab NAS, I used a 4-disk Synology DS412+ for seven years. Honestly, I loved my Synology. It was one of the best purchases I ever made. It was a gentle introduction to the world of NAS servers, and it’s where I’d recommend you start if you’re not sure about the whole NAS thing.
My 10 TB Synology DS412+ has served me well for seven years.
A few months ago, my Synology failed to boot and started making a clicking noise. A chill ran up my spine as I realized how dependent I’d become on this single device. Synology servers are not user-repairable, so if a part breaks after warranty, you have to replace the whole server. And if you’re dumb like me, and you’ve used a Synology-proprietary storage format, you can’t access your data without another Synology system.
Fortunately, my old Synology recovered after I cleaned it out and reseated the disks, but it was an important wake-up call. I decided to switch to TrueNAS, as it offers an open-source implementation of an open storage format.
TrueNAS and ZFS 🔗︎
TrueNAS (formerly known as FreeNAS) is one of the most popular operating systems for storage servers. It’s open-source, and it’s been around for almost 20 years, so it seemed like a reliable choice.
TrueNAS uses ZFS, a filesystem designed specifically for storage servers. Traditional filesystems like NTFS or ext4 run on top of a data volume that manages low-level disk I/O. ZFS manages everything in the stack from the file-level logic down to disk I/O. ZFS' comprehensive control gives it more power and performance than other filesystems.
Some neat features of ZFS include:
- Aggregating multiple physical disks into a single filesystem
- Automatically repairing data corruption
- Creating point-in-time snapshots of data on disk (similar to OS X’s Time Machine feature)
- Optionally encrypting or compressing data on disk
Before building this system, I had zero experience with ZFS, so I was excited to try it out.
Storage planning 🔗︎
Estimating my storage capacity needs 🔗︎
When I bought my Synology NAS, I initially installed three 4 TB drives and left the fourth slot empty. That gave me a total of 7 TB of usable space with Synology Hybrid Raid. Three years later, I was running out of space, so I added a fourth drive, bringing my total usable space to 10 TB.
I decided to apply the same strategy for my new build. I wanted a system that met my current needs with room to grow. My rough target was to start with 20 TB of usable storage and extra headroom for up to 30 TB if I add disks later.
ZFS doesn’t let you add a new drive to an existing pool, but that feature is under active development. Hopefully, by the time I need to expand storage, the feature will be available in TrueNAS.
Many small disks or fewer large disks? 🔗︎
ZFS is designed to survive disk failures, so it stores each block of data redundantly. This feature complicates capacity planning because your total usable storage is not just the sum of each disk’s capacity.
ZFS creates filesystems out of “pools” of disks. The more disks in the pool, the more efficiently ZFS can use their storage capacity. For example, if you give ZFS two 10 TB drives, you can only use half of your total disk capacity. If you instead use five 4 TB drives, ZFS gives you 14 TB of usable storage. Even though your total disk space is the same in either scenario, the five smaller drives give you 40% more usable space.
When you’re building a NAS server, you need to decide whether to use a smaller quantity of large disks or a larger quantity of small disks. Smaller drives are usually cheaper in terms of $/TB, but they’re more expensive to operate. Two 4 TB drives require twice the electricity of a single 8 TB drive.
I wanted to minimize my server’s physical footprint, so I opted for fewer, larger drives.
raidz 1, 2, or 3? 🔗︎
ZFS offers different options for redundancy: raidz1, raidz2, and raidz3. The main difference is in robustness. raidz1 can survive one disk failure without losing data. raidz2 can survive two simultaneous disk failures, and raidz3 can survive three.
What you gain in robustness, you pay for in usable storage. Given five 4 TB hard drives, here’s how much usable storage you’d get from each ZFS mode:
| ZFS type | Usable storage | % of total capacity |
|---|---|---|
| raidz1 | 15.4 TB | 77.2% |
| raidz2 | 11.4 TB | 57.2% |
| raidz3 | 7.7 TB | 38.6% |
I chose raidz1. With only a handful of disks, the odds of two drives failing simultaneously is fairly low.
Keep in mind that ZFS is not a backup strategy. ZFS can protect you against disk failure, but there are many threats to your data that ZFS won’t mitigate, such as accidental deletion, malware, or physical theft. I use restic to replicate everything important to encrypted cloud backups.
The value of ZFS is that I don’t have to resort to my cloud backups if one drive dies, but I’ll have to recover from backups if two drives fail. That would be a pain, but it’s not worth giving up 20% of my server’s usable storage for raidz2.
The more physical drives you have, the more defensive you should be about disk failure. If I had a pool of 20 disks, I’d probably use raidz2 or raidz3.
Preventing concurrent disk failures 🔗︎
Naively, the probability of two disks failing at once seems vanishingly small. Based on Backblaze’s stats, high-quality disk drives fail at 0.5-4% per year. A 4% risk per year is a 2% chance in any given week. Two simultaneous failures would happen once every 48 years, so I should be fine, right?
The problem is that disks aren’t statistically independent. If one disk fails, its neighbor has a substantially higher risk of dying. This is especially true if the disks are the same model, from the same manufacturing batch, and processed the same workloads. Given this, I did what I could to reduce the risk of concurrent disk failures.
I chose two different models of disk from two different manufacturers. To reduce the chances of getting disks from the same manufacturing batch, I bought them from different vendors. I can’t say how much this matters, but it didn’t increase costs significantly, so why not?
I purchased the same model of disk from two different vendors to decrease the chances of getting two disks from the same manufacturing batch.
How I chose parts 🔗︎
Motherboard 🔗︎
The first decision was motherboard size. I’ve always appreciated my Synology DS412+’s compact form factor. I’ve never built a computer with a mini-ITX motherboard before, and this seemed like a good opportunity.
I chose the ASUS Prime A320I-K for a few reasons:
- It has four SATA ports, which would allow me to connect four disks directly to the motherboard.
- It supports Radeon graphics, which would spare me from buying a separate graphics card
- It’s affordable, at only $98
The ASUS Prime A320I-K supports onboard graphics in a mini-ITX form factor.
I also looked at the B450, which was very similar but almost twice the price. The main advantage seemed to be better overclocking support, which I didn’t need.
CPU 🔗︎
From what I had read, ZFS is not very CPU-intensive. I ran a basic test by installing TrueNAS on a cheap Dell OptiPlex 7040 mini PC. It barely used the CPU, so it seemed safe to go with a low-powered option.
My main criteria in a CPU was support for Radeon graphics so that I could use the A320 motherboard’s onboard HDMI output.
The AMD Athlon 3000G is inexpensive and has native graphics support.
I settled on the AMD Athlon 3000G. At only $105, it’s a good value, it supports Radeon graphics, and it has decent CPU benchmarks.
Case 🔗︎
When I built my last VM server, I used a Fractal Design case. It’s my favorite computer case ever, so I returned to Fractal Design on this build.
I went with the Fractal Design Node 304 Black, a compact mini-ITX case. I liked the design because it’s closer to a cube than a tower. It has six drive bays, which allows me to start with enough drives and still have room to grow in the future.
The Fractal Design Node 304 Black is a mini-ITX case with space for six disks.
Disk (Data) 🔗︎
With six drive bays available in the case, I decided to start with four 8 TB disks, which translates to 22.5 TB of usable storage under raidz1. When I need to expand in the future, a fifth disk will bring me to 30.9 TB, and a sixth would get me 37 TB.
In the 8 TB range, there aren’t many drives below 7200 RPM, but you can go up to 10k RPM. For my NAS, speeds above 7200 RPM wouldn’t make a difference because the bottleneck is the network. A 10k RPM drive would be louder and consume more power but offer no practical gain in performance.
I initially tried checking Backblaze’s hard drive stats to avoid failure-prone disks, but they use drives on the pricier side. At one point, I was considering $400 drives for their impressively low 0.5% failure rate, but I realized it’s irrational to spend twice as much to reduce the failure rate by a few percent.
The last pitfall to avoid is shingled magnetic recording (SMR) technology. ZFS performs poorly on SMR drives, so if you’re building a NAS, avoid known SMR drives. If the drive is labeled as CMR, that’s conventional magnetic recording, which is fine for ZFS.
I chose the Toshiba N300 and the Seagate IronWolf. I saw positive reviews of both on the TrueNAS forums and reddit. Both models sold for $180-190, which was a good value for the storage space.
Toshiba N300 (left) and Seagate IronWolf (right)
Disk (OS) 🔗︎
TrueNAS needs a dedicated OS disk, but from what I’d read, it doesn’t demand much of it. The OS needs at least 2 GB of space, but TrueNAS infrequently reads or writes to the OS disk.
The Kingston A400 is a fantastic value as a 120 GB M.2 SSD for only $32.
I went with the Kingston A400 because it was incredibly inexpensive — $32 for a 120 GB M.2 disk. I love M.2 disks! They don’t require any cabling. They just tuck away into the motherboard, take up nearly zero space, and you never have to touch them again.
Memory 🔗︎
In my research, I frequently found references to the “rule” that ZFS requires 1 GB of RAM for every TB of disk space in the system. According to ZFS developer Richard Yao, that rule is a myth. There are some RAM-hungry ZFS features like data deduplication, but ZFS runs fine with constrained memory.
I find memory extremely boring to shop for. I wish I had a more rigorous process for choosing RAM, but I couldn’t find trustworthy benchmarks or user reports for RAM. My process was:
- Review the list of RAM sticks compatible with the ASUS A320I-K motherboard
- Filter for 32 GB or 64 GB options that used only two sticks
- Filter for brands I trust (Corsair, Crucial, G.SKILL, Kingston, Samsung, Patriot, Mushkin, HyperX)
- Filter for options below $150
That process led me to the CORSAIR Vengeance LPX 32GB CMK32GX4M2A2400C14 (2 x 16GB) for $128.
The CORSAIR Vengeance LPX 32GB CMK32GX4M2A2400C14 (2 x 16GB) is compatible with the A320I-K motherboard and is a decent price for 32 GB.
Power supply unit (PSU) 🔗︎
In terms of power capacity, basically any consumer PSU would have been sufficient. According to PCPartPicker, my system only requires 218 W. I would have picked a PSU in the 300-400 W range, but there weren’t semi-modular options with lower wattage. I went with the 500 W EVGA 110-BQ-0500-K1.
The EVGA 110-BQ-0500-K1 is a semi-modular PSU. At 500 W, it offers more than enough power for my build.
90-degree SATA cables 🔗︎
I needed 90-degree SATA cables to work within the case’s space constraints
One item I’ve never purchased before was a 90-degree SATA cable. I didn’t realize I needed them until I saw that there wasn’t enough space between my motherboard and PSU to plug in a standard SATA cable. These slim 90-degree cables solved the problem.
It was such a tight squeeze between my PSU and motherboard that I needed 90-degree slim SATA cables.
What’s missing? 🔗︎
There are a few components that I intentionally excluded from my build due to price, complexity, or physical space.
Graphics card (GPU) 🔗︎
With scarce physical space and motherboard ports, I didn’t want a dedicated graphics card. I chose a motherboard and CPU combination that supports graphics rendering without an external card.
Host bus adaptor (HBA) 🔗︎
Many NAS builds include a host bus adaptor (HBA). An HBA is a chip that goes into the PCI slot of a motherboard and increases the number of disks the motherboard can support.
ZFS requires you to reflash the HBA’s firmware in a process that sounds tedious and confusing. I decided to punt on the HBA until I need more storage. The ASUS A320I-K has four SATA ports, which is enough for my initial needs. I made sure to leave a PCI slot empty for a future HBA.
ECC RAM 🔗︎
In researching different TrueNAS builds, I saw several posts claiming that ECC RAM (error correction code RAM) is a must-have to prevent data corruption. I ultimately decided against ECC RAM and just used standard, consumer-grade RAM.
While I obviously don’t want my server to corrupt my data in RAM, I’ve also been using computers for the past 30 years without ECC RAM, and I’ve never noticed data corruption. If I were building a server for heavy load from multiple users all day, I’d spring for a build with ECC RAM. For home needs, I think simple consumer-grade RAM should be fine.
SLOG disk 🔗︎
Many ZFS builds include a separate, dedicated SSD called the SLOG (separate intent log).
The idea is that writing to an SSD is orders of magnitude faster than writing to multiple spinning disks. When an application writes data, ZFS can quickly write it to the SSD, tell the application that the write succeeded, then asynchronously move the data from the SSD to the storage pool. The SLOG improves write speeds significantly.
I chose not to integrate a SLOG disk because I’m limited by ports and drive bays. Adding a SLOG disk meant either forfeiting my only PCI slot or one of my six drive bays. I’d rather leave myself room to expand capacity later.
Parts list 🔗︎
* Caveat: This motherboard may not work out of the box with the AMD Athlon 3000G CPU. See details below.
Compared to off-the-shelf products 🔗︎
For comparison, here are some off-the-shelf solutions at similar price points.
| Product | 2022 Budget NAS | Synology DS920+ | QNAP TS-473A-8G-US |
|---|---|---|---|
| Disk bays | 6 | 4 | 4 |
| RAM | 32 GB | 4 GB | 4 GB |
| Max RAM | 32 GB | 8 GB | 8 GB |
| CPU benchmark | 4479 | 3002 | 4588 |
| Price | $530.29 | $549.99 | $549 |
The total cost of my build is similar to off-the-shelf solutions, but I get more value for my money. I have 8x as much RAM, and I’m not locked in to any closed-source, vendor-specific OS platform.
Build photos 🔗︎
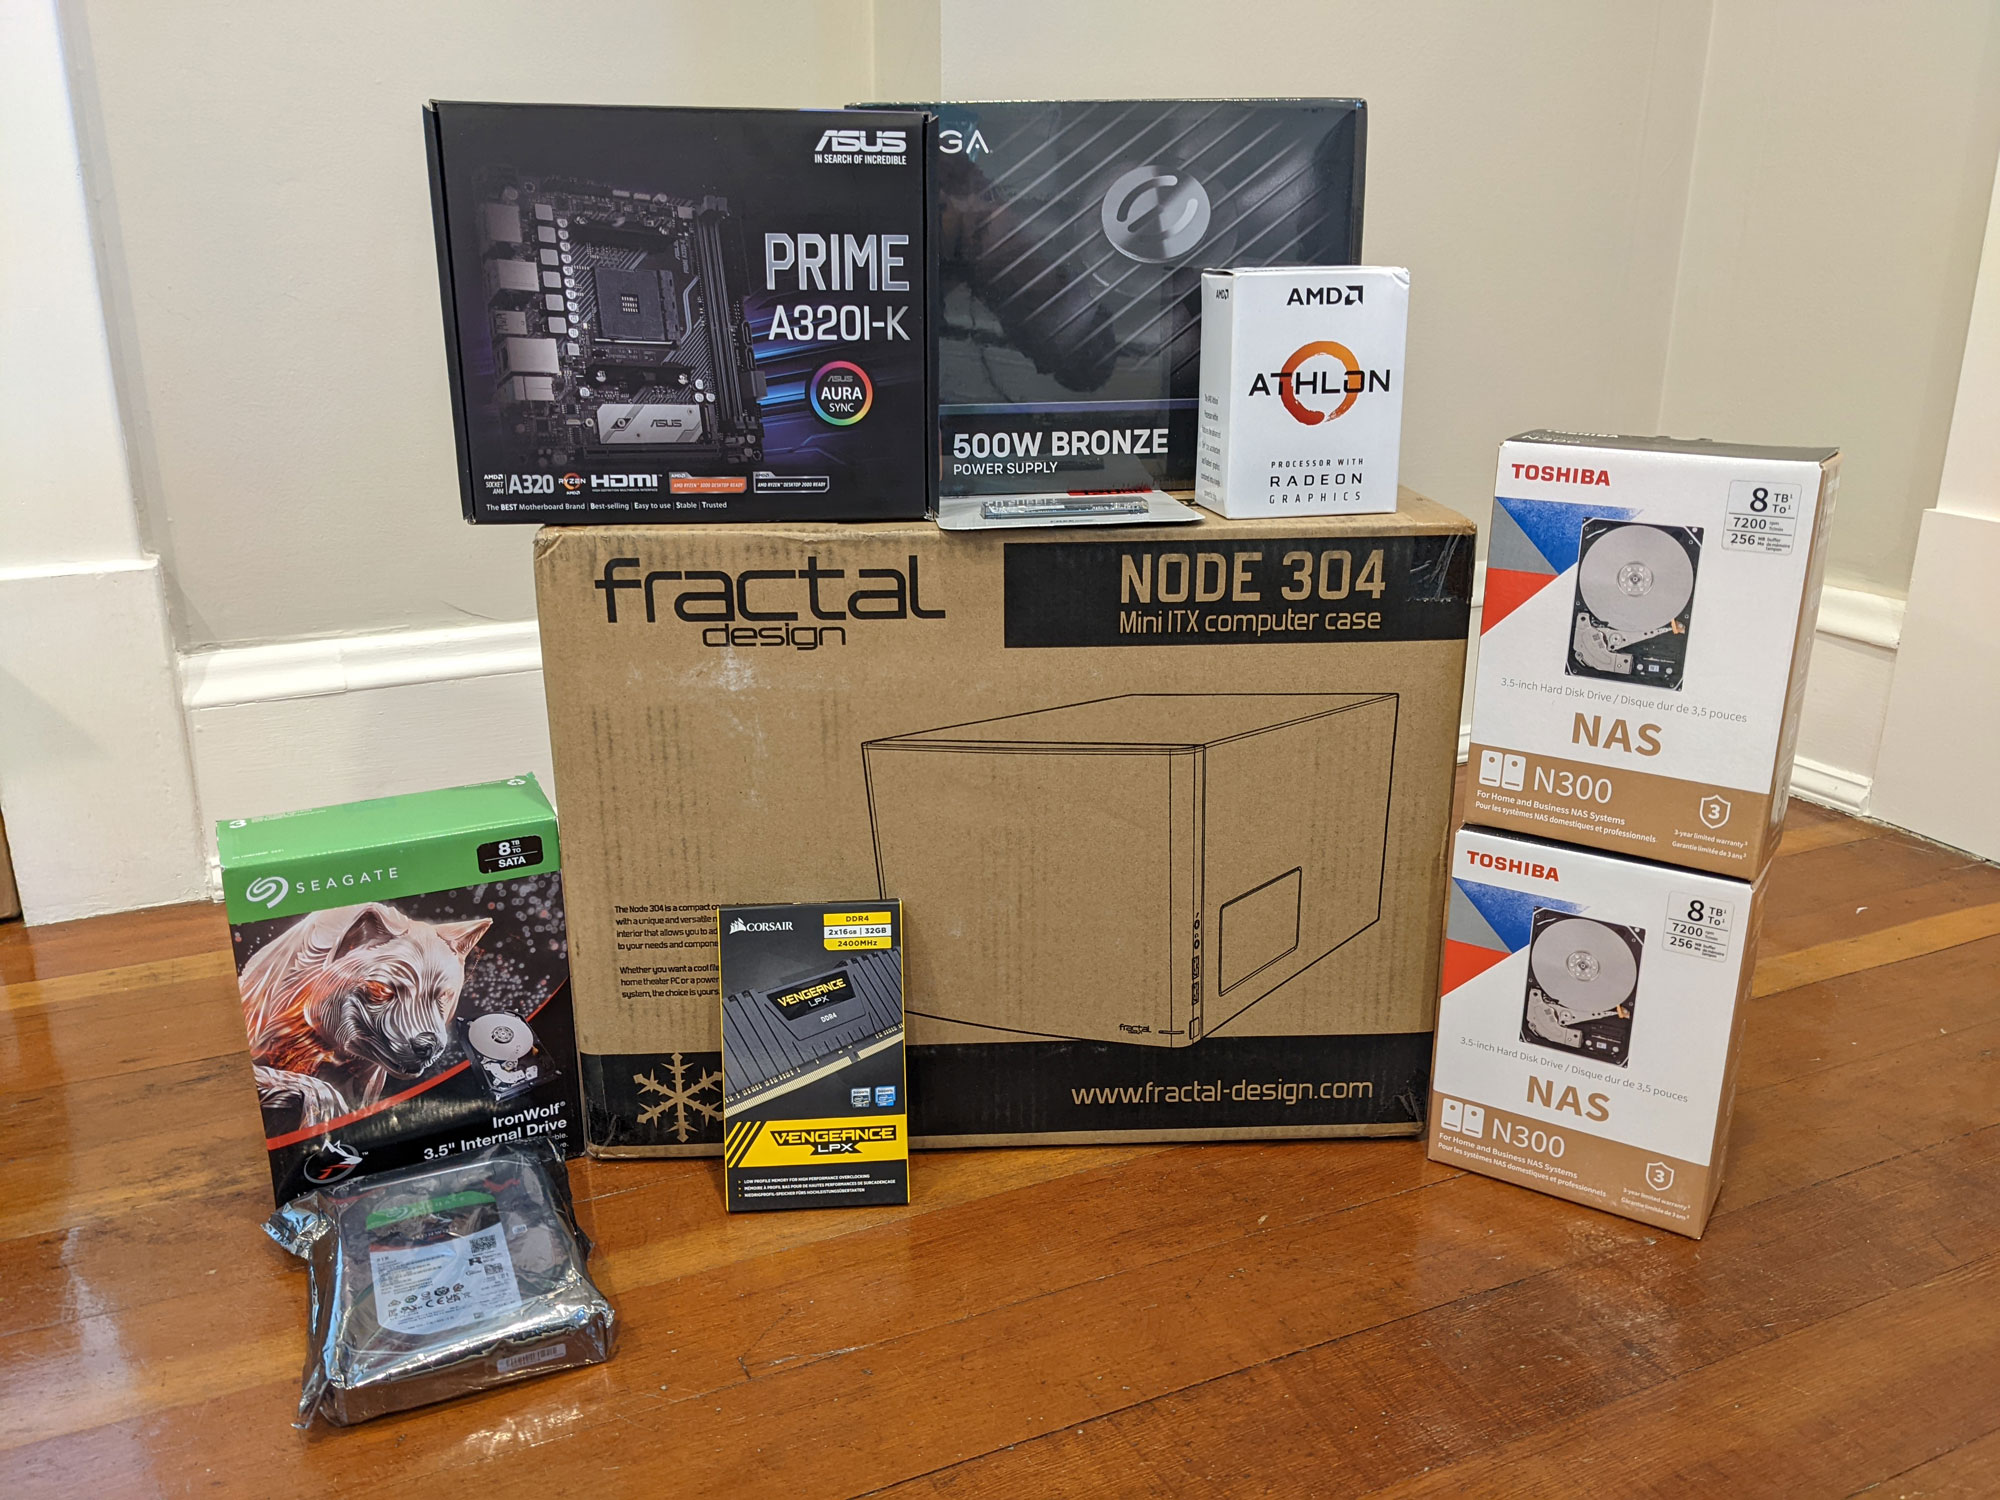
All the parts in their retail boxes
I had no issues installing the motherboard in the Fractal Design mini-ITX case.
I love installing M.2 SSDs. No wires or rails — one screw, and you’re done.
This is the first system I’ve ever built that doesn’t expose the back face of the PSU outside of the case. Instead, the case has a short NEMA extension cable that routes the internal PSU to the case’s own external power input.
It was such a tight squeeze between the motherboard’s SATA ports and the PSU that I had to buy special 90-degree slim SATA cables.
After connecting everything to the motherboard (except for the CPU fan)
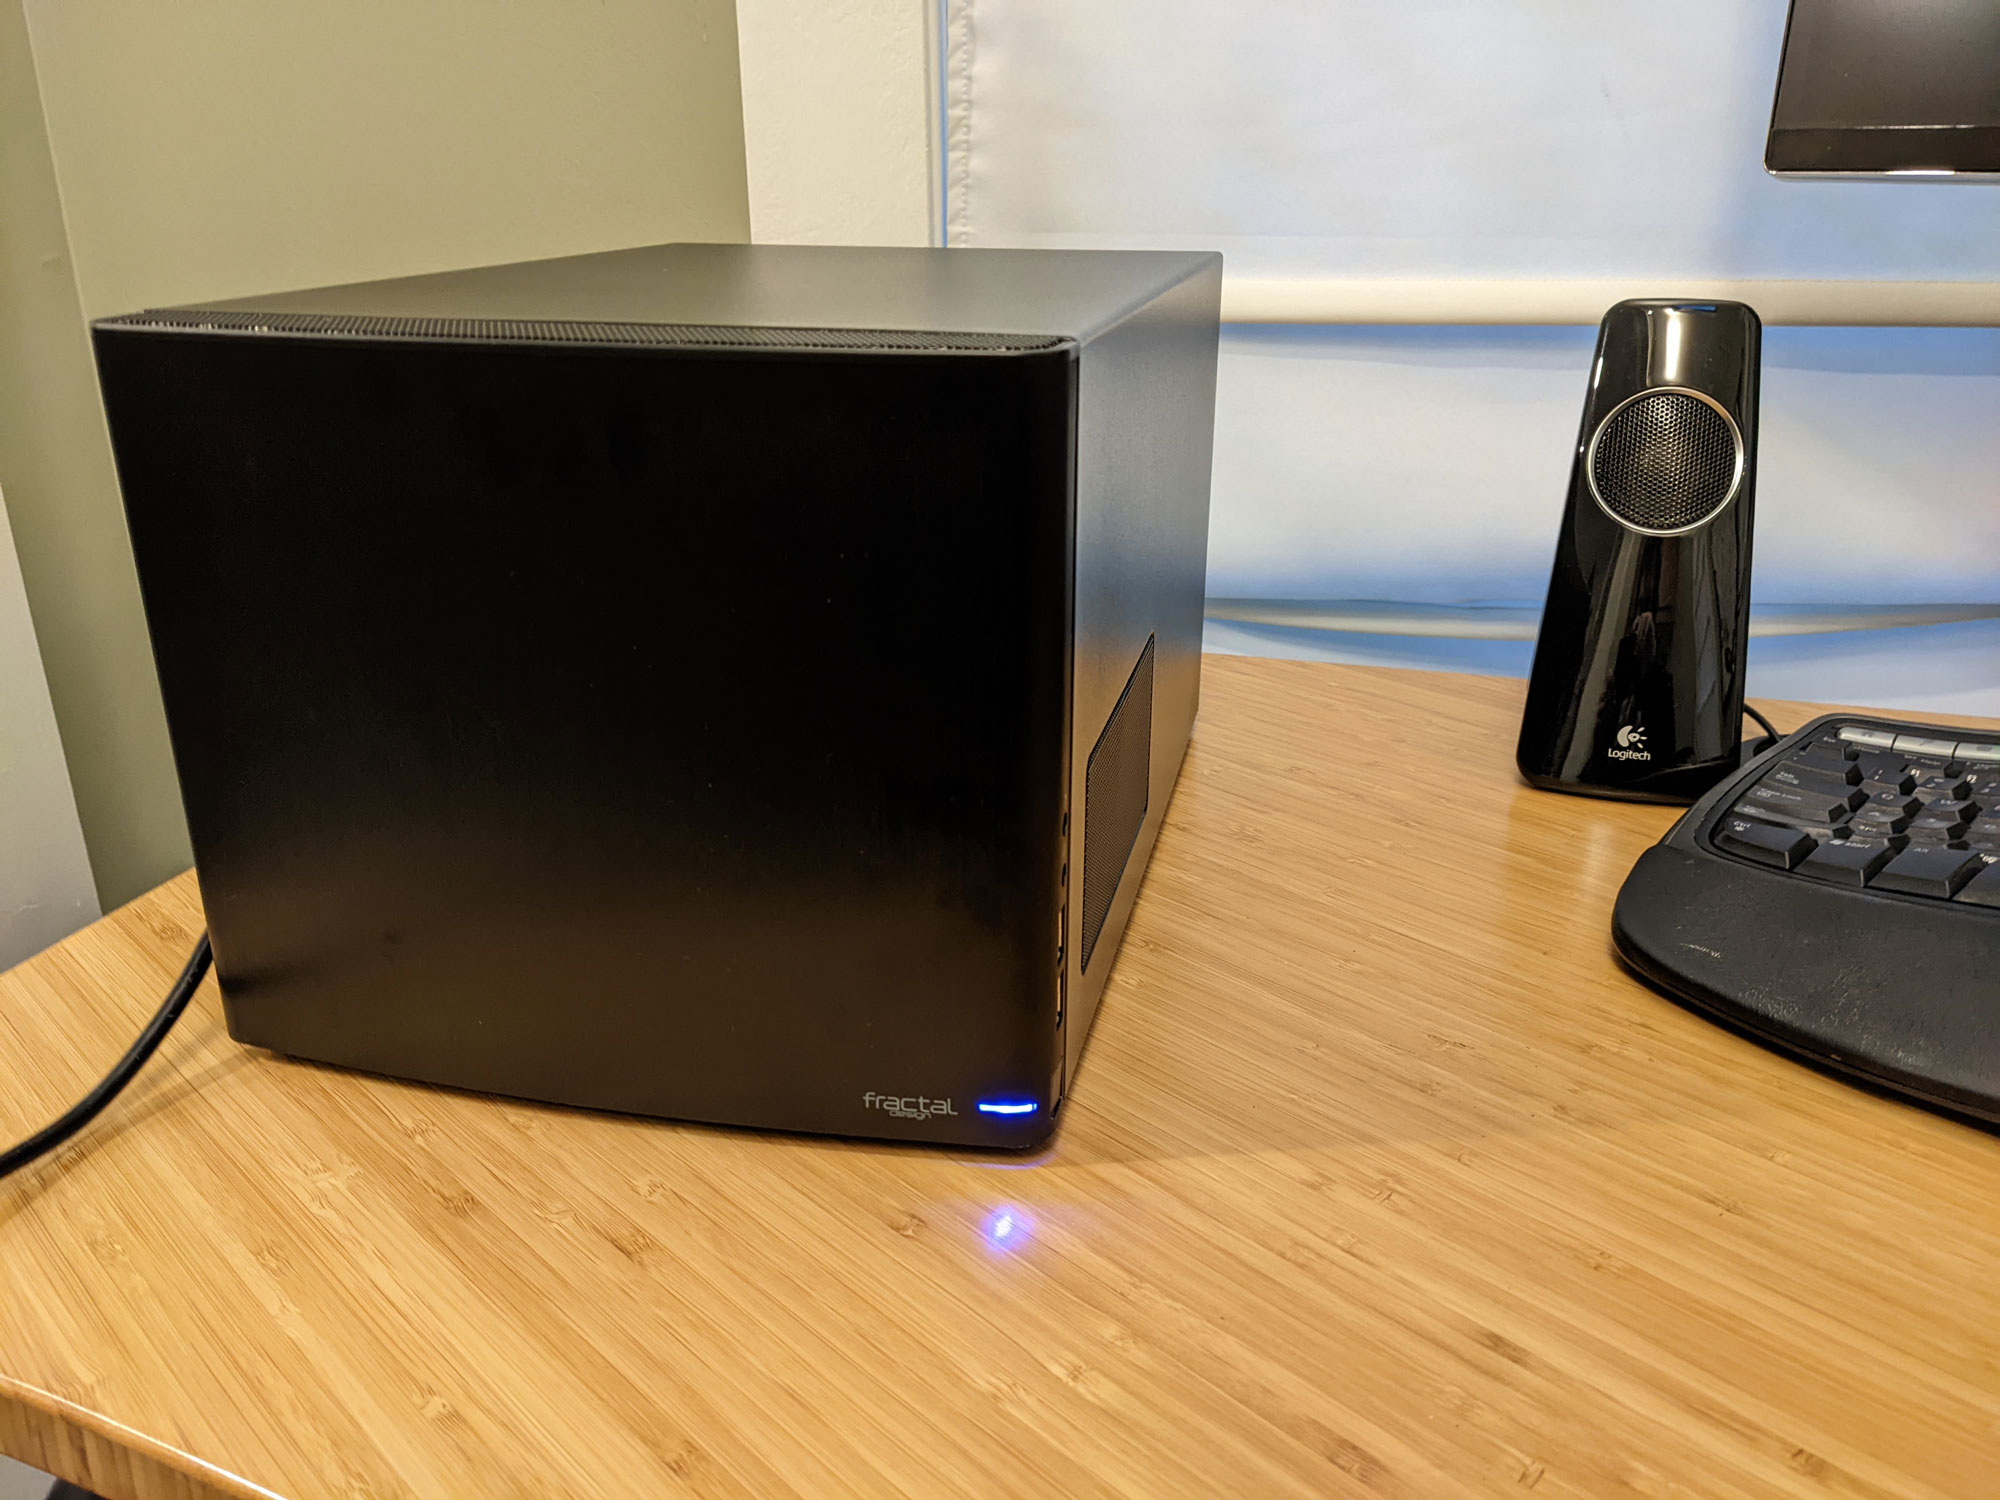
The completed build
Building the server with TinyPilot 🔗︎
Longtime readers of this blog may recall that I used the Raspberry Pi to create a tool specifically for building and managing servers. It’s called TinyPilot. This was the third server I’ve built with TinyPilot and the first I built with the new TinyPilot Voyager 2.
Instead of connecting a keyboard, mouse, and monitor to the TrueNAS server, I managed the installation with a TinyPilot Voyager 2.
I’m obviously biased, but building this server with the Voyager 2 was a lot of fun! I never had to connect a keyboard or monitor to the server. I could see video output, boot to BIOS, and mount the TrueNAS installer image all from my web browser.
TinyPilot allows me to mount the TrueNAS installer ISO without plugging in a flash drive, keyboard, or monitor.
The one gap I ran into was in upgrading the BIOS. TinyPilot can mount disk images like .img and .iso files, but it doesn’t yet know how to share raw files with the target computer. When I needed to load the .CAP file for the ASUS BIOS upgrade, I shamefully put them on a USB thumb drive instead of keeping it a pure TinyPilot build. I hope to add support for that scenario soon so that TinyPilot can handle my next BIOS upgrade.
Is this BIOS version incompatible? Or am I an idiot? 🔗︎
When I got all the components installed, the system powered on, but there was no video display.
Oh no! Did I misunderstand the motherboard’s onboard video requirements? I did all the usual diagnostics: reseated the RAM, reseated the CPU, and checked all the cables — same result.
After some panicked Googling, I saw mentions that the ASUS Prime A320I-K requires a BIOS upgrade before it can work with the Athlon 3000G. I recalled seeing that warning when I was selecting parts and breezing right by it. “I’ve done BIOS updates,” I thought. “They’re no big deal!”
I didn’t consider how I’d upgrade my BIOS without a CPU.
Luckily, the Ryzen 7 CPU from my 2017 homelab VM server was compatible with the ASUS Prime A320. I borrowed the CPU and GPU from that server, and I got my new NAS server to boot!
I was able to use parts from my old 2017 homelab VM server to upgrade the BIOS.
Strangely, even after I got the system to boot with borrowed parts, the motherboard reported that it was running BIOS version 2203, which ASUS claims is compatible with the AMD Athlon 3000G CPU. But I updated to the latest BIOS, which was 5862.
The ASUS Prime A320I-K CPU compatibility page claims it’s compatible with the Athlon 3000G starting at BIOS version 2203.
After upgrading to 5862, I still couldn’t get a boot. Then, I realized that I was plugging my HDMI cable into the server’s DisplayPort output.
Why did the DisplayPort designers make it so easy to plug in HDMI cables by mistake?
Was this whole parts-borrowing rigamarole even necessary? There are two possibilities:
- I’m dumb and didn’t notice my HDMI cable plugged into the motherboard’s DisplayPort output until after I upgraded the BIOS.
- ASUS is dumb, and they incorrectly listed the Athlon 3000G as compatible with BIOS version 2203 when it isn’t.
Normally, I’d accept the blame, but the ASUS BIOS was so flaky that the problem might have been on the ASUS side. In any case, I was relieved to finally boot the NAS without any borrowed parts.
The moment I finally got a boot screen with the Athlon 3000G installed
Performance benchmarks 🔗︎
One of the surprises to me in writing this up was that I couldn’t find any good benchmarking tools for measuring NAS performance. There are tools that run on the NAS itself to benchmark local disk I/O, but that doesn’t reflect real-world usage. Most of my usage is over the network, so a local disk benchmark will completely miss bottlenecks in the networking stack.
I just made up my own rudimentary benchmark. I generated two sets of random file data and then used robocopy to measure read and write speeds between my main desktop and my NAS. This was by no means a rigorous test — I didn’t do it on an isolated network, and I didn’t shut down all other processes on my desktop while running the test. I ran the same tests against my old Synology DS412+ as a comparison.
The first file set was 20 GiB of 1 GiB files, and the other was 3 GiB of 1 MiB files. I took the average of three trials over both encrypted volumes and unencrypted volumes.
Performance topped out at 111 MiB/s (931 Mbps), which is suspiciously close to 1 Gbps. This suggests that the limiting factor is my networking hardware, as my switch, my desktop, and the NAS servers all have 1 Gbps Ethernet ports.
Read performance 🔗︎
For unencrypted volumes, I was surprised to see my rusty, 7-year-old Synology outperform my shiny, new TrueNAS build. Synology was 31% faster at reading small files and 10% faster on large files.
Synology’s glory was short-lived, as it completely choked on encryption. Synology’s read speeds dropped by 67-75% on encrypted volumes, whereas encryption had no effect on TrueNAS. That allowed TrueNAS to outperform Synology by 2.3x for small files and 3x for large files on an encrypted volume. I keep most of my data on encrypted volumes, so this test more accurately represents my typical usage.
Write performance 🔗︎
Although my old Synology managed to outshine TrueNAS on reads, this was not the case for writes. Even on an unencrypted volume, TrueNAS was 77% faster on small files, and the two systems performed similarly on 1 GiB files.
Again, bringing encryption into the mix obliterates Synology’s write performance. With encryption enabled, TrueNAS was 5.2x faster on small files and 3.2x faster on large files.
Power consumption 🔗︎
I used a Kill A Watt P4460 meter to measure power consumption on both my old Synology and the new TrueNAS server:
| Synology DS412+ | 2022 NAS | |
|---|---|---|
| Idle | 38 W | 60 W |
| Load | 43 W | 67 W |
The new server uses 60% more power than my old Synology, which is a bit surprising. I pay about $0.17/kWh, so the server costs around $7.20/month to run.
I don’t know much about what factors drive up the power draw, but one possibility is the PSU. Synology probably has a PSU that’s perfectly sized to its other components, whereas my 500 W PSU is likely inefficient at powering a system that requires only 15% of its capacity.
Final thoughts 🔗︎
Motherboard 🔗︎
My biggest complaint about the ASUS Prime A320I-K was its limited compatibility, but it’s possible that I’m mistaken.
Beyond that, I wasn’t crazy about the BIOS. Its upgrade utility was completely broken. It’s supposed to be able to download and install the latest BIOS versions, but when I tried upgrading, it kept telling me that I had the latest BIOS when I didn’t. I had to upgrade manually by downloading the files and loading them on a thumb drive.
The ASUS EZ Flash utility claimed I had the latest BIOS at version 2203. The ASUS website offered BIOS version 5862, so I had to update manually.
I also missed that the A320I-K supports a maximum of 32 GB of RAM. I’m not sure if I’ll ever need to expand memory, but it would have been good to give myself some more breathing room.
If I were to do this build over, I’d go with the Gigabyte B550I. It’s $50 more, but it supports 64 GB of RAM, 2.5 Gbps Ethernet, and it has an extra M.2 slot.
Case 🔗︎
I was disappointed in the Fractal Design Node 304. When I built my VM server with the Fractal Design Meshify C, the case kept delighting me with features I’d never seen on other cases. On this build, it was the opposite. I kept thinking, “Why is this a problem in this case when this has never been a problem for me before?”
It looks nice on the outside, but I found it awkward to work in. There was barely any documentation, and some of the case mechanisms weren’t obvious.
It’s my first mini-ITX build, and I know the case designers have to make sacrifices in the name of minimizing size, so maybe I’m judging it too harshly.
CPU 🔗︎
I’m happy with the Athlon 3000G, but it turned out to be massively overpowered for my needs. My TrueNAS dashboard reports that CPU load has been 99% idle for the past month of usage:
TrueNAS barely uses any CPU capacity.
The most important thing about the CPU was that it supported AMD’s Radeon video technology, which saved me from needing a GPU. For $105, it was a great deal.
Disk (Data) 🔗︎
It’s a bit too early to judge disks, so check back in about five years to see how I’m liking them. So far, so good.
My biggest worry was that the disks would be too noisy, but I never hear them at all. The only time I’ve heard them was while running the performance benchmarks. Interestingly, they were noisiest not during reads or writes but when I was deleting files between tests.
Power supply unit (PSU) 🔗︎
After seeing that the system idles at 60 W, I’m wondering if I should have put more effort into a lower-capacity power supply. 500 W is more than double the capacity I need, so maybe I could have reduced my server’s idle power draw with a PSU in the 300-400 W range.
Disk (OS) 🔗︎
The Kingston A400 is working fine. TrueNAS puts such a minimal load on the OS disk that there isn’t much for it to do. It has 90 GB free, so I could have used an even smaller drive.
There’s almost zero disk activity in TrueNAS' reporting. There’s a tiny I/O read every week as part of some scheduled task, but that’s it.
TrueNAS rarely touches its OS disk after booting.
TrueNAS 🔗︎
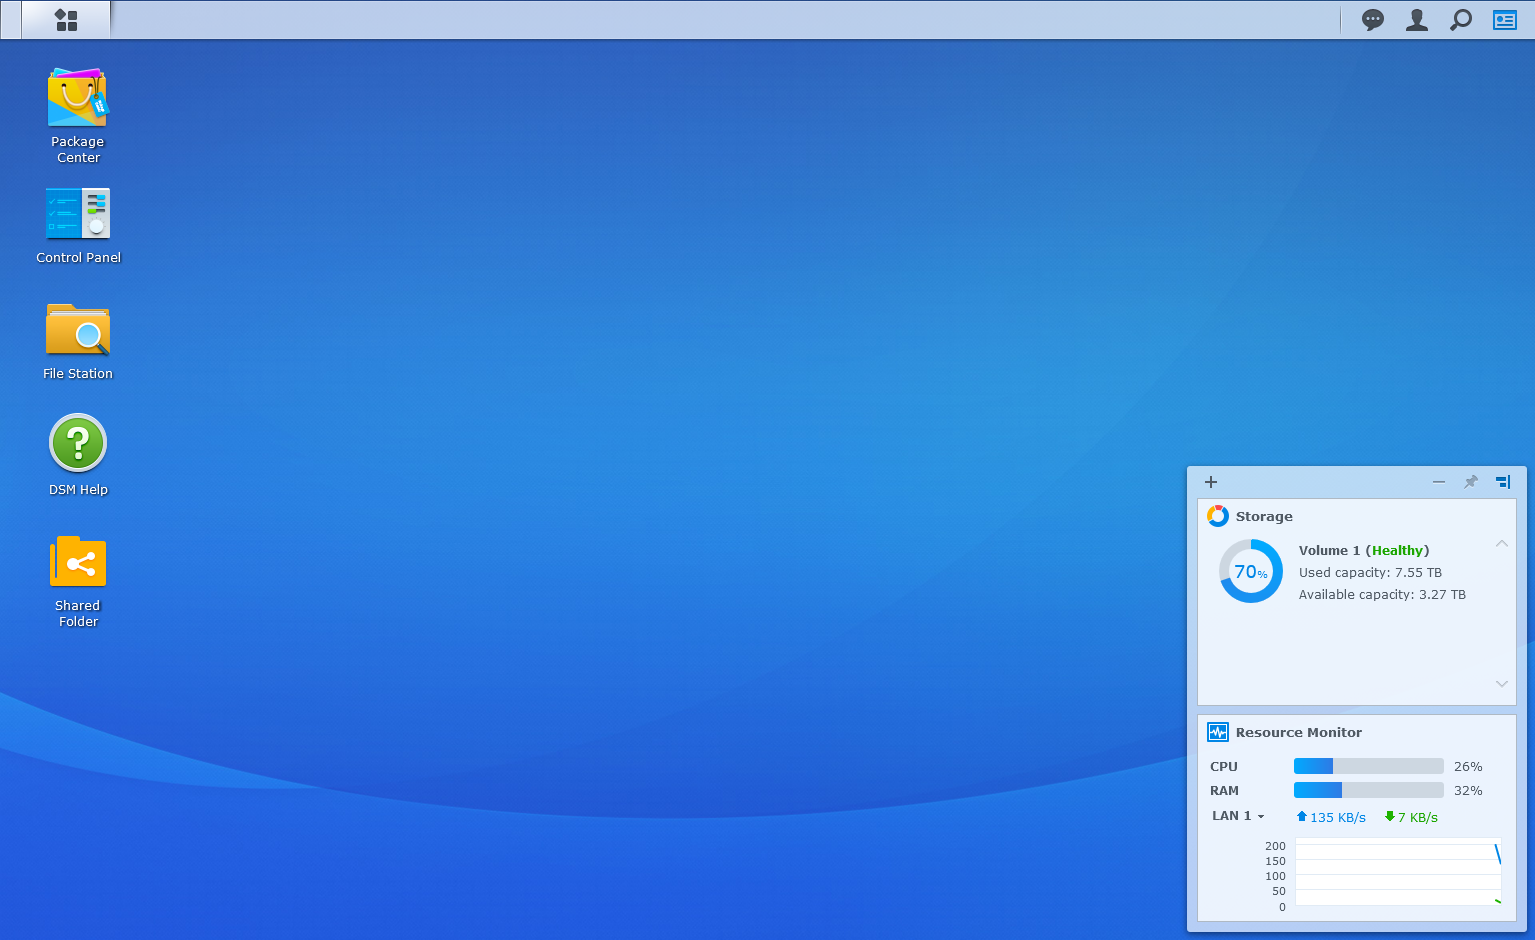
Coming into TrueNAS, I knew my Synology’s web UI would be hard to beat. It’s the most elegant and intuitive interface I’ve ever seen for a network appliance. They did a great job of building a clean UI that spares the end-user from technical details of the underlying filesystem.
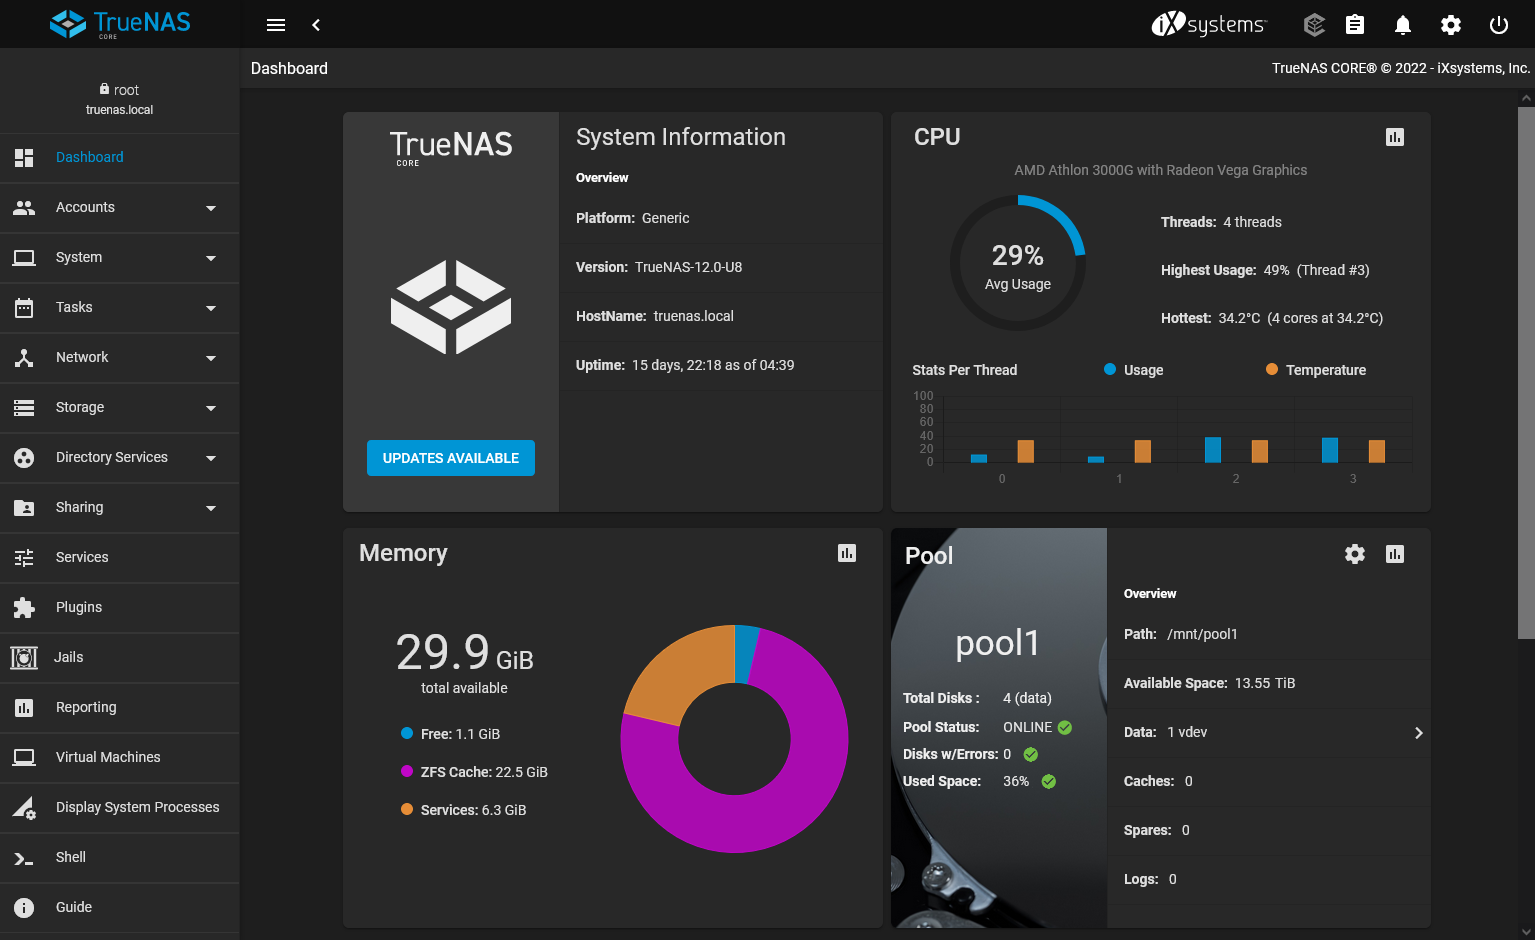
TrueNAS has its hacker charm, but I find it a huge usability downgrade from Synology. The interface seems like it was designed by someone with disdain for anything outside of the command line.
The Synology web interface (left) is leaps and bounds ahead of TrueNAS (right).
On TrueNAS, it took me several tries to create a new volume and share it on my network. You have to jump between several disconnected menus, and there aren’t any hints about what action you need to perform next. With Synology, there’s a smooth UI flow that guides you through all the required settings.
I found third-party apps much harder to install on TrueNAS. I use Plex Media Server to stream my movie and TV collection, and Plex is a pre-configured plugin on TrueNAS. It should be one of the easiest apps to install, but it took me an hour of fiddling and searching through documentation. By comparison, installing Plex on Synology takes about two minutes of clicking through a wizard.
I’m sticking with TrueNAS because I care more about platform lock-in than almost anything else, and I like supporting open-source software. If I were recommending a NAS to a friend who wasn’t as ideologically driven, I’d suggest Synology.
ZFS 🔗︎
ZFS is cool, but I haven’t found a need for most of its features beyond RAID.
I see people talking about snapshotting, but I haven’t found a need for it. I already have snapshots in my restic backup solution. They’re not especially convenient, but I’ve been using restic for two years, and I only recall needing to recover data from a snapshot once.
One interesting feature is encrypted snapshots. You can take snapshots of a data volume without having to decrypt it. I have some data that I want to keep encrypted, but I don’t need to access it very often, so being able to back it up regularly without decrypting it would be handy.
Overall 🔗︎
Overall, I’m enjoying my new NAS, and I learned a lot from this build. If this had been my first experience with a NAS, I’d be miserable and confused, but starting with my Synology gave me a gentle introduction to the technologies involved. I feel like the training wheels are off, and I’m ready to tinker with the power features of ZFS and TrueNAS.
Video 🔗︎
Thanks to the members of the Blogging for Devs Community for providing early feedback on this post.
Recommend
About Joyk
Aggregate valuable and interesting links.
Joyk means Joy of geeK
