

UE4 中使用 Control Rig 实现捏脸系统
source link: http://www.lymanli.com/2022/05/04/UE4-face-editor/
Go to the source link to view the article. You can view the picture content, updated content and better typesetting reading experience. If the link is broken, please click the button below to view the snapshot at that time.
UE4 中使用 Control Rig 实现捏脸系统

本文基于 UE 引擎提供的 Control Rig 插件,实现了一个简易的捏脸系统。
一、模型导入
将 fbx 格式的模型导入 UE 编辑器中,会生成 Skeletal Mesh、Physics Asset、Skeleton 3 个文件:
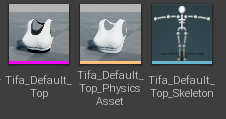
有的模型会分成不同的部分来制作,所以在导入后会产生多组模型文件。
我们需要在角色蓝图中把它们重新组装起来。
在内容浏览器中,右键 → Blueprint Class → Actor,创建一个角色蓝图类。
双击打开后,在左侧的 Components 下添加所有的 Skeletal Mesh:
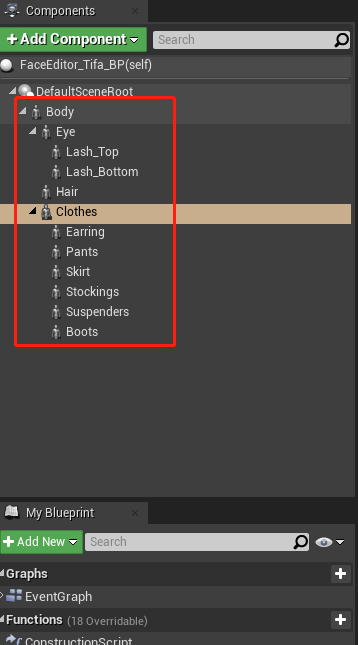
并在右侧的 Details 面板下设置好对应的 Mesh:

二、启用 Control Rig
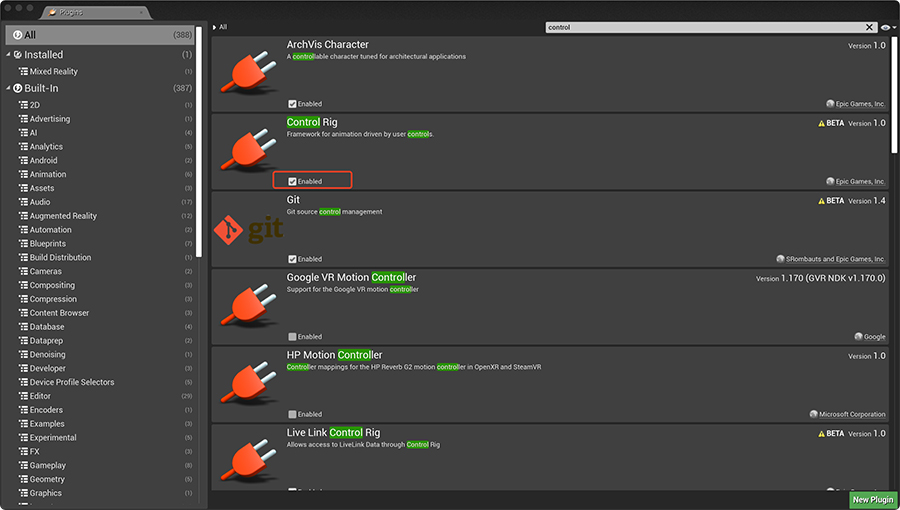
Control Rig 是一套绑定系统,在 UE4 中以插件的形式提供。在插件面板中,搜索 Control Rig,勾选后重启 UE 编辑器:
三、创建 Control Rig 蓝图
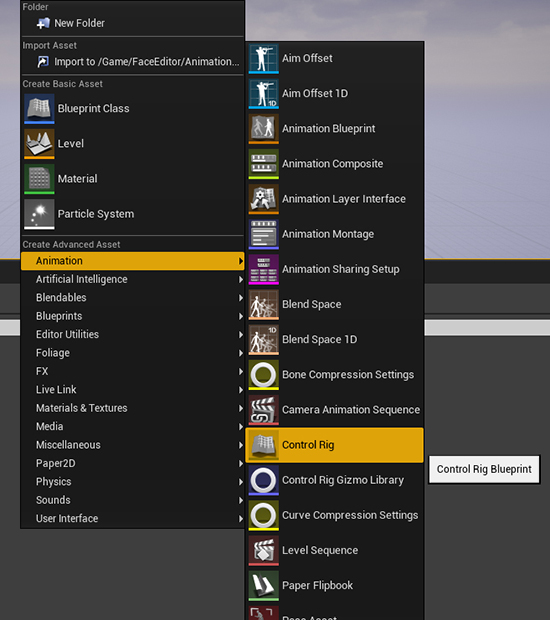
在内容浏览器中,右键 → Animation → Control Rig,选择父类并创建:
创建后双击打开,在左边点击 Import Hierarchy,在弹窗里点击下拉,选中人体的 Mesh:
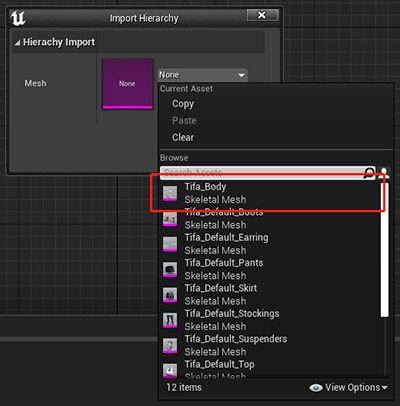
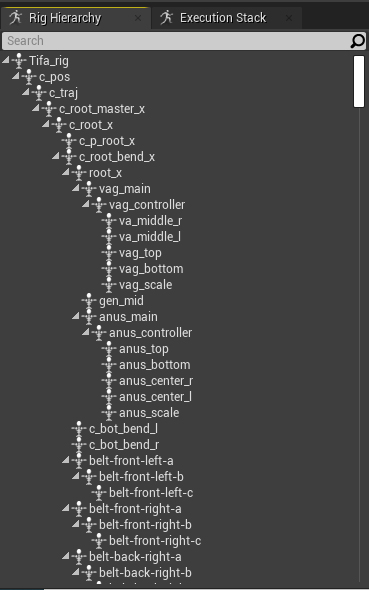
可以看到加载骨骼成功:
四、新增 Control
1、新增 Root 绑定
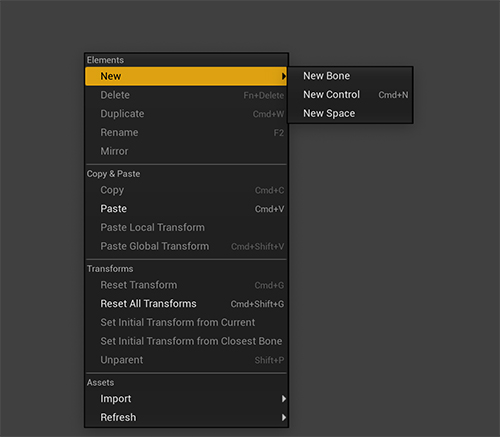
将骨骼树收起,在空白处点击右键,选择 New Control,命名为 Root:
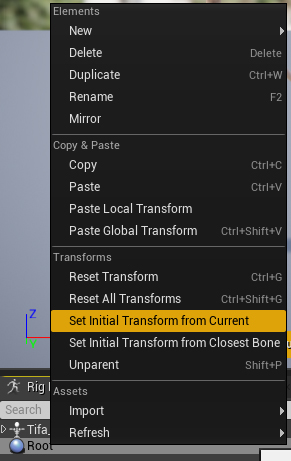
右键 Root,选择 Set InitInitial Transform from current,用来设置 Root 的初始位置:
然后在图表中设置绑定:
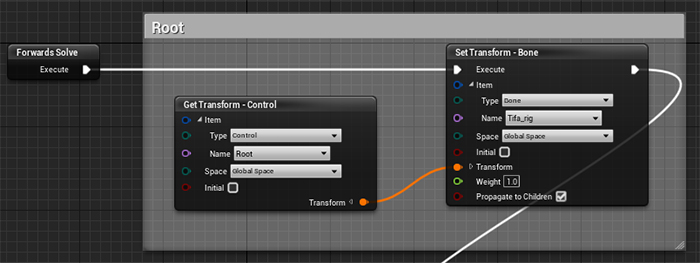
本质上是通过获取到 Root 的 Transform,然后设置到骨骼的 Transform 上。
这里记得把 Propagate to Children 勾选上。
这样在窗口中拖动 Root 时,就能发现整个网格体发生了位移。
2、特定骨骼绑定
绑定特定骨骼的过程与 Root 类似,主要是怎么把 control 的初始位置设置到对应的骨骼上。
下面以鼻子为例,在骨骼树中搜索 Nose,找到对应骨骼,右键 → New Control:
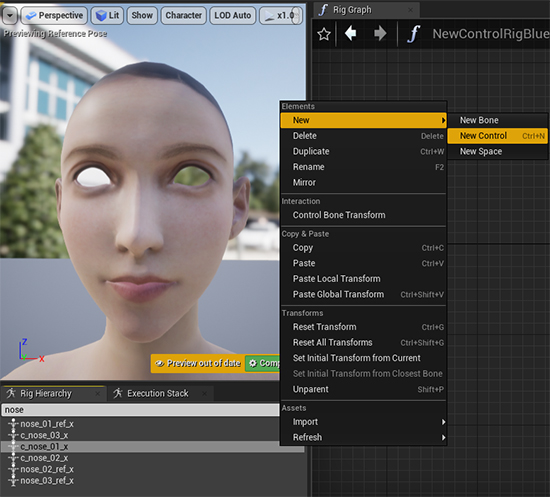
此时 Control 的初始位置就与骨骼的位置一致。
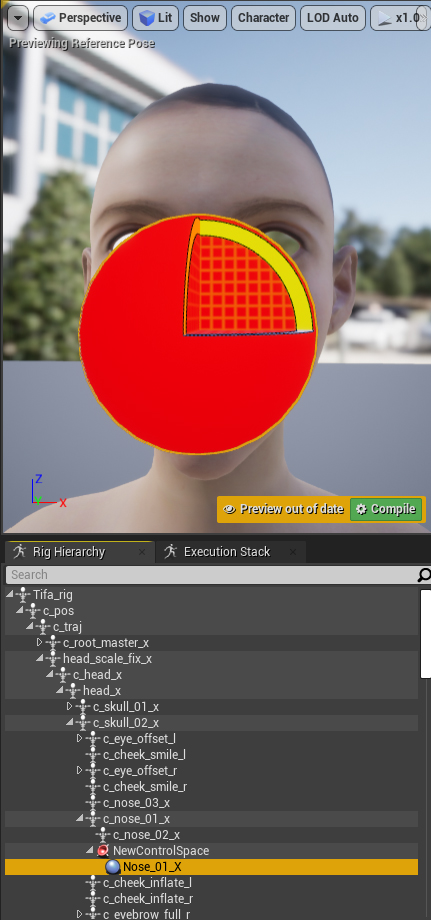
随后将新增的 Control 移动到 Root下面,右键 Set Initial Transform from Current,设置初始位置。
后续绑定与 Root 类似,通过修改 Transform,可以在窗口里对鼻子进行拖动。
拖动 Control 之后,点击 Complie,所有的 Control 就可以还原到初始位置。
五、Control Rig 蓝图添加控制逻辑
前面的步骤已经将 Control 与骨骼进行绑定,所以这一步只需要通过特定的策略来修改 Control 的 Transform,就可以实现捏脸逻辑。

六、Control Rig 暴露参数
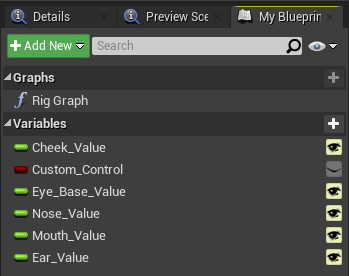
在 My Blueprint 下为 Control Rig 新增参数,参数用于决定形变的程度,暴露给外部修改:
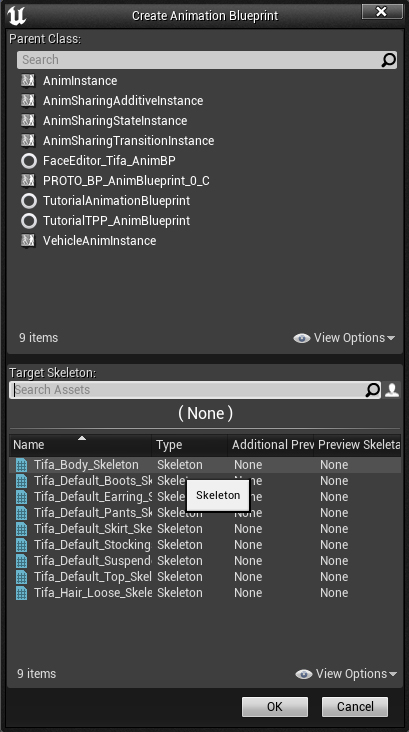
七、创建动画蓝图
在内容浏览器中,右键 → Animation → Animation Blueprint,在弹窗中选择人体的骨骼:
八、关联蓝图
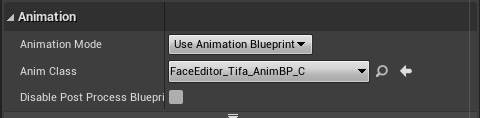
1、关联角色蓝图与动画蓝图
修改 Skeletal Mesh 下的 Animation 属性,将 Anim Class 设置成刚创建的动画蓝图。
这样新创建的动画蓝图就可以决定最终模型在运行时输出的姿势。
2、关联动画蓝图与 Control Rig
打开之前创建的动画蓝图,切换到 AnimGraph,创建 Control Rig 节点,将 Control Rig Class 设置为新创建的 Control Rig 蓝图。
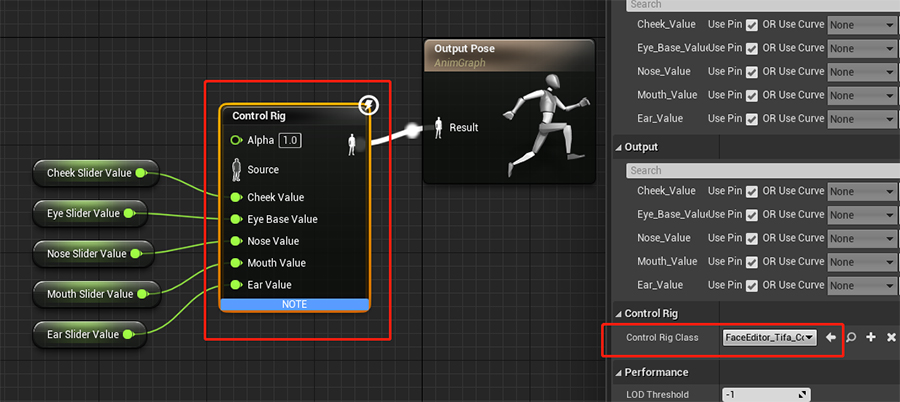
将 Control Rig 的参数向上暴露给动画蓝图,并连接好图表,方便后续在 Event Graph 中修改:
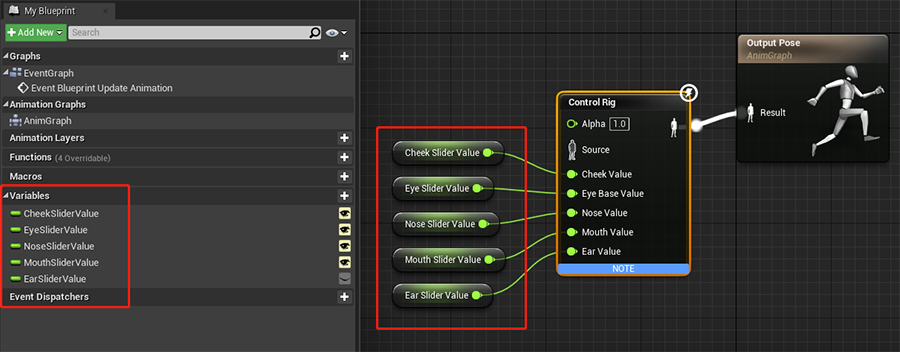
到这一步,只要修改参数值,就能进行捏脸。
九、添加控制界面
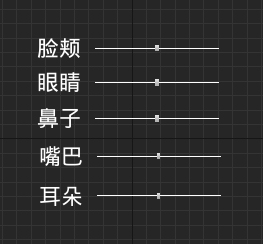
在内容浏览器中,右键 → User Interface → Widget Blueprint,创建后双击打开,添加滑杆控件:
在关卡蓝图中,创建控制面板:
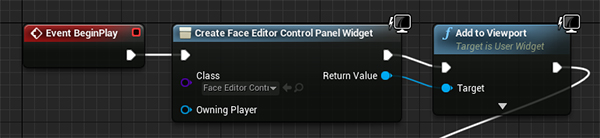
这样点击运行就能看见 UI:
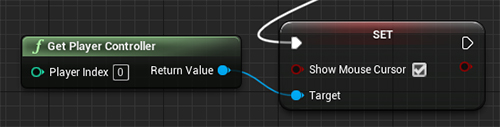
由于捏脸场景只有 UI 控制,为了避免鼠标在操作时,切换到场景控制,需要设置 PlayerController 的 Show Mouse Cursor 为 true,可以在关卡蓝图里进行设置:
十、滑杆关联动画蓝图的参数
关联参数需要创建一个 GameInstance 来保存滑杆的数值,并在事件蓝图里去实时获取。
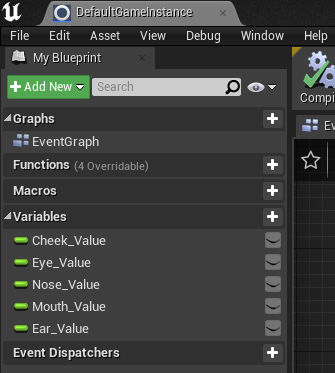
在内容浏览器中,右键 → Blueprint Class → GameInstance,创建 GameInstance 蓝图类,并新增变量:
然后在 Project Settings → Project → Maps & Modes → Game Instance,设置 GameInstance 蓝图类:

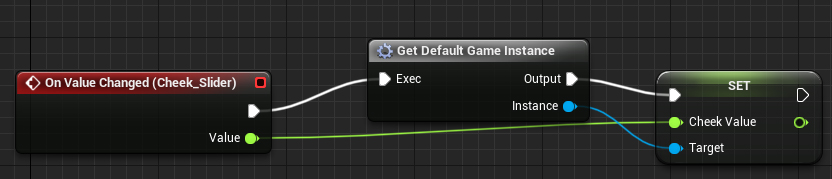
在 Widget Blueprint 设置滑杆值:
然后在动画蓝图的事件图表里读取:

这样就能把滑杆值和捏脸参数实时同步。
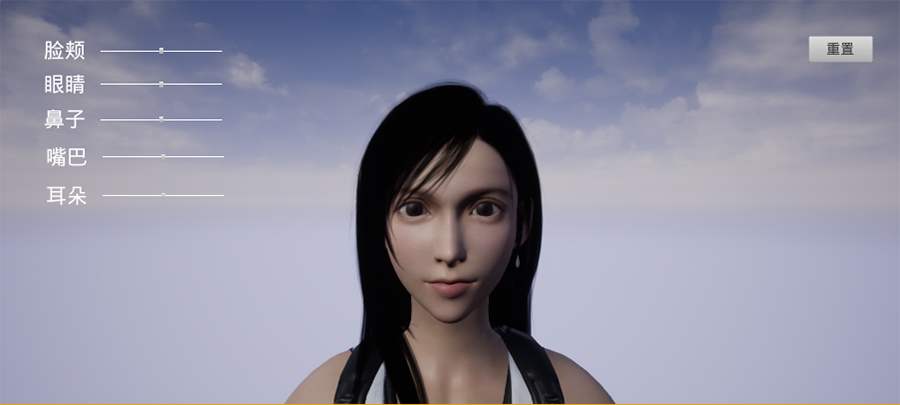
最后看一下效果:

请到 GitHub 上查看完整代码。
Recommend
About Joyk
Aggregate valuable and interesting links.
Joyk means Joy of geeK