

springcloud - 注册中心eureka
source link: https://lqfgh.github.io/2019/08/08/pring-cloud-eureka-build/
Go to the source link to view the article. You can view the picture content, updated content and better typesetting reading experience. If the link is broken, please click the button below to view the snapshot at that time.
springcloud - 注册中心eureka - 李庆丰的博客 | Lee Blog
[TOC]
今天主要就来说说怎么不使用IDE的向导搭建一个
eureka,还有注册中心的基本配置
创建一个简单的 maven 项目

添加 eureka-server 依赖
eureka服务端需要添加spring-cloud-starter-eureka-server依赖
<?xml version="1.0" encoding="UTF-8"?>
<project xmlns="http://maven.apache.org/POM/4.0.0"
         xmlns:xsi="http://www.w3.org/2001/XMLSchema-instance"
         xsi:schemaLocation="http://maven.apache.org/POM/4.0.0 http://maven.apache.org/xsd/maven-4.0.0.xsd">
    <modelVersion>4.0.0</modelVersion>

    <groupId>com.feng.cloud</groupId>
    <artifactId>eureka-server</artifactId>
    <version>1.0-SNAPSHOT</version>

    <dependencyManagement>
        <dependencies>
            <!--spring cloud依赖管理-->
            <dependency>
                <groupId>org.springframework.cloud</groupId>
                <artifactId>spring-cloud-dependencies</artifactId>
                <version>Dalston.SR1</version>
                <type>pom</type>
                <scope>import</scope>
            </dependency>
            <!--spring boot依赖管理-->
            <dependency>
                <groupId>org.springframework.boot</groupId>
                <artifactId>spring-boot-dependencies</artifactId>
                <version>1.5.9.RELEASE</version>
                <type>pom</type>
                <scope>import</scope>
            </dependency>
        </dependencies>
    </dependencyManagement>

    <dependencies>
        <!--eureka-server服务端 -->
        <dependency>
            <groupId>org.springframework.cloud</groupId>
            <artifactId>spring-cloud-starter-eureka-server</artifactId>
        </dependency>
    </dependencies>

    <build>
        <plugins>
            <plugin>
                <groupId>org.springframework.boot</groupId>
                <artifactId>spring-boot-maven-plugin</artifactId>
                <configuration>
                    <executable>true</executable>
                </configuration>
            </plugin>
        </plugins>
    </build>

</project>
创建启动类
启动类中最主要的部分是添加
@EnableEurekaServer说明这是注册中心
package com.feng.eureka;

import org.springframework.boot.SpringApplication;
import org.springframework.boot.autoconfigure.SpringBootApplication;
import org.springframework.cloud.netflix.eureka.server.EnableEurekaServer;

/**
 * @author Lee
 */
@EnableEurekaServer
@SpringBootApplication
public class EurekaServerApplication {

    public static void main(String[] args) {
        SpringApplication.run(EurekaServerApplication.class,args);
    }

}
创建配置文件 bootstrap.yml
配置的作用会用注释说明
server:
  port: 7000

spring:
  application:
    name: eureka-server
eureka:
  instance:
    hostname: ${spring.cloud.client.ipAddress} #eureka服务端的实例名称
  client:
    register-with-eureka: false #不向注册中心注册自己,设置为false
    fetch-registry: false #false表示自己端就是注册中心,我的职责就是维护服务实例,并不需要去检索服务
    service-url:
      defaultZone: http://${eureka.instance.hostname}:${server.port}/eureka/ #被客户端注册的地址
  server:
    enable-self-preservation: false #是否启动自我保护机制,测试环境应该关闭自我保护机制,服务失效90秒被自动移除。生产环境应该开启自我保护机制,即使服务失效
    eviction-interval-timer-in-ms: 3000 #检查失效时间
将服务注册到 eureka
接下来我们创建一个新的
spring boot项目,用于注册到注册中心若想将服务注册到
eureka只需要在配置中添加如下配置
eureka:
  client:
    service-url:
      defaultZone: http://localhost:7000/eureka/
eureka:
  client:
    service-url:
      defaultZone: http://localhost:7000/eureka/
修改注册到注册中心实例的显示地址和实例名称
如果客户端使用默认的实例名字,那么实例的名字就是这个样子的,而且当鼠标放到上面的时候右下角显示的地址是
localhost,那么怎么将localhost改为服务部署的IP地址,并且将注册到注册中心的实例名称自定义呢。
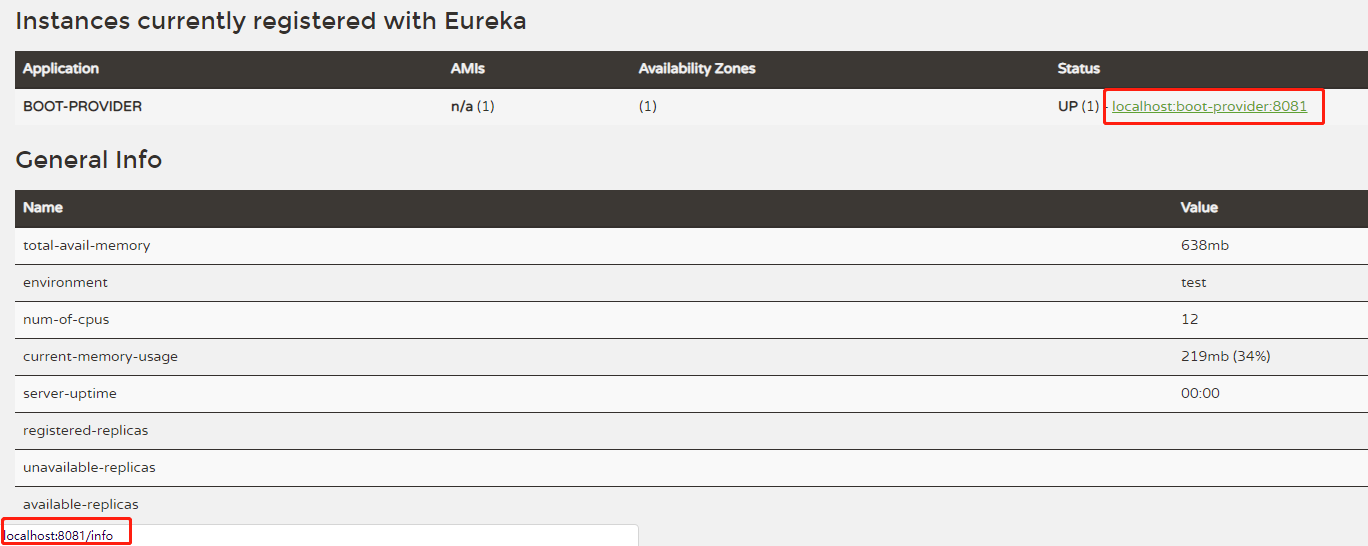
将客户端的配置添加
eureka.instance.prefer-ip-address属性eureka: client: service-url: defaultZone: http://localhost:7000/eureka/ instance: prefer-ip-address: true # 显示实例的ip地址eureka: client: service-url: defaultZone: http://localhost:7000/eureka/ instance: prefer-ip-address: true # 显示实例的ip地址
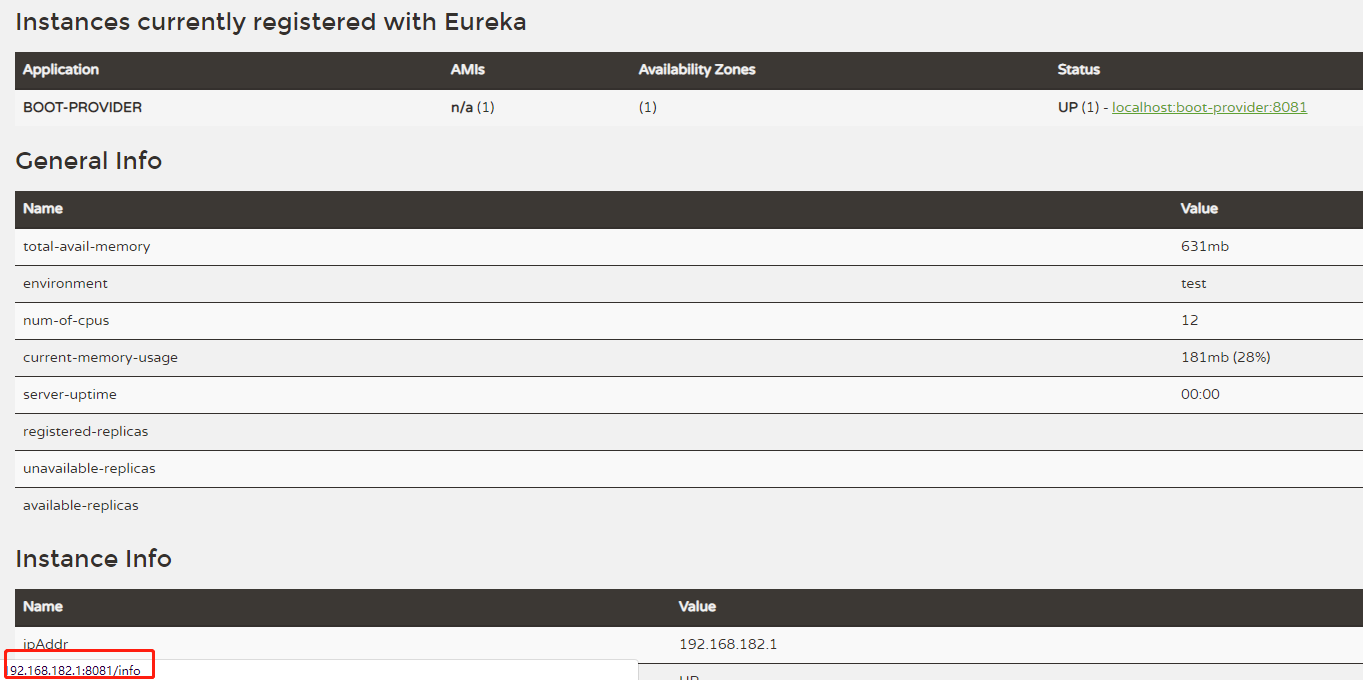
接下来添加配置实例id
instance-id,显示自定义实例名称eureka: client: service-url: defaultZone: http://localhost:7000/eureka/ instance: prefer-ip-address: true # 显示实例的ip地址 instance-id: boot-providereureka: client: service-url: defaultZone: http://localhost:7000/eureka/ instance: prefer-ip-address: true # 显示实例的ip地址 instance-id: boot-provider
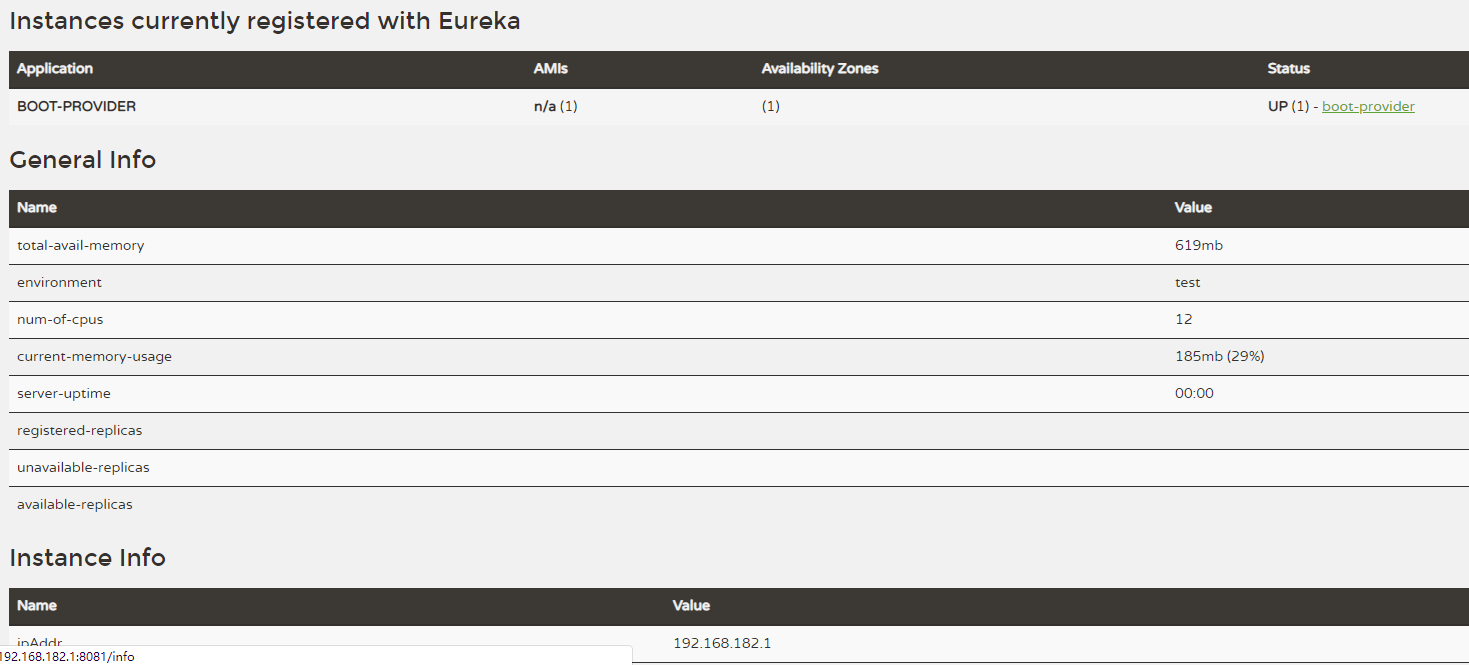
发现图中客户端实例的名称变成了我们自定义的名称
boot-provider
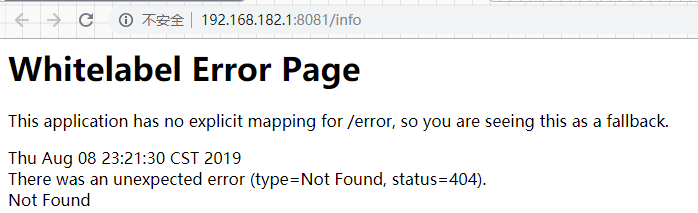
修改客户端实例的 info 信息
当我们点击实例名称的超链接想要查看客户端实例的信息时,发现响应的时404页面

首先客户端添加依赖
spring-boot-starter-actuator服务健康监控,关于健康控监控多余的东西在这里就不作 介绍了.添加
maven的resource插件
        <dependency>
            <groupId>org.springframework.boot</groupId>
            <artifactId>spring-boot-starter-actuator</artifactId>
        </dependency>
        <dependency>
            <groupId>org.springframework.boot</groupId>
            <artifactId>spring-boot-starter-actuator</artifactId>
        </dependency>
            <plugin>
                <groupId>org.apache.maven.plugins</groupId>
                <artifactId>maven-resources-plugin</artifactId>
                <configuration>
                    <delimiters>
                        <!-- 表示取resources中以$*$的信息被解析 -->
                        <delimiter>$</delimiter>
                    </delimiters>
                </configuration>
            </plugin>
配置
info客户端实例的info信息可以自定义一些键值对.由于上面配置了
maven的resource插件,$*$的属性将会被解析
info:
  app.name: boot-provider
  company.name: spring-eureka
  author: feng
  build.artifactId: $project.artifactId$
  buid.version: $project.version$
info:
  app.name: boot-provider
  company.name: spring-eureka
  author: feng
  build.artifactId: $project.artifactId$
  buid.version: $project.version$

这些都配置完发现点可以显示
info的信息了
eureka 集群配置
我这里为了搭建集群环境,重新建了三个注册中心项目
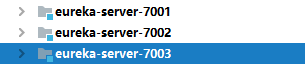
为了更接近真实环境,我将
hosts文件做下修改,不同的注册中心分别对应不同的域名
127.0.0.1       eureka7001server.com
127.0.0.1       eureka7002server.com
127.0.0.1       eureka7003server.com
eureka-server-7001配置```yml
eureka 端口号
server: port: 7001
spring: application: name: eureka-server
eureka: instance: hostname: ${spring.cloud.client.ipAddress} #eureka服务端的实例名称 client: register-with-eureka: false #false表示不向注册中心注册自己。 fetch-registry: false #false表示自己端就是注册中心,我的职责就是维护服务实例,并不需要去检索服务 service-url: #注册中心的地址 defaultZone: http://eureka7002server.com:7002/eureka/,http://eureka7003server.com:7003/eureka/ server: enable-self-preservation: false #是否启动自我保护机制
> `eureka-server-7002` 配置
>
```yml
server:
  port: 7002

spring:
  application:
    name: eureka-server

eureka:
  instance:
    hostname: ${spring.cloud.client.ipAddress} #eureka服务端的实例名称
  client:
    register-with-eureka: false #false表示不向注册中心注册自己。
    fetch-registry: false #false表示自己端就是注册中心,我的职责就是维护服务实例,并不需要去检索服务
    service-url:
      defaultZone: http://eureka7001server.com:7001/eureka/,http://eureka7003server.com:7003/eureka/
  server:
    enable-self-preservation: false
eureka-server-7003配置
server:
  port: 7003

spring:
  application:
    name: eureka-server

eureka:
  instance:
    hostname: ${spring.cloud.client.ipAddress} #eureka服务端的实例名称
  client:
    register-with-eureka: false #false表示不向注册中心注册自己。
    fetch-registry: false #false表示自己端就是注册中心,我的职责就是维护服务实例,并不需要去检索服务
    service-url:
      defaultZone: http://eureka7002server.com:7002/eureka/,http://eureka7001server.com:7001/eureka/
  server:
    enable-self-preservation: false
客户端实例注册
```yml eureka: client: service-url: defaultZone: http://eureka7001server.com:7001/eureka/,http://eureka7002server.com:7002/eureka/,http://eureka7003server.com:7003/eureka/
最终效果
由于篇幅原因,我这里只放出
eureka-server-7001的截图

我们发现最终注册中心会互相注册
Recommend
About Joyk
Aggregate valuable and interesting links.
Joyk means Joy of geeK