

Spring5-源码构建编译
source link: https://xiaomozhang.github.io/2021/10/16/spring5-build-soure-code/
Go to the source link to view the article. You can view the picture content, updated content and better typesetting reading experience. If the link is broken, please click the button below to view the snapshot at that time.
一. 准备工作
1.编译环境
maven
jdk8
idea
2. 编译版本:
SpringV5.2.7RELEASE+GradleWapper+jdk1.8.0_131编译
二. 源码下载
git地址: spring-framework
Spring的源码是发布在github上面的
注: 需要连接加速科学上网软件才行, 不然git特别慢


版本号介绍
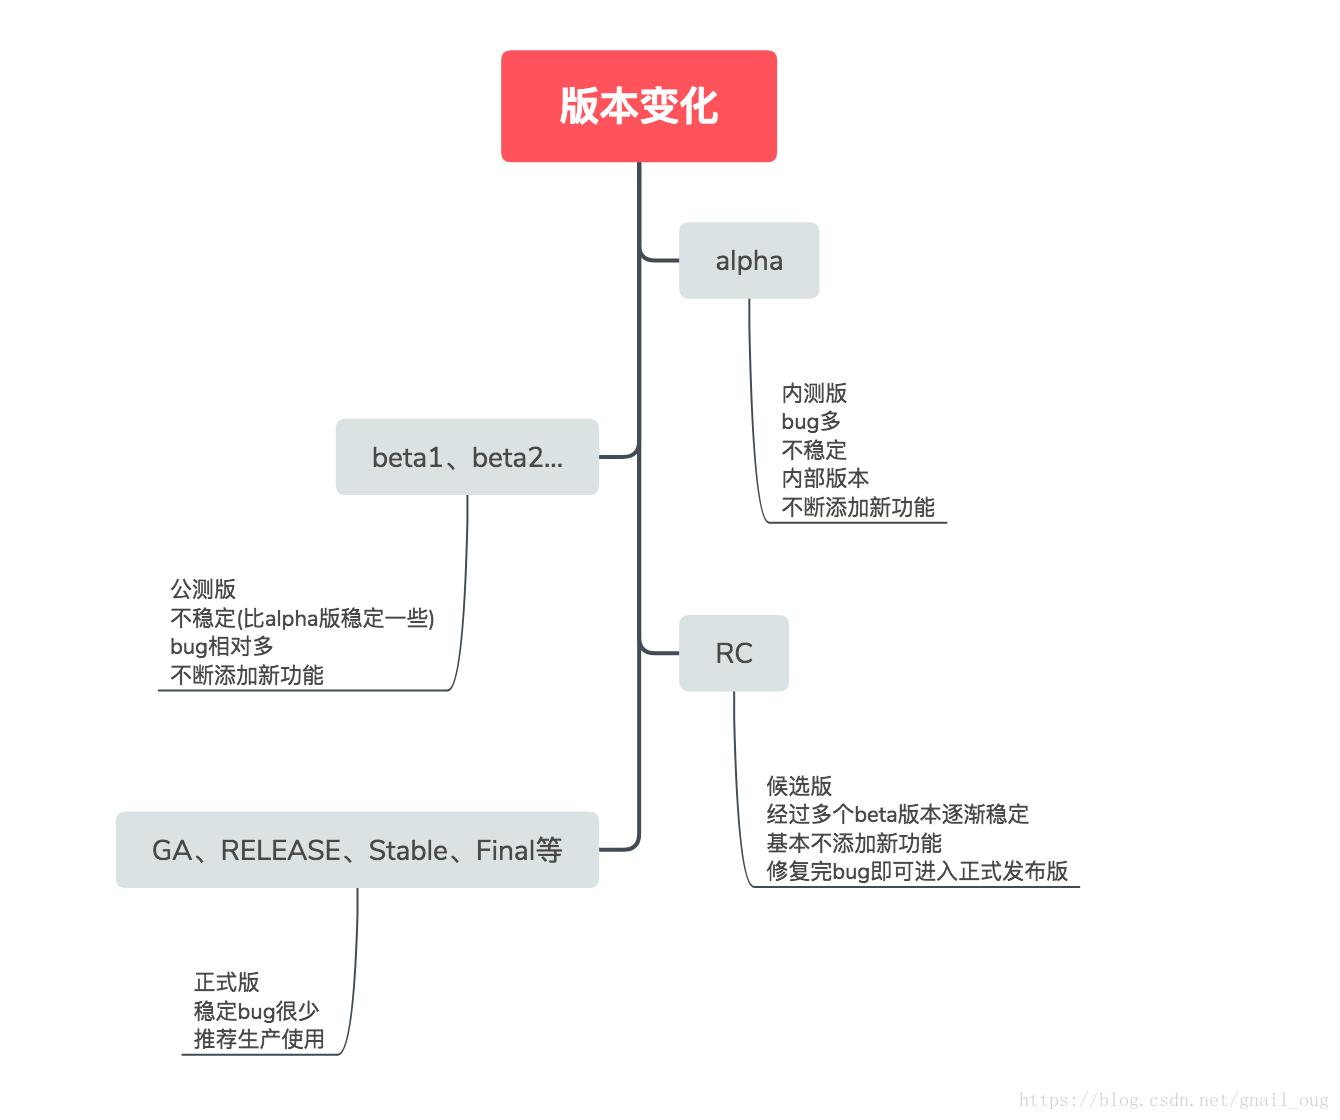
M:M1,M2,…中的M是milestone的简写,意思是里程碑,代表着有重大改进的版本。
三. 构建工作准备
安装源码有两种方式:
第一种: 下载spring使用的对应的Gradle版本,安装
第二种: 使用自带的gradleWrapper.
备注: 我在导入项目到idea的时候, 不能够选择使用的gradle编译类型(使用系统的gradle还是gradleWrapper), 所以, 我是自己安装了Gradle, 然后编译的.
查看spring源码中gradle的版本. 下载对应版本的gradle.
在gradle-wrapper.properties中查看版本号
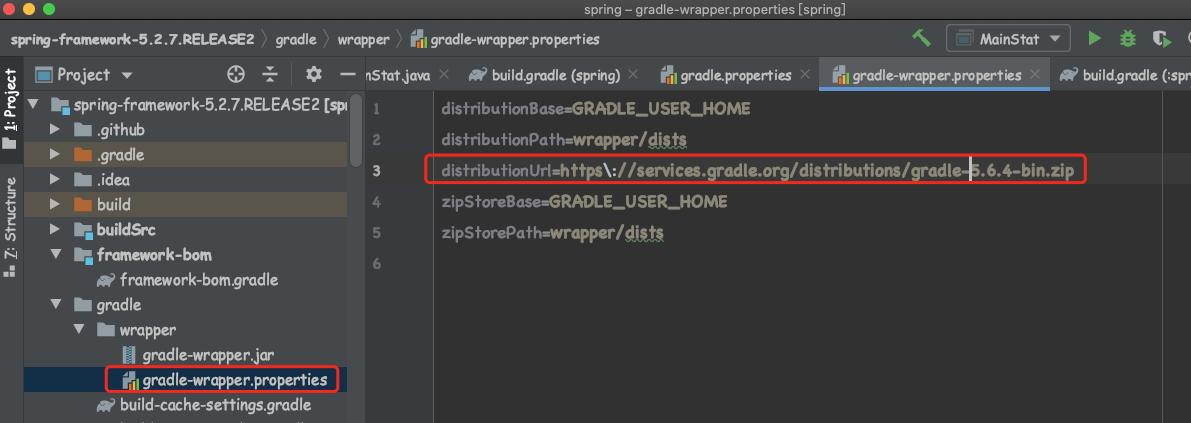
我们看看到spring5.2.7.RELEASE对应的gradle版本是5.6.4-bin.zip. 我们下载这个文件.
如果使用方法二, gradleWrapper会自动下载, 这是官方推荐的方式. window平台的idea可以选择使用gradleWrapper的方式.
四. 编译Spring源码项目
1. 修改build.gradle
这个文件就相当于我们Maven的pom.xml 管理项目的依赖等配置
设置镜像
repositories {
            maven{ url 'https://maven.aliyun.com/nexus/content/groups/public/'}
            maven{ url 'https://maven.aliyun.com/nexus/content/repositories/jcenter'}
            mavenCentral()
            maven { url "https://repo.spring.io/libs-spring-framework-build" }
        }
2. 编译compileTestJava模块
进入到源码所在文件夹, 执行一下命令. 我的是mac本, 所以需要加./, 如果是windows本就不需要加
./gradlew :spring-oxm:compileTestJava配置了镜像很快(一两分钟)就能编译完成, 如果要很久说明你的镜像没起作用
3. 导入项目到idea中, 进行编译
我这里导入代码, 自动就会进行编译了. 不需要额外的操作. 这个和idea的版本有关,我的idea是2020.1的
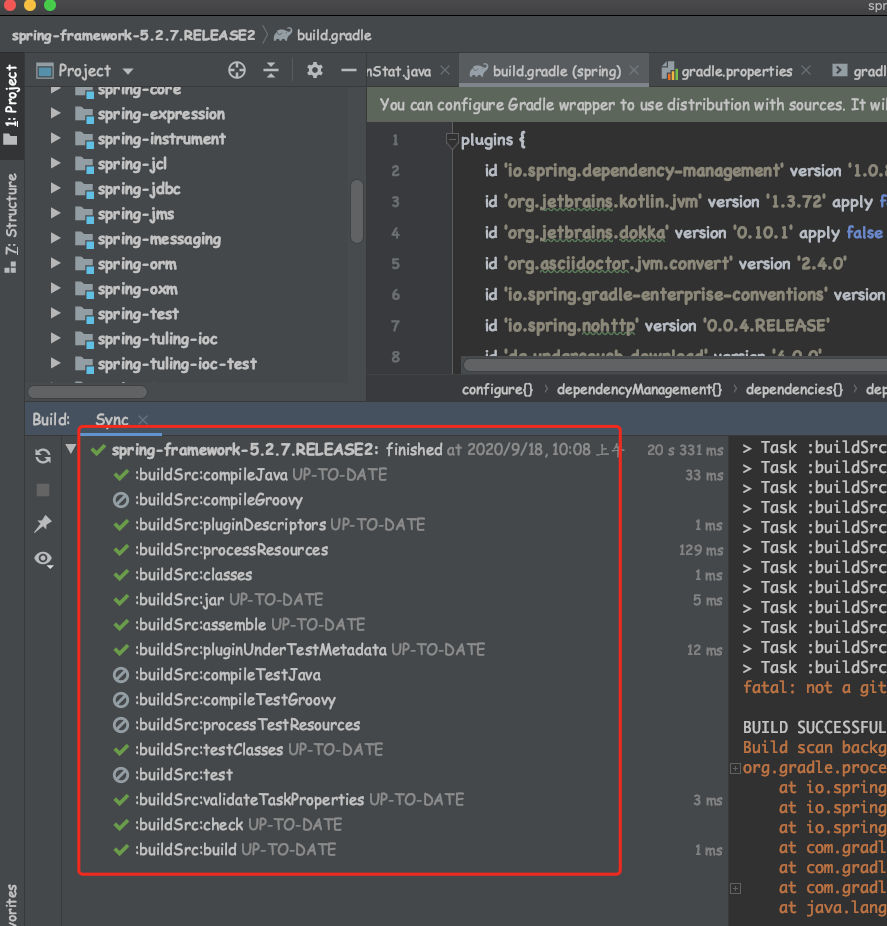
最后提示finished就ok了.
五. 测试源码编译是否成功
1. 添加测试模块代码
new->model->gradle–>输入模块名称
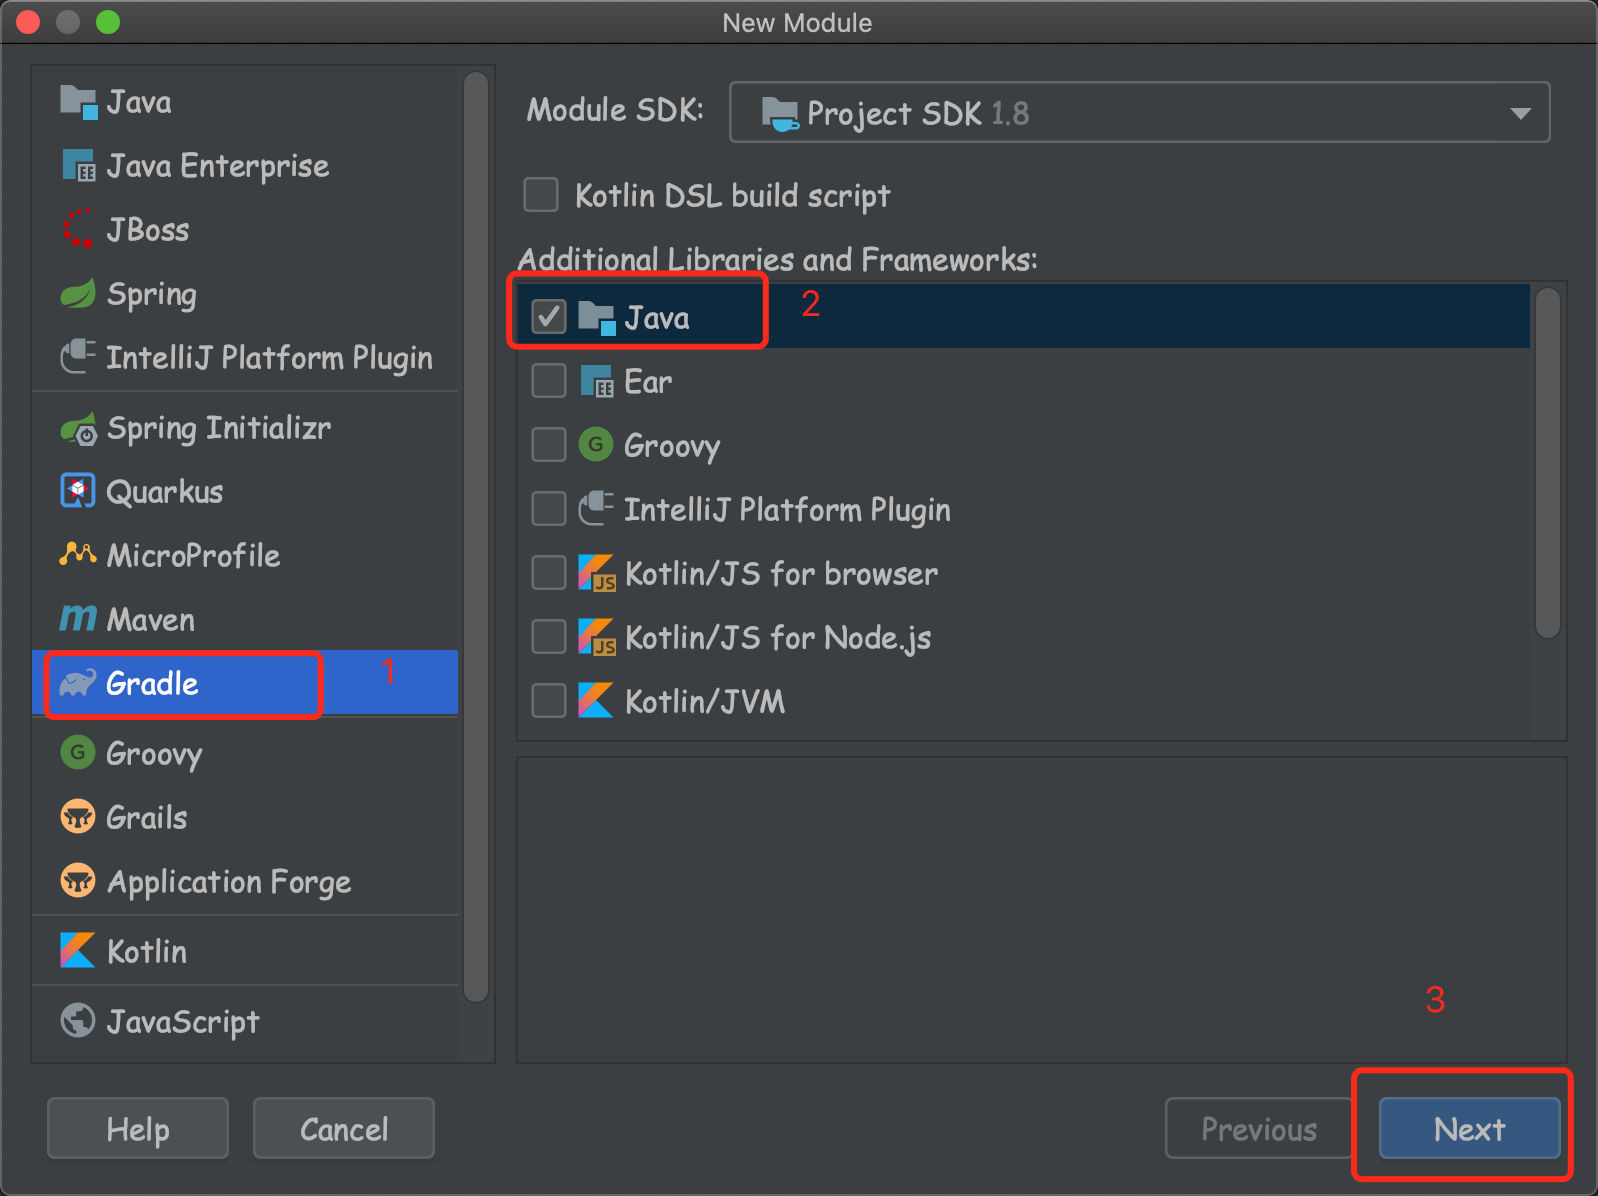
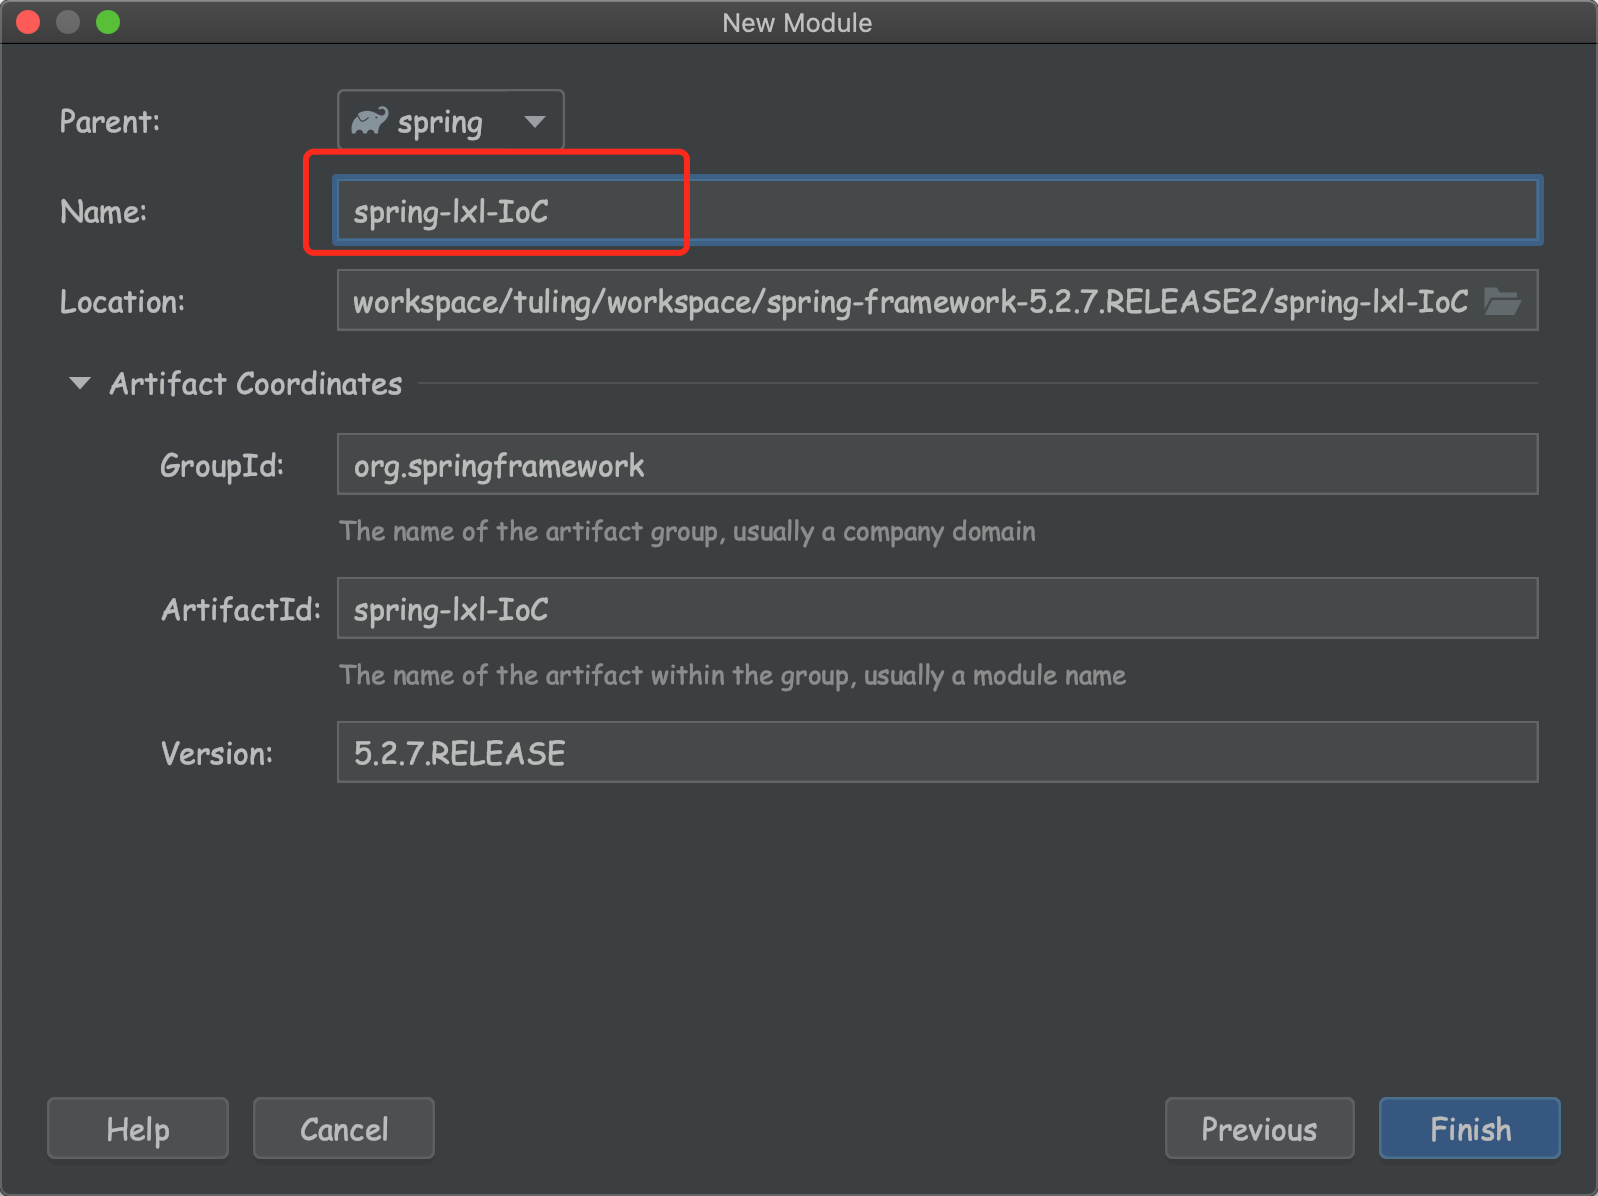
设置项目名, 设置好以后点击finish
为项目添加依赖
dependencies {
    testCompile group: 'junit', name: 'junit', version: '4.12'
    compile(project(":spring-context"))
}
compile(project(“:spring-context”)) 代表本项目的
2. 添加测试文件, 测试IoC功能
- 为项目添加依赖compile(project(“:spring-context”)) 代表本项目的properties
dependencies { testCompile group: 'junit', name: 'junit', version: '4.12' compile(project(":spring-context")) }2. 添加测试文件, 测试IoC功能
- 为项目添加依赖compile(project(“:spring-context”)) 代表本项目的properties
dependencies { testCompile group: 'junit', name: 'junit', version: '4.12' compile(project(":spring-context")) } - 随意添加一个bean
package com.lxl.www;
import org.springframework.stereotype.Service;
@Service
public class UserServiceImpl {
public void sayHi(){
    System.out.println("Hello Spring!");
}
- 添加启动类
```java
import cn.tulingxueyuan.beans.UserServiceImpl;
import javafx.application.Application;
import org.springframework.context.ApplicationContext;
import org.springframework.context.annotation.AnnotationConfigApplicationContext;
import org.springframework.context.annotation.ComponentScan;
import org.springframework.context.annotation.Configuration;
@Configuration
@ComponentScan("com.lxl.www")
public class MainStat {
public static void main(String[] args) {
ApplicationContext context=new AnnotationConfigApplicationContext(MainStat.class);
UserServiceImpl bean = context.getBean(UserServiceImpl.class);
bean.sayHi();
}
}启动MainStat并运行. 如果看到如下输出, 表示成功了
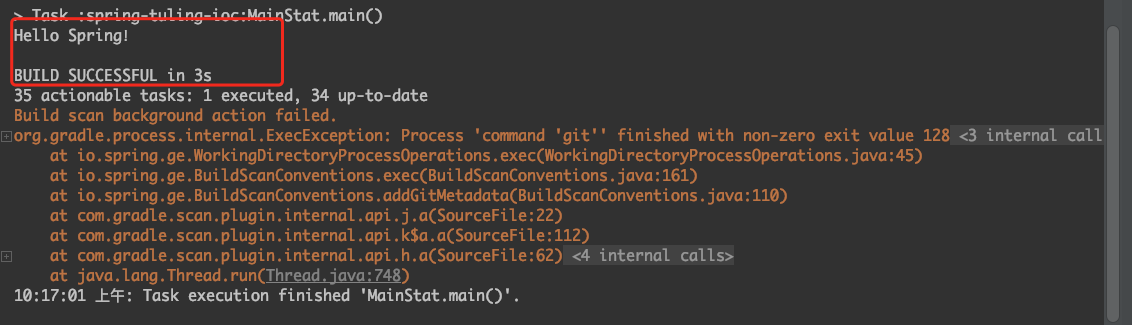
代码依然会报错, 是一个git的异常, 这个可以忽略. 看到上面编译成功,并且有打印结果, 就说明成功了.
Recommend
About Joyk
Aggregate valuable and interesting links.
Joyk means Joy of geeK