

PyQt 打造的图像预览软件
source link: https://yuanjie-ai.github.io/2022/02/12/pyqt5-view-image/
Go to the source link to view the article. You can view the picture content, updated content and better typesetting reading experience. If the link is broken, please click the button below to view the snapshot at that time.

PyQt 打造的图像预览软件
发表于
2022-02-12
阅读次数: 2 本文字数: 4.9k 阅读时长 ≈ 4 分钟
寒假某天下午的突发奇想,想实现一款图像预览软件。大概思路是:在软件的左侧点击图片,软件的右侧就能实时预览图片,因为感觉这个功能有一定的应用场景,所以实现了一下。
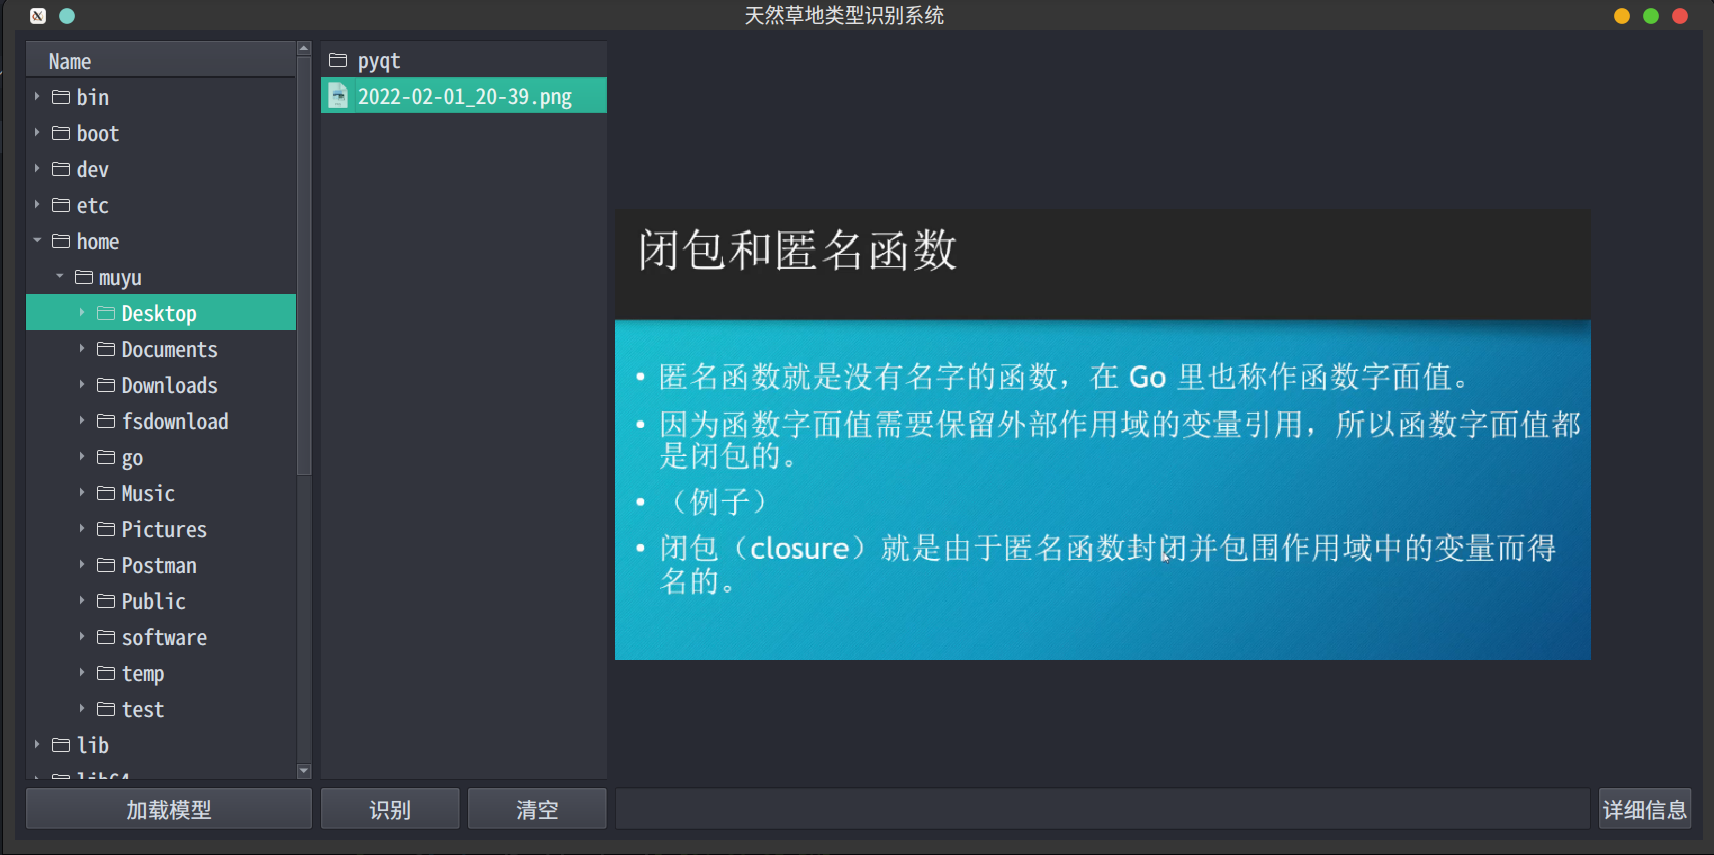
简单说一下设计思路吧,代码没啥难度:
- 使用 GridLayout 手动布局提升美感,左侧是文件列表,右侧是图片预览
- 当从左侧文件列表点击文件时,判断点击的文件是否为图像类型,如果是,右侧显示图像。关于如何显示高清图像,可以参考我之前的博客
- 文件列表使用
QTreeView和QListView实现,QTreeView负责显示文件夹层级关系,QListView负责显示文件。两者都挂载文件模型。 - Qt 的使用就是学会基础操作后大量翻阅官方库的过程。
可以看到里面还有加载模型、识别等按钮,也能猜出来这是深度学习应用的软件。
import sys, time
from PyQt5.QtWidgets import (QMainWindow, QWidget, QGridLayout, QApplication,
                             QPushButton, QStatusBar, QProgressBar, QLabel,
                             QTreeView, QListView, QFileSystemModel, QLineEdit,
                             QInputDialog, QFileDialog, QTextEdit, QMessageBox)
from PyQt5.QtCore import QDir
import os
from PyQt5.QtGui import QPixmap, QFont
from PyQt5.Qt import QSize, QImageReader
import qdarkstyle


class SecondWindow(QWidget):

def __init__(self, msg):
        super(SecondWindow, self).__init__()
        self.resize(400, 400)
        self.move(200, 200)

layout = QGridLayout()
        self.info = QTextEdit()
        layout.addWidget(self.info)
        self.info.setText(msg)
        self.setLayout(layout)
        self.setWindowTitle('详细信息')


class mainwindow(QMainWindow):

def __init__(self):
        super(mainwindow, self).__init__()

self.setWindowTitle("天然草地类型识别系统")

# 显示正在加载
        self.status = QStatusBar()
        self.status.setStyleSheet('QStatusBar::item {border: none;}')
        self.setStatusBar(self.status)

self.progressBar = QProgressBar()
        self.label = QLabel()
        self.label.setText("加载中,请稍后... ")
        self.status.addPermanentWidget(self.label, stretch=2)
        self.status.addPermanentWidget(self.progressBar, stretch=4)
        self.progressBar.setRange(0, 100)
        self.progressBar.setMinimum(0)
        self.progressBar.setMaximum(0)
        self.statusBar().setVisible(False)

self.setMinimumSize(1500, 720)

layout = QGridLayout()
        w = QWidget()
        w.setLayout(layout)
        self.setCentralWidget(w)

# 文件树
        self.treeview = QTreeView()
        self.listview = QListView()
        layout.addWidget(self.treeview, 0, 0, 7, 2)
        layout.addWidget(self.listview, 0, 2, 7, 2)

path = QDir.rootPath()

self.dirModel = QFileSystemModel()
        self.dirModel.setRootPath(QDir.rootPath())
        self.dirModel.setFilter(QDir.NoDotAndDotDot | QDir.AllDirs)

self.fileModel = QFileSystemModel()
        self.fileModel.setFilter(QDir.NoDotAndDotDot | QDir.Files)

self.treeview.setModel(self.dirModel)
        self.listview.setModel(self.fileModel)

self.treeview.setRootIndex(self.dirModel.index(path))
        self.listview.setRootIndex(self.fileModel.index(path))

self.treeview.clicked.connect(self.on_clicked)
        self.listview.clicked.connect(self.run_model)

self.treeview.hideColumn(1)
        self.treeview.hideColumn(2)
        self.treeview.hideColumn(3)

# 显示图片
        self.image_label = QLabel()
        self.image_label.setMinimumSize(800, 700)
        layout.addWidget(self.image_label, 0, 4, 5, 10)

# 加载模型
        btn = QPushButton("加载模型")
        layout.addWidget(btn, 7, 0, 1, 2)
        btn.clicked.connect(self.load_model)

more_btn = QPushButton("详细信息")
        layout.addWidget(more_btn, 7, 14, 1, 1)
        more_btn.clicked.connect(self.show_info)

reco_btn = QPushButton("识别")
        layout.addWidget(reco_btn, 7, 2, 1, 1)
        reco_btn.clicked.connect(self.predict)

clear_btn = QPushButton("清空")
        layout.addWidget(clear_btn, 7, 3, 1, 1)
        clear_btn.clicked.connect(self.clear)

# 预测结果
        self.res = QLineEdit()
        self.res.setReadOnly(True)
        layout.addWidget(self.res, 7, 4, 1, 10)

self.model = None
        self.fname = None

def clear(self):
        self.res.clear()
        self.image_label.setVisible(False)

def show_info(self):
        if self.fname is not None:
            # 调用你的图片信息代码,我这里没对应的 excel
            # 详细信息赋值给 msg 即可
            msg = "详细信息"
            self.child = SecondWindow(msg)
            self.child.show()

# 当选中图片的时候,直接进行预测
    def run_model(self):
        self.image_label.setVisible(True)
        idx = self.listview.currentIndex()
        fname = self.fileModel.filePath(idx)
        img_type = fname.split('.')[-1]
        # 判断下是不是图片
        if img_type in ["png", "jpg"]:
            img = QImageReader(fname)
            scale = self.image_label.width() / img.size().width()
            height = int(img.size().height() * scale)
            img.setScaledSize(QSize(self.image_label.width(), height))
            img = img.read()
            pixmap = QPixmap(img)
            self.image_label.setPixmap(pixmap)
            self.fname = fname

# 测试代码放在这里
    def predict(self):
        if self.fname is not None:
            # y = self.model(x)
            # y = str(y)
            self.res.setText("cls 1: 0.9, cls 2: 0.8, cls 3: 0.9")
        # res = self.model(img)
        # self.res.setText(res)
        else:
            msgBox = QMessageBox()
            msgBox.setIcon(QMessageBox.Warning)
            msgBox.warning(self, "警告", "请选择图片后再预测")

def on_clicked(self, index):
        path = self.dirModel.fileInfo(index).absoluteFilePath()
        self.listview.setRootIndex(self.fileModel.setRootPath(path))

# 加载模型的代码
    def load_model(self):
        self.status.setVisible(True)
        file_filter = 'PKL File (*.pt *.pth *.pkl)'
        response = QFileDialog.getOpenFileName(
            parent=self,
            caption='Select a data file',
            directory=os.getcwd(),
            filter=file_filter,
        )
        pth_file, _ = response
        # torch load model
        # self.model.load_state_dict(torch.load(pth_file))
        self.status.setVisible(False)


if __name__ == '__main__':
    app = QApplication([])
    dark_stylesheet = qdarkstyle.load_stylesheet_pyqt5()
    # 如果想美化就取消注释
    # app.setStyleSheet(dark_stylesheet)
    m = mainwindow()
    m.show()
    sys.exit(app.exec())
Recommend
-
17
A full guide on Qt for Python – PySide and PyQt. With PySide and PyQt Python code examples, tutorials and references.
-
13
Use PyQt's QThread to Prevent Freezing GUIs by
-
48
Remove adsConnecting PyQt to an SQL Database Connecting an application to a relational database and gett...
-
9
PyQt Layouts: Create Professional-Looking GUI Applications...
-
9
Python and PyQt: Creating Menus, Toolbars, and Status Bars...
-
9
Creating PyQt Layouts for GUI Applications PyQt’s layout managers provide a user-friendly and productive way of arranging graphical components, or widgets, on a GUI....
-
50
Build a Contact Book With Python, PyQt, and SQLite by
-
8
摘要这一篇我们主要介绍使用 Qt Designer 来进行 GUI 的设计。我们会通过一个记事本的例子,来了解 Qt Designer 的使用。 使用 PyQt 创建 GUI 的程序大致上有两种方式,1. 使用
-
7
使用 PyQt 快速搭建带有 GUI 的应用(1)–初识 PyQt 所属分类:Python库介绍 摘要本文是对 PyQt 的介绍。本...
-
2
这学期选修了嵌入式系统的课程,大作业选择的题目是人脸口罩检测。由于课程提供的开发板搭载的芯片是 STM32F103ZET6,跑不动神经网络,所以打算将 OV7725 拍摄到的图像通过串口传输给上位机处理。关于人脸口罩检测可以参见上一篇博客
About Joyk
Aggregate valuable and interesting links.
Joyk means Joy of geeK