

Privacy Cookbook - Ch 19 The one with the Apple New Persona
source link: https://decentralize.today/privacy-cookbook-chapter-19-the-one-with-the-apples-new-personaprivacy-cookbook-3/
Go to the source link to view the article. You can view the picture content, updated content and better typesetting reading experience. If the link is broken, please click the button below to view the snapshot at that time.

Privacy Cookbook - Chapter 19 - The one with the Apple - A New Persona
When it comes to privacy, you often hear Apple fans jumping in first with:
“what happens on my iPhone stays on my iPhone”
Sure, except that it does not stay on your iPhone!
An easy approach would be to install Linux on your Mac (if you can) and move on...
Chapter closed and done? Nah, let’s not ignore the fact that Apple has a lot of users and, of course, that you'll be in the Apple Garden (locked into their universe), but you can still have a pretty good setup together.
This chapter is the first of 3 Apple-specific Privacy Cookbooks entries that can pretty much be used for any combination or cooperation and this first part can even be applied to Android, Xbox, and, of course, Microsoft products.
Stay Private, create yourself!
The very first thing to do is get into cryptocurrency. I would recommend XMR and Bitcoin for your online journey.
Whenever you can use XMR, do so. Sadly, some of the recommendations do not, so I include Bitcoin in the tutorial.
Now create a new persona:
You can use a country that fits you best. However, I recommend first going to Bitrefill and check if the country you have your eye on is supporting the Apple app and iTunes stores. Fear not, most countries are supported, and this is where your Bitcoin comes in play later on.
Choose a name that could actually be from the country where you are creating your persona so that you don't stand out in any way. It is your choice if you are male or female etc.
Remember that Apple has price differences between countries and territories, Europe is more expensive than most of North America, and they are more expensive than most countries in Asia and so on. Your imagination and research is the limit...
After you've created a name, let’s do the obvious, you need an email. Do not skip this step, even if you already have an email. You want a clean new start. I personally would use Tutanota or Protonmail. Do not use your real name (but I think that goes without saying!)

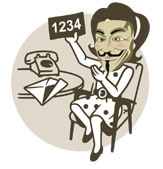
After you've created an email address, let’s get you a telephone number...
(This is for UK based telephone numbers but they are slowly adding other numbers). The service is located in Iceland! The beauty of it is that they not only accept Bitcoin but also XMR as one of the payment options. You don't even need an email address to sign up!
(Check here for Russian, Polish, Ukrainian and UK numbers, for a one time verification you can also select a Cambodian or Kazakstan number - the service is based in the Ukraine). Again, on this service you do not need an email address.
On the following services, you do need an email address, but that's no biggy.
https://www.textverified.com
(US telephone number, accepts Bitcoin, and a few other cryptocurrencies!) It is a good service if you do not mind having your telephone number and service in the USA
https://www.sms77.io
(German based number) Accepts XMR and Bitcoin
https://onlinesim.ru/en/
(Based in Russia and offers numbers in 72 countries!)
Accepts XMR and Bitcoin
Most services only want a number, which also goes for Apple, so your country of origin or your Apple account, does not need to be from the number you own for your new persona. Remember you can also use one time numbers to verify a service so you can verify your Apple account with a different number from your Signal account etc...
If you want a matching profile picture for your name:
Congrats, you now have a persona, email and telephone number!
Now go to:
https://appleid.apple.com/account
Or fire up your new Apple device!
Fill out what Apple asks from you, include the country and name you generated and submit one of your new shiny telephone numbers. Make sure to read everything and switch off location services, Siri and everything what intrudes on privacy during the setup process. Chose a country which has an option to buy Apple App and iTunes load on Bitrefill.
Congrats, you now have an Apple account that doesn't link directly back to you!
Ok, moving on...
After you've booted up your Mac, go to privacy.sexy and configure the Mac in the way you fits you best. I recommend every point of the options, as it almost takes your Mac to where it is supposed to be in the first place.
Now click:
Settings -> Security & Privacy -> FileVault
Encrypt your hard disk
Enforce system hibernation and evict FileVault keys from memory instead of traditional sleep to memory
sudo pmset -a destroyfvkeyonstandby 1sudo pmset -a hibernatemode 25
If you choose to evict FileVault keys in standby mode, you should also modify your standby and power nap settings. Otherwise, your machine may wake while in standby mode and then power off due to the absence of the FileVault key
sudo pmset -a powernap 0sudo pmset -a standby 0sudo pmset -a standbydelay 0sudo pmset -a autopoweroff 0
The next part (Firewall) should be covered on privacy.sexy, but it won't hurt to doublecheck:
Click Firewall -> Turn on Firewall - > Block all incoming connections and Enable stealth mode
You can do this also via the terminal:
Enable the firewall (State = 1)
sudo /usr/libexec/ApplicationFirewall/socketfilterfw --setglobalstate on
Turning on log mode
sudo /usr/libexec/ApplicationFirewall/socketfilterfw --setloggingmode on
Enable Stealth mode
sudo /usr/libexec/ApplicationFirewall/socketfilterfw --setstealthmode on
To prevent built-in software as well as code-signed, downloaded software from being whitelisted automatically:
Disabled allow signed built-in applications automatically
sudo /usr/libexec/ApplicationFirewall/socketfilterfw --setallowsigned off
Disabled allow signed downloaded applications automatically
sudo /usr/libexec/ApplicationFirewall/socketfilterfw --setallowsignedapp off
Click Privacy and go over every point as you think it fits you best. Switch off all location services, Camera and Microphone, Bluetooth, Speech recognition and go over every point, and select the best fitting options. Apple Advertising turn off Personalised Ads. Analytics & Improvements make sure everything is off!
Jump over to your terminal again
sudo sh -c 'echo "127.0.0.1 ocsp.apple.com" >> /etc/hosts'
This adds OCSP to your hostfile and blocks telemetry to Apple.
Enable Firmware password
https://support.apple.com/en-us/HT204455
Randomizing your MAC address is not automatically possible on macOS, you can, however, do this manually after each reboot
Go to the terminal
(Turn the Wi-Fi off)
networksetup -setairportpower en0 off
(Change the MAC Address)
sudo ifconfig en0 ether 88:63:11:11:11:11
(Turn the Wi-Fi back on)
networksetup -setairportpower en0 on
Now the big question is how can you get paid apps or services on Apple? But even for this there is an easy solution. Jump over to Bitrefill and select your country, and buy some redeemable Apple load. You can use the load for every Apple service and for every app, just as you would if you had used your credit card.

This is the first step to making your Mac safer. Next we will go to some software and fine-tuning in the following Privacy Cookbook entries.
Stay safe and enjoy being a new person!
The Privacy Advocate
Recommend
About Joyk
Aggregate valuable and interesting links.
Joyk means Joy of geeK