

Getting started with Keycloak powered by Quarkus - Mastertheboss
source link: http://www.mastertheboss.com/keycloak/getting-started-with-keycloak-powered-by-quarkus/
Go to the source link to view the article. You can view the picture content, updated content and better typesetting reading experience. If the link is broken, please click the button below to view the snapshot at that time.
This article covers the updates in Keycloak which now runs on top of Quarkus. The former (WildFly) distribution of Keycloak is deprecated so you should promptly start the migration process.
Keycloak overview
Keycloak is an Identity Provider that enables you to secure your Web applications by providing Single Sign-On (SSO) capabilities and leveraging industry standards such as SAML 2.0, OpenID Connect and OAuth 2.0.
So far, the engine of Keycloak distribution was WildFly application server. To deliver a faster and leaner server, Keycloak now builds on the top of Quarkus. The new distribution format is ideal for a Microservice environment where fast start up applications with a small footprint is a must.
In the next section we will learn how to install, start and configure Keycloak (powered by Quarkus) using development and production settings.
Installing the new Keycloak
The latest version of Keycloak is still available at: https://www.keycloak.org/downloads
Download an unzip it in a folder of your like. Before we get started, it is important to know that Keycloak can now be run in two operating modes:
- Development mode: You can activate this operating mode with the start-dev command. This mode relaxes some requirements in terms of security/hostname resolution therefore it’s ideal when developing or testing.
- Production mode: You can activate this mode when you use the build and start command. This mode has stricter requirements therefore we recommend using it for real world scenarios.
Then, you should know that Keycloak uses a different set of files to start and configure the server. Here is the tree view of the project:
.
├── bin
│   ├── client
│   │   ├── keycloak-admin-cli-17.0.0.jar
│   │   └── keycloak-client-registration-cli-17.0.0.jar
│   ├── kcadm.bat
│   ├── kcadm.sh
│   ├── kc.bat
│   ├── kcreg.bat
│   ├── kcreg.sh
│   └── kc.sh
│
├── conf
│   ├── cache-ispn.xml
│   ├── keycloak.conf
│   └── README.md
├── data
│   ├── h2
│   │   ├── keycloakdb.mv.db
│   │   └── keycloakdb.trace.db
│   └── tmp
Core files:
- kc.sh / kc.bat the script you can use to start Keycloak.
- kcadm.sh / kcadm.bat the script to launch commands from the Command Line
- keycloak.conf: this file contains the server configuration options using the key=value format
Starting Keycloak in development mode
You can start Keycloak in development mode as follows:
./kc.sh start-dev
Check that the server started successfully:
When running in development mode, Keycloak uses by default an H2 Database to store its configuration and is available on port 8080. In the next section, we will learn how to change the default database. On the other hand, if you want to start Keycloak on a different port, use the –http-port option. Example:
./kc.sh start-dev --http-port=8180
To check other available options, you can use:
./kc.sh start-dev --help
Start Keycloak in Production
To start the Identity Server in production mode, you have to meet some requirements, with regards to hostname resolution and security. Also, in production mode, you can start the server in two steps:
- build phase: this is where Quarkus optimizations take place, the configuration files are pre-parsed and changes are persisted in the image. You need to rebuild your configuration when you move from development mode to production.
- run phase: this is where you start Keycloak and you can optionally set values to any of the configuration options
Let’s see how to accomplish these steps, using a production ready database like PostgreSQL.
Firstly, we will start PostgreSQL DB. The default keycloak Database name is “keycloak” therefore we will start PostgreSQL as Docker image with these settings:
docker run -e POSTGRES_PASSWORD=postgres -e POSTGRES_DB=keycloak -e POSTGRES_USER=postgres -d -p 5432:5432 postgres
Next, we need to provide a keystore for the server. To create it in JKS format with keytool:
keytool -genkeypair -alias localhost -keyalg RSA -keysize 2048 -validity 365 -keystore server.keystore -dname "cn=Server Administrator,o=Acme,c=GB" -keypass secret -storepass secret
By default the keystore is searched in the conf folder of the distribution. Therefore, if you copy it in that location, you won’t need to provide extra parameters at start up.
cp server.keystore /home/keycloak/keycloak-17.0.0/conf
We are now ready for the build phase, where we can set as default Database PostgreSQL:
./kc.sh build --db postgres
Finally, the last stage is to start Keycloak:
./kc.sh start --db-url-host localhost --db-username postgres --db-password postgres --hostname=fedora --https-key-store-password=secret
Strict hostname resolution
When running in production mode, Keycloak enforces strict hostname resolution. Therefore if you are jusy relying on localhost you will hit the following exception:
java.lang.RuntimeException: Strict hostname resolution configured but no hostname was set
To avoid this error, use the –hostname option as above or set –hostname-strict=false
Here is Keycloak 17 up and running in Production mode:

Securing applications with Keycloak
We have covered some key aspects of the latest Keycloak release. In terms of securing applications you should remove the default /auth context from Keycloak URL. This is because, by default, Keycloak with Quarkus uses the Root Web context.
To keep publishing the HTTP Security Context under the /auth server URL you can use the http-relative-path option:
./kc.sh start-dev --http-relative-path /auth
That being said, let’s see how to adapt your configuration from this tutorial Secure WildFly applications with OpenID Connect
We will start Keycloak in development mode. Remove any keystores (if any) from the conf folder , and start the server on port 8180 to avoid clashing with WildFly:
./kc.sh start-dev --http-port=8180
Then, run the kcadm.sh script to create the Realm wildfly-realm and the Client configuration customer-manager-client:
./kcadm.sh config credentials --server http://localhost:8180 --realm master --user admin --password admin

./kcadm.sh create realms -s realm=wildfly-realm -s enabled=true -o

./kcadm.sh create users -r wildfly-realm -s username=customer-admin -s enabled=true

./kcadm.sh set-password -r wildfly-realm --username customer-admin --new-password admin

./kcadm.sh create clients -r wildfly-realm -s clientId=customer-manager-client -s publicClient="true"  -s "redirectUris=[\"http://localhost:8080/*\"]" -s enabled=true

./kcadm.sh create roles -r wildfly-realm -s name=customer-manager

./kcadm.sh add-roles --uusername customer-admin --rolename customer-manager -r wildfly-realm
As you can see, the only relevant change is the first line, where use have removed the /auth context from the –server parameter.
In terms of application code you don’t need any change but you must update the oidc.json with the correct auth-server-url_
{
  "realm": "wildfly-realm",
  "auth-server-url": "http://localhost:8180/",
  "ssl-required": "external",
  "resource": "customer-manager-client",
  "public-client": true,
  "confidential-port": 0
}
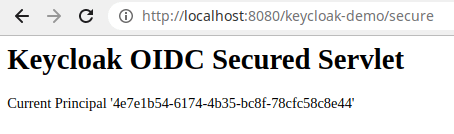
Then, rebuild your WildFly application and login with the user credentials (“customer-admin” / “admin”). You will be able to access the Secured Servlet:
 Source code
The source code for the Keycloak 17-ready configuration is available here: https://github.com/fmarchioni/mastertheboss/tree/master/bootable-jar/elytron-oidc-client-keycloak17
Recommend
About Joyk
Aggregate valuable and interesting links.
Joyk means Joy of geeK