

Azure Arc Machine Learning Part 2: Training Machine Learning Models On-Premises...
source link: https://www.codeproject.com/Articles/5323949/Azure-Arc-Machine-Learning-Part-2-Training-Machine
Go to the source link to view the article. You can view the picture content, updated content and better typesetting reading experience. If the link is broken, please click the button below to view the snapshot at that time.
In the first article of the series, we connected a local Kubernetes cluster to Azure Arc. This article teaches how to train models with Azure Machine Learning (AML) running on an on-premises Kubernetes cluster managed by Arc.
You can view the full project code on GitHub.
Attaching a Kubernetes Cluster in an ML Workspace
To run an ML workload on an Arc-enabled cluster, we must attach the Kubernetes cluster to an ML workspace in Azure. Let’s first create an AML resource in the Azure Portal.
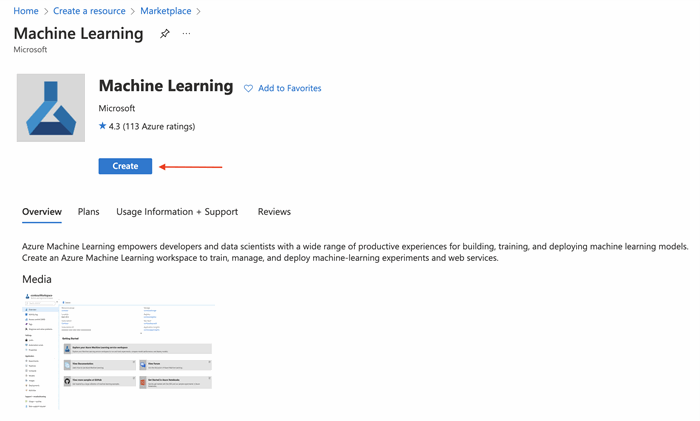
We can log in to the Azure portal and search for machine learning in the marketplace. On the Machine Learning page, we click Create.
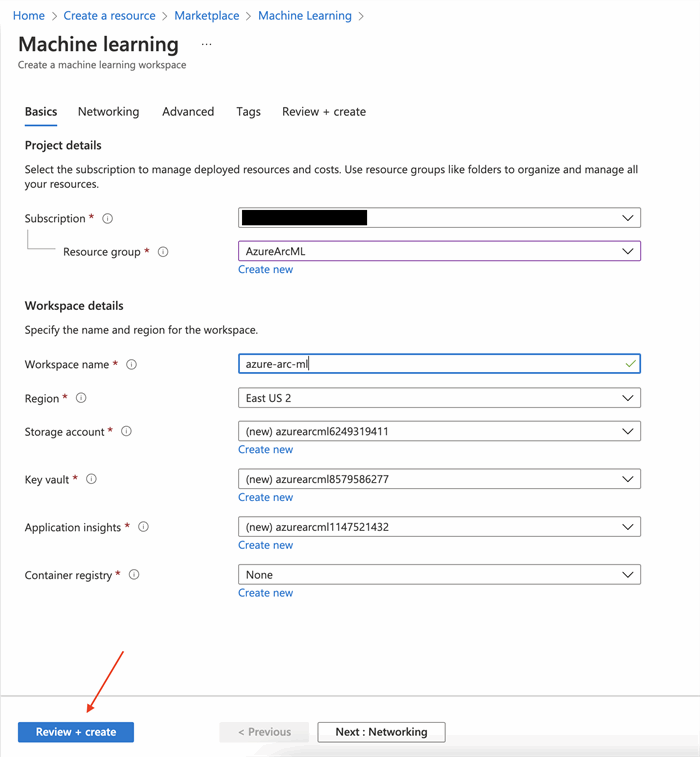
On the next page, we select a resource group and specify the name and region for the workspace. Once done, we click Review + create.
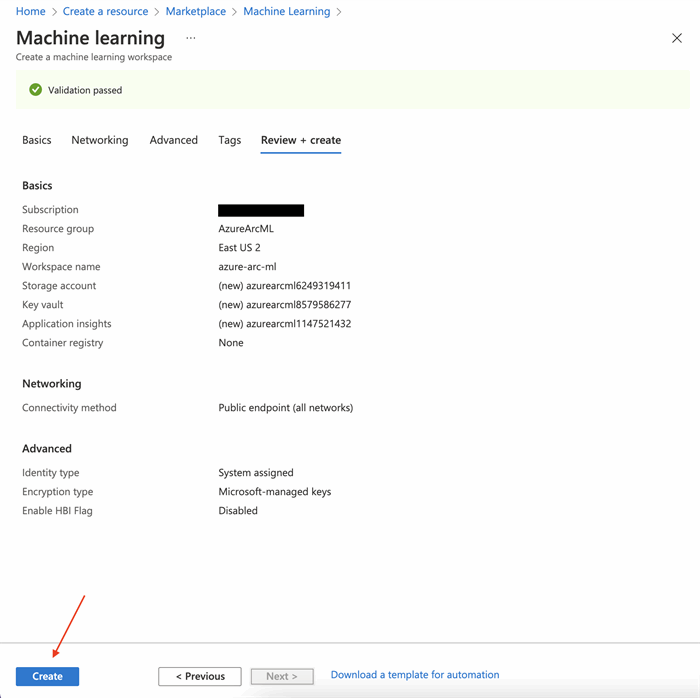
It takes a few seconds to validate the specified settings. When done, we click Create.
When the deployment is complete, we go to the resource.
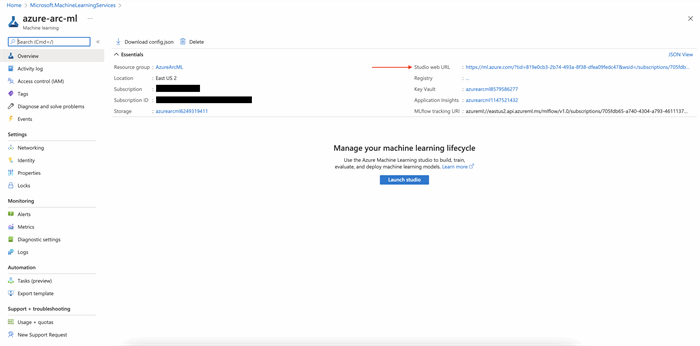
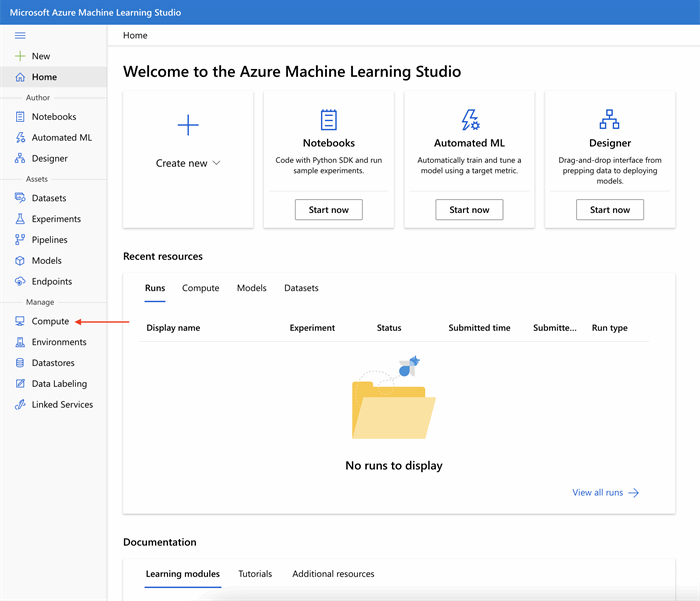
Here, along with other configurations, we can also see the URL for the AML studio. We click the link to launch the studio.
Then, in the studio, we click Compute in the left menu.
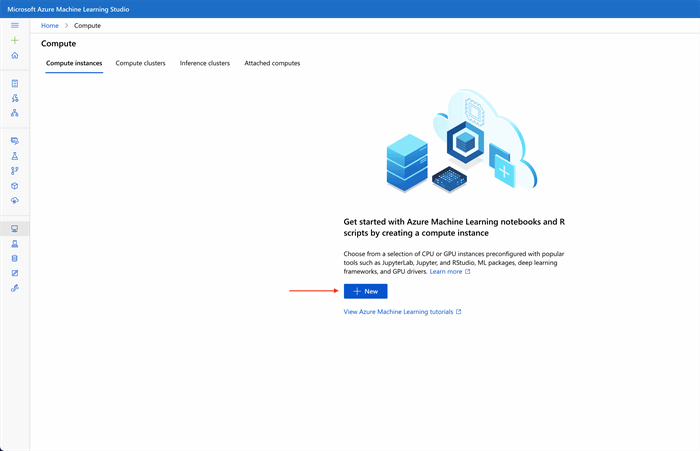
We must create a compute instance before making and running notebooks in AML studio. Under Compute instances, we click New.
We enter the Compute name on the next page and specify the requirements. Once done, we click Create.

Azure only takes a few seconds to deploy the compute instance.
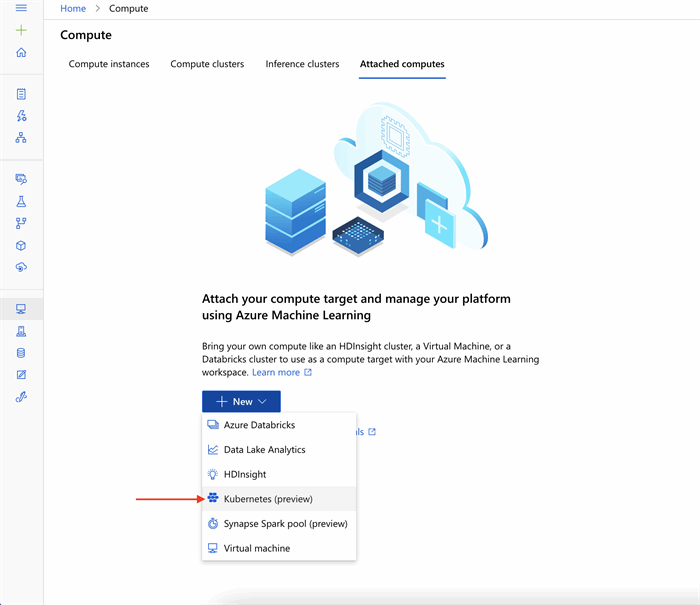
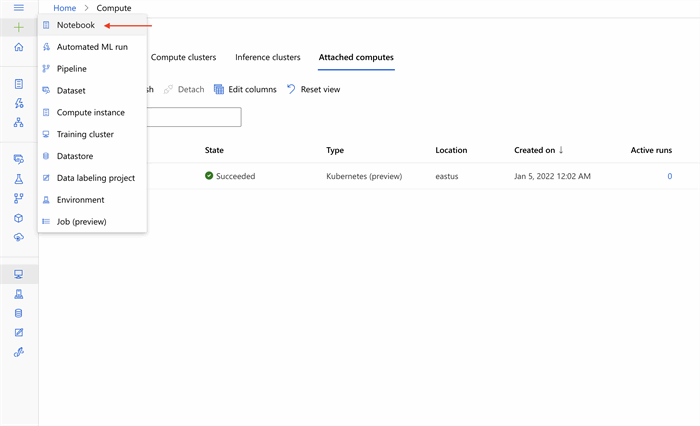
The next step is to attach our Kubernetes cluster to an ML workspace. We navigate to Attached computes, click New, and select Kubernetes (preview) from the menu.
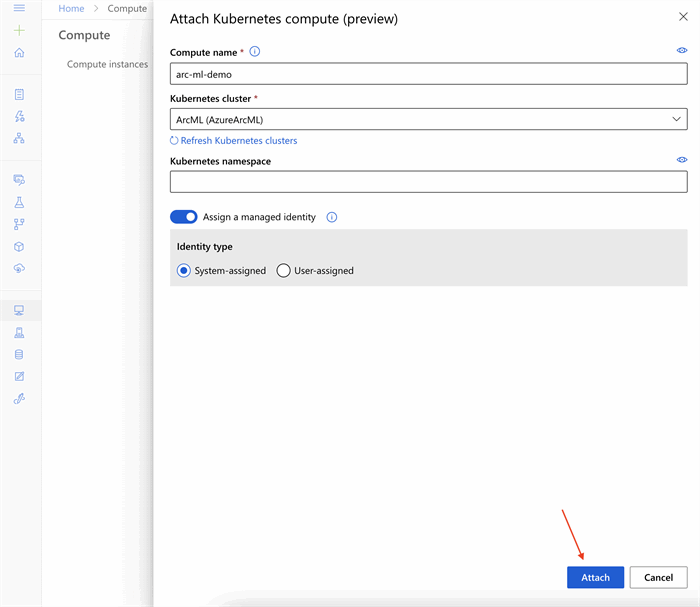
We enter a name for our computer on the next page and select our Kubernetes cluster from the list. Also, we must set the Assign a managed identity to System-assigned. Once done, we click Attach.
When finished, we see our attached Kubernetes cluster under Attached computes. Now we’re all set to train our model using AML.
Training the ML Model on an Arc-Enabled Kubernetes Cluster
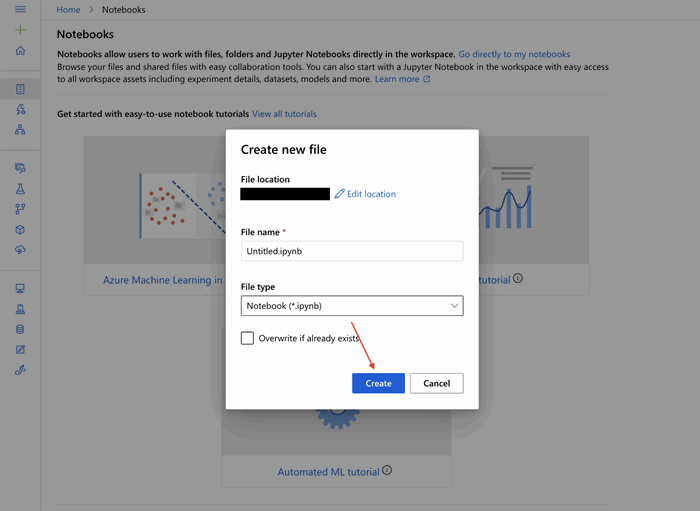
In AML studio, we click the plus sign (+) on the top left side and click Notebook.
We specify file location, name, and type on the next page and click Create.
Now, we’ll train a classic image classification model on the fashion-mnist dataset.
Before we can start training the model, we must connect to our ML workspace. Enter the following code to connect to the AML workspace:
# Connect to Azure Machine Learning Workspace
import azureml.core
from azureml.core import Workspace
ws = Workspace.from_config()
Then, we’ll create a script folder to keep all the scripts related to our machine learning model.
# Create script folder
import os
script_folder = os.path.join(os.getcwd(), 'script')
os.makedirs(script_folder, exist_ok=True)
Once this code finishes, we see the script directory under Users > {$username}.
Next, we must create an ML model for our image classification problem. The following code creates a file called train.py in the script folder that contains all the methods for training and testing our classification model.
%%writefile script/train.py


import os
import time
import azureml
import argparse
import numpy as np
import tensorflow as tf
from tensorflow import keras
from keras import backend as K
from keras import utils, losses
from keras.models import Sequential
from azureml.core import Workspace, Run
from keras.layers import Conv2D, MaxPooling2D
from keras.layers import Dense, Dropout, Flatten

os.environ["TF_CPP_MIN_LOG_LEVEL"]= "2"
os.environ['KERAS_BACKEND'] = 'tensorflow'

#Fashion MNIST Dataset CNN model development: https://github.com/zalandoresearch/fashion-mnist
from keras.datasets import fashion_mnist


parser = argparse.ArgumentParser()
parser.add_argument('--data-folder', type=str, dest='data_folder', help='data folder mounting point')
args = parser.parse_args()

#load training and testing data
(x_train, y_train), (x_test, y_test) = fashion_mnist.load_data()
print(x_train.shape, y_train.shape, x_test.shape, y_test.shape, sep = '\n')

# Define the labels
fashion_mnist_labels = ["Top",
"Trouser",
"Jumper",
"Dress",
"Coat",
"Sandal",
"Shirt",
"Trainer",
"Bag",
"Ankle boot"]

#data pre-processing
x_train = x_train.astype('float32')
x_test = x_test.astype('float32')
x_train /= 255
x_test /= 255
y_train = utils.to_categorical(y_train, num_classes)
y_test = utils.to_categorical(y_test, num_classes)

#formatting issues for image depth (greyscale = 1) with different kernels (tensorflow, cntk, etc)
if K.image_data_format()== 'channels_first':
x_train = x_train.reshape(x_train.shape[0], 1, img_rows, img_cols)
x_test = x_test.reshape(x_test.shape[0],1,img_rows, img_cols)
input_shape = (1, img_rows, img_cols)
else:
x_train = x_train.reshape(x_train.shape[0], img_rows, img_cols,1)
x_test = x_test.reshape(x_test.shape[0],img_rows, img_cols,1)
input_shape = (img_rows, img_cols,1)

# declare variables for model training
num_classes = 10
batch_size = 128
epochs = 10
img_rows,img_cols = 28,28

# model for image classification
model = Sequential()

model.add(Conv2D(64, kernel_size=(3,3), padding = 'same', activation = 'relu', input_shape=input_shape))
model.add(MaxPooling2D(pool_size=(2,2)))
model.add(Dropout(0.2))

model.add(Conv2D(32, kernel_size=(3,3), padding = 'same', activation = 'relu'))
model.add(MaxPooling2D(pool_size=(2,2)))

model.add(Flatten())
model.add(Dense(128, activation='relu'))

model.add(Dropout(0.5))
model.add(Dense(num_classes, activation='softmax'))

model.summary()


# start an Azure ML run
run = Run.get_context()

# training the deep learning model
model.compile(loss=losses.categorical_crossentropy, optimizer="Adam", metrics=['accuracy'])
hist = model.fit(x_train, y_train, batch_size=batch_size, epochs=epochs, verbose=1, validation_data=(x_test, y_test))

# evaluate the model performance on test data
print('Predict the test set')
result = model.evaluate(x_test, y_test, verbose=0)
print('Test Loss: ', result[0])
print('Test Accuracy: ', result[1])

# calculate accuracy on the prediction
print('Accuracy is', result[1])


os.makedirs('outputs/model', exist_ok=True)
# save trained model
model.save('outputs/model/model.h5')
In this code, we load the fashion-mnist data from Keras datasets. The fashion-mnist dataset consists of 60,000 examples for training and a test set of 10,000 examples associated with the label from 10 classes. Once we successfully load the data, we normalize the images and format the image depth.
After pre-processing the data, we create a sequential model for image classification. The model consists of two 2D convolution layers, each followed by a max pooling 2D layer. The neural network model also uses a softmax function as an activation function for multi-class classification.
Next, we start the Azure Machine Learning run for training and evaluating the data on training and validation data, respectively. Once the model training completes, we save it for future use.
When the script is in place, the next step is to attach the Arc-enabled Kubernetes compute as follows:
# Get attached Arc-enabled kubernetes compute
arc_compute = ws.compute_targets["arc-ml-demo"]
The above code sets the compute target as our attached Kubernetes cluster.
Finally, let’s run the ML workload.
from azureml.core import Experiment
from azureml.core.environment import Environment
from azureml.core.conda_dependencies import CondaDependencies
from azureml.core import ScriptRunConfig


# Register environment to re-use later
env = Environment('test')
conda_dep = packages = CondaDependencies.create(conda_packages=['pip', 'tensorflow', 'keras', 'scikit-learn'],
pip_packages=['azureml-defaults'])
env.python.conda_dependencies = conda_dep
env.register(workspace = ws)


# reference the data
datastore = ws.get_default_datastore()
data_ref = datastore.path('./data').as_mount()


src = ScriptRunConfig(source_directory=script_folder,
script='train.py',
arguments=['--data-folder', str(data_ref)],
compute_target=arc_compute,
environment=env)

# Run the experiment
src.run_config.data_references = {data_ref.data_reference_name: data_ref.to_config()}
run = Experiment(workspace=ws, name='fashion-mnist').submit(src)
run.wait_for_completion(show_output=True)
In this code, we first register the environment and define the dependencies for our environment. We also register the current ML workspace with the environment. Since we’re loading the data from Keras datasets, we must create a data_ref object to reference the data in the default datastore. To submit a run in AML, we package the configuration information, including the script, compute target, and environment in an instance of the ScriptRunConfig class. Next, we submit these configurations and start the ML load in Azure.
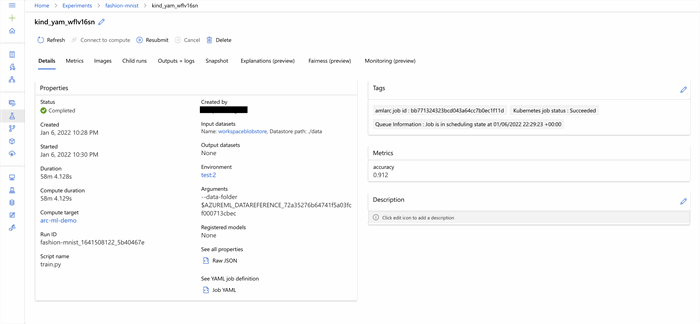
Once the model starts training, it provides a web link to view its training progress. This link allows us to consistently view and extract logs, metrics, and models in history. Once our model completes training, we should see similar output to this image:
We can also check our model’s performance as follows:
print(run.get_metrics())
Our model has completed training and reports a decent accuracy of 91 percent. Since the results are worthy, we can register this model with Azure.
Registering the Model in Azure
When we register the model with Azure, Azure uploads it to our workspace’s default storage account, and we can mount it anywhere. This approach is beneficial when we want to create a backend system that returns the model’s prediction. Once registered, we can download or deploy the registered model.
Azure uploads the files in the outputs folder into an experiment record by default. Since we saved our trained model in the outputs folder, it should be in the experiment record. We can register our model from there. Before registering, let’s verify that we have our model in the desired folder.
# get files in experiment record
print(run.get_file_names())
The above line of code outputs the names of all the files in the record. We should also see the model.h5 file, which in our case is in the outputs/model folder.
Next, we register this model as follows:
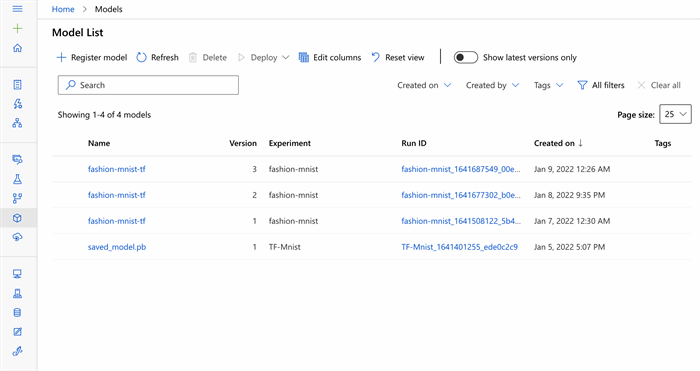
# register model
model = run.register_model(model_name='fashion-mnist-tf', model_path='outputs/')
print(model.name, model.id, model.version, sep = '\t')
Once the above code executes successfully, we should see our model in Azure.
We can also download a copy of the trained model to our local system and use it for inference.
Next Steps
This article attached our locally-hosted, Arc-enabled Kubernetes cluster to an AML workspace and used it to train a classic image classification model. Continue to the following article, where we learn to deploy our model and enable inference anywhere with Azure Arc-enabled ML.
To learn more about how to configure Azure Kubernetes Service (AKS) and Azure Arc-enabled Kubernetes clusters for training and inferencing machine learning workloads, check out Configure Kubernetes clusters for machine learning.
Recommend
About Joyk
Aggregate valuable and interesting links.
Joyk means Joy of geeK