

The joy of building a ray tracer, for fun, in Rust.
source link: https://blog.singleton.io/posts/2022-01-02-raytracing-with-rust/
Go to the source link to view the article. You can view the picture content, updated content and better typesetting reading experience. If the link is broken, please click the button below to view the snapshot at that time.

TLDR? You can find the code and a bunch of examples on GitHub at dps/rust-raytracer.
Over the holiday break, I decided to learn Rust. Rust is a modern systems programming language which has a really interesting type system. The type system can catch broad classes of common programming mistakes - e.g. ensuring memory is accessed safely - at compile time while generating tight, performant machine code. I’ve heard a lot about Rust from friends and colleagues over the past several years. Their most frequent descriptions in the early days were “esoteric” and “puzzling” but during 2021 it’s been increasingly common to hear gushing praise for the language.
Former Twitter CEO Jack Dorsey described Rust as a “perfect” programming language last week.rust is a perfect programming language
— jack⚡️ (@jack) December 24, 2021
I had run through “hello world” and simple boilerplate web server examples in early versions of Rust but didn’t leave those experiences feeling like this language was about to take over the world. Now I really wanted to understand what all the fuss was about so decided to try building something real in Rust to see for myself - building a simple ray tracer was a great fit.

This post isn’t really about ray tracing, for that you should check out the wonderful Ray Tracing in One Weekend by Peter Shirley. Nor is it really a post about Rust, for that you can try the Rust Book or the O’Reilly book which I enjoyed. What I’d like to share with you is simply how much fun it was to fiddle around with my own software which paints pretty pictures of a virtual world while exploring a whole new way of thinking about code.
Getting started: Rust
I’m a bit of a polyglot as programming languages go (or perhaps jack of all languages, master of none ?). I keep mostly current in C++, Java, Go, python, ruby and Javascript and write a little Scala each year too. I knew that Rust’s memory management was going to be a bit different to each of those, though I well understood the motivation for it having written plenty of buggy code in all of the above. As Rust would feel different, I knew I would do best to start by reading.
Rust has batteries-included documentation baked right in to its toolchain - you can get straight to the docs in your browser after a fresh Rust install with rustup docs. This includes Rust by Example and The official Rust book. I had a couple of flights to take, so I started with a “real” book. The O’Reilly “crab” book by Jim Blandy, Jason Orendorff and Leonora Tindall. This is one of the best O’Reilly books I have used - it opens with a brief treatise on why you should learn Rust and then dives in to three worked examples of real and not-completely-trivial programs which help you get a feel for the syntax, the standard library and the power of Rust’s build and packaging system cargo. I loved this - starting with real code is great. If you’re getting started with Rust I thoroughly recommend it.
At first glance, Rust looks a bit like C but I found it best to try not to think of it that way. For the first hour or so I was reaching for constructs like the ternary operator (x = condition ? a : b) in C or Javascript, but soon realized that (i) there is no ternary operator because (ii) there are much better ways of expressing stuff like that because… Rust is an expression language like LISP or Ruby. That means almost everything is an expression, even if statements so let x = if condition { a } else { b } just works. Here you can see a closure in Rust and the extremely versatile match block and Option enum which reminds me of Scala code.
|texture: &Option<(Vec<u8>, usize, usize, String)>| {
    match texture {
        Some(tuple) => tuple.3.clone(),
        None => "".to_string(),
    }
}
In fact writing Rust code reminds me most of writing Scala with some of the nice parts of the toolchain of Go and the package ecosystem of Javascript/npm thrown in. Besides that, of course, there’s a mysterious little .clone() in that snippet - the way Rust handles memory management and object lifecycles is all its own. More on that in a bit…
Getting started: ray tracer
Ray tracing is a technique for creating images of a virtual scene by modeling what happens to the path of virtual rays of light as they bounce off all the objects in it. We place a bunch of objects including a camera and light source(s) in a scene. Then we shoot rays of light out at the scene for each pixel in the image we’re trying to draw.
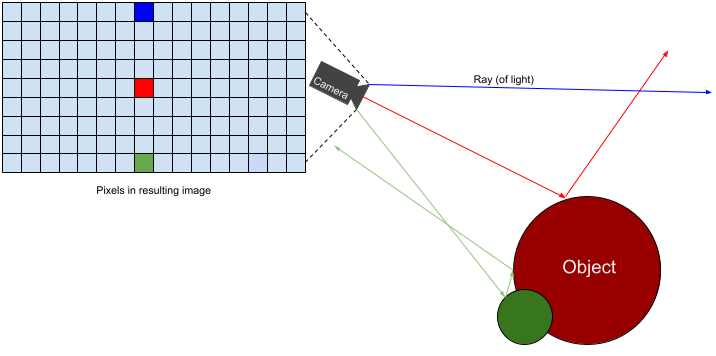
Every time a light ray hits an object we model what would happen to it using a real-world physics/optics based model and lots of trigonometry. For example, if a light ray hits a shiny surface we model it being reflected off at the correct angle. We continue tracing the ray’s path as it bounces around until it reaches a light-source (or is completely absorbed) and then work the color of that light and the effect of each surface it hit all the way back to the eye to determine the color of that particular pixel in our final image. In fact we do that many times for each pixel and average the color together (reflections off rough surfaces are random, for instance, so you can get a different result each time a ray shoots out from the same pixel). The really cool thing is that if we implement just a few rules for a few different kinds of material in the scene, ray tracing can produce impressive, close to photorealistic, results.
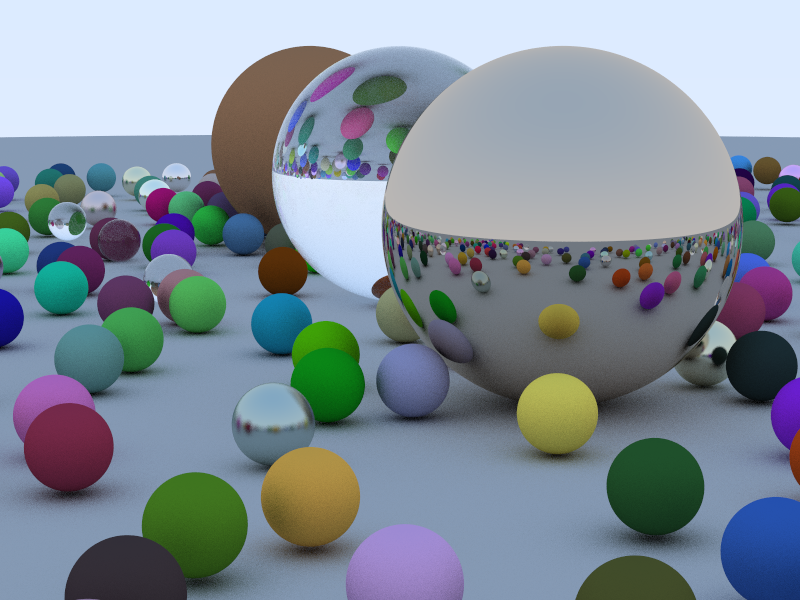
To build my ray tracer, I started by following Peter Shirley’s guide: Ray Tracing in One Weekend. Peter’s guide includes example code in C++ and is really clear and well paced. It goes into a lot of detail on the math and physics behind the raytracer. As I translated the code into Rust, I tried not to copy it directly but rather to figure out a more idiomatic Rust way of doing what I wanted. I think this was fairly successful - my code certainly reads more like Rust than C++ as the commits proceed.
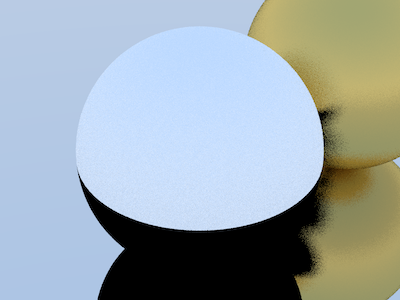
If you open up Peter’s guide, you’ll see that the cover image looks strikingly like the one above. That one, however, was generated entirely by my own code written in Rust. I made a few mistakes along the way - for instance, check out this wonky “sphere”.
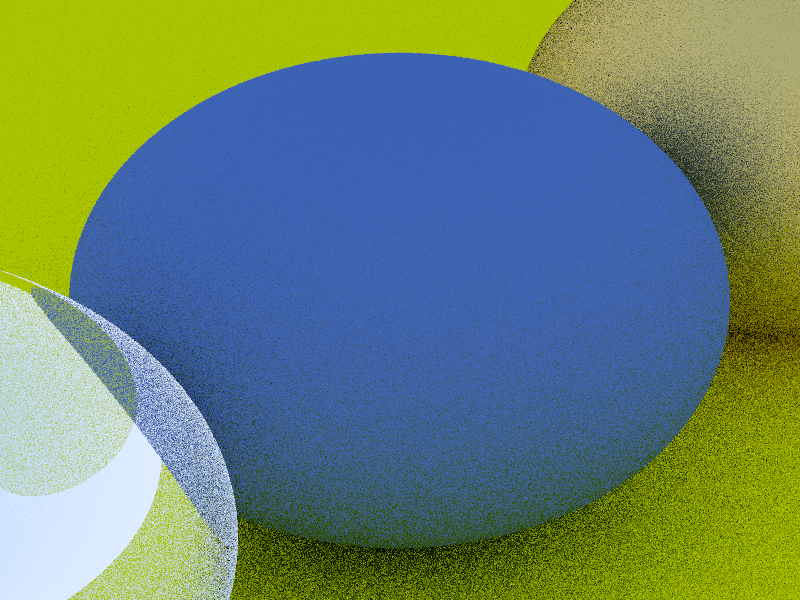
This wonky sphere is a result of my code to compute the aspect ratio of the image not working correctly and took an embarrassingly long time to debug. I had written something like:
let aspect_ratio = (800 / 600) as f64You’ve probably spotted the bug already? Rust sees 800 and 600 are both integers and does integer division producing1 as f64?. This is not Rust’s fault (python does the same FWIW), but I had a few habits to unlearn from recent weeks of Javascript coding.
It was extremely satisfying to end up with a fully working implementation in a new language.
I won’t rehash the guide step by step here - go take a look for yourself. I will say that simply getting a basic ray tracer working is an excellent project to explore the features of any new language. There’s enough code that you’ll want to split it into modules. You need to create plenty of objects and use some mechanism where code can work on objects of different types (e.g. so that operations on rays bouncing off of objects made of different materials can reuse the same code). You’ll also have to figure out how to debug the code you are writing. As a treat you get to look at lots of pretty (and sometimes not so pretty) pictures along the way.
Impressions of Rust
Rust memory model
Rust’s memory model and type system’s understanding of how objects are owned, what interacts with them and when was the most novel part of the whole experience. I ultimately found this quite intuitive to understand and powerful to work with. I made a few mistakes that tested my understanding. The compiler feels persnickety for sure, but the error messages it produces are really clear and helped me learn how to think about the concepts involved.
error[E0382]: use of moved value: `foo`
  --> src/main.rs:20:15
   |
18 |     let foo: String = "Hello, world!".to_string();
   |         --- move occurs because `foo` has type `std::string::String`, which does not implement the `Copy` trait
19 |     consume(foo);
   |             --- value moved here
20 |     let bar = foo;
   |               ^^^ value used here after move
Rust doesn’t have a garbage collected memory model like Go or Java. Like C++ this makes it possible to write more efficient and deterministically performant code. The challenge of doing this in C++ is that ensuring you access memory correctly and safely (e.g. never using a pointer to an object after it has been freed) is entirely your concern. Empirically most C++ codebases have many cases of unintended, unsafe, memory access which introduce correctness and security problems. Rust aims to fix this by restricting how programs can use pointers to objects and verifying at compile time that the rules haven’t been broken.
“Rust’s rules are probably unlike what you’ve seen in other programming languages. Learning how to work with them and turn them to your advantage is, in our opinion, the central challenge of learning Rust.” – Programming Rust, O’Reilly Media.
Ownership
Rust makes the concept of ownership explicit (vs implicit in C++). Except for very simple types (like integers, characters), every value has a single owner and they are freed when the owner goes out of scope. Values are explicitly moved from one owner to another and the compiler verifies that they are not accessed via the original owner after such a move. You can “borrow” a reference to a valued owned by another object. There are two types of reference - shared read only references and mutable references. Mutable references allow reading and writing the value, but crucially the compiler ensures that one and only one mutable reference can exist at a time. These restrictions prevent use-after-free errors and also help ensure safe access to data in a multi-threaded context (either one thread can be reading and writing and object or many threads can be reading).
For my raytracer, all the objects that represent the scene need to be set up and then shared across the threads doing the rendering. The scene can contain objects like Spheres which can be made of Texture type materials. Textures can hold huge bitmaps and we definitely don’t want to copy them around as execution proceeds. Our Textures need to have a single owner and correctly use references across the program.
// The scene is parsed from a json file, loading every Texture that is referenced.
// scene now owns all the related objects - the Spheres, the Camera etc.
let scene = serde_json::from_slice::<Config>(&json).expect("Unable to parse config json");

// ...
// Much later, when it's time to render a line in the image, we pass scene in as a reference.
// render_line runs across many threads so the scene reference here is a shared, read-only, one.
render_line(band, &scene, &lights, i);
By contrast, I made the simple type Point3D (which just stores three floats) one that could be copied when needed with #[derive(... Copy ...)]:
#[derive(Debug, Clone, Copy, Deserialize, Serialize)]
pub struct Point3D {
    x: f64,
    y: f64,
    z: f64,
}
Point3Ds are therefore passed by value in function calls. Making both pass by reference and pass by value possible and so clear as a direct language feature is something I really appreciated.
Arranging code
In this regard, Rust is quite particular and the docs quite confusing (or at least long winded and lacking a quick practical example). The source files main.rs and lib.rs within a package are magically known to the build system (as well as mod.rs in subdirectories). Modules can, of course, be broken up into additional files beyond these and when referenced with a mod module_name statement within one of the known files (or dependent code pulled in already) the build system automatically tries to find them at module_name.rs or module_name/mod.rs. It’s a bit weird but at least you don’t have to write any BUILD files by hand. The full docs on how to structure your code across modules and files are here.
This is perhaps a good moment to mention that there’s much less StackOverflow content for Rust than I was used to for Javascript, python etc. Google also mostly serves the official docs (or mirrors of them) for most queries, so if the official docs are not great on a particular topic, there’s a good chance you’ll have to figure it out for yourself. Did I mention the O’Reilly book was a godsend?
Polymorphic types
Polymorphism in Rust works more like it does in Go than in C++ or Java. Rust doesn’t do polymorphism by inheritance / subclassing. Indeed, there’s no concept of inheritance among objects at all in Rust.
Instead Rust uses generics to abstract over different possible types and traits to impose constraints on what those types must provide.
Inheritance has recently fallen out of favor as a programming design solution in many programming languages because it’s often at risk of sharing more code than necessary. Subclasses shouldn’t always share all characteristics of their parent class but will do so with inheritance. … For these reasons, Rust takes a different approach, using trait objects instead of inheritance. – Rust docs
For the ray tracer, I defined traits for two types - Hittable and Scatterable. Hittable is the base type for any object that a ray of light can hit. Scatterable is a behavior of materials that objects are made of and determines what happens to the light ray as it is scattered off them.
pub trait Hittable {
    fn hit(&self, ray: &Ray, t_min: f64, t_max: f64) -> Option<HitRecord>;
}

pub trait Scatterable {
    fn scatter(&self, ray: &Ray, hit_record: &HitRecord) -> Option<(Option<Ray>, Srgb)>;
}
Debugging
The most natural way to debug a ray tracer involves generating small test scenes, rendering them and seeing whether the results match your intuition. Each iteration can take tens of seconds and this becomes tedious quite quickly. I started to rely instead on unit tests for each part of the code. Rust makes this delightfully simple. You can write tests inline in the same file as the code being exercised, labeled with a special #[test] attribute. cargo test then compiles and runs all the tests in the package.
#[test]
fn test_sphere_hit() {
    let center = Point3D::new(0.0, 0.0, 0.0);
    let sphere = Sphere::new(center, 1.0, ...);
    let ray = Ray::new(Point3D::new(0.0, 0.0, -5.0),
                       Point3D::new(0.0, 0.0, 1.0));
    let hit = sphere.hit(&ray, 0.0, f64::INFINITY);
    assert_eq!(hit.unwrap().t, 4.0);
}
As my project became more elaborate, I added cargo test to a git precommit hook and wrote test cases which rendered (a very very low res version of) a couple of test scenes. This was super useful to keep every commit nice and clean.
The real fun begins
Now I had a complete simple ray tracer and a basic understanding of how Rust works, it was time to have some fun! Peter Shirley suggests a few extensions at the end of his guide.
Parallel rendering
I wanted to go beyond a single frame and make some cool animations of the camera flying around my scene. However, rendering a single 800x600 frame for a complex scene was pretty slow (approx 20 seconds) so my first task was to speed that up. Initially I was only rendering in a single thread on one CPU core, but my laptop has 8 CPU cores (16 CPU threads). Ray tracing is inherently very parallelizable - we can model each ray independently of all the others. Let’s see if we can use all that processing power to speed things up. The Rust ecosystem has a bunch of modules that make concurrent programming easy. I followed the same process demonstrated in the O’Reilly book to speed up the rendering of a Mandelbrot set and ultimately used the rayon crate to achieve an approx 10x speed up by distributing the load across CPUs. Rayon is a data-parallelism library for Rust which makes it easy to convert a sequential computation into a parallel one. It also guarantees freedom from data-races. Rayon was impressively easy to use.
 1  let mut pixels = vec![0; image_width * image_height * 3];
 2  let bands: Vec<(usize, &mut [u8])> = pixels.chunks_mut(image_width * 3).enumerate().collect();
 3
 4  bands.into_par_iter().for_each(|(i, band)| {
 5      render_line(band, &scene, &lights, i);
 6  });
Rust has standard library support to break a large structure like the vector holding our output image pixels here into many non-overlapping mutable chunks. This makes it possible to divide work across multiple threads where each thread owns a subset of the overall output data, maintaining the single writer constraint. That’s what chunks_mut does on line 2 above - we’re breaking our vector of pixels into chunks representing each line in the output.
into_par_iter is a a Rayon primitive and it’s kinda magic! It decides how to divide the data into tasks and it will dynamically adapt for maximum performance as computation proceeds.
This really works! Not every line in a ray traced scene is equally complicated to compute (e.g. the top row will often be all sky and intersect no objects, whereas a line near the center of the scene might have much more complexity).
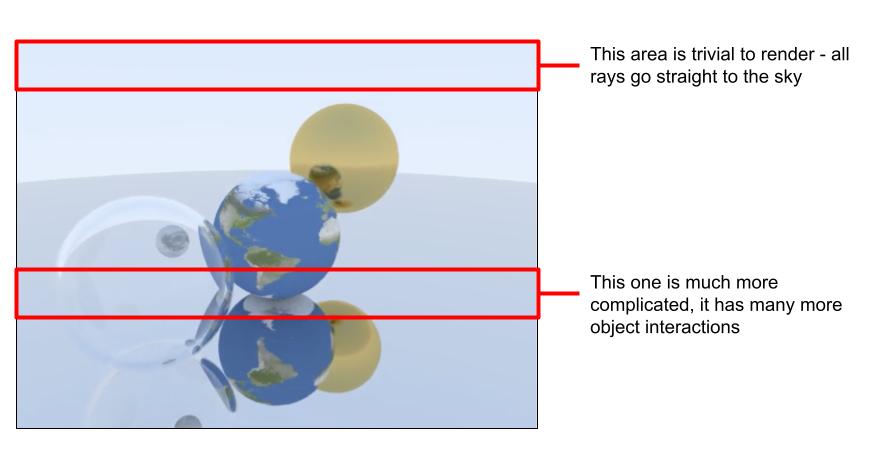
Before I tried Rayon, I used another crate (crossbeam) which divided the work naively across CPUs, here’s what the wall clock time looked like on each CPU to render a single frame:
Rendering anim/frame_003.png
Chunk time: 573ms   // the "easiest" 1/8th
Chunk time: 776ms
Chunk time: 1728ms
Chunk time: 4180ms
Chunk time: 5215ms
Chunk time: 5428ms
Chunk time: 5632ms
Chunk time: 5705ms  // the "hardest" 1/8th
Frame time: 5735ms  // time for the whole frame.
Here we’re using 8 threads to render 1/8th of the lines each. The time to complete the frame is determined by the most complicated eighth. But that one took 10 times longer to render than the simplest. What we want is for that first CPU, once it’s done to start “stealing” work from the ones which are lagging overall and that’s exactly what Rayon does to achieve a faster overall throughput.
Ultimately, dividing the work up with into_par_iter rendered the same frame in 2500 ms and made it possible to max out my laptop CPU. By parallelizing the work, Rayon achieved a 10x speed up with the same input data vs a single threaded render.
Texture mapping
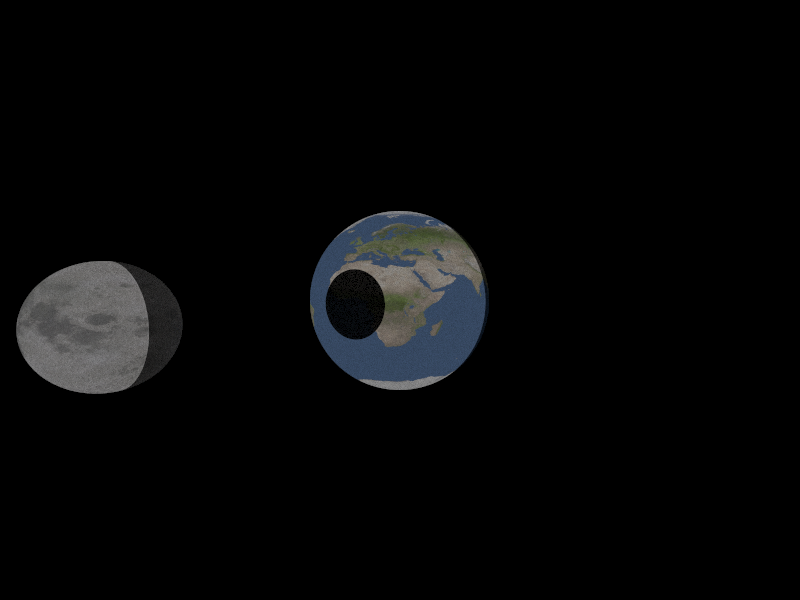
My ray tracer draws spheres. It’s really simple, so it can only draw spheres. What’s the coolest thing you can draw with spheres? Yep, I wanted to draw the earth and the moon (and maybe if I could get lighting working well simulate an eclipse by casting the shadow of the moon onto the earth). To make the earth look like the earth, I needed to implement texture mapping - to wrap a satellite image around the sphere and determine the right color for each ray intersection from it.
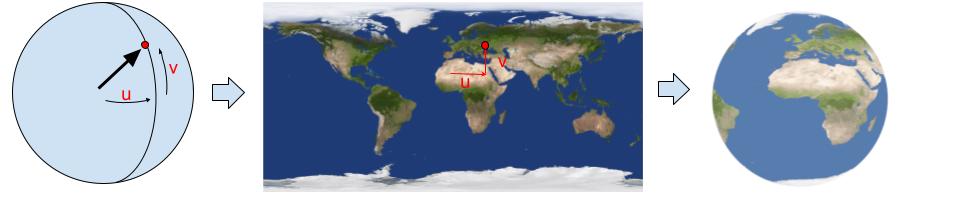
Conceptually this is fairly simple - the vector from the sphere’s center to the point hit by the ray is easy to calculate by doing vector arithmetic and subtracting the sphere’s center point from point where the ray intersected the sphere. Once normalized, the y component of that vector determines v - the latitude on the sphere and vertical offset in the texture image. u - the longitude / horizontal offset can be computed with arctan(x/z) / 2? (i.e. the angular distance around the sphere). While it might be conceptually simple, I managed to implement this wrong on the first couple of tries.
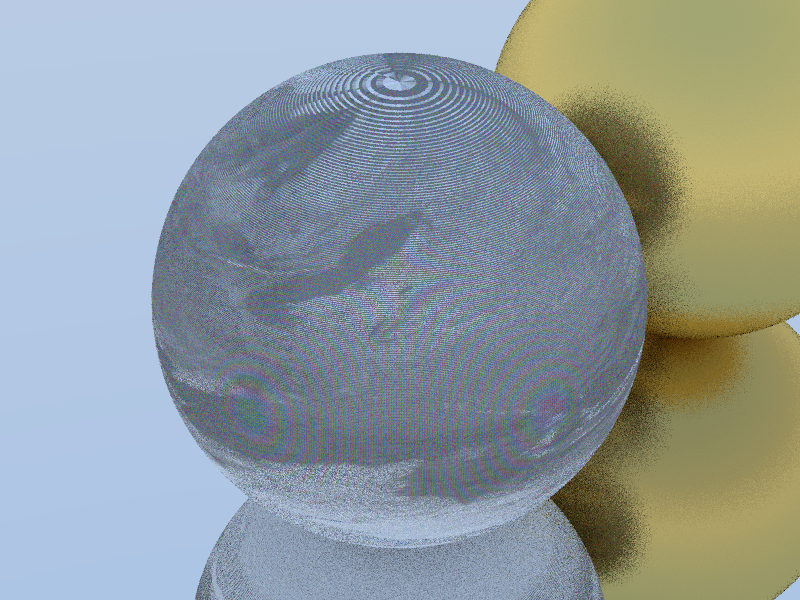
I assumed the problem was with my trigonometry (and indeed, it was broken). The easiest way to debug this turned out to be to ignore the texture pixels and check that I could simply render the northern/southern/eastern and western hemispheres correctly:
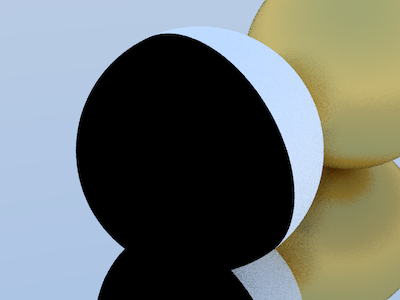
 Once I got that working it turned out the pixel indexing code was wrong too. This might look cool, but it’s not the earth! It took a couple more debugging steps to get this right.
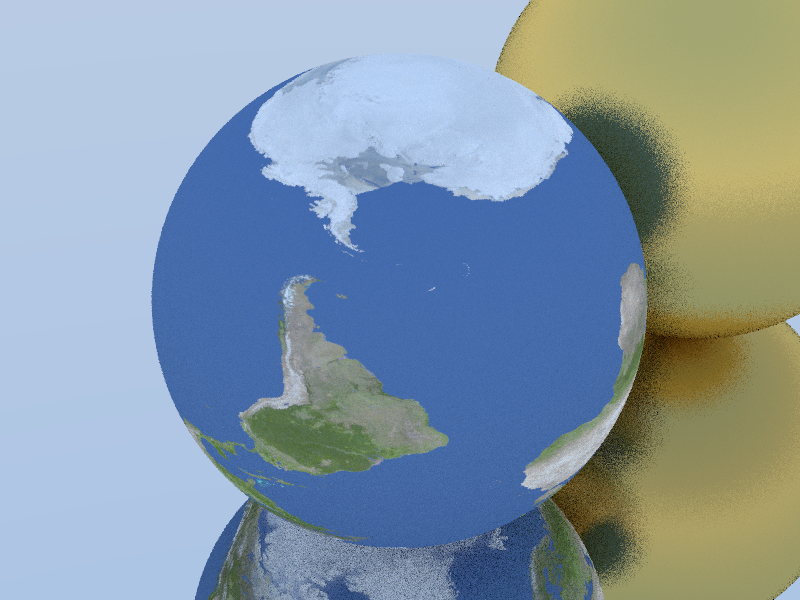
Finally, I figured it all out and was able to make this pretty neat looking animation.
Lighting
Lights — You can do this explicitly, by sending shadow rays to lights, or it can be done implicitly by making some objects emit light, biasing scattered rays toward them, and then downweighting those rays to cancel out the bias. Both work. I am in the minority in favoring the latter approach.
– Ray Tracing in One Weekend
I decided to try Peter Shirley’s approach to lighting as mentioned above. For each scattering interaction with some probability I cast new rays towards the center of every light in the scene.
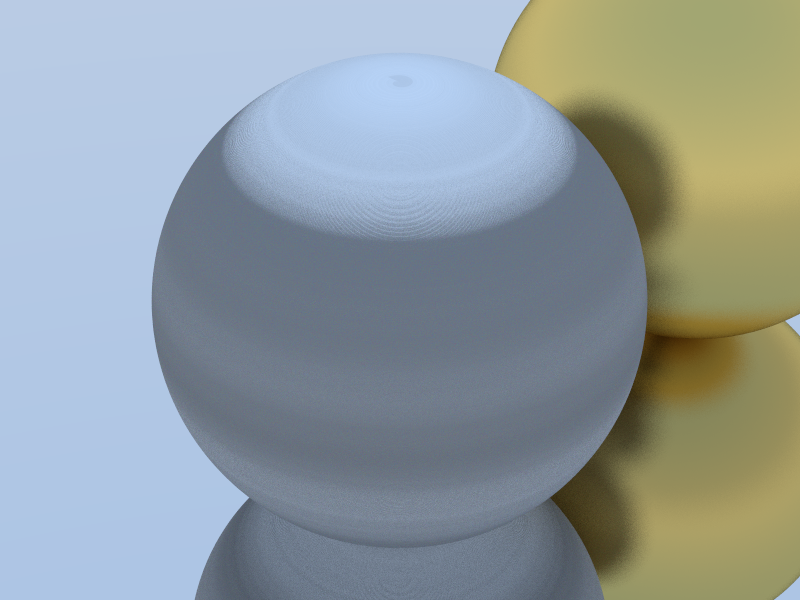
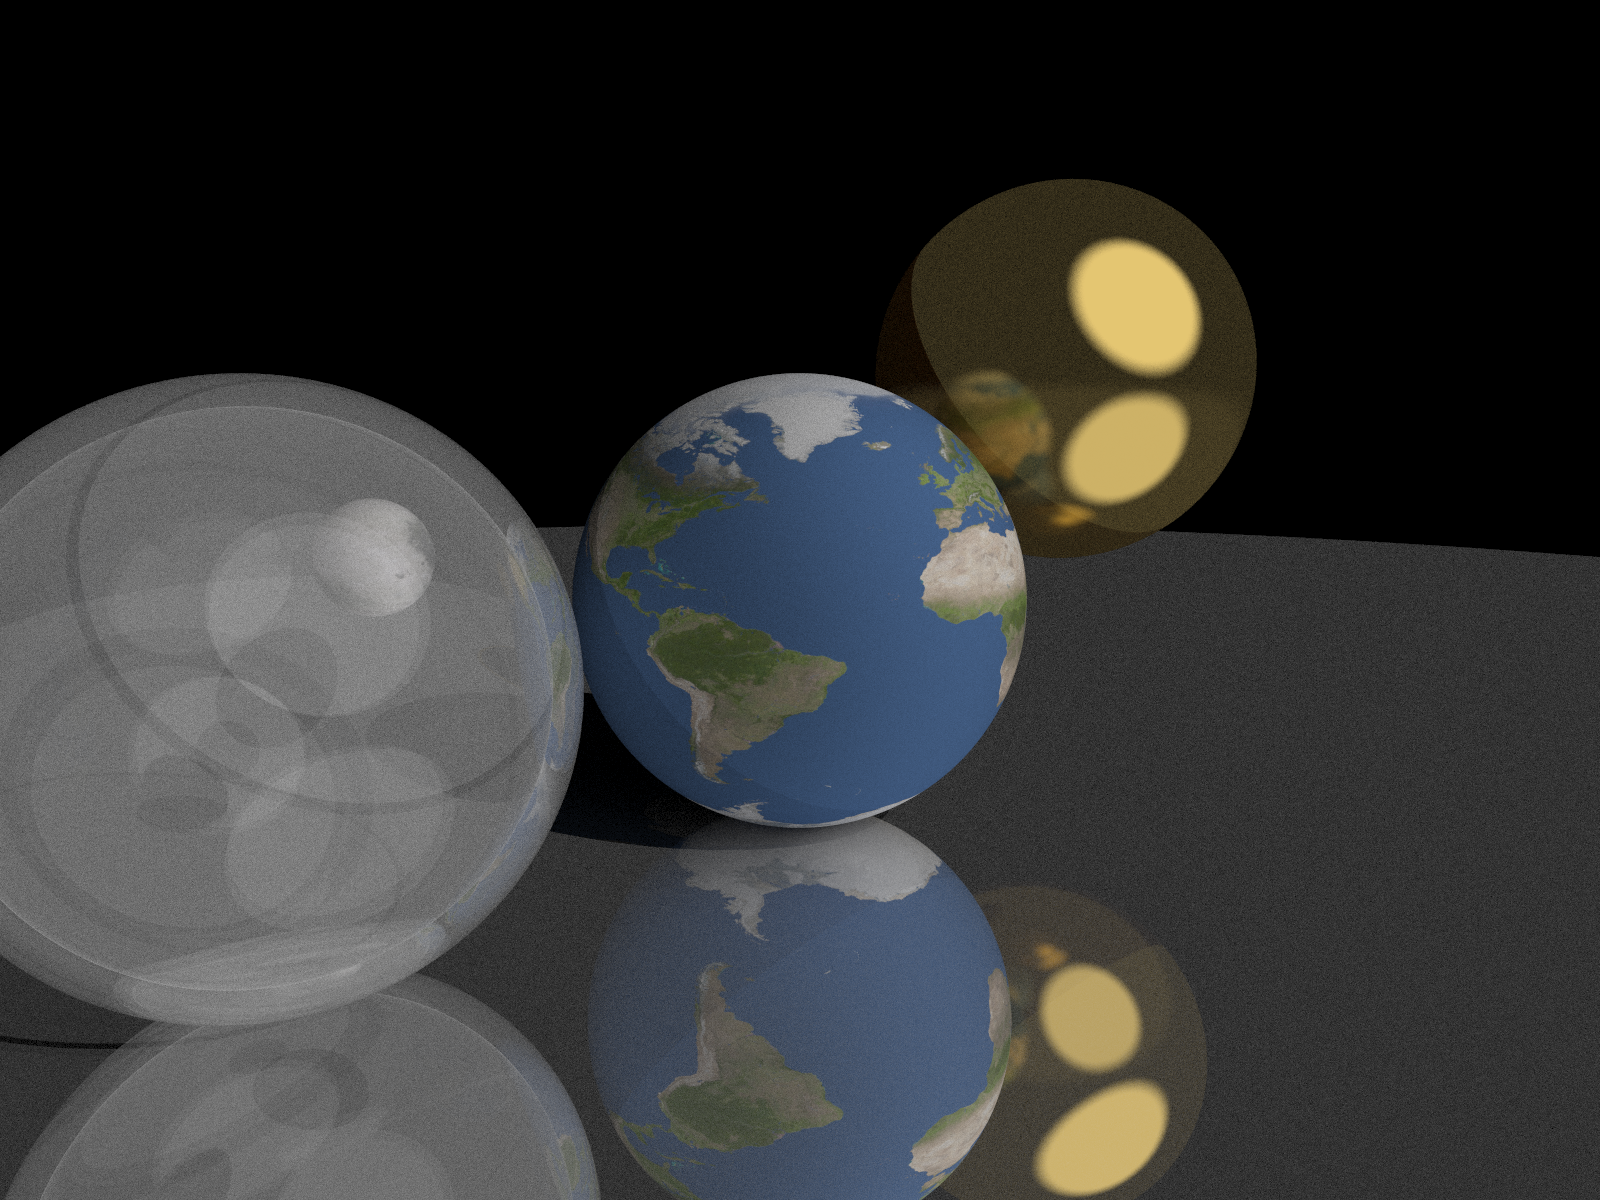
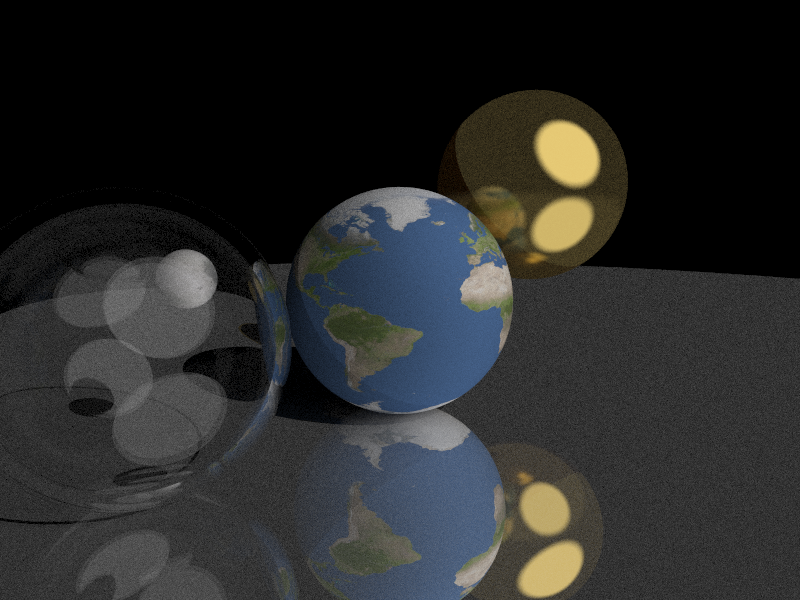
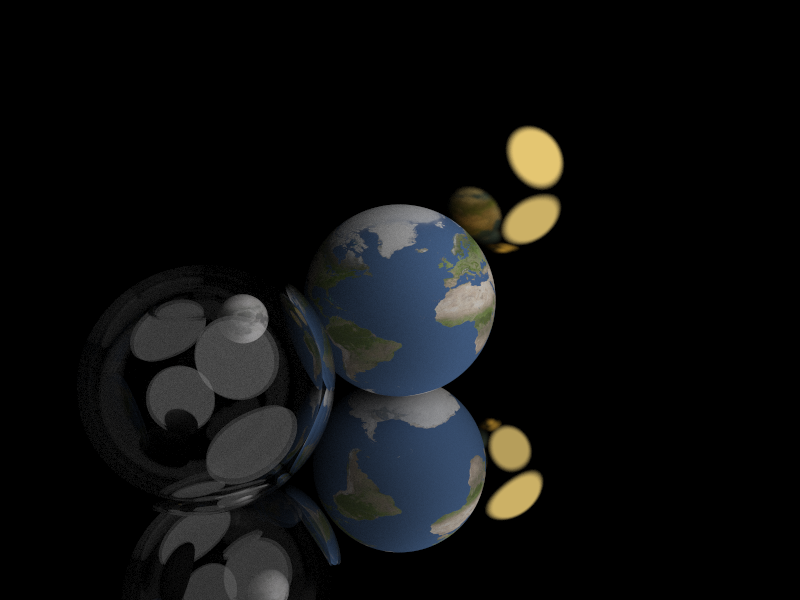 This was the first attempt - it looks pretty good! But it didn’t work quite right when I cranked up the samples per pixel to show more detail. Check out the glass sphere on the left below - it shouldn’t be starting to look opalescent.
 Debugging/iterating on this was really fun. I just kinda followed my nose and experimented with a bunch of stuff. This part of the project really helped me truly understand how every part of the ray tracer works. Here’s an example - I wanted to figure out how much difference the maximum depth of recursion in rendering made. In the animation below you can see the detail that appears with each subsequent depth limit.
 It’s pretty cool to see only direct illumination on the first pass, the first set of reflections on the second. The moon appears at max_depth 5 because it is inside a hollow glass sphere itself composed of two nested spheres - so you have to traverse that many object intersections before the light can get in to the moon and escape back out to the camera!
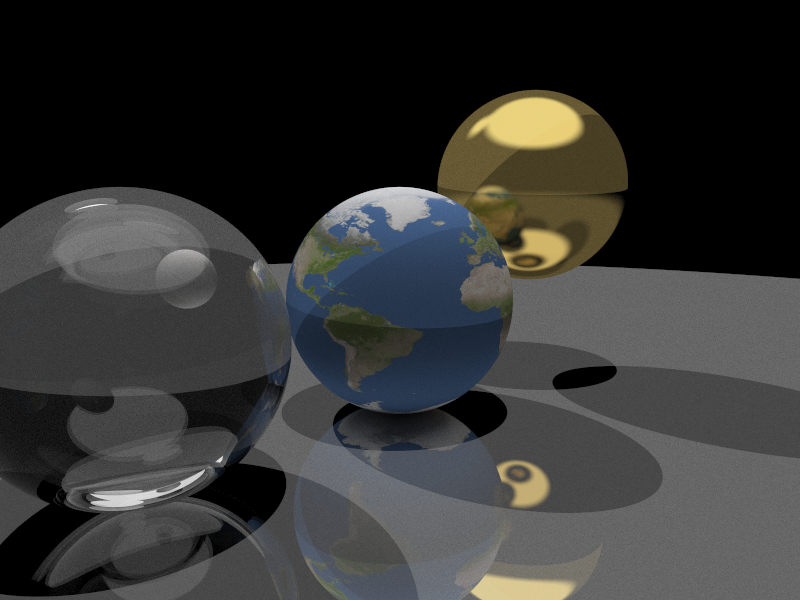
Here’s my final lighting set up, applied to a scene with a small offset light and a big light directly above the objects. You can see the light and shadows cast by each light.
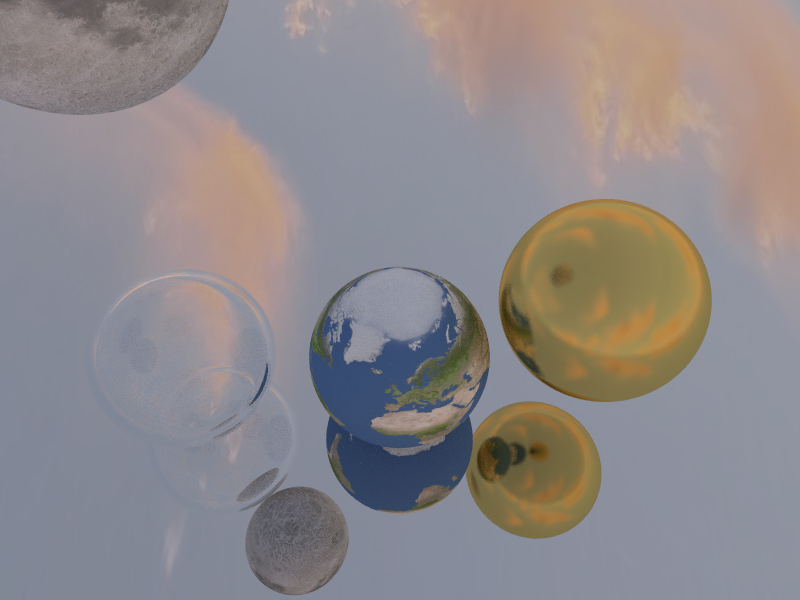
Render a sky texture
Before the lighting code I added, all the light in the scene came from the sky, which is rendered as a continuous gradient from light blue to white. A logical extension of the texture mapping work is to apply a texture to the sky. I figured it would look pretty cool to see realistic clouds in the sky. The end result didn’t disappoint - I think this is cool!
 While I had already written texture and lighting code to solve the crux of this problem, getting it done required a big refactor of the code to avoid lots of duplicated logic and motivated the final feature I added - the ability to read scene data from a file.
Read scene data from JSON file
Reading the scene from a file gave me a chance to explore the serde crate. Serde is a framework for serializing and deserializing Rust data structures efficiently and generically. Serde is built on the trait system and can read and write a whole bunch of formats including JSON. It can autogenerate (“derive”) deserializers for arbitrary structs. It’s also possible to customize these. Here’s an example - for the texture property of my Sky struct, I didn’t want to serialize out all the raw pixel data. This property should be serialized as the path to the file that contains the data. Deserializing should read the file path and then try to load the raw data from the file. The serde_conv macro made this pretty easy (elegant, even?)
#[serde_with::serde_as]
#[derive(Debug, Serialize, Deserialize)]
pub struct Sky {
    #[serde_as(as = "TextureOptionPixelsAsPath")]
    pub texture: Option<(Vec<u8>, usize, usize, String)>,
}

serde_with::serde_conv!(
    TextureOptionPixelsAsPath,
    Option<(Vec<u8>, usize, usize, String)>,
    |texture: &Option<(Vec<u8>, usize, usize, String)>| {
        match texture {
            Some(tuple) => tuple.3.clone(),
            None => "".to_string(),
        }
    },
    |value: &str| -> Result<_, std::convert::Infallible> {
        match value {
            "" => Ok(None),
            _ => Ok(Some(load_texture_image(value))),
        }
    }
);
Conclusion
Building a ray tracer was a great way to learn Rust. Rust is a powerful and effective language - it has a learning curve but rewards study! You can find the code I wrote and a bunch of examples on GitHub at dps/rust-raytracer.
And finally, here is that little earth / moon eclipse scene I was excited about. The size of the shadow is not to scale, but it’s fun to see some earthshine illuminating the dark side of the moon!
– Thanks to Luke Miles for reviewing a draft of this post.
Recommend
About Joyk
Aggregate valuable and interesting links.
Joyk means Joy of geeK