

GitHub - Yasic/DynamicClipImage
source link: https://github.com/Yasic/DynamicClipImage?
Go to the source link to view the article. You can view the picture content, updated content and better typesetting reading experience. If the link is broken, please click the button below to view the snapshot at that time.
iOS实现动态区域裁剪图片
裁剪图片功能在很多上传图片的场景里都需要用到,一方面应用服务器可能对图片的尺寸大小有限制,因而希望上传的图片都是符合规定的,另一方面,用户可能希望只上传图片中的部分内容,突出图片中关键的信息。而为了满足用户多种多样的裁剪需求,就需要裁剪图片时能支持由用户动态地改变裁剪范围、裁剪尺寸等。
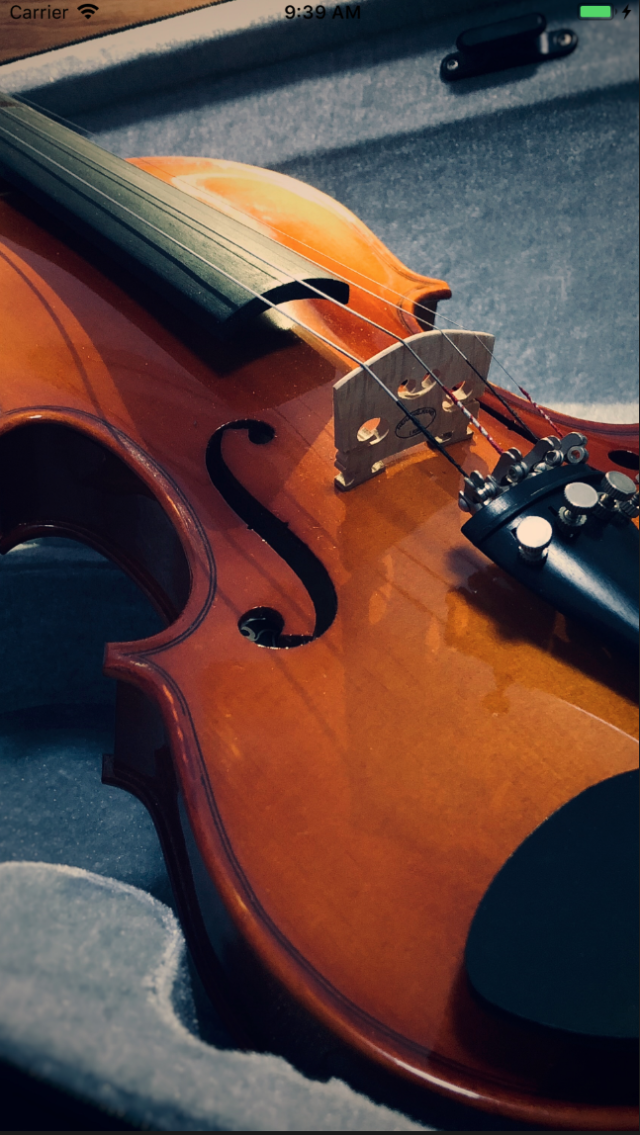
首先看一下效果图

动态裁剪图片的基本过程大致可以分为以下几步
- 显示图片与裁剪区域
- 支持移动和缩放图片
- 支持手势改变裁剪区域
- 进行图片裁剪并获得裁剪后的图片
显示图片与裁剪区域
在裁剪图片之前,首先我们要在页面上显示待裁剪的图片,如下图所示

这一步比较简单,配置一个 UIImageView 来放置图片即可。但是要注意一点,UIImageView 有多种 contentMode,最常见有三种
- UIViewContentModeScaleToFill
- UIViewContentModeScaleAspectFit
- UIViewContentModeScaleAspectFill
三者区别可以看下面的比较
- UIViewContentModeScaleToFill

- UIViewContentModeScaleAspectFit
- UIViewContentModeScaleAspectFill
可以看出,ScaleToFill 会改变图片的长宽比例来铺满整个 UIImageView,ScaleAspectFill 则会保持图片比例来铺满,从而会有部分图片内容超出 UIImageView 区域的情况,而 ScaleAspectFit 则会保证图片比例不变,同时图片内容都显示在 UIImageView 中,即使无法铺满 UIImageView。
因此不同显示模式会影响到我们最终显示到屏幕上的图片的样子,而在裁剪过程中最理想的放置图片的模式则是,图片的短边刚好铺满裁剪区域的短边,而长边至少不会小于裁剪区域的长边,这就要求我们要考虑裁剪区域的长宽来放置我们的图片。
接下来我们要放置我们的裁剪区域,它的样子如下所示
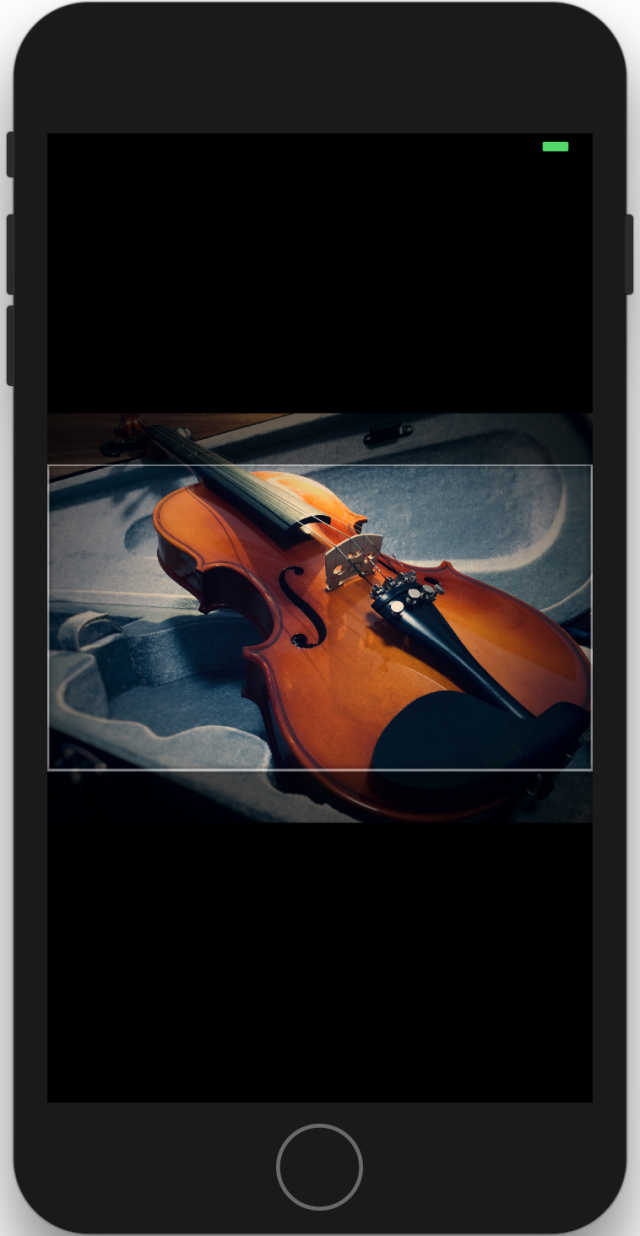
裁剪区域本身就是在 UIImageView 上放上一层 UIView,再在 UIView 上绘制出一个白边框的方格 Layer。
首先自定义一个 CAShapeLayer
#import <QuartzCore/QuartzCore.h>

@interface YasicClipAreaLayer : CAShapeLayer

@property(assign, nonatomic) NSInteger cropAreaLeft;
@property(assign, nonatomic) NSInteger cropAreaTop;
@property(assign, nonatomic) NSInteger cropAreaRight;
@property(assign, nonatomic) NSInteger cropAreaBottom;

- (void)setCropAreaLeft:(NSInteger)cropAreaLeft CropAreaTop:(NSInteger)cropAreaTop CropAreaRight:(NSInteger)cropAreaRight CropAreaBottom:(NSInteger)cropAreaBottom;


@end

@implementation YasicClipAreaLayer

- (instancetype)init
{
    self = [super init];
    if (self) {
        _cropAreaLeft = 50;
        _cropAreaTop = 50;
        _cropAreaRight = SCREEN_WIDTH - self.cropAreaLeft;
        _cropAreaBottom = 400;
    }
    return self;
}

- (void)drawInContext:(CGContextRef)ctx
{
    UIGraphicsPushContext(ctx);

    CGContextSetStrokeColorWithColor(ctx, [UIColor whiteColor].CGColor);
    CGContextSetLineWidth(ctx, lineWidth);
    CGContextMoveToPoint(ctx, self.cropAreaLeft, self.cropAreaTop);
    CGContextAddLineToPoint(ctx, self.cropAreaLeft, self.cropAreaBottom);
    CGContextSetShadow(ctx, CGSizeMake(2, 0), 2.0);
    CGContextStrokePath(ctx);

    CGContextSetStrokeColorWithColor(ctx, [UIColor whiteColor].CGColor);
    CGContextSetLineWidth(ctx, lineWidth);
    CGContextMoveToPoint(ctx, self.cropAreaLeft, self.cropAreaTop);
    CGContextAddLineToPoint(ctx, self.cropAreaRight, self.cropAreaTop);
    CGContextSetShadow(ctx, CGSizeMake(0, 2), 2.0);
    CGContextStrokePath(ctx);

    CGContextSetStrokeColorWithColor(ctx, [UIColor whiteColor].CGColor);
    CGContextSetLineWidth(ctx, lineWidth);
    CGContextMoveToPoint(ctx, self.cropAreaRight, self.cropAreaTop);
    CGContextAddLineToPoint(ctx, self.cropAreaRight, self.cropAreaBottom);
    CGContextSetShadow(ctx, CGSizeMake(-2, 0), 2.0);
    CGContextStrokePath(ctx);

    CGContextSetStrokeColorWithColor(ctx, [UIColor whiteColor].CGColor);
    CGContextSetLineWidth(ctx, lineWidth);
    CGContextMoveToPoint(ctx, self.cropAreaLeft, self.cropAreaBottom);
    CGContextAddLineToPoint(ctx, self.cropAreaRight, self.cropAreaBottom);
    CGContextSetShadow(ctx, CGSizeMake(0, -2), 2.0);
    CGContextStrokePath(ctx);

    UIGraphicsPopContext();
}

- (void)setCropAreaLeft:(NSInteger)cropAreaLeft
{
    _cropAreaLeft = cropAreaLeft;
    [self setNeedsDisplay];
}

- (void)setCropAreaTop:(NSInteger)cropAreaTop
{
    _cropAreaTop = cropAreaTop;
    [self setNeedsDisplay];
}

- (void)setCropAreaRight:(NSInteger)cropAreaRight
{
    _cropAreaRight = cropAreaRight;
    [self setNeedsDisplay];
}

- (void)setCropAreaBottom:(NSInteger)cropAreaBottom
{
    _cropAreaBottom = cropAreaBottom;
    [self setNeedsDisplay];
}

- (void)setCropAreaLeft:(NSInteger)cropAreaLeft CropAreaTop:(NSInteger)cropAreaTop CropAreaRight:(NSInteger)cropAreaRight CropAreaBottom:(NSInteger)cropAreaBottom
{
    _cropAreaLeft = cropAreaLeft;
    _cropAreaRight = cropAreaRight;
    _cropAreaTop = cropAreaTop;
    _cropAreaBottom = cropAreaBottom;

    [self setNeedsDisplay];
}

@end
这里 layer 有几个属性 cropAreaLeft、cropAreaRight、cropAreaTop、cropAreaBottom,从命名上可以看出这几个属性定义了这个 layer 上绘制的白边框裁剪区域的坐标信息。还暴露了一个方法用于配置这四个属性。
然后在 CAShapeLayer 内部,重点在于复写 drawInContext 方法,这个方法负责直接在图层上绘图,复写的方法主要做的事情是根据上面四个属性 cropAreaLeft、cropAreaRight、cropAreaTop、cropAreaBottom 绘制出封闭的四条线,这样就能表示裁剪区域的边界了。
要注意的是 drawInContext 方法不能手动显示调用,必须通过调用 setNeedsDisplay 或者 setNeedsDisplayInRect 让系统自动调该方法。
在裁剪页面里,我们放置了一个 cropView,然后将自定义的 CAShaplayer 加入到这个 view 上
    self.cropView.layer.sublayers = nil;
    YasicClipAreaLayer * layer = [[YasicClipAreaLayer alloc] init];

    CGRect cropframe = CGRectMake(self.cropAreaX, self.cropAreaY, self.cropAreaWidth, self.cropAreaHeight);
    UIBezierPath * path = [UIBezierPath bezierPathWithRoundedRect:self.cropView.frame cornerRadius:0];
    UIBezierPath * cropPath = [UIBezierPath bezierPathWithRect:cropframe];
    [path appendPath:cropPath];
    layer.path = path.CGPath;

    layer.fillRule = kCAFillRuleEvenOdd;
    layer.fillColor = [[UIColor blackColor] CGColor];
    layer.opacity = 0.5;

    layer.frame = self.cropView.bounds;
    [layer setCropAreaLeft:self.cropAreaX CropAreaTop:self.cropAreaY CropAreaRight:self.cropAreaX + self.cropAreaWidth CropAreaBottom:self.cropAreaY + self.cropAreaHeight];
    [self.cropView.layer addSublayer:layer];
    [self.view bringSubviewToFront:self.cropView];
这里主要是为了用自定义的 CAShapelayer 产生出空心遮罩的效果,从而出现中心的裁剪区域高亮而四周非裁剪区域有蒙层的效果,示意图如下

所以首先确定了 cashapelayer 的大小为 cropview 的大小,生成一个对应的 UIBezierPath,然后根据裁剪区域的大小(由 self.cropAreaX, self.cropAreaY, self.cropAreaWidth, self.cropAreaHeight 确定)生成空心遮罩的内圈 UIBezierPath,
CGRect cropframe = CGRectMake(self.cropAreaX, self.cropAreaY, self.cropAreaWidth, self.cropAreaHeight);
    UIBezierPath * path = [UIBezierPath bezierPathWithRoundedRect:self.cropView.frame cornerRadius:0];
    UIBezierPath * cropPath = [UIBezierPath bezierPathWithRect:cropframe];
    [path appendPath:cropPath];
    layer.path = path.CGPath;
然后将这个 path 配置给 CAShapeLayer,并将 CAShapeLayer 的 fillRule 配置为 kCAFillRuleEvenOdd
    layer.fillRule = kCAFillRuleEvenOdd;
    layer.fillColor = [[UIColor blackColor] CGColor];
    layer.opacity = 0.5;
    layer.frame = self.cropView.bounds;
其中 fillRule 属性表示使用哪一种算法去判断画布上的某区域是否属于该图形“内部”,内部区域将被填充颜色,主要有两种方式
- kCAFillRuleNonZero,这种算法判断规则是,如果从某一点射出任意方向射线,与对应 Layer 交点为 0 则不在 Layer 内,大于 0 则在 画布内
- kCAFillRuleEvenOdd 如果从某一点射出任意射线,与对应 Layer 交点为偶数则在画布内,否则不在画布内
再给 CAShapeLayer 设置蒙层颜色为透明度 0.5 的黑色,就可以实现空心蒙层效果了。
最后就是设置 layer 的四个属性并绘制内边框的白色边线。
    [layer setCropAreaLeft:self.cropAreaX CropAreaTop:self.cropAreaY CropAreaRight:self.cropAreaX + self.cropAreaWidth CropAreaBottom:self.cropAreaY + self.cropAreaHeight];
    [self.cropView.layer addSublayer:layer];
    [self.view bringSubviewToFront:self.cropView];
合理放置图片
到这一步我们正确显示了图片,也正确显示出了裁剪区域,但是我们没有将二者的约束关系建立起来,因此可能会出现下面这样的情况

可以看到这里由于这张图片的 width 远大于 height,因此会在裁剪区域内出现黑色区域,这对用户来说是一种不好的体验,同时也会影响到我们后面的裁剪步骤,究其原因是因为我们没有针对裁剪区域的宽高来放置 UIImageView,我们希望最理想的效果是,能在裁剪区域内实现类似 UIViewContentModeScaleAspectFill 的效果,也就是图片保持比例地铺满裁剪区域,并允许部分内容超出裁剪区域,这就要求
- 当图片宽与裁剪区域宽之比大于图片高与裁剪区域高之比时,将图片高铺满裁剪区域高,图片宽成比例放大
- 当图片高与裁剪区域高之比大于图片宽与裁剪区域宽之比时,将图片宽铺满裁剪区域宽,图片高成比例方法
这里我们用到 Masonry 来做这些布局操作
    CGFloat tempWidth = 0.0;
    CGFloat tempHeight = 0.0;

    if (self.targetImage.size.width/self.cropAreaWidth <= self.targetImage.size.height/self.cropAreaHeight) {
        tempWidth = self.cropAreaWidth;
        tempHeight = (tempWidth/self.targetImage.size.width) * self.targetImage.size.height;
    } else if (self.targetImage.size.width/self.cropAreaWidth > self.targetImage.size.height/self.cropAreaHeight) {
        tempHeight = self.cropAreaHeight;
        tempWidth = (tempHeight/self.targetImage.size.height) * self.targetImage.size.width;
    }

    [self.bigImageView mas_updateConstraints:^(MASConstraintMaker *make) {
        make.left.mas_equalTo(self.cropAreaX - (tempWidth - self.cropAreaWidth)/2);
        make.top.mas_equalTo(self.cropAreaY - (tempHeight - self.cropAreaHeight)/2);
        make.width.mas_equalTo(tempWidth);
        make.height.mas_equalTo(tempHeight);
    }];
可以看到,我们进行了两步判断,从而获得合适的宽高值,然后将图片进行布局,在自动布局时将图片中心与裁剪区域中心重合,最后我们会得到下面的效果图

支持移动和缩放图片
正如上面所讲,由于图片在裁剪区域内是以类似 UIViewContentModeScaleAspectFill 的方式放置的,很可能出现部分内容溢出裁剪区域,因此我们要让图片能支持动态移动和缩放,从而使用户能灵活地裁剪图片的内容。
具体实现上,我们其实是在 cropview 上加上手势,间接操作图片的尺寸和位置,这样有助于后面我们实现动态改变裁剪区域的实现。
这里实现缩放的原理实际是对放置图片的 UIImageView 的 frame 进行修改,首先我们要记录下最初的 UIImageView 的 frame
self.originalFrame = CGRectMake(self.cropAreaX - (tempWidth - self.cropAreaWidth)/2, self.cropAreaY - (tempHeight - self.cropAreaHeight)/2, tempWidth, tempHeight);然后为 cropView 添加手势
    // 捏合手势
    UIPinchGestureRecognizer *pinGesture = [[UIPinchGestureRecognizer alloc] initWithTarget:self action:@selector(handleCenterPinGesture:)];
    [self.view addGestureRecognizer:pinGesture];
然后是手势处理函数
-(void)handleCenterPinGesture:(UIPinchGestureRecognizer *)pinGesture
{
    CGFloat scaleRation = 3;
    UIView * view = self.bigImageView;

    // 缩放开始与缩放中
    if (pinGesture.state == UIGestureRecognizerStateBegan || pinGesture.state == UIGestureRecognizerStateChanged) {
        // 移动缩放中心到手指中心
        CGPoint pinchCenter = [pinGesture locationInView:view.superview];
        CGFloat distanceX = view.frame.origin.x - pinchCenter.x;
        CGFloat distanceY = view.frame.origin.y - pinchCenter.y;
        CGFloat scaledDistanceX = distanceX * pinGesture.scale;
        CGFloat scaledDistanceY = distanceY * pinGesture.scale;
        CGRect newFrame = CGRectMake(view.frame.origin.x + scaledDistanceX - distanceX, view.frame.origin.y + scaledDistanceY - distanceY, view.frame.size.width * pinGesture.scale, view.frame.size.height * pinGesture.scale);
        view.frame = newFrame;
        pinGesture.scale = 1;
    }

    // 缩放结束
    if (pinGesture.state == UIGestureRecognizerStateEnded) {
        CGFloat ration =  view.frame.size.width / self.originalFrame.size.width;

        // 缩放过大
        if (ration > 5) {
            CGRect newFrame = CGRectMake(0, 0, self.originalFrame.size.width * scaleRation, self.originalFrame.size.height * scaleRation);
            view.frame = newFrame;
        }

        // 缩放过小
        if (ration < 0.25) {
            view.frame = self.originalFrame;
        }
        // 对图片进行位置修正
        CGRect resetPosition = CGRectMake(view.frame.origin.x, view.frame.origin.y, view.frame.size.width, view.frame.size.height);

        if (resetPosition.origin.x >= self.cropAreaX) {
            resetPosition.origin.x = self.cropAreaX;
        }
        if (resetPosition.origin.y >= self.cropAreaY) {
            resetPosition.origin.y = self.cropAreaY;
        }
        if (resetPosition.size.width + resetPosition.origin.x < self.cropAreaX + self.cropAreaWidth) {
            CGFloat movedLeftX = fabs(resetPosition.size.width + resetPosition.origin.x - (self.cropAreaX + self.cropAreaWidth));
            resetPosition.origin.x += movedLeftX;
        }
        if (resetPosition.size.height + resetPosition.origin.y < self.cropAreaY + self.cropAreaHeight) {
            CGFloat moveUpY = fabs(resetPosition.size.height + resetPosition.origin.y - (self.cropAreaY + self.cropAreaHeight));
            resetPosition.origin.y += moveUpY;
        }
        view.frame = resetPosition;

        // 对图片缩放进行比例修正,防止过小
        if (self.cropAreaX < self.bigImageView.frame.origin.x
            || ((self.cropAreaX + self.cropAreaWidth) > self.bigImageView.frame.origin.x + self.bigImageView.frame.size.width)
            || self.cropAreaY < self.bigImageView.frame.origin.y
            || ((self.cropAreaY + self.cropAreaHeight) > self.bigImageView.frame.origin.y + self.bigImageView.frame.size.height)) {
            view.frame = self.originalFrame;
        }
    }
}
在手势处理时,要注意,为了能跟随用户捏合手势的中心进行缩放,我们要在手势过程中移动缩放中心到手指中心,这里我们判断了 pinGesture 的 state 来确定手势开始、进行中和结束阶段。
    if (pinGesture.state == UIGestureRecognizerStateBegan || pinGesture.state == UIGestureRecognizerStateChanged) {
        // 移动缩放中心到手指中心
        CGPoint pinchCenter = [pinGesture locationInView:view.superview];
        CGFloat distanceX = view.frame.origin.x - pinchCenter.x;
        CGFloat distanceY = view.frame.origin.y - pinchCenter.y;
        CGFloat scaledDistanceX = distanceX * pinGesture.scale;
        CGFloat scaledDistanceY = distanceY * pinGesture.scale;
        CGRect newFrame = CGRectMake(view.frame.origin.x + scaledDistanceX - distanceX, view.frame.origin.y + scaledDistanceY - distanceY, view.frame.size.width * pinGesture.scale, view.frame.size.height * pinGesture.scale);
        view.frame = newFrame;
        pinGesture.scale = 1;
    }
pinchCenter 就是捏合手势的中心,我们获取到当前图片 view 的 frame,然后计算当前 view 与手势中心的 x、y 坐标差,再根据手势缩放值 scale,创建出新的 frame
CGRect newFrame = CGRectMake(view.frame.origin.x + scaledDistanceX - distanceX, view.frame.origin.y + scaledDistanceY - distanceY, view.frame.size.width * pinGesture.scale, view.frame.size.height * pinGesture.scale);这个 frame 的中心坐标就在缩放手势的中心,将新的 frame 赋值给图片 view,从而实现依据手势中心进行缩放的效果。
而在手势结束阶段,我们要对图片缩放进行边界保护,既不能放大过大,也不能缩小过小。
CGFloat ration =  view.frame.size.width / self.originalFrame.size.width;

        // 缩放过大
        if (ration > 5) {
            CGRect newFrame = CGRectMake(0, 0, self.originalFrame.size.width * scaleRation, self.originalFrame.size.height * scaleRation);
            view.frame = newFrame;
        }

        // 缩放过小
        if (ration < 0.25) {
            view.frame = self.originalFrame;
        }
同时缩放后如果图片与裁剪区域出现了空白区域,还要对图片的位置进行修正以保证图片始终是覆盖全裁剪区域的。
// 对图片进行位置修正
        CGRect resetPosition = CGRectMake(view.frame.origin.x, view.frame.origin.y, view.frame.size.width, view.frame.size.height);

        if (resetPosition.origin.x >= self.cropAreaX) {
            resetPosition.origin.x = self.cropAreaX;
        }
        if (resetPosition.origin.y >= self.cropAreaY) {
            resetPosition.origin.y = self.cropAreaY;
        }
        if (resetPosition.size.width + resetPosition.origin.x < self.cropAreaX + self.cropAreaWidth) {
            CGFloat movedLeftX = fabs(resetPosition.size.width + resetPosition.origin.x - (self.cropAreaX + self.cropAreaWidth));
            resetPosition.origin.x += movedLeftX;
        }
        if (resetPosition.size.height + resetPosition.origin.y < self.cropAreaY + self.cropAreaHeight) {
            CGFloat moveUpY = fabs(resetPosition.size.height + resetPosition.origin.y - (self.cropAreaY + self.cropAreaHeight));
            resetPosition.origin.y += moveUpY;
        }
        view.frame = resetPosition;
这里我们通过生成当前图片的 CGRect,与裁剪区域的边界进行如下比较
- 图片左边线大于裁剪区域左边线时图片移动到裁剪区域 x 值
- 图片上边线大于裁剪区域上边线时图片移动到裁剪区域 y 值
- 图片右边线小于裁剪区域右边线时图片右贴裁剪区域右边线
- 图片下边线小于裁剪区域右边线时图片下贴裁剪区域下边线
进行这番操作后,可能会出现由于图片过小无法铺满裁剪区域的情况,如下图所示

因此还需要再次对图片尺寸进行修正
        // 对图片缩放进行比例修正,防止过小
        if (self.cropAreaX < self.bigImageView.frame.origin.x
            || ((self.cropAreaX + self.cropAreaWidth) > self.bigImageView.frame.origin.x + self.bigImageView.frame.size.width)
            || self.cropAreaY < self.bigImageView.frame.origin.y
            || ((self.cropAreaY + self.cropAreaHeight) > self.bigImageView.frame.origin.y + self.bigImageView.frame.size.height)) {
            view.frame = self.originalFrame;
        }
这样就实现了缩放功能。
相比于缩放,移动功能实现就简单了,只需要在 cropview 上添加 UIPanGestureRecognizer,然后在回调方法里拿到需要移动的距离,修改 UIImageView 的 center 就可以了。
    CGPoint translation = [panGesture translationInView:view.superview];
    [view setCenter:CGPointMake(view.center.x + translation.x, view.center.y + translation.y)];
                [panGesture setTranslation:CGPointZero inView:view.superview];
但是同样为了保证移动后的图片不会与裁剪区域出现空白甚至是超出裁剪区域,这里更新了图片位置后,在手势结束时还要对图片进行位置修正
                CGRect currentFrame = view.frame;

                if (currentFrame.origin.x >= self.cropAreaX) {
                    currentFrame.origin.x = self.cropAreaX;

                }
                if (currentFrame.origin.y >= self.cropAreaY) {
                    currentFrame.origin.y = self.cropAreaY;
                }
                if (currentFrame.size.width + currentFrame.origin.x < self.cropAreaX + self.cropAreaWidth) {
                    CGFloat movedLeftX = fabs(currentFrame.size.width + currentFrame.origin.x - (self.cropAreaX + self.cropAreaWidth));
                    currentFrame.origin.x += movedLeftX;
                }
                if (currentFrame.size.height + currentFrame.origin.y < self.cropAreaY + self.cropAreaHeight) {
                    CGFloat moveUpY = fabs(currentFrame.size.height + currentFrame.origin.y - (self.cropAreaY + self.cropAreaHeight));
                    currentFrame.origin.y += moveUpY;
                }
                [UIView animateWithDuration:0.3 animations:^{

                    [view setFrame:currentFrame];
                }];
可以看到,这里做的位置检查与缩放时做的检查是一样的,只是由于不会改变图片尺寸所以这里不需要进行尺寸修正。
支持手势改变裁剪区域
接下来就是动态裁剪图片的核心内容了,其实原理也很简单,只要在上面的移动手势处理函数中,进行一些判断,决定是移动图片位置还是改变裁剪区域,也就是自定义的 CAShapeLayer 的绘制方框的尺寸就可以了。
首先我们定义一个枚举,用来表示当前应当操作的是图片还是裁剪区域的边线
typedef NS_ENUM(NSInteger, ACTIVEGESTUREVIEW) {
    CROPVIEWLEFT,
    CROPVIEWRIGHT,
    CROPVIEWTOP,
    CROPVIEWBOTTOM,
    BIGIMAGEVIEW
};
它们分别表示触发对象为裁剪区域左边线、右边线、上边线、下边线以及 UIImageView
然后我们定义一个枚举属性
@property(assign, nonatomic) ACTIVEGESTUREVIEW activeGestureView;判断操作对象的标准是当前的手势所触发的位置是在边线上还是在非边线上,因此我们需要知道手势触发时的坐标,要知道这一点就需要我们继承一个 UIPanGestureRecognizer 并覆写一些方法
@interface YasicPanGestureRecognizer : UIPanGestureRecognizer

@property(assign, nonatomic) CGPoint beginPoint;
@property(assign, nonatomic) CGPoint movePoint;

-(instancetype)initWithTarget:(id)target action:(SEL)action inview:(UIView*)view;

@end

@interface YasicPanGestureRecognizer()

@property(strong, nonatomic) UIView *targetView;

@end

@implementation YasicPanGestureRecognizer

-(instancetype)initWithTarget:(id)target action:(SEL)action inview:(UIView*)view{

    self = [super initWithTarget:target action:action];
    if(self) {
        self.targetView = view;
    }
    return self;
}

- (void)touchesBegan:(NSSet *)touches withEvent:(UIEvent*)event{

    [super touchesBegan:touches withEvent:event];
    UITouch *touch = [touches anyObject];
    self.beginPoint = [touch locationInView:self.targetView];
}

- (void)touchesMoved:(NSSet<UITouch *> *)touches withEvent:(UIEvent *)event
{
    [super touchesMoved:touches withEvent:event];
    UITouch *touch = [touches anyObject];
    self.movePoint = [touch locationInView:self.targetView];
}

@end
可以看到,我们首先传入了一个 view,用于将手势触发的位置转换为 view 中的坐标值。在 - (void)touchesBegan:(NSSet *)touches withEvent:(UIEvent*)event{ 方法中我们得到了手势开始时的触发点 beginPoint,在 - (void)touchesMoved:(NSSet<UITouch *> *)touches withEvent:(UIEvent *)event 方法中我们获得了手势进行时的触发点 movePoint。
自定义完 UIPanGestureRecognizer 后我们将其加到 cropview 上并把 cropview 作为参数传给 UIPanGestureRecognizer
    // 拖动手势
    YasicPanGestureRecognizer *panGesture = [[YasicPanGestureRecognizer alloc] initWithTarget:self action:@selector(handleDynamicPanGesture:) inview:self.cropView];
    [self.cropView addGestureRecognizer:panGesture];
接下来就是处理手势的函数,这里我们可以将整个过程分为三个步骤,开始时 -> 进行时 -> 结束时。
- 手势开始时
在这里我们要根据手势的 beginPoint 判断触发对象是边线还是 UIImageView
// 开始滑动时判断滑动对象是 ImageView 还是 Layer 上的 Line
    if (panGesture.state == UIGestureRecognizerStateBegan) {
        if (beginPoint.x >= self.cropAreaX - judgeWidth && beginPoint.x <= self.cropAreaX + judgeWidth && beginPoint.y >= self.cropAreaY && beginPoint.y <= self.cropAreaY + self.cropAreaHeight && self.cropAreaWidth >= 50) {
            self.activeGestureView = CROPVIEWLEFT;
        } else if (beginPoint.x >= self.cropAreaX + self.cropAreaWidth - judgeWidth && beginPoint.x <= self.cropAreaX + self.cropAreaWidth + judgeWidth && beginPoint.y >= self.cropAreaY && beginPoint.y <= self.cropAreaY + self.cropAreaHeight &&  self.cropAreaWidth >= 50) {
            self.activeGestureView = CROPVIEWRIGHT;
        } else if (beginPoint.y >= self.cropAreaY - judgeWidth && beginPoint.y <= self.cropAreaY + judgeWidth && beginPoint.x >= self.cropAreaX && beginPoint.x <= self.cropAreaX + self.cropAreaWidth && self.cropAreaHeight >= 50) {
            self.activeGestureView = CROPVIEWTOP;
        } else if (beginPoint.y >= self.cropAreaY + self.cropAreaHeight - judgeWidth && beginPoint.y <= self.cropAreaY + self.cropAreaHeight + judgeWidth && beginPoint.x >= self.cropAreaX && beginPoint.x <= self.cropAreaX + self.cropAreaWidth && self.cropAreaHeight >= 50) {
            self.activeGestureView = CROPVIEWBOTTOM;
        } else {
            self.activeGestureView = BIGIMAGEVIEW;
            [view setCenter:CGPointMake(view.center.x + translation.x, view.center.y + translation.y)];
            [panGesture setTranslation:CGPointZero inView:view.superview];
        }
}- 手势进行时
在这里,如果触发对象是边线,则计算边线需要移动的距离和方向,以及对于边界条件的限制以防止边线之间交叉错位的情况,具体来说就是获得坐标差值,更新 cropAreaX、cropAreaWidth 等值,然后更新 CAShapeLayer 上的空心蒙层。
如果触发对象是 UIImageView 则只需要将其位置进行改变即可。
// 滑动过程中进行位置改变
    if (panGesture.state == UIGestureRecognizerStateChanged) {
        CGFloat diff = 0;
        switch (self.activeGestureView) {
            case CROPVIEWLEFT: {
                diff = movePoint.x - self.cropAreaX;
                if (diff >= 0 && self.cropAreaWidth > 50) {
                    self.cropAreaWidth -= diff;
                    self.cropAreaX += diff;
                } else if (diff < 0 && self.cropAreaX > self.bigImageView.frame.origin.x && self.cropAreaX >= 15) {
                    self.cropAreaWidth -= diff;
                    self.cropAreaX += diff;
                }
                [self setUpCropLayer];
                break;
            }
            case CROPVIEWRIGHT: {
                diff = movePoint.x - self.cropAreaX - self.cropAreaWidth;
                if (diff >= 0 && (self.cropAreaX + self.cropAreaWidth) < MIN(self.bigImageView.frame.origin.x + self.bigImageView.frame.size.width, self.cropView.frame.origin.x + self.cropView.frame.size.width - 15)){
                    self.cropAreaWidth += diff;
                } else if (diff < 0 && self.cropAreaWidth >= 50) {
                    self.cropAreaWidth += diff;
                }
                [self setUpCropLayer];
                break;
            }
            case CROPVIEWTOP: {
                diff = movePoint.y - self.cropAreaY;
                if (diff >= 0 && self.cropAreaHeight > 50) {
                    self.cropAreaHeight -= diff;
                    self.cropAreaY += diff;
                } else if (diff < 0 && self.cropAreaY > self.bigImageView.frame.origin.y && self.cropAreaY >= 15) {
                    self.cropAreaHeight -= diff;
                    self.cropAreaY += diff;
                }
                [self setUpCropLayer];
                break;
            }
            case CROPVIEWBOTTOM: {
                diff = movePoint.y - self.cropAreaY - self.cropAreaHeight;
                if (diff >= 0 && (self.cropAreaY + self.cropAreaHeight) < MIN(self.bigImageView.frame.origin.y + self.bigImageView.frame.size.height, self.cropView.frame.origin.y + self.cropView.frame.size.height - 15)){
                    self.cropAreaHeight += diff;
                } else if (diff < 0 && self.cropAreaHeight >= 50) {
                    self.cropAreaHeight += diff;
                }
                [self setUpCropLayer];
                break;
            }
            case BIGIMAGEVIEW: {
                [view setCenter:CGPointMake(view.center.x + translation.x, view.center.y + translation.y)];
                [panGesture setTranslation:CGPointZero inView:view.superview];
                break;
            }
            default:
                break;
        }
}- 手势结束时
手势结束时,我们需要对位置进行修正。如果是裁剪区域边线,则要判断左右、上下边线之间的距离是否过短,边线是否超出 UIImageView 的范围等。如果左右边线距离过短则设置最小裁剪宽度,如果上线边线距离过短则设置最小裁剪高度,如果左边线超出了 UIImageView 左边线则需要紧贴 UIImageView 的左边线,并更新裁剪区域宽度,以此类推。然后更新 CAShapeLayer 上的空心蒙层即可。
如果是 UIImageView 则跟上一节一样要保证图片不会与裁剪区域出现空白。
    // 滑动结束后进行位置修正
    if (panGesture.state == UIGestureRecognizerStateEnded) {
        switch (self.activeGestureView) {
            case CROPVIEWLEFT: {
                if (self.cropAreaWidth < 50) {
                    self.cropAreaX -= 50 - self.cropAreaWidth;
                    self.cropAreaWidth = 50;
                }
                if (self.cropAreaX < MAX(self.bigImageView.frame.origin.x, 15)) {
                    CGFloat temp = self.cropAreaX + self.cropAreaWidth;
                    self.cropAreaX = MAX(self.bigImageView.frame.origin.x, 15);
                    self.cropAreaWidth = temp - self.cropAreaX;
                }
                [self setUpCropLayer];
                break;
            }
            case CROPVIEWRIGHT: {
                if (self.cropAreaWidth < 50) {
                    self.cropAreaWidth = 50;
                }
                if (self.cropAreaX + self.cropAreaWidth > MIN(self.bigImageView.frame.origin.x + self.bigImageView.frame.size.width, self.cropView.frame.origin.x + self.cropView.frame.size.width - 15)) {
                    self.cropAreaWidth = MIN(self.bigImageView.frame.origin.x + self.bigImageView.frame.size.width, self.cropView.frame.origin.x + self.cropView.frame.size.width - 15) - self.cropAreaX;
                }
                [self setUpCropLayer];
                break;
            }
            case CROPVIEWTOP: {
                if (self.cropAreaHeight < 50) {
                    self.cropAreaY -= 50 - self.cropAreaHeight;
                    self.cropAreaHeight = 50;
                }
                if (self.cropAreaY < MAX(self.bigImageView.frame.origin.y, 15)) {
                    CGFloat temp = self.cropAreaY + self.cropAreaHeight;
                    self.cropAreaY = MAX(self.bigImageView.frame.origin.y, 15);
                    self.cropAreaHeight = temp - self.cropAreaY;
                }
                [self setUpCropLayer];
                break;
            }
            case CROPVIEWBOTTOM: {
                if (self.cropAreaHeight < 50) {
                    self.cropAreaHeight = 50;
                }
                if (self.cropAreaY + self.cropAreaHeight > MIN(self.bigImageView.frame.origin.y + self.bigImageView.frame.size.height, self.cropView.frame.origin.y + self.cropView.frame.size.height - 15)) {
                    self.cropAreaHeight = MIN(self.bigImageView.frame.origin.y + self.bigImageView.frame.size.height, self.cropView.frame.origin.y + self.cropView.frame.size.height - 15) - self.cropAreaY;
                }
                [self setUpCropLayer];
                break;
            }
            case BIGIMAGEVIEW: {
                CGRect currentFrame = view.frame;

                if (currentFrame.origin.x >= self.cropAreaX) {
                    currentFrame.origin.x = self.cropAreaX;

                }
                if (currentFrame.origin.y >= self.cropAreaY) {
                    currentFrame.origin.y = self.cropAreaY;
                }
                if (currentFrame.size.width + currentFrame.origin.x < self.cropAreaX + self.cropAreaWidth) {
                    CGFloat movedLeftX = fabs(currentFrame.size.width + currentFrame.origin.x - (self.cropAreaX + self.cropAreaWidth));
                    currentFrame.origin.x += movedLeftX;
                }
                if (currentFrame.size.height + currentFrame.origin.y < self.cropAreaY + self.cropAreaHeight) {
                    CGFloat moveUpY = fabs(currentFrame.size.height + currentFrame.origin.y - (self.cropAreaY + self.cropAreaHeight));
                    currentFrame.origin.y += moveUpY;
                }
                [UIView animateWithDuration:0.3 animations:^{

                    [view setFrame:currentFrame];
                }];
                break;
            }
            default:
                break;
        }
    }
进行图片裁剪并获得裁剪后的图片
最后一步就是对图片进行裁剪了。首先确定对图片的缩放尺寸 imageScale
CGFloat imageScale = MIN(self.bigImageView.frame.size.width/self.targetImage.size.width, self.bigImageView.frame.size.height/self.targetImage.size.height);然后将 cropView 的裁剪区域对应到 UIImageView 上,再除以缩放值,即可得到对应 UIImage 上需要裁剪的区域
    CGFloat cropX = (self.cropAreaX - self.bigImageView.frame.origin.x)/imageScale;
    CGFloat cropY = (self.cropAreaY - self.bigImageView.frame.origin.y)/imageScale;
    CGFloat cropWidth = self.cropAreaWidth/imageScale;
    CGFloat cropHeight = self.cropAreaHeight/imageScale;
    CGRect cropRect = CGRectMake(cropX, cropY, cropWidth, cropHeight);
最后调用 CoreGraphic 的方法,将图片对应区域的数据取出来生成新的图片,就是我们需要的裁剪后的图片了。
    CGImageRef sourceImageRef = [self.targetImage CGImage];
    CGImageRef newImageRef = CGImageCreateWithImageInRect(sourceImageRef, cropRect);
UIImage *newImage = [UIImage imageWithCGImage:newImageRef];Recommend
About Joyk
Aggregate valuable and interesting links.
Joyk means Joy of geeK