

使用NodeJs和JavaScript开发微信公众号
source link: https://my.oschina.net/webzhifeiji/blog/5321145
Go to the source link to view the article. You can view the picture content, updated content and better typesetting reading experience. If the link is broken, please click the button below to view the snapshot at that time.

使用NodeJs和JavaScript开发微信公众号 - 前端纸飞机的个人博客 - OSCHINA - 中文开源技术交流社区
大家作为前端可能活多或少的都写过结合微信jsdk开发的微信h5网页,对授权登录这块以及部分sdk可能都有通过后台接口来调用,那么大家有没有想过,这些后台接口都是怎么写的呢?那么今天这篇文章就带大家来了解下是如何写的!
- 注册微信订阅号
- 注册小程序测试号
- sunny-ngrok工具安装及注册账号
注意:sunny-ngrok的原型是ngrok,不过ngrok是国外的,sunny-ngrok是国内的一个私服,速度更快了,主要作用是域名转发,模拟公网ip和端口,甚至可以配置给客户在公网上展示项目。地址:http://www.ngrok.cc/ ,进去后注册开通隧道,有免费的。 记住:一个微信号只能注册一种微信产品,但是可以管理多个。
这是我的隧道:(免费的如果启动不了就直接用这个吧) 使用sunny-ngrok尝试一次转发: 下载工具,启动工具,输入隧道id,回车 说明127.0.0.1:3000已经被转发到zhifieji.vipgz4.idcfengye.com的公网ip上了。
建个weixin目录,npm初始化:
npm init -y
把下面的内容复制到package.json里:
{
  "name": "weixin-lesson",
  "version": "1.0.0",
  "description": "微信开发",
  "main": "index.js",
  "directories": {
    "doc": "doc"
  },
  "scripts": {
    "sunny": "./bin/sunny clientid 62d16df91a118fd3",
    "ngrok": "./bin/ngrok http 3000",
    "test": "echo \"Error: no test specified\" && exit 1"
  },
  "repository": {
    "type": "git",
    "url": "[email protected]:web_dev/weixin-lesson.git"
  },
  "author": "",
  "license": "ISC",
  "dependencies": {
    "axios": "^0.18.0",
    "co-wechat": "^2.3.0",
    "co-wechat-oauth": "^2.0.1",
    "crypto": "^1.0.1",
    "express": "^4.16.4",
    "jsonwebtoken": "^8.4.0",
    "koa": "^2.6.2",
    "koa-bodyparser": "^4.2.1",
    "koa-compress": "^3.0.0",
    "koa-jwt": "^3.5.1",
    "koa-route": "^3.2.0",
    "koa-router": "^7.4.0",
    "koa-socket": "^4.4.0",
    "koa-static": "^5.0.0",
    "koa-views": "^6.1.5",
    "koa-websocket": "^5.0.1",
    "koa-xml-body": "^2.1.0",
    "moment": "^2.23.0",
    "mongoose": "^5.4.4",
    "promise-redis": "0.0.5",
    "pug": "^2.0.3",
    "redis": "^2.8.0",
    "request": "^2.88.0",
    "request-promise": "^4.2.2",
    "socket.io": "^2.2.0",
    "watch": "^1.0.2",
    "wechat": "^2.1.0",
    "wechat-oauth": "^1.5.0",
    "xml2js": "^0.4.19"
  }
}
然后安装依赖
npm install
# 或
yarn
再在weixin目录下建立seed目录,seed目录下建立index.js和index.html。
index.js:
const Koa = require('koa')
const Router = require('koa-router')
const static = require('koa-static')
const bodyParser = require('koa-bodyparser');
const app = new Koa()
app.use(bodyParser())
const router = new Router()
app.use(static(__dirname + '/'))

app.use(router.routes()); /*启动路由*/
app.use(router.allowedMethods());
app.listen(3000);
index.html:
<!DOCTYPE html>
<html>

<head>
    <title>全栈开发微信公众号</title>
    <meta charset="UTF-8">
    <meta name="viewport" content="width=device-width,initial-scale=1,user-scalable=0">
    <script src="https://unpkg.com/[email protected]/dist/vue.min.js"></script>
    <script src="https://unpkg.com/axios/dist/axios.min.js"></script>
    <script src="https://unpkg.com/cube-ui/lib/cube.min.js"></script>
    <script src="https://cdn.bootcss.com/qs/6.6.0/qs.js"></script>
    <script src="http://res.wx.qq.com/open/js/jweixin-1.4.0.js"></script>
    <link rel="stylesheet" href="https://unpkg.com/cube-ui/lib/cube.min.css">
    <style>
        /* .cube-btn {
            margin: 10px 0;
        } */
    </style>
</head>

<body>
    <div id="app">
        <cube-input v-model="value"></cube-input>
        <cube-button @click='click'>Click</cube-button>
    </div>
    <script>
        var app = new Vue({
            el: '#app',
            data: {
                value: 'input'
            },

            methods: {
                click: function () {
                    console.log('click')
                }
            },
            mounted: function () {

            },
        });
    </script>
</body>

</html>
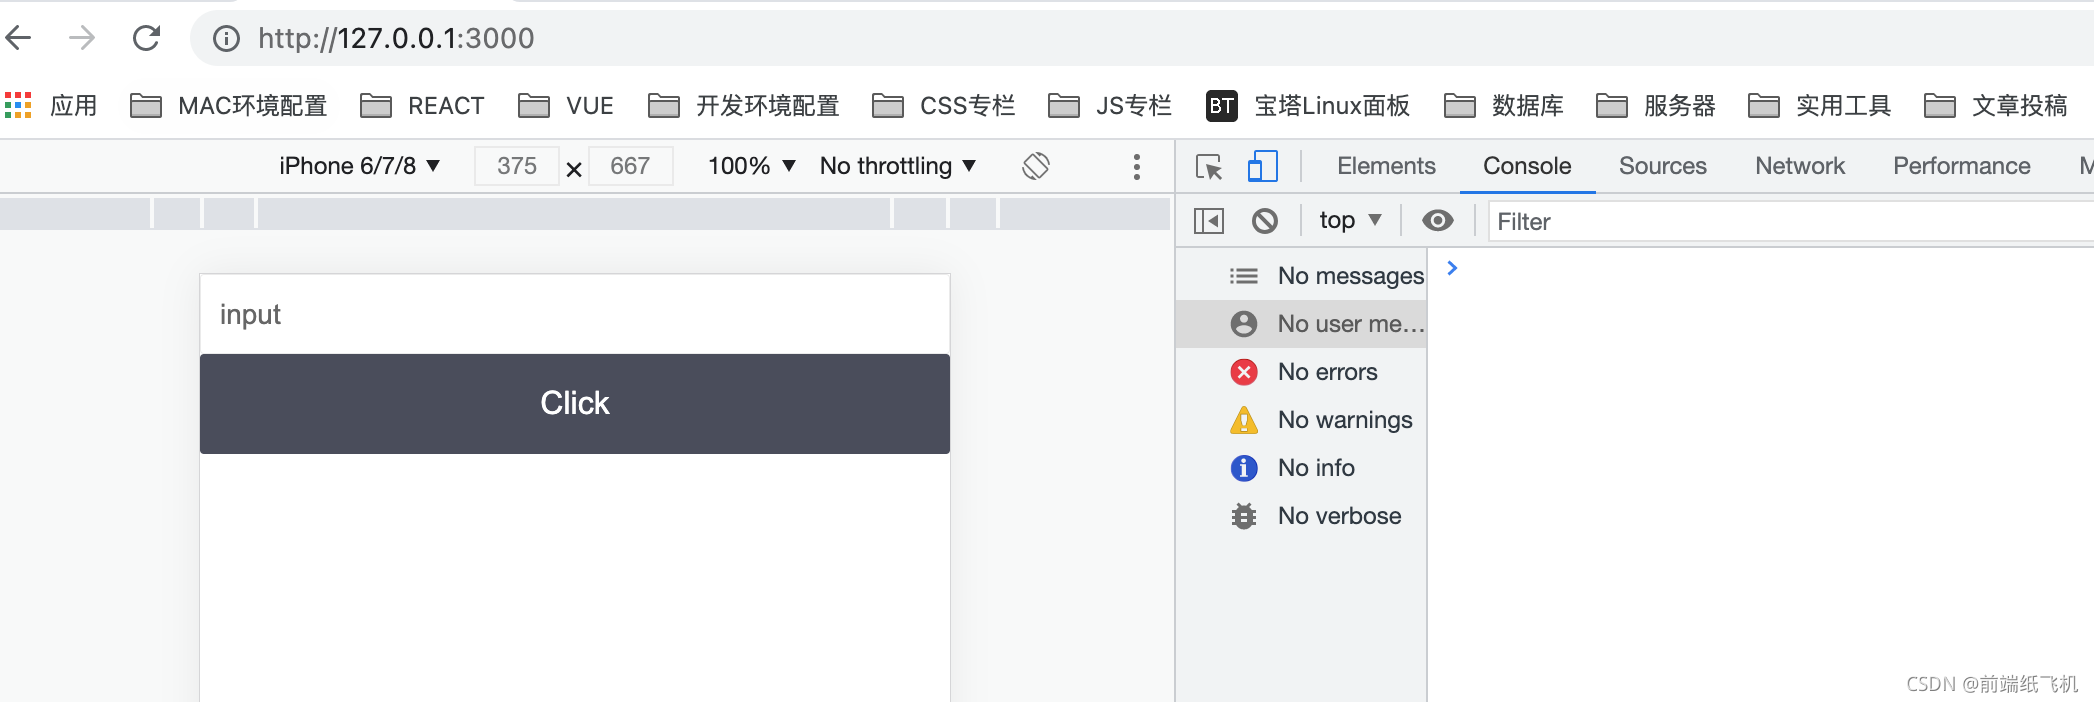
在seed目录打开终端,执行nodemon(需要安装), 3000端口打开127.0.0.1
npm install -g nodemon
nodemon
 前面说通过ngrok把3000端口转发到了zhifieji.vipgz4.idcfengye.com上,我们打开这个网址试下:
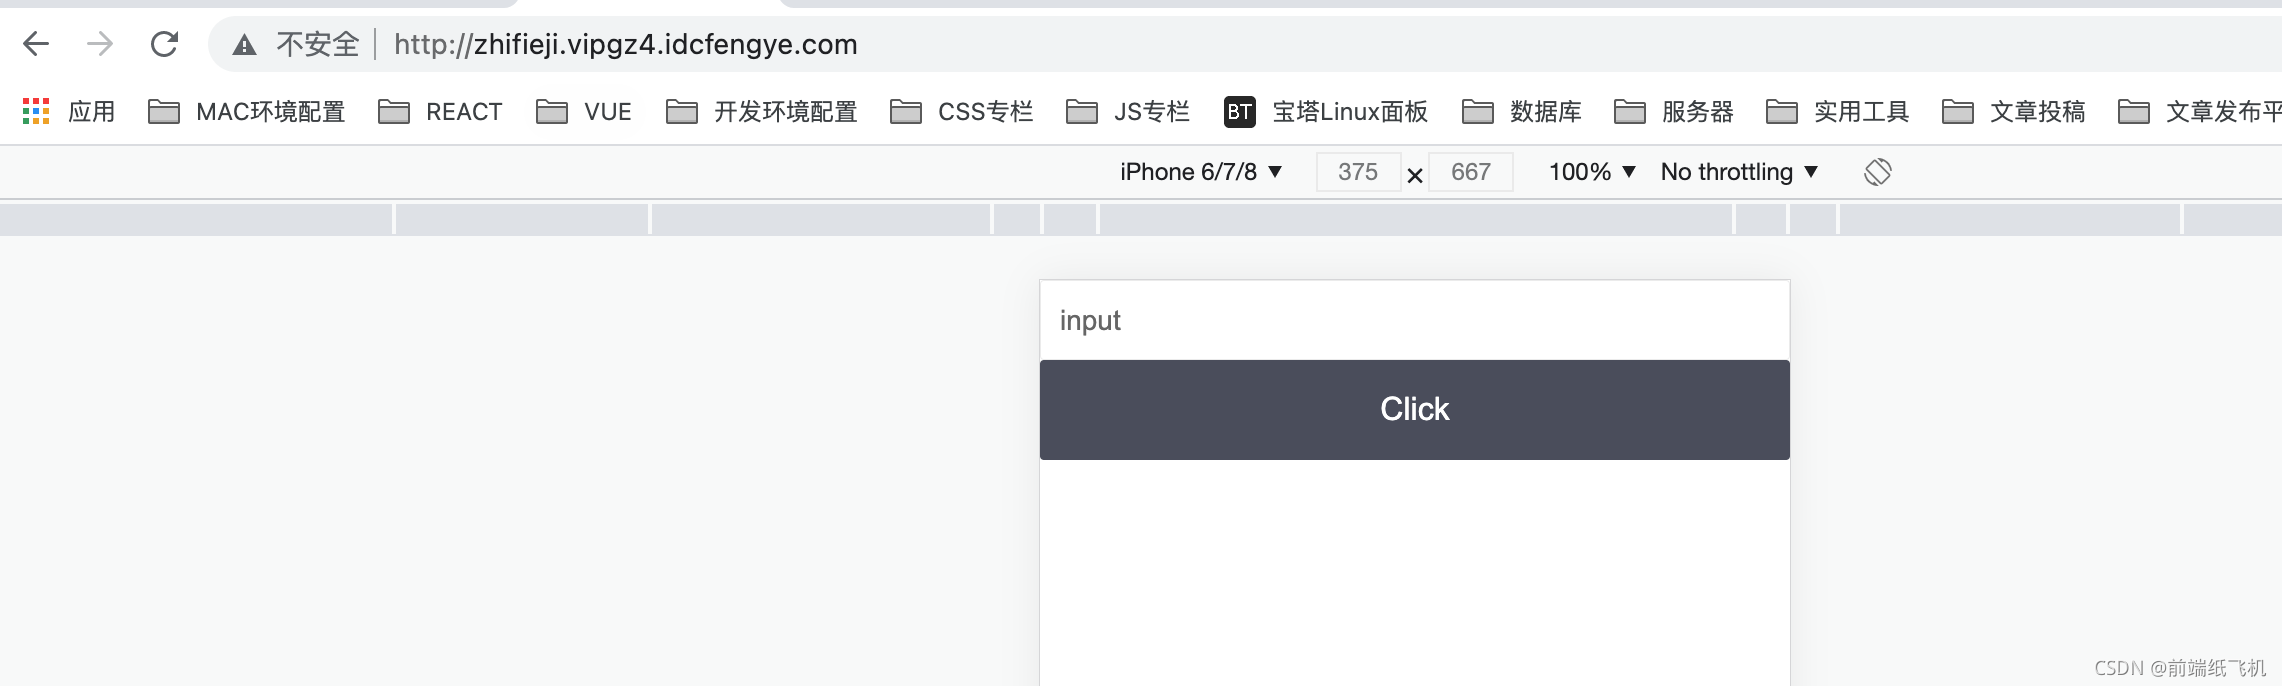
二、使用消息接口
微信自带消息自动回复功能,可以在公众平台设置,但是很死板,无法动态回复消息
进入微信开发者工具,申请公众平台测试账号 有一些配置,填写转发的域名,token随意,要和服务器的用的一样 接口配置的URL就是转发的网址加了/wechat,再去提交接口配置信息(要多试试,才能提交成功)。
再就是在项目seed目录里配置,新建一个conf.js,把前面的appid、appsecret、token带上:
module.exports={
    appid: 'wx77f481fc8a9113a4',
    appsecret: '2b84470b9fb0f8166a8518c5b40edaf9',
    token: 'qweqwe'
}
在index.js里引入,使用一个库co-wechat,所以index.js将变成下面:
const Koa = require('koa')
const Router = require('koa-router')
const static = require('koa-static')
const bodyParser = require('koa-bodyparser');
const app = new Koa()
const conf = require('./conf')//引入conf
app.use(bodyParser())
const router = new Router()
app.use(static(__dirname + '/'))

const wechat = require('co-wechat')//使用co-wechat库
router.all('/wechat', wechat(conf).middleware(
    async message => {
        console.log('wechat:', message)
        return 'Hello World ' + message.Content
    }
))

app.use(router.routes()); /*启动路由*/
app.use(router.allowedMethods());
app.listen(3000);
知识点:co-开头的库是代表着满足异步要求的库
成功后,这个时候呢,可以关注下面的测试号二维码
发送1,会回复Hello World 1(如果是设置的没有这中获取用户发送的信息的方法,所以有时候也需要api),如下图: 
三、微信一些api的调用
相关文档:https://developers.weixin.qq.com/doc/offiaccount/Basic_Information/Get_access_token.html
获取token:
const axios = require('axios')
const tokenCache = {
    access_token:'',
    updateTime:Date.now(),
    expires_in:7200
}

router.get('/getTokens',async ctx => {//获取token
    const wxDomain =  `https://api.weixin.qq.com`
    const path = `/cgi-bin/token`
    const param = `?grant_type=client_credential&appid={conf.appid}&secret={conf.appsecret}`
    const url = wxDomain + path + param
    const res = await axios.get(url)
    Object.assign(tokenCache,res.data,{
        updateTime:Date.now()
    })
    ctx.body = res.data
})
获取用户信息
router.get('/getFollowers',async ctx => {//获取用户信息
    const url = `https://api.weixin.qq.com/cgi-bin/user/get?access_token=${tokenCache.access_token}`
    const res = await axios.get(url)
    console.log('getFollowers:',res)
    ctx.body = res.data
})
以上为原生的写法,实际上我们十有库可以用的。
使用 co-wechat-api
yarn add co-wechat-api
const WechatAPI = require('co-wechat-api')
const api = new WechatAPI(
    conf.appid,
    conf.appsecret,
    // // 取Token
    // async () => await ServerToken.findOne(),
    // // 存Token
    // async token => await ServerToken.updateOne({}, token, { upsert: true })
)
router.get('/getFollowers', async ctx => {
    let res = await api.getFollowers()
    res = await api.batchGetUsers(res.data.openid, 'zh_CN')//加上后会返回详细信息
    ctx.body = res
})
四、全局票据
全局票据需要基于mongodb或者redires,我们用mongodb。 新建个mongoose.js
const mongoose = require('mongoose')
const {
    Schema
} = mongoose
mongoose.connect('mongodb://localhost:27017/weixin', {
    useNewUrlParser: true
}, () => {
    console.log('Mongodb connected..')
})
exports.ServerToken = mongoose.model('ServerToken', {
    accessToken: String
});
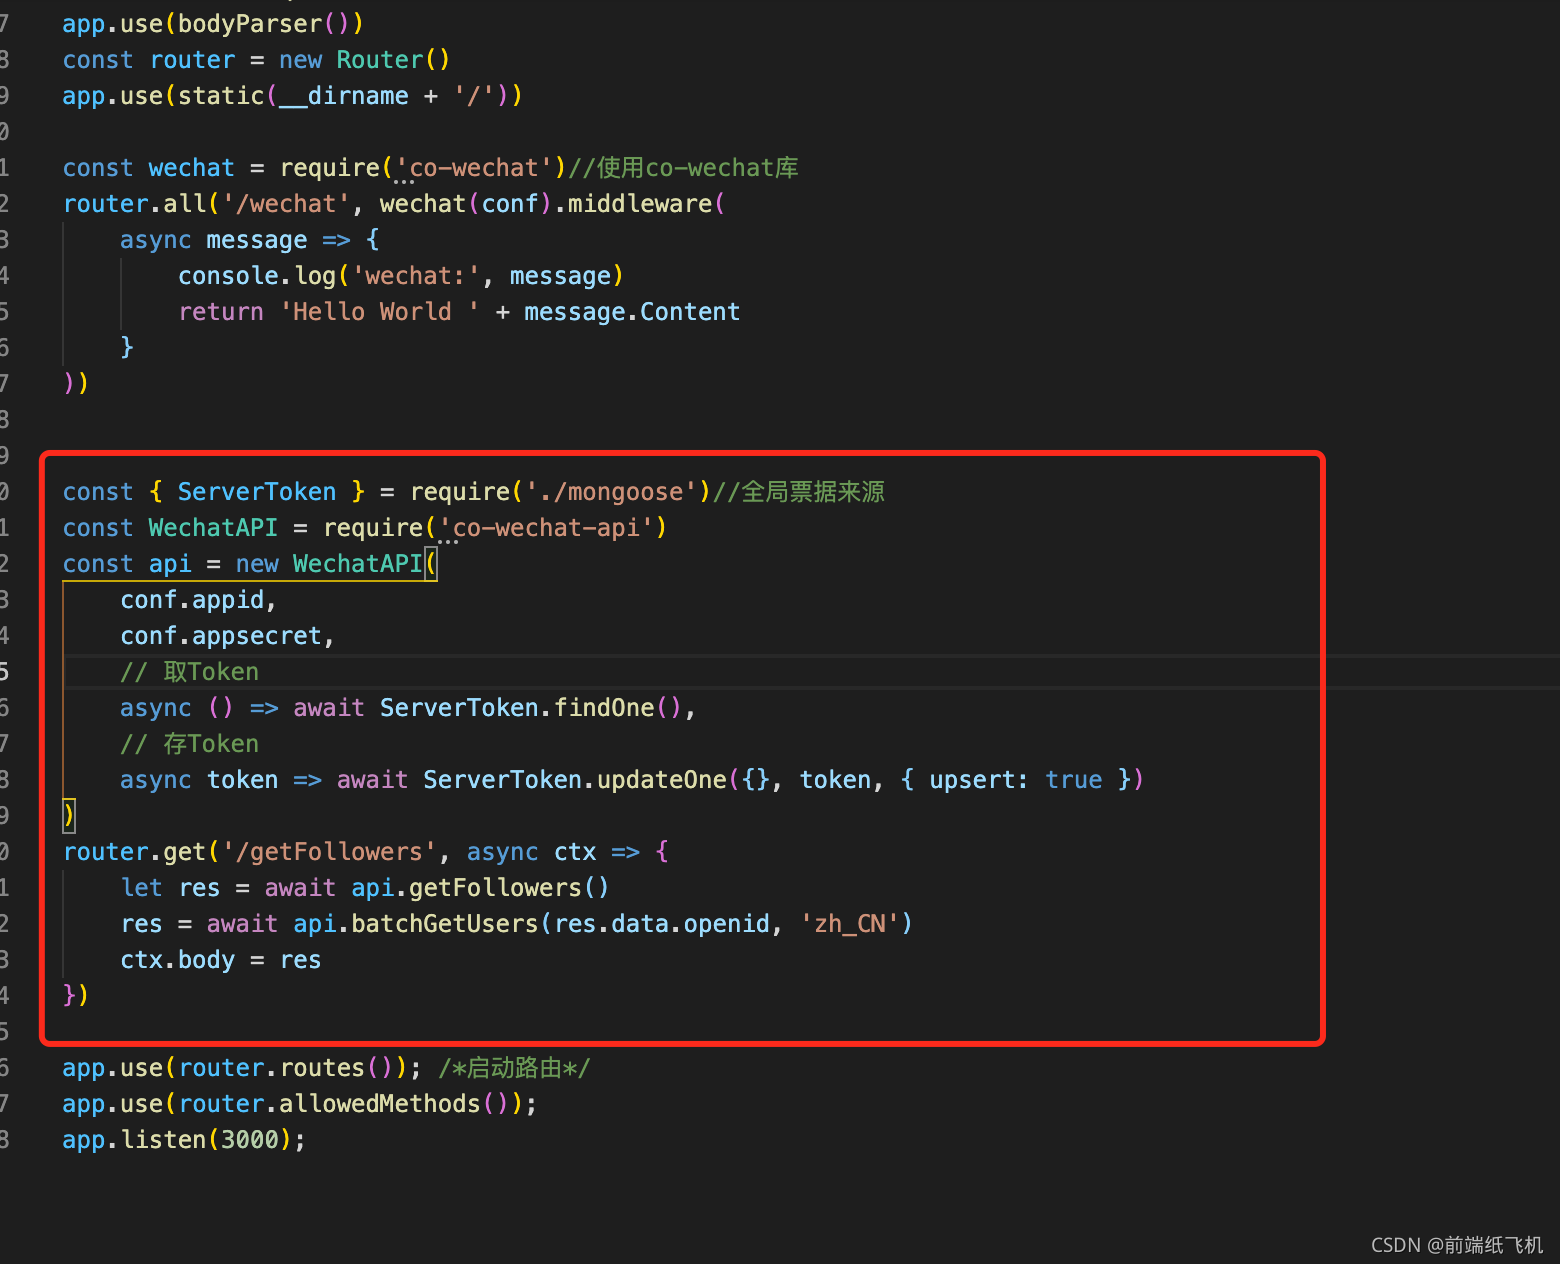
index.js里改造上面用co-wechat-api的:
const { ServerToken } = require('./mongoose')//全局票据来源
const WechatAPI = require('co-wechat-api')
const api = new WechatAPI(
    conf.appid,
    conf.appsecret,
    // 取Token
    async () => await ServerToken.findOne(),
    // 存Token
    async token => await ServerToken.updateOne({}, token, { upsert: true })
)
router.get('/getFollowers', async ctx => {
    let res = await api.getFollowers()
    res = await api.batchGetUsers(res.data.openid, 'zh_CN')
    ctx.body = res
})
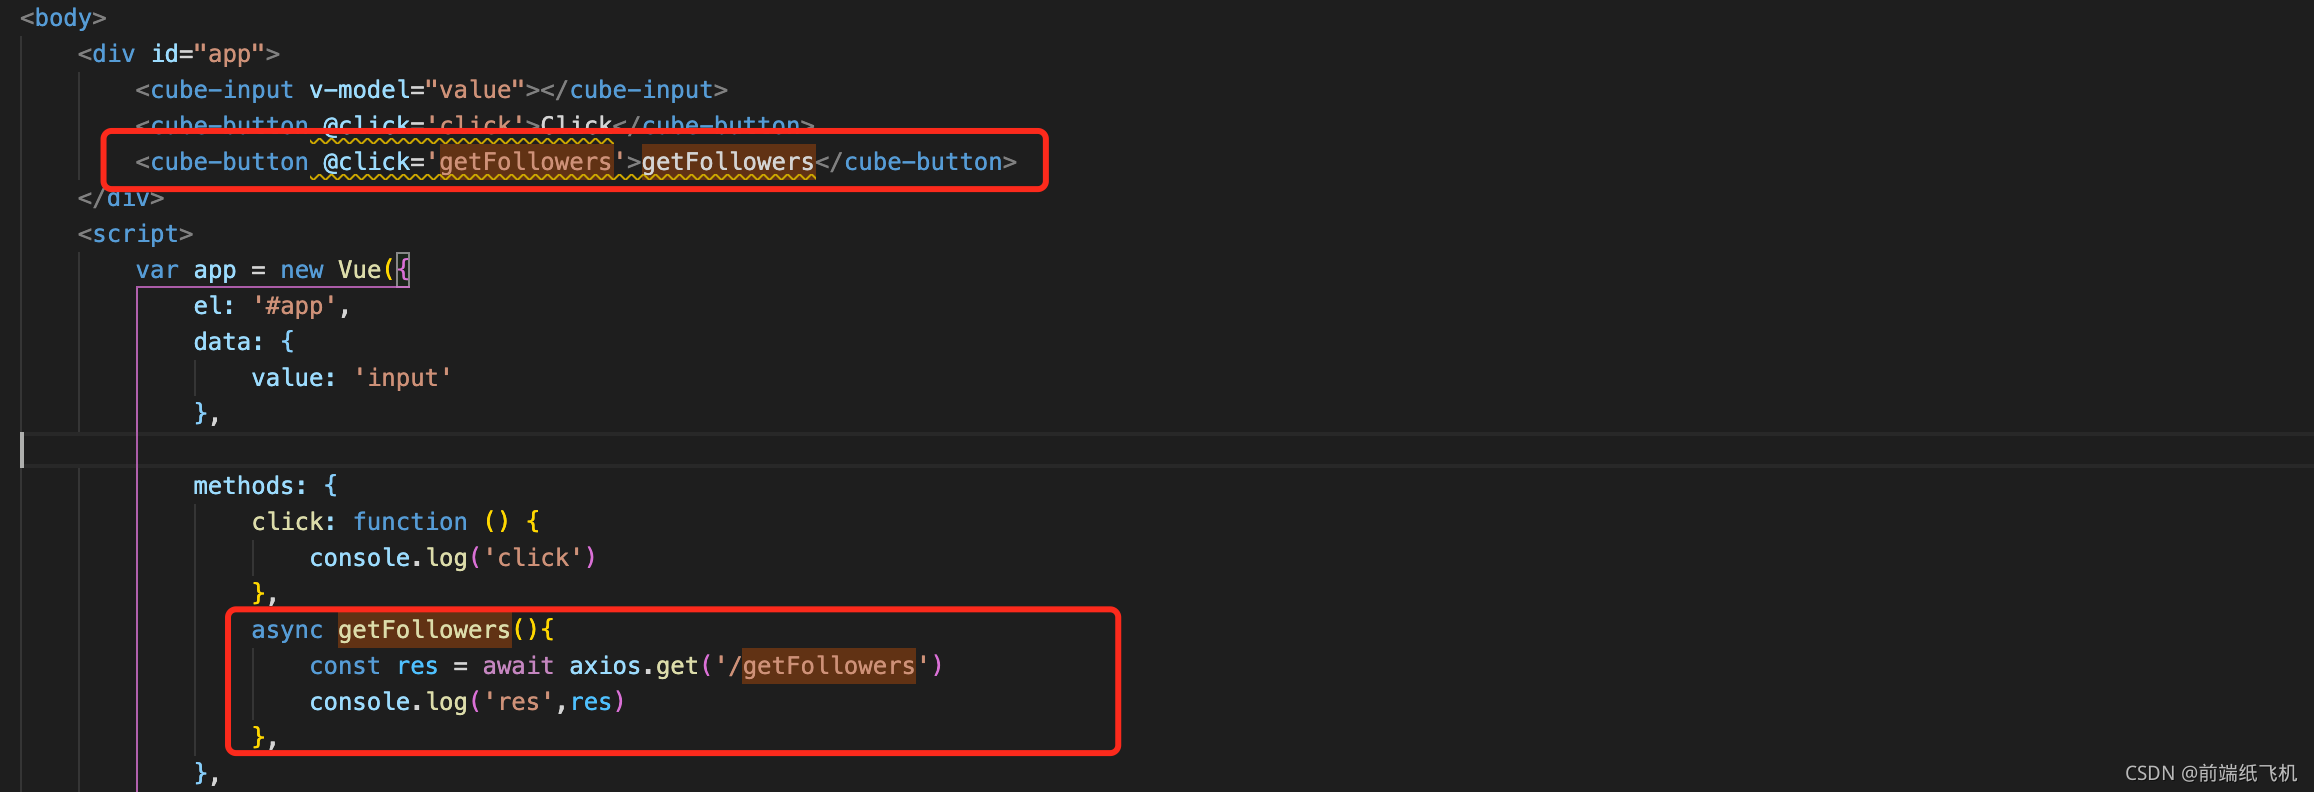
 再在index.html中加上一个按钮和一个按钮点击方法:
<cube-button @click='getFollowers'>getFollowers</cube-button>
 async getFollowers(){
      const res = await axios.get('/getFollowers')
      console.log('res',res)
},
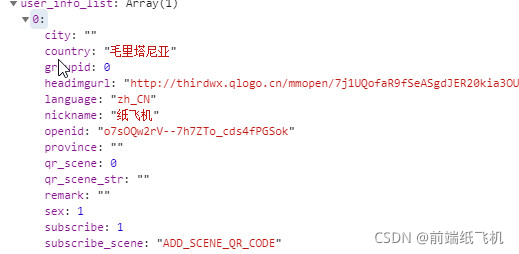
 动动小手点击一下:(这个getFollwers拿到了数据)
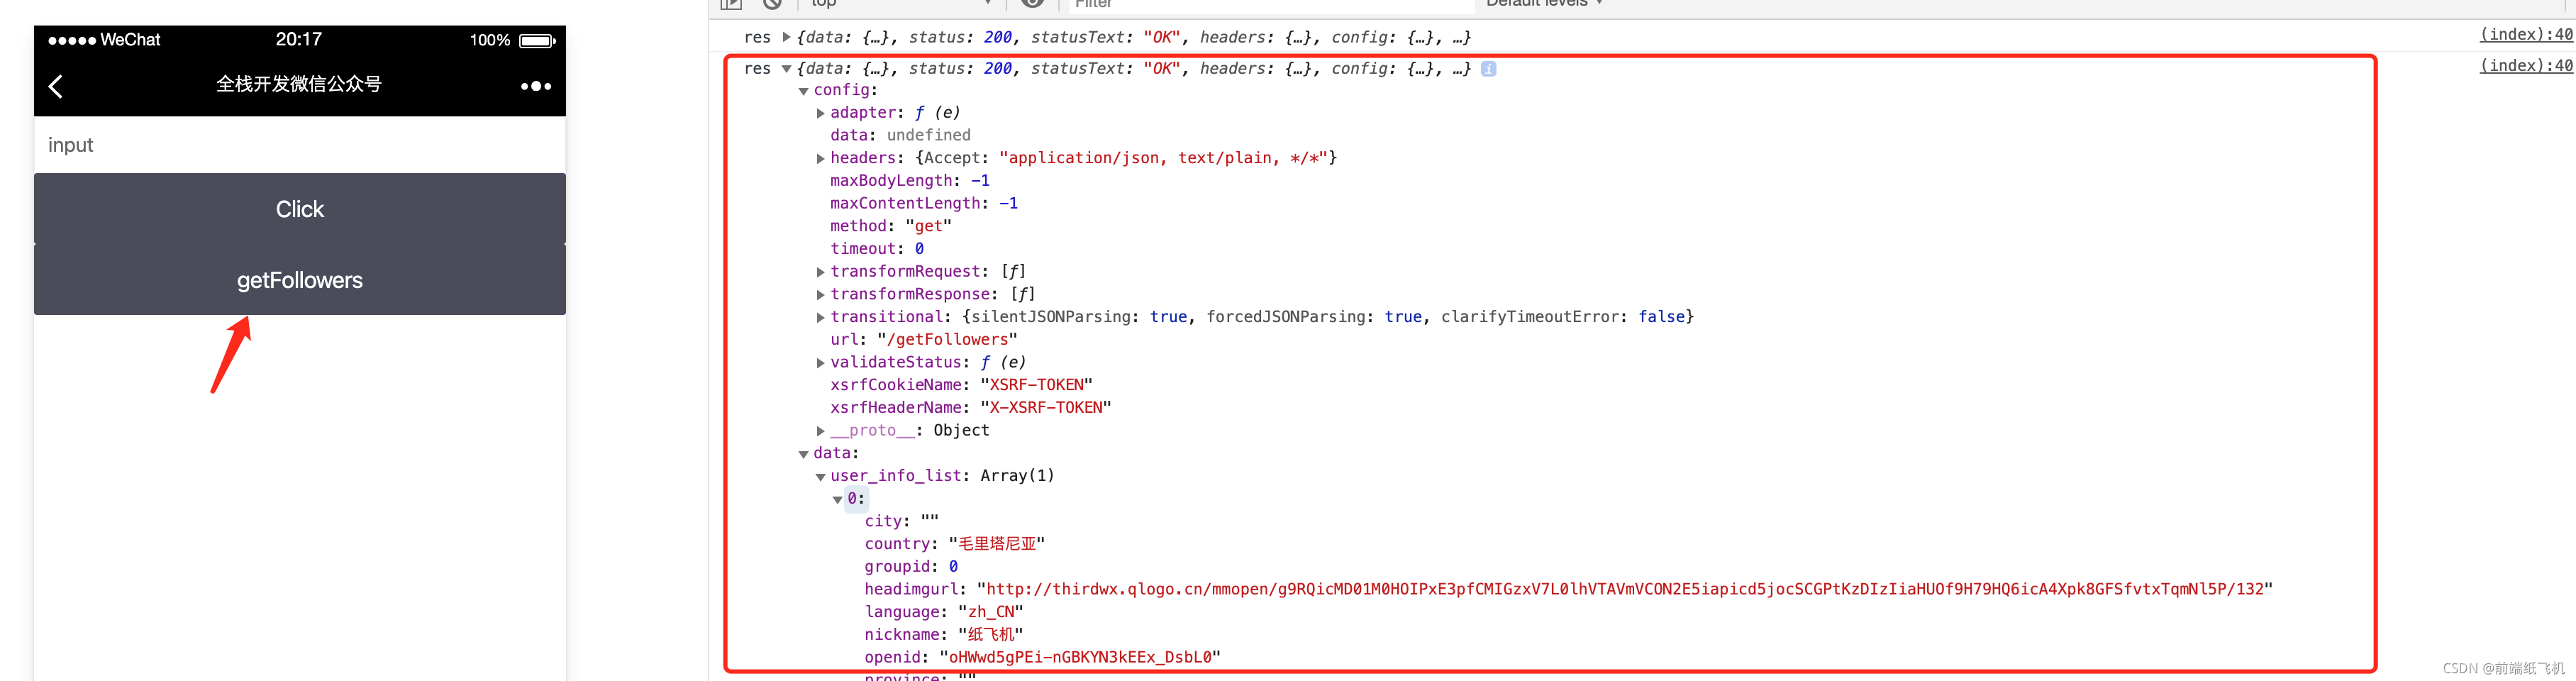
五、消息推动
就类似于这个,手机微信扫码微信公众平台前台发送1或者2,饼图自动统计1和2发送的次数。  后台(模拟器)会显示前台(手机微信在测试订阅号)的推送,而且更新echart。 代码为下面的vote部分,后面会放出代码。
六、Oauth2认证流程
首先要知道有三个端,浏览器,服务器,微信服务器。
1.浏览器向服务器发送认证请求
2.服务器让浏览器重定向微信认证界面
3.浏览器向微信服务器请求第三方认证(微信认证)
4.微信服务器毁掉给服务器一个认证code
5.服务器用code向微信服务器申请认证令牌
6.微信服务器返给服务器一个令牌
最后当服务器得到令牌认证成功后,发给浏览器一个指令,刷新界面
刷新后就会有一个用户信息
使用微信开发者工具,选择公众号网页,用来预览。
PS:以上代码中
- 消息推动我放在vote目录了
- 剩余的api调用方法放在了seed目录
七、实现一个微信认证登录
配置js接口安全域名,就是我们转发的公网域名(不用带协议):zhifieji.vipgz4.idcfengye.com 再就是每个微信接口api那里也要授权域名,即下图的修改位置,修改的和上面一样:(zhifieji.vipgz4.idcfengye.com) 把前面的项目中seed目录拷贝一份叫做seed_up,我们给予前面的在seed_up中继续干! index.js;
const OAuth = require('co-wechat-oauth')//引入一个oauth库
const oauth = new OAuth(conf.appid,conf.appsecret)

/**
 * 生成用户URL
 */
router.get('/wxAuthorize', async (ctx, next) => {
    const state = ctx.query.id
    console.log('ctx...' + ctx.href)
    let redirectUrl = ctx.href
    redirectUrl = redirectUrl.replace('wxAuthorize', 'wxCallback')
    const scope = 'snsapi_userinfo'
    const url = oauth.getAuthorizeURL(redirectUrl, state, scope)
    console.log('url' + url)
    ctx.redirect(url)
})
/**
 * 用户回调方法
 */
router.get('/wxCallback', async ctx => {
    const code = ctx.query.code
    console.log('wxCallback code', code)
    const token = await oauth.getAccessToken(code)
    const accessToken = token.data.access_token
    const openid = token.data.openid
    console.log('accessToken', accessToken)
    console.log('openid', openid)
    ctx.redirect('/?openid=' + openid)
})
/**
 * 获取用户信息
 */
router.get('/getUser', async ctx => {
    const openid = ctx.query.openid
    const userInfo = await oauth.getUser(openid)
    console.log('userInfo:', userInfo)
    ctx.body = userInfo
})
index.html:
<!DOCTYPE html>
<html>

<head>
    <title>全栈开发微信公众号</title>
    <meta charset="UTF-8">
    <meta name="viewport" content="width=device-width,initial-scale=1,user-scalable=0">
    <script src="https://unpkg.com/[email protected]/dist/vue.min.js"></script>
    <script src="https://unpkg.com/axios/dist/axios.min.js"></script>
    <script src="https://unpkg.com/cube-ui/lib/cube.min.js"></script>
    <script src="https://cdn.bootcss.com/qs/6.6.0/qs.js"></script>
    <script src="http://res.wx.qq.com/open/js/jweixin-1.4.0.js"></script>
    <link rel="stylesheet" href="https://unpkg.com/cube-ui/lib/cube.min.css">
    <style>
        /* .cube-btn {
            margin: 10px 0;
        } */
    </style>
</head>

<body>
    <div id="app">
        <cube-input v-model="value"></cube-input>
        <cube-button @click='click'>Click</cube-button>
        <cube-button @click='getTokens'>getTokens</cube-button>
        <cube-button @click='getFollowers'>getFollowers</cube-button>
        <cube-button @click='auth'>微信登录</cube-button>
        <cube-button @click='getUser'>获取用户信息</cube-button>
    </div>
    <script>
        var app = new Vue({
            el: '#app',
            data: {
                value: 'input'
            },

            methods: {
                click: function () {
                    console.log('click')
                },
                async getTokens(){
                    const res = await axios.get('/getTokens')
                    console.log('res:',res)
                },
                async getFollowers(){
                    const res = await axios.get('/getFollowers')
                    console.log('res',res)
                },
                async auth(){
                    window.location.href = '/wxAuthorize'
                },
                async getUser(){
                    const qs = Qs.parse(window.location.search.substr(1))
                    const openid= qs.openid
                    const res = await axios.get('/getUser',{
                        params:{
                            openid
                        }
                    })
                    console.log('res',res)
                }
            },
            mounted: function () {

            },
        });
    </script>
</body>

</html>
全局票据(一样用到mongoose,从上次的修改) mongoose.js:
const mongoose = require('mongoose')
const {
    Schema
} = mongoose
mongoose.connect('mongodb://localhost:27017/weixin', {
    useNewUrlParser: true
}, () => {
    console.log('Mongodb connected..')
})
exports.ServerToken = mongoose.model('ServerToken', {
    accessToken: String
});

//以下为seed_up新增

schema = new Schema({
    access_token: String,
    expires_in: Number,
    refresh_token: String,
    openid: String,
    scope: String,
    create_at: String
});
// 自定义getToken方法
schema.statics.getToken = async function (openid) {
    return await this.findOne({
        openid: openid
    });
};
schema.statics.setToken = async function (openid, token) {
    // 有则更新,无则添加
    const query = {
        openid: openid
    };
    const options = {
        upsert: true
    };
    return await this.updateOne(query, token, options);
};

exports.ClientToken = mongoose.model('ClientToken', schema);
继续改下index.js:
const { ServerToken,ClientToken } = require('./mongoose')//全局票据来源
const oauth = new OAuth(conf.appid, conf.appsecret,
    async function (openid) {
        return await ClientToken.getToken(openid)
    },
    async function (openid, token) {
        return await ClientToken.setToken(openid, token)
    }
)
写出来效果如下:完美
[video(video-KTwIIMGP-1632587503822)(type-tencent)(url-https://v.qq.com/txp/iframe/player.html?vid=e3278ajafl6)(image-http://puui.qpic.cn/vpic/0/e3278ajafl6.png/0)(title-)]
八、调用微信jssdk
1.获取jsconfig
index.html:
<cube-button @click='getJSConfig'>获取jsconfig</cube-button>
async getJSConfig(){
  console.log('wx',wx)
  const res = await axios.get('/getJSConfig',{
      params:{
          url:window.location.href
      }
  })
  console.log('config',res)
  res.data.jsApiList = ['onMenuShareTimeline']
  wx.config(res.data)
  wx.ready(function () {
      console.log('wx.ready......')
  })
}
index.js:
/**
 * 获取JSConfig
 */
router.get('/getJsConfig',async ctx => {
    console.log('getJSSDK...',ctx.query)
    const res = await api.getJsConfig(ctx.query)
    ctx.body = res
})
如果能走到wx.ready(),说明这个时候可以使用别的功能那个api了。
2.获取网络状态
在wx.ready()后加,当然在ready()里加最为合理:
//获取网络状态
wx.getNetworkType({
     success: function (res) {
         // 返回网络类型2g,3g,4g,wifi
         const networkType = res.networkType
         console.log('getNetworkType...', networkType)
     }
})
获取到我是wifi环境,很完美!其余的jssdk调用方法也是如此!
还有一点,通常我们十前后端分离的开发项目,所以我把项目改成了前后端分离。
九、前后端分离的开发
1、新建了个weixin_pro的项目 2、将weixin项目的package.json复制到weixin_pro 3、分一个cube-ui目录为前端代码 4、分一个quiz目录为后端代码 5、weixin_pro下安装依赖,为后端依赖 6、cube-ui下安装依赖为前端依赖 7、分别启动前端代码后后端代码
运行效果如下:
[video(video-v2FEoxvx-1632588608459)(type-tencent)(url-https://v.qq.com/txp/iframe/player.html?vid=l3278ig1v72)(image-http://puui.qpic.cn/vpic/0/l3278ig1v72.png/0)(title-)]
十、代码地址
前后端分离前的代码:https://gitee.com/huqinggui/weixin.git 前后端分离后的代码:https://gitee.com/huqinggui/weixin_pro.git
Recommend
-
120
最近沉迷吃鸡不能自拔,好久没更新文章了。后续将陆续完善《Koa2微信公众号开发》。 一、简介 关于微信公众号的介绍就省略了,自行搜索。注册过程也不说了。我们会直接注册测试号来实现代码。这将会是个全面讲解微信公众号开发的系列教程。本篇是该系列的第一篇,...
-
35
公司要做微信公众号,又折腾了一遍,总结一下,备忘用 申请测试帐号 个人申请的公众号没有认证的话,是没有那么多权限的,不过微信给我们提供了一个申请测试帐号的页面,申请的测试帐号基本上有所有的权限,申请地址...
-
32
前言 前两天分享了一下 网抑云之微信公众号开发 , 现已整理开源,还有许多要完善的地方 <!--more--> 微信公众号开发 ...
-
4
记录在使用 uni-app 开发公众号应用时防止被缓存的方法 # 背景 修改页面后重新打包,测试人员在确认问题时总是说没改,页面没有变化,需要进行繁琐的清...
-
7
这很可能是NodeJS中用来开发微信支付APIv3的顶级SDK之一 微信支付官方提供了两个包,一个是Java版的,另一个是PHP版的。继上一篇无侵入地向官方PHP版提供了媒体文件上传功能之后,我就在想,
-
5
微信支付APIv3的Nodejs版SDK,让开发变得简单不再繁琐 在向云端推送这个 wechatpay-axios-plugin 业务实现时,发现0.1系列还不够好用,还需要进行更多层级的包裹包装,遂再次做了重大更新,让SDK使用起来更简单、飘逸。...
-
1
1. wechat-sdk 1.1. 开发者认证配置 接入指南, 成为开发者 开发者通过检验signature对请求进行校验。若确认此次GET请求来自微信服务器,请原样...
-
7
[TOC] Hello 各位小伙伴,松哥今天要和大家聊一个有意思的话题,就是使用 Spring Boot 开发微信公众号后台。 很多小伙伴可能注意到松哥的微信公众号后台有一个回复关键字如 666 或者 888 可以获取学习资料的功能,这是松哥...
-
6
尝试开发微信公众号消息推送功能并且和小程序关联首页 - Web Design/2019-11-10
-
6
微信公众号开发 你要有一个微信公众号,一个内网穿透工具 服务器配置:设置与开发-->基本配置-->服务器配置 token:3-32字符,自己生成配置到服务器配置 公网 IP:云服务器一般都有公网IP
About Joyk
Aggregate valuable and interesting links.
Joyk means Joy of geeK