

Starting My Dream Project: Building the Chat GUI for a Conversational AI
source link: https://hackernoon.com/starting-my-dream-project-building-the-chat-gui-for-a-conversational-ai
Go to the source link to view the article. You can view the picture content, updated content and better typesetting reading experience. If the link is broken, please click the button below to view the snapshot at that time.

Starting My Dream Project: Building the Chat GUI for a Conversational AI
Listen to this story
A full time student and is exploring stuff with an intention to learn and add value.
Hello everyone, I am Tumin, and this is going to be my first blog on Hackernoon! I hope everyone is doing well and healthy. Little something about me will be, I just graduated from high school and started college. I always and still love problem-solving (not consciously, though). Consciously, I’d try new more and more stuff from web development to AI to math to even mystery thriller games. After all these years of not sticking with any of them for a long time, I understood that the tiny stuff which made me stick with them for quite a long time was the adrenaline of a new problem to solve- an unknown territory I had never gone before to explore.
And after exploring for quite some time in various topics and learning and understanding new things in life, I decided to make this incredible project, which I will talk about for the rest of the article. Then a realization hit me that I am way too young (5th grader then), and I do not know anything, not enough coding, not enough math, not enough nothing. But with these entries, I hope we all can go on this journey of learning and understanding new things together.
My dream project
Around the time when I wanted to create the dream project, I did not know that by the time I grew up, the project I wanted to create would be such a saturated topic (maybe…?) and that the resources would be so readily available. Actually, the availability of resources decreases the urge to solve a problem, but I will still try my hands on it.
And without further ado, my dream project is to create my very own, wait for it… my very own personal AI assistant. If you are thinking of leaving this story, please wait as there is more to it (Though it is understandable). And those who did not think so... Thank you so much! c:
I always wanted to create something more than only a software-based assistant from the day since I saw Tony Stark’s JARVIS working and physically helping him make his new suit. No, can’t create such industrial-level robots and AI at home DIY, but I can implement a borderline robot and AI though it can be slow and time-consuming.
My project will be called Project ARI (Assistive Reactive Interface) or Project ARI-A (Assistive Reactive Interface - Arm) to create and program the robot arm. I plan to first create the minimum user interface so that ARI can be accessed without much haphazard from the terminal. Then in the following days, I will introduce conversational AI, and later on, I will connect with APIs to make the ARI feature and add more functions to it.
From today onwards, with this blog in Hackernoon, I will be journaling my progress with Project ARI. A little disclaimer, though this project is my dream project I also have a college life and personal life. So I will try my best to make progress and publish new entries as quickly as possible, but in case I cannot, thank you for supporting and understanding!
Entry 1 - The user interface
The foreword
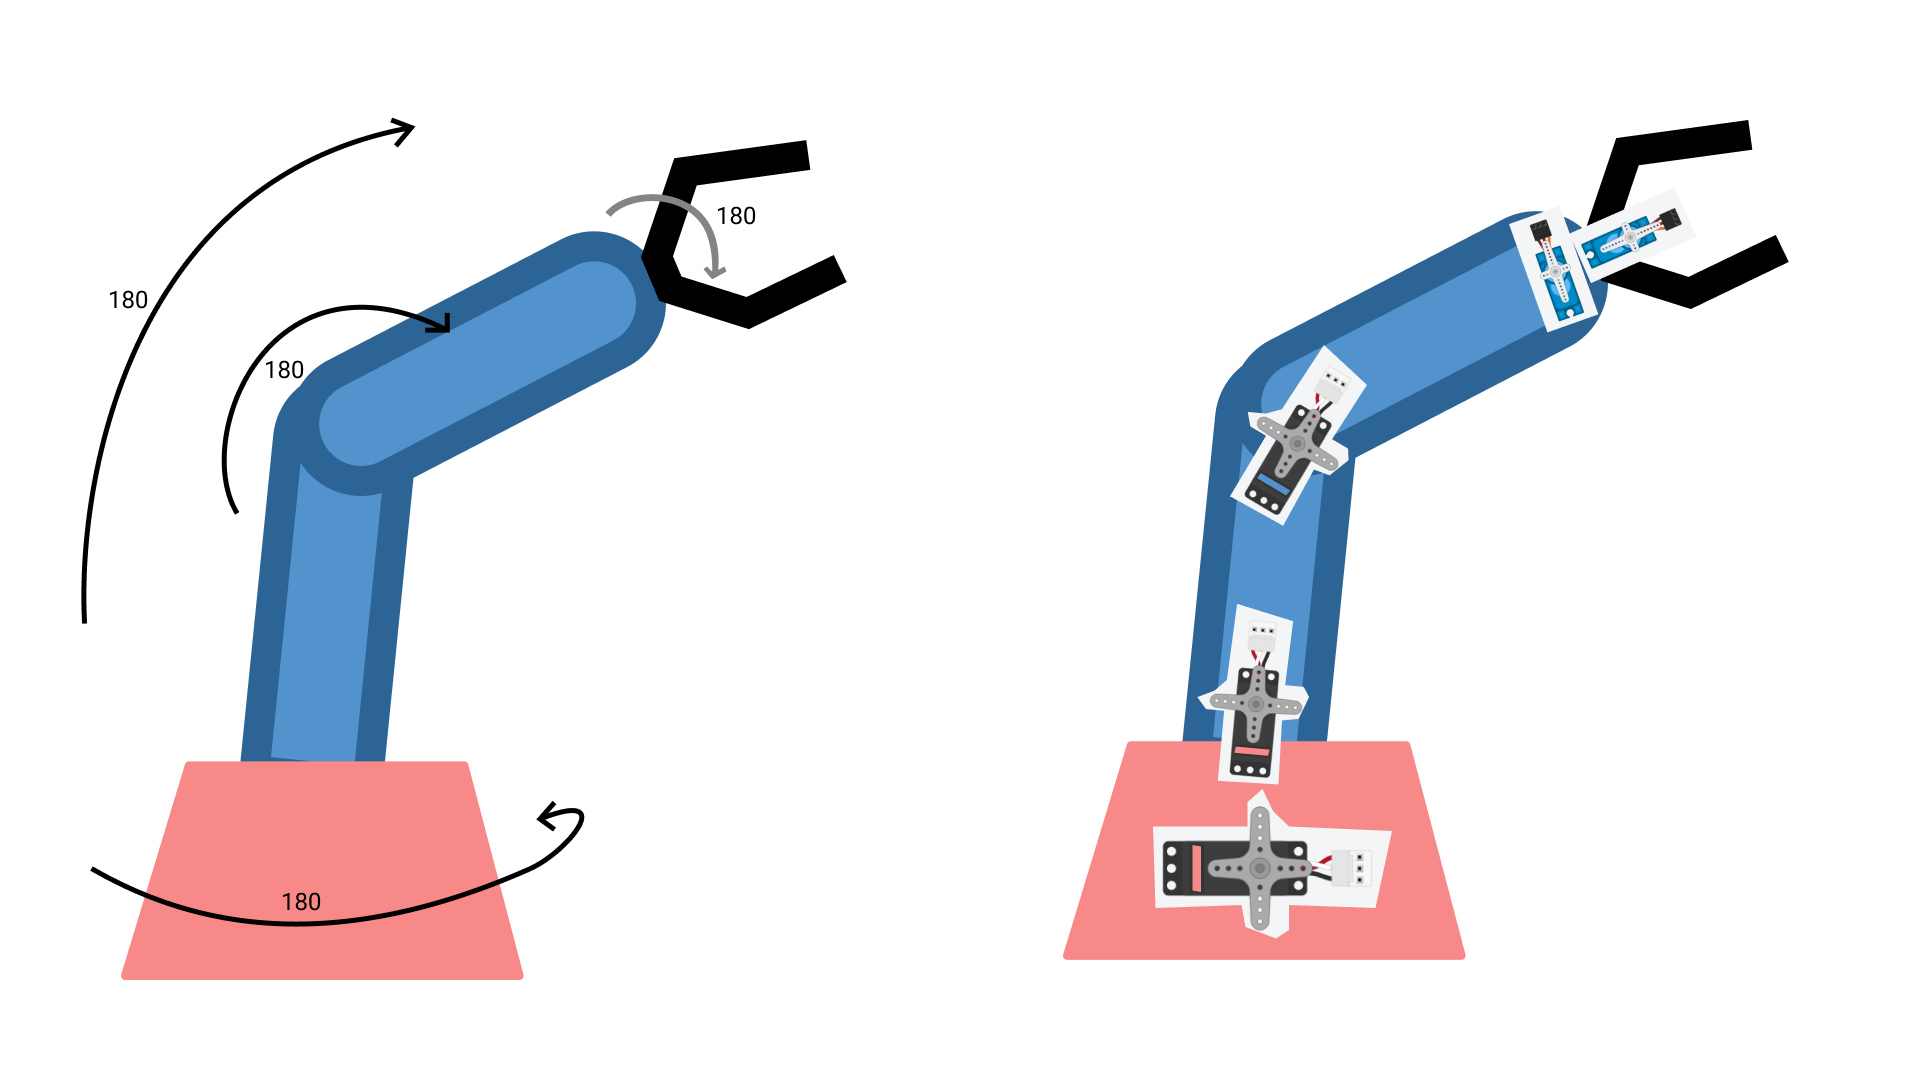
First thing I have nothing of ARI in my hands except the idea (which again is in my head, not my hands), so basically, there is no physical or digital proof of ARI’s existence except this clumsily drawing I made years ago to describe my optimism of making a robot arm with no prior knowledge to anything
Nevertheless, after doing my research online, I understand the difference between chatbot AI which is so readily available by Google and IBM. Then after getting pleased by the ads of GPT-3, finally I understood I did not need a chatbot AI; I needed Conversational AI. For those who do not know what is the difference:
Chatbot AI is a simple AI which, with the help of deep learning and stuff, knows what to reply to you after reading your input. These kinds of AIs are seen a lot in website customer helplines and Facebook messenger bots. While a Conversation AI will not only reply based upon your last input, it can recite the information given in the past, reply based on the theme and context of the conversation as you know the most essential aspect of human communication is the ability to understand and remember what the other speaker has said and the flow of a smooth conversation. And based on that aspect, a conversational AI can also do a task when implied to.
After all this, I knew before designing the model for the AI while I procrastinated my the other studies, I needed a GUI to easily interact with the AI and maybe later have eased to implement Computer Vision features.
Designing the GUI
So first things first I headed to my favorite UI creation tool Figma. There I designed this badass.
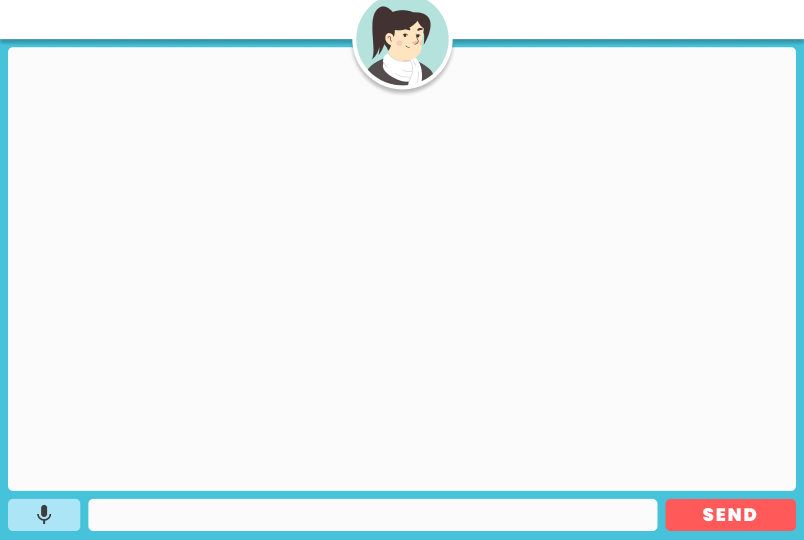
I did not tell you before, but I have thought of my ARI’s avatar as that girl in the design above. So then, after it was completed, I headed to my VScode and created the python file to code this GUI with the help of Tkinter but little did I know how hard it is to code a modern flat UI in python using Tkinter. So then I started to have second thoughts on whether I should use React or electron to make the app. Later, after training my model with python, I can technically use the model with any other language that supports TensorFlow. Then I realized I did not know much about it already, so what if I try to implement it later in life while it is connected to RaspberryPi, which I do not know if it supports JS.
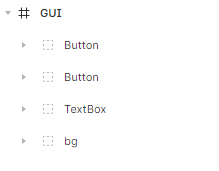
Then after a few moments of brainstorming, I thought to take help from our best friend, Youtube. After that searching, I came across this software that would take the Figma link and automatically create a Tkinter file for me in a few seconds. I was so happy, then when I followed the tutorial, they asked me to name the different layers of the UI in this way
I did not know why. When I ran the software, I have to say it was pretty cool to do this lot in a matter of seconds, but unfortunately, the software couldn’t give me the exact thing I wanted and the look of the UI totally glitched. It was totally understandable because my UI has complex feats, unlike the tutorial; whatsoever, the software is still so incredible that it can do all of this!
But thanks to the result files given by the software, now I knew why it made me name the layers of my Figma file like that. Instead of hardcoding every element and design as we do with CSS, what it did was, took all of the stuff which was only there for looks and was not interactable; it turned it into a single picture and used it as a background image.
Same with the button and textbox. The only difference is that bg cannot interact totally while button images can be clickable, and you can type in the textbox images. So I did the same and downloaded the image files separately and used them as background.
After facing the issues wherein Tkinter, we cannot precisely specify its button’s height and width in pixel and more stuff like that, I also came to understand that that large display of text area is not really needed for only the user and the AI’s chat. So I decreased its width and left a considerable portion to later use it for CV features. So then my AI-less chat interface is totally ready where I can only chat with myself.
The mic button is there because I am going to implement type with voice next to add a TTS with the replies of the AI and make it look kinda like a conversation.
I understand that many features of my Project ARI are yet to be added, and it is going to be a long journey. And I hope you will stay and learn with me while we create this fantastic project!
Until then, stay safe and check out my other Blogs on Math and Programming and do not forget to sign up for my newsletters to get notified when my next entry is out!
Recommend
-
9
Team Building Exercises with Dream Build Play As noted from my previous post on Dream Build Play, the competi...
-
5
OpenDialog - open-source conversational application platform OpenDialog enables you to quickly design, develop and deploy conversational applications. You write conversational applications using OpenDialog's flexible no-code c...
-
4
Roblox is getting voice chat, starting first with ‘Spatial Voice’Illustration by Grayson Blackmon / The Verge Roblox is taking its first steps to introduce voice chat by opening up a feature it’s calling “Spatial Voice” to sele...
-
8
Paul PINARD September 14, 2021 1 minute read ...
-
4
Eeshwari Bollapragada September 18, 2021 3 minute read
-
11
Building Microsoft Teams Tabs Apps with Java Part 3: Creating a Conversational Tab App ...
-
1
Windows 11 on Surface Duo now has Wi-Fi and GPS
-
3
Introduction In this Blog, I will share with you solutions to three selected challenges, which occur when handling chat partner information inputs in SAP CAI. The upcoming challenges emerged when I was building a chatbot to record employe...
-
5
Building a Dream Team: How to Hire Top iOS, Android, and Web Developers Share Are you finding hiring developers with specific platfo...
-
3
About Joyk
Aggregate valuable and interesting links.
Joyk means Joy of geeK