

How to configure an Advanced Installer build step into a Jenkins pipeline
source link: https://www.advancedinstaller.com/configure-build-step-jenkins-pipeline.html
Go to the source link to view the article. You can view the picture content, updated content and better typesetting reading experience. If the link is broken, please click the button below to view the snapshot at that time.
How to configure an Advanced Installer build step into a Jenkins pipeline
Written by Ciprian Burca · October 29th, 2021
Jenkins is one of the most famous Continuous Integration tools, similar to TeamCity, that allows developers to easily integrate changes into their build on a continuous basis.
Since it is open-source, Jenkins is widely popular in the community when it comes to automated solutions.
 Our
Advanced Installer MSI Builder
plugin aims to offer smooth integration with the Jenkins workflow to all our users.
Our
Advanced Installer MSI Builder
plugin aims to offer smooth integration with the Jenkins workflow to all our users.
If you don't already know, Advanced Installer offers free licenses for Open Source projects.
More details here .
Also, if you are part of the Open Source community, do not hesitate to share the above information with other members.
Knowing how useful Jenkins is for developers, we want to show you how its integration with Advanced Installer works.
In this article, you will learn how to automate the deployment of Advanced Installer on the build agent and add a package build step to the pipeline.
How to configure Advanced Installer in Jenkins
1. Install Advanced Installer plugin for Jenkins
To kick off this tutorial, we first need to install the Advanced Installer MSI Builder plugin to the Jenkins server. You can do so from the Plugin Manager view.
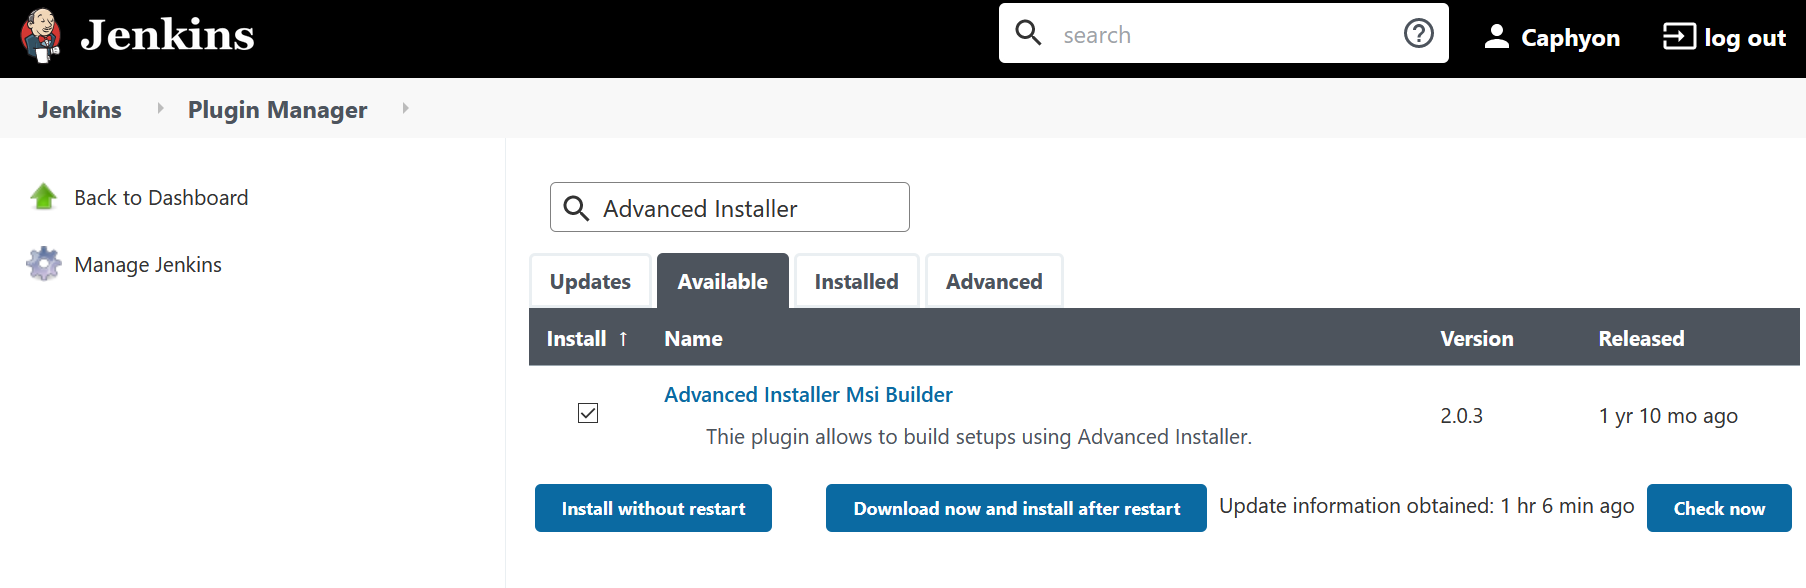
Use the filter to discover the plugin, select it, and click the button: Download now and install after restart.
2. Configure Advanced Installer tool deployment
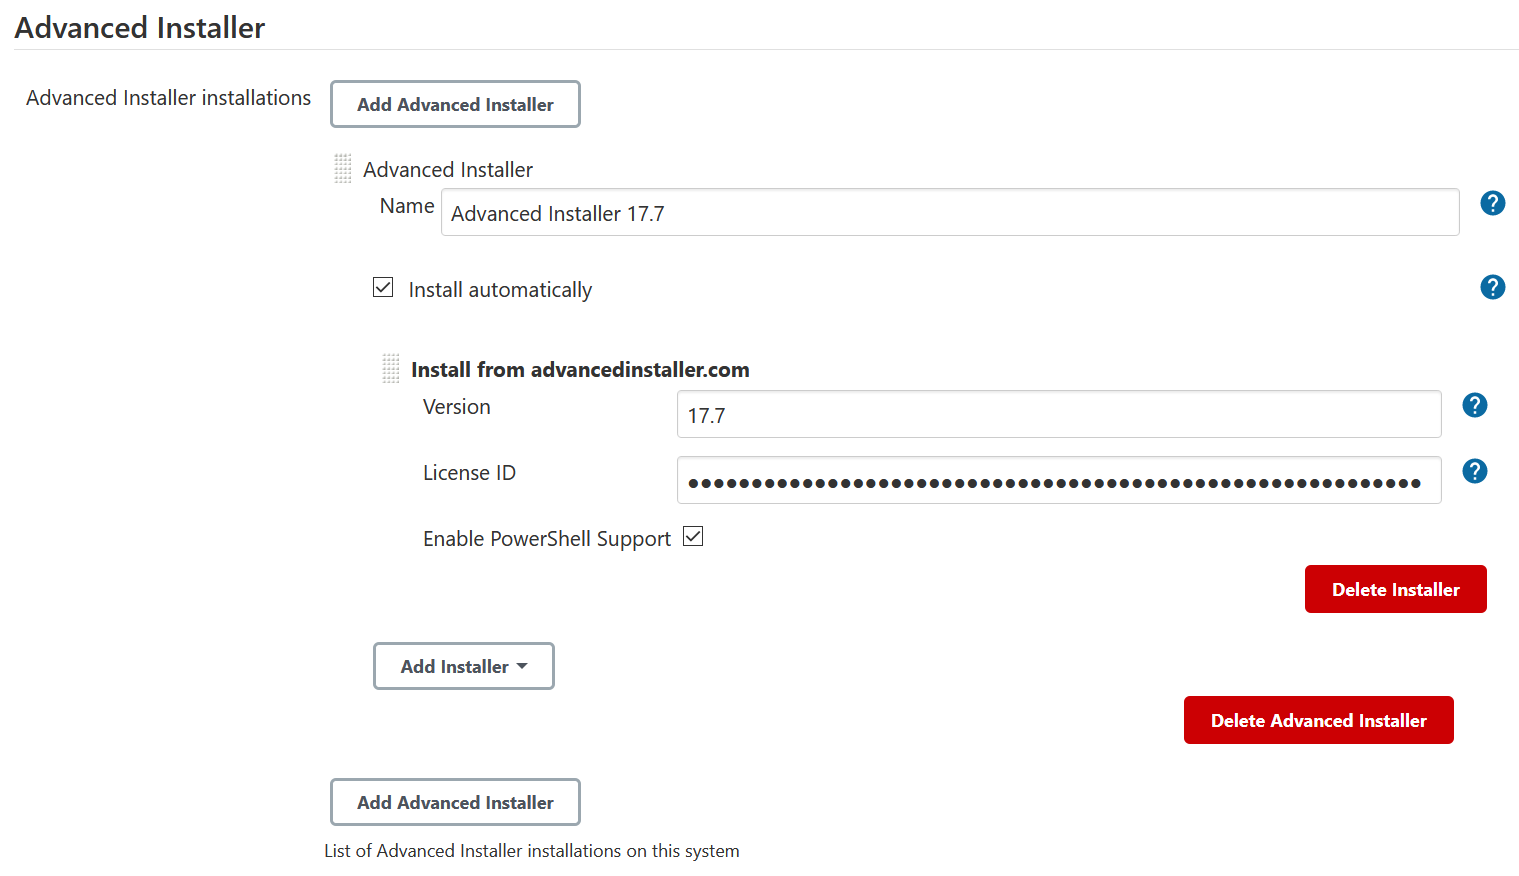
To configure the Advanced Installer tool, we need to go to the Global Tool Configuration view.
- Click Add Advanced Installer.
- In the Name field, you must configure a friendly name for the tool. This is a mandatory step.
- In the Version field, we must configure the Advanced Installer version to be deployed. Which is also mandatory.
- In the License ID field, configure the Advanced Installer license. If you plan on building projects that do not require a license, you can skip this step.
- The Enable PowerShell Support option will register a COM interface on the agent during the pipeline. After that, you will be able to use Advanced Installer from PowerShell scripts.
 You can add as many tools as you like by clicking
Add Advanced Installer
.
You can add as many tools as you like by clicking
Add Advanced Installer
.
3. Add the build step to the pipeline
It's time to add the build step to the pipeline, we have arrived at the essential part of this tutorial - this is where everything comes together.
To edit your pipeline, click Add Build Step, and choose Invoke Advanced Installer.

3.1 Select the Advanced Installer tool

3.2 Configure plugin run type
You will see that the plugin has two “Run Type” modes in order to offer flexibility and accommodate all usage scenarios.
3.1.1 Deploy Advanced Installer tool
In this scenario, the plugin will:
- Deploy Advanced Installer,
- Register it using the provided License ID,
- Enable PowerShell support, if specified.
The last option is helpful if you're using Advanced Installer from PowerShell scripts or directly from the command line.
3.1.2 Deploy Advanced Installer tool and build project
In this scenario, the plugin will:
- Deploy Advanced Installer,
- Register it using the provided License ID,
- Enable PowerShell support, if specified,
- Build AIP configured in the Advanced Installer Project section.
3.3 Configure Advanced Installer Project
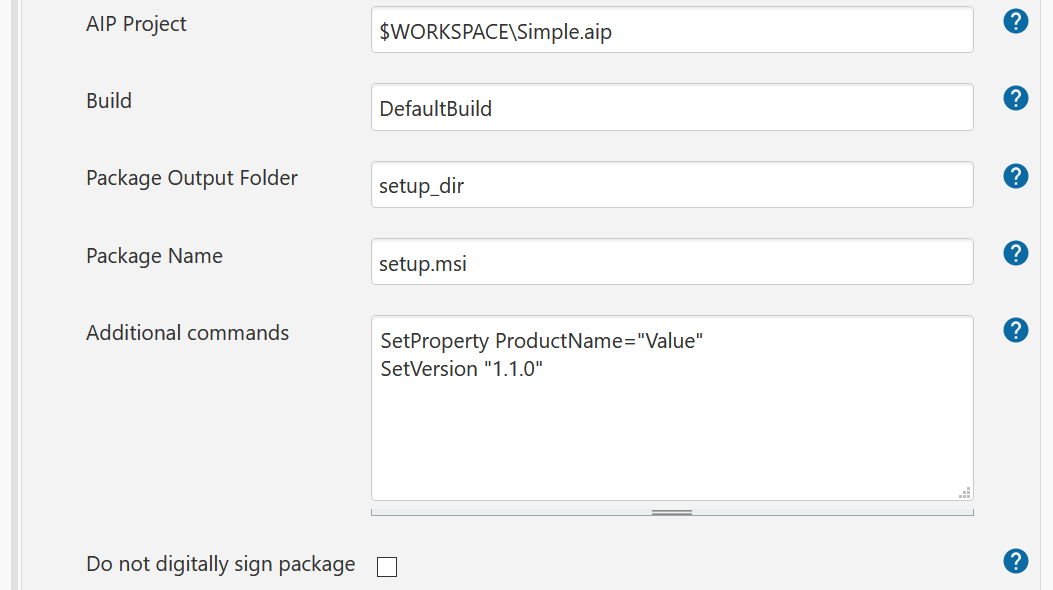
The Advanced Installer build step has the following configurations:
- AIP Project - The path of the Advanced Installer project file (.AIP). It can be either an absolute path or relative to the workspace directory.
- Build - A project build to be executed. If this field is empty, all the builds from the project will be executed.
- Package Output Folder - The folder where the built package should be created. It can be either an absolute path or relative to the workspace directory. If left empty, it will automatically use the folder configured in the AIP project.
- Package Name - The name of the resulting package. If left empty, it will take automatically the name configured in the AIP project.
- Additional Commands - Additional commands to be executed.
- Do not digitally sign the package - Skips the digital signature step, even if it is configured in the project.
You can complete the above fields by using build variables through the syntax ${VAR} or $VAR.
Conclusion
This is how to configure an Advanced Installer build step into your Jenkins pipeline. We hope you found this tutorial useful and that it makes your work smoother when using Jenkins.
Let us know your questions or thoughts in the comments.
The Advanced Installer MSI Builder Plugin is open-source on GitHub. If you have any inquiries let us know.
Recommend
About Joyk
Aggregate valuable and interesting links.
Joyk means Joy of geeK