

Test pull requests with the Try in Web IDE GitHub action
source link: https://developers.redhat.com/articles/2021/10/07/test-pull-requests-try-web-ide-github-action
Go to the source link to view the article. You can view the picture content, updated content and better typesetting reading experience. If the link is broken, please click the button below to view the snapshot at that time.

Test pull requests with the Try in Web IDE GitHub action Skip to main content
Web-based, cloud-hosted integrated development environments (IDEs) can make development and collaboration more efficient if they are well integrated with version control. This article shows you how to use the Try in Web IDE GitHub action to test and comment on pull requests in your browser-based IDE. Examples are based on Red Hat CodeReady Workspaces running in the Developer Sandbox for Red Hat OpenShift.
Note: CodeReady Workspaces is Red Hat's supported version of Eclipse Che.
The Try in Web IDE GitHub action
The Try in Web IDE GitHub action
The Try in Web IDE GitHub action makes it easy to try a pull request in your browser-based developer environment. The GitHub action listens to pull request events and provides a comment or status check with a link. When you click the link, it opens the branch in a new web IDE workspace.
The Eclipse Che documentation repository has recently integrated this GitHub action into its workflow. You can view a recent pull request to try it yourself. Figure 1 shows a pull request comment created by the GitHub action. Clicking the badge opens a new workspace to try the pull request in the web browser.
 Figure 1: Clicking the badge creates a pull request comment.
Figure 2 shows a status check done by the GitHub action. Clicking the Details link opens a new workspace to try the pull request in the web browser.
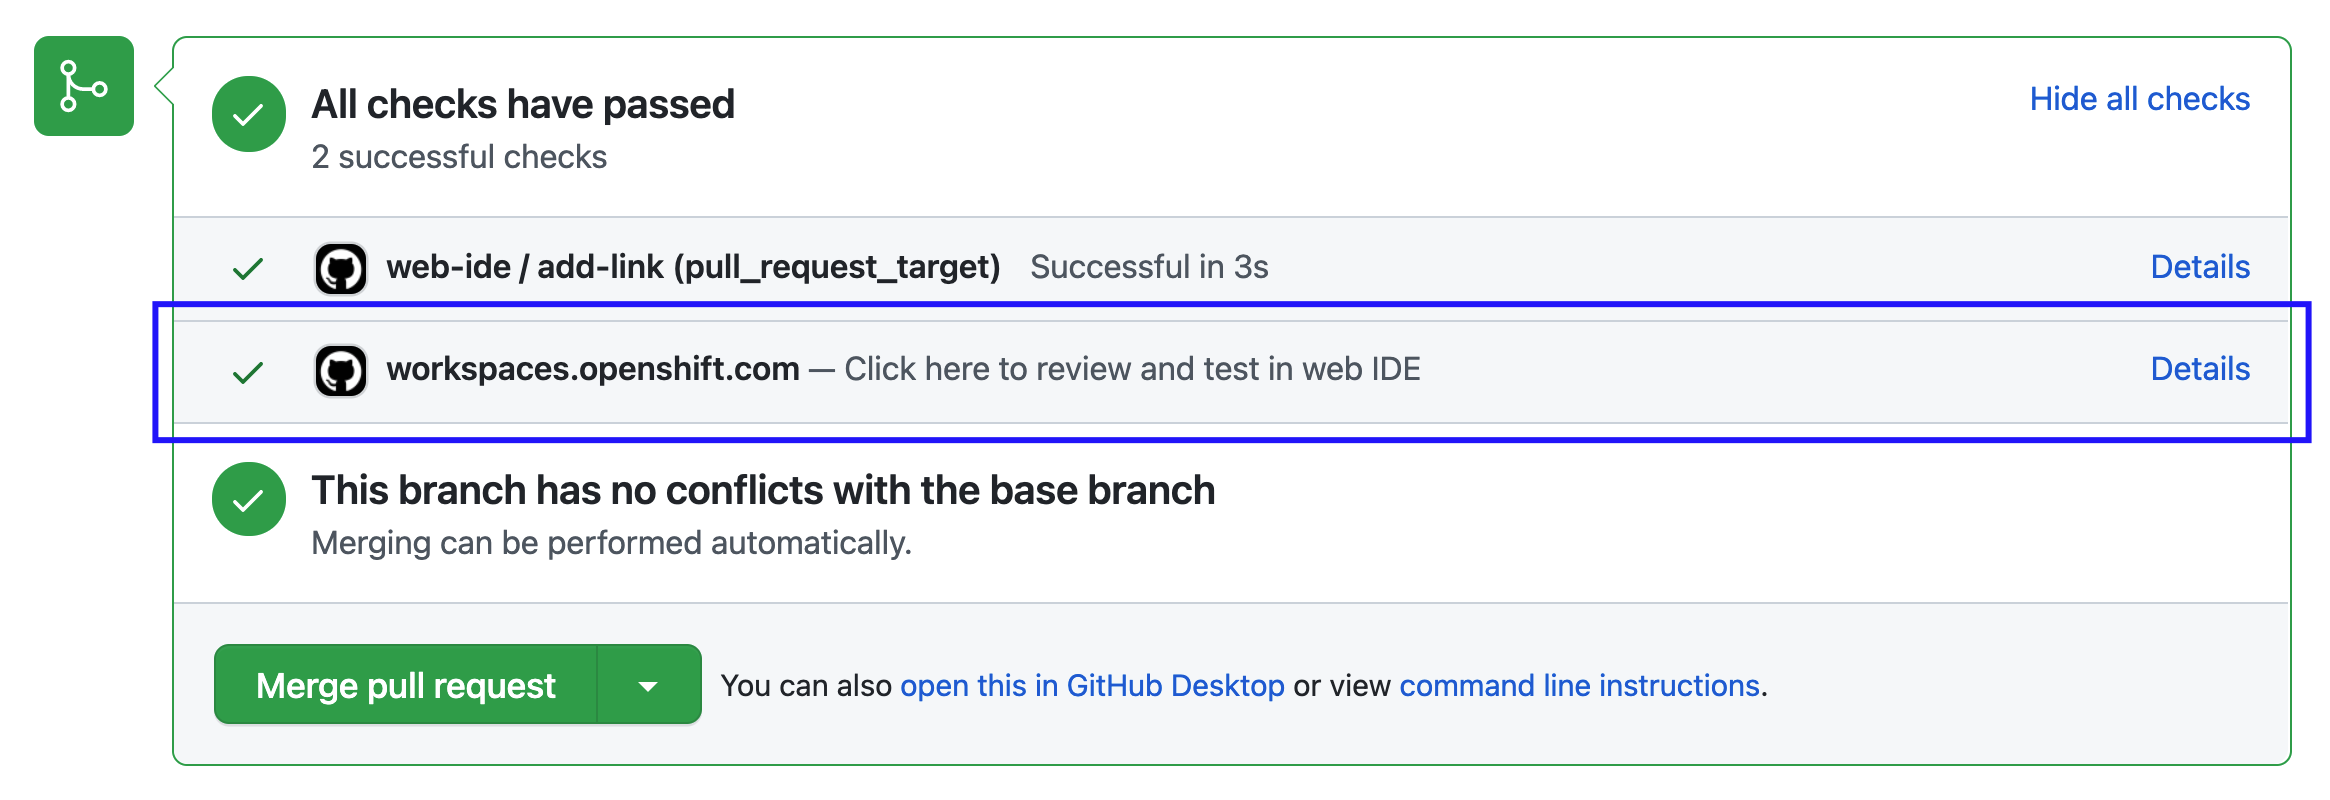 Figure 2: Click the Details link to see the pull request in a web browser.
Figure 3 shows the workspace created in CodeReady Workspaces in the Developer Sandbox. This is the web IDE workspace that opens in the web browser when you click either the badge from Figure 1 or the link from Figure 2. From here, you can try the pull request and test its correctness.
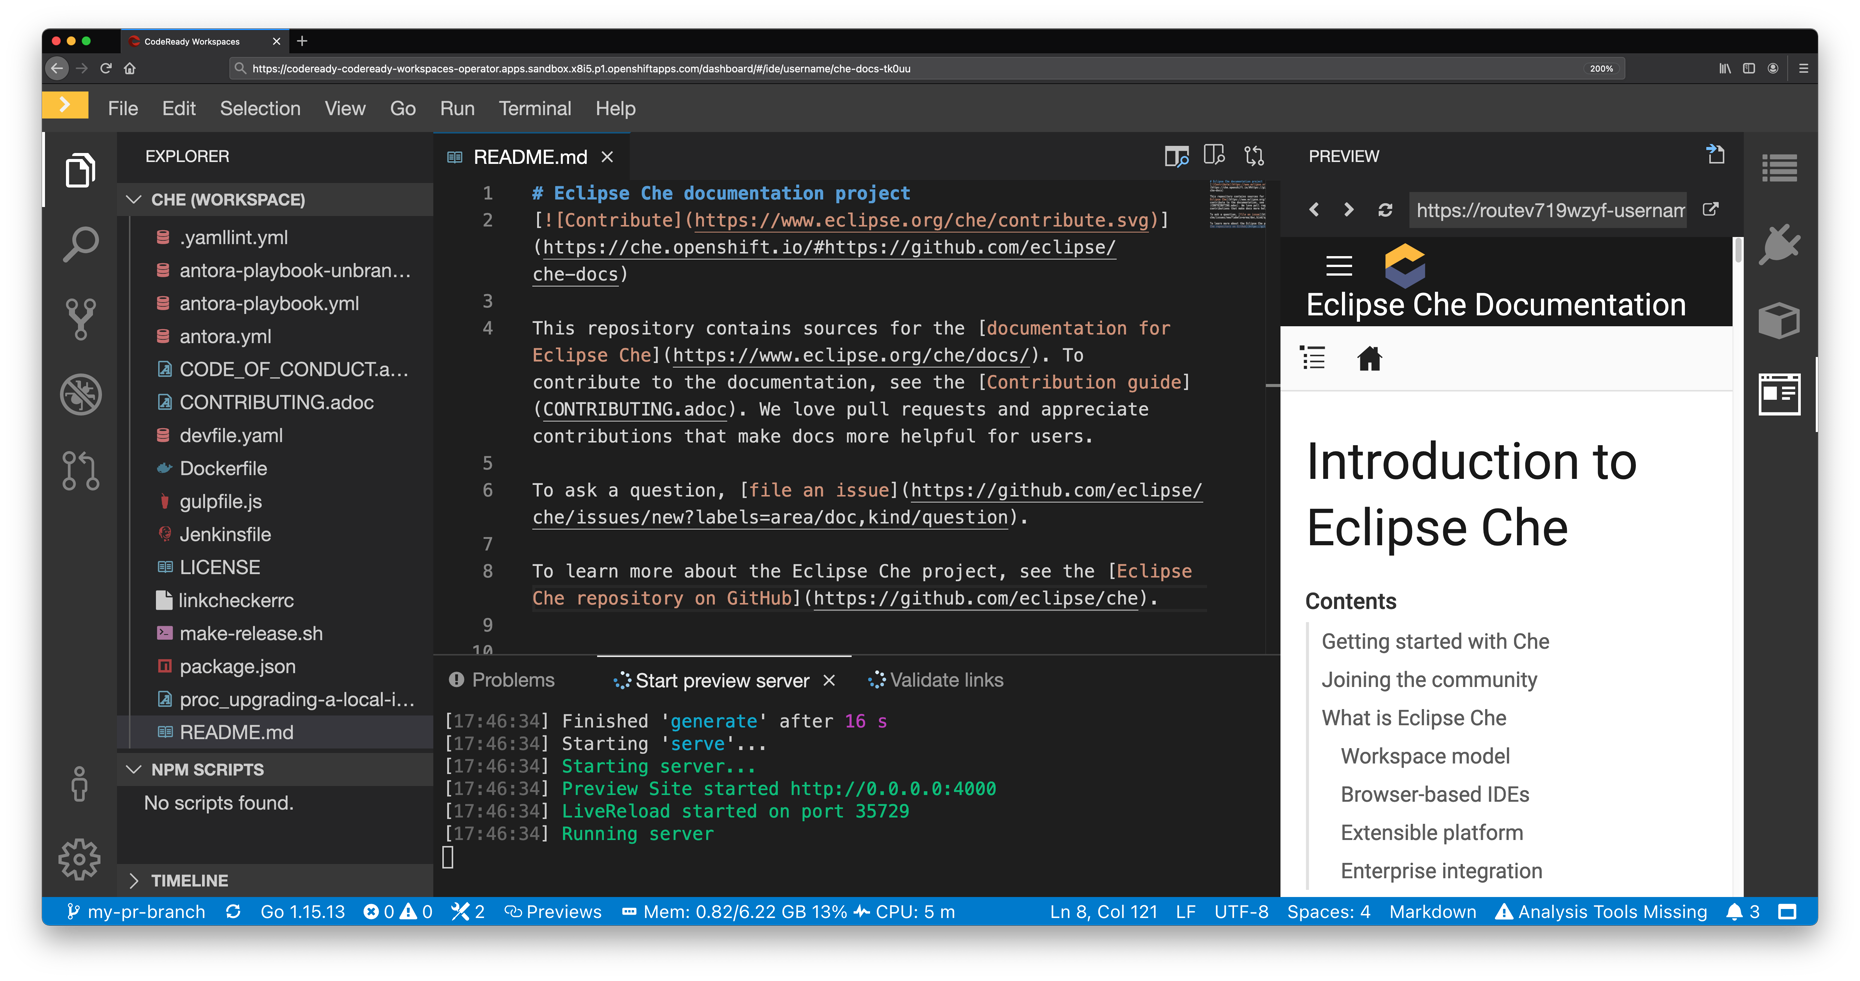 Figure 3: Try the pull request and test its correctness.GitHub actions in CodeReady Workspaces
GitHub actions in CodeReady Workspaces
This section shows you how to add the Try in Web IDE GitHub action to your GitHub repository's workflow. We'll integrate the GitHub actions with CodeReady Workspaces in the Developer Sandbox.
Prerequisites and setup
You will need a Red Hat account to use CodeReady Workspaces in the Developer Sandbox. Navigate to Developer Sandbox for Red Hat OpenShift, register for a free account, and launch your Developer Sandbox environment. Note that you must verify your identity with a phone number.
You also need an account on GitHub and a repository where you can integrate GitHub actions with your sandbox.
Finally, you should have a devfile in the root of your GitHub repository. We'll use the devfile very shortly.
Step 1: Create the GitHub workflow file
In your GitHub repository, create a .github/workflows directory if it does not exist already. Then, create a file named example.yml in .github/workflows with the following content:
name: Try in Web IDE example

on:
  pull_request_target:
    # Triggers workflow on pull request open
    types: [opened]

jobs:
  add-link:
    runs-on: ubuntu-20.04
    steps:
      - name: Web IDE Pull Request Check
        id: try-in-web-ide
        uses: redhat-actions/try-in-web-ide@v1
        with:
          # GitHub action inputs

          # required
          github_token: ${{ secrets.GITHUB_TOKEN }}

          # optional - defaults to true
          add_comment: true

          # optional - defaults to true
add_status: trueThis file defines a workflow named Try in Web IDE example, with a job that runs the v1 version of the Try in Web IDE GitHub action. The workflow is triggered on the pull_request_target event on the opened activity type.
Step 2: Configure the GitHub workflow file
You can further configure the workflow defined in example.yml to fit your needs. Consider adding more activity types within the on.pull_request_target.types field. Alongside the opened event, other events that you might find useful are reopened (which is triggered when the pull request is reopened) and synchronize (which is triggered when the pull request's tracking branch synchronizes with its source branch). The new types are added in the following code snippet:
...

on:
  pull_request_target:
    # Add multiple activity types
    types: [opened, reopened, synchronize]

...The add_comment and add_status GitHub action inputs can also be configured to customize whether the comment or status check is created in the pull request. For example, the following code snippet disables pull request comments:
        ...

        with:
          github_token: ${{ secrets.GITHUB_TOKEN }}
          add_comment: false
add_status: trueThe full table of inputs is available in the Try in Web IDE GitHub action documentation.
Step 3: Create a devfile
To define the development environment of the web IDE workspace, creating a devfile in the root of the repository is highly recommended. Configuring a devfile ensures that the workspace contains everything you need to effectively try and test the pull request, such as plug-ins, development commands, Kubernetes objects, and other aspects of the environment setup.
New to devfiles? See the article, CodeReady Workspaces devfile, demystified for an introduction to defining devfiles.
For example, specifying the Red Hat Java plug-in in the devfile provides features that Java developers use (for things like debugging, code completion, and so on) within the web IDE workspace.
Here is an example of a minimal devfile.yml file for a Java project:
apiVersion: 1.0.0
metadata:
  name: project-dev-environment
projects:
  - name: project-name-here
    source:
      type: git
      location: 'GITHUB REPOSITORY URL HERE'
components:
  - type: chePlugin
id: redhat/java/latestThis devfile defines the project name and source location, as well as the Java plug-in. Many more components can be added in a devfile to fine-tune the development environment for your specific project.
Conclusion
Conclusion
After you have completed the steps in this article, creating a new pull request will trigger the Try in Web IDE GitHub action and create a comment, status check, or both, depending on how you've configured the action inputs. With a Red Hat account, you can now try pull requests in a web-based IDE with the click of a link.
Recommend
About Joyk
Aggregate valuable and interesting links.
Joyk means Joy of geeK