
4

群晖 DSM v6.2 版本开启 SSH 获取 root
source link: https://vps.la/2021/10/07/%e7%be%a4%e6%99%96-dsm-v6-2-%e7%89%88%e6%9c%ac%e5%bc%80%e5%90%af-ssh-%e8%8e%b7%e5%8f%96-root/
Go to the source link to view the article. You can view the picture content, updated content and better typesetting reading experience. If the link is broken, please click the button below to view the snapshot at that time.

为什么要获取root?因为我要修正黑群晖获取CPU型号不正确。虽然使用没什么毛病,但是看着不爽。如果你也有同样的需求可以跟着步骤来先获取群晖 DSM v6.2 的root权限然后再去修正CPU型号不正确的问题。
开始前你需要准备Putty或者xshell终端连接工具;
0x01 开启SSH
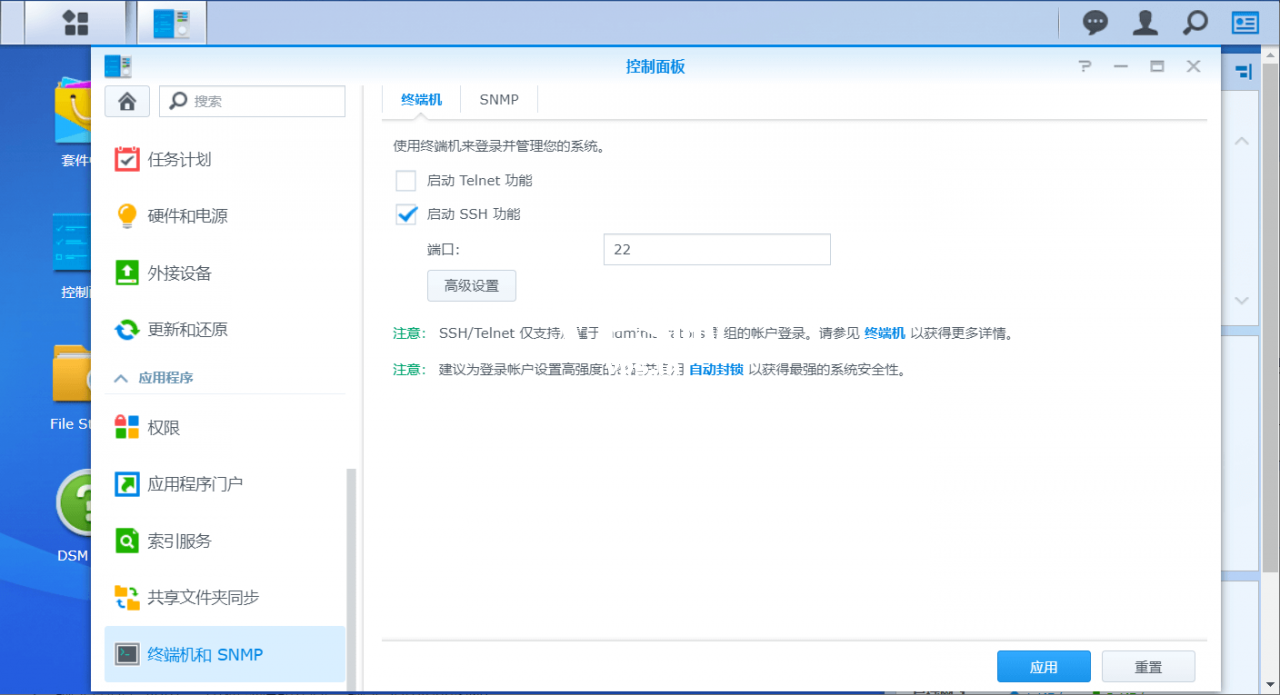
先在群晖系统里面开启SSH登录,桌面控制面板–>终端机和SNMP–>终端机–>勾选启动SSH功能,如下图;
0x02 开始获取
使用终端工具连接到 你的群晖系统。
- sudo –i # 切换到临时root权限,输入命令后输入你当前用户的密码即可等待命令提示变更为root;
- cd /etc/ssh # 进入到/etc/ssh目录;
- chmod 755 sshd_config # 设置sshd_config文件的权限为755;
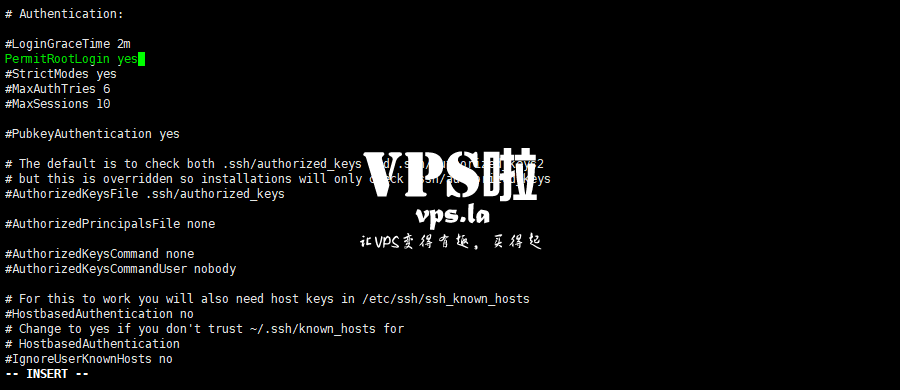
- vim /etc/ssh/sshd_config # 编辑sshd_config文件;

打开sshd_config 找到 #PermitRootLogin prohibit-password 修改为 PermitRootLogin yes 如下图,保存退出;
0x03 重设密码
编辑保存完sshd_config文件后,在当前命令行键入:
- synouser —setpw root xxx # 设置root的密码,xxx为你要为root账户设置的密码;
- reboot # 重启群晖系统,或者进入群晖系统重启即可;
未经允许不得转载:VPS啦 » 群晖 DSM v6.2 版本开启 SSH 获取 root
Recommend
About Joyk
Aggregate valuable and interesting links.
Joyk means Joy of geeK