

Attaching to a Raspberry Pi's Serial Console (UART) for debugging
source link: https://www.jeffgeerling.com/blog/2021/attaching-raspberry-pis-serial-console-uart-debugging
Go to the source link to view the article. You can view the picture content, updated content and better typesetting reading experience. If the link is broken, please click the button below to view the snapshot at that time.

Attaching to a Raspberry Pi's Serial Console (UART) for debugging
October 1, 2021
Sometimes a Pi just won't boot. Or it'll boot, but it'll do weird things. Or you don't have an HDMI display, and you can't log into your Pi via SSH. Or maybe you're like me, and someone 'accidentally' cut your Raspberry Pi in half, and you want to see what it's doing since it won't boot anymore.
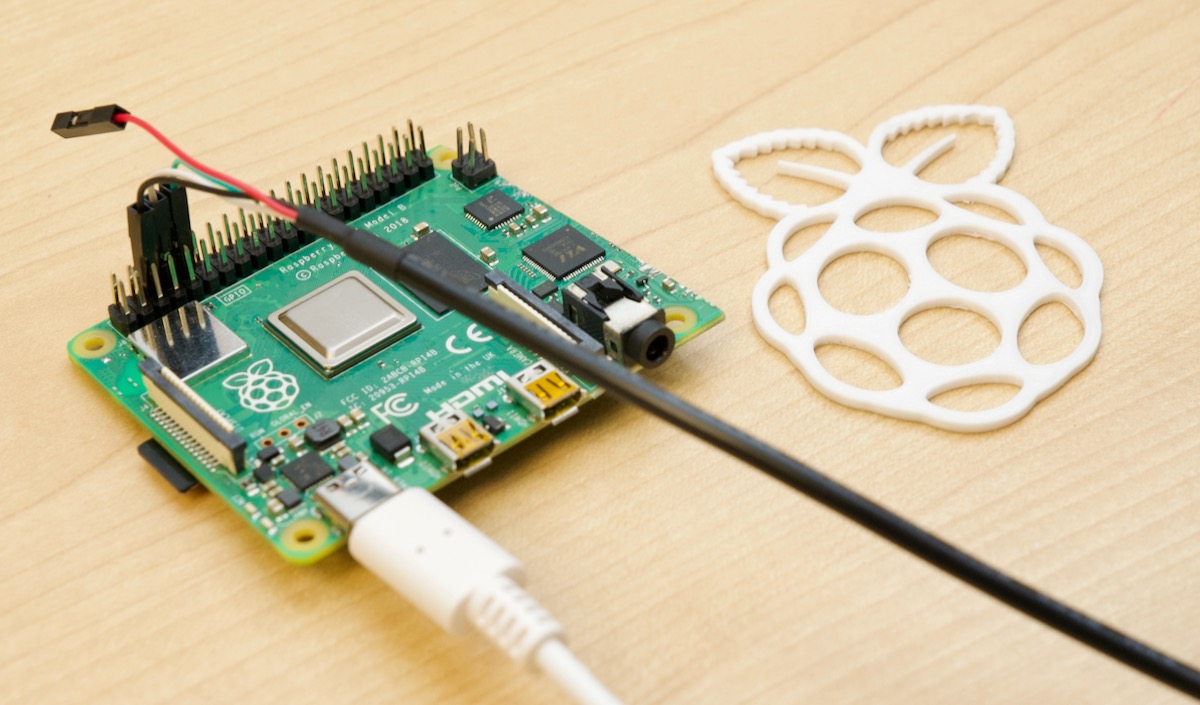
The Raspberry Pi can output information over a 'serial console', technically known as a UART (Universal Asynchronous Receiver/Transmitter). Many devices—including things like storage controller cards, which in a sense run their own internal operating system on an SoC—have a 'UART header', which is typically three or four pins that can connect over the RS-232 standard (though many do not operate at 12v like a traditional serial port! Use a USB-to-TTL adapter like the one I mention below).
Simply Embedded has a great overview of UART if you want to learn more.
If you want to access the Pi's serial console, here's what you need to do:
- Buy a USB to serial adapter. I bought the Adafruit 954 USB-to-TTL Serial Cable.
- Pop the Pi's microSD card into another computer, edit the
config.txtfile inside thebootvolume, and add the following line at the bottom:enable_uart=1. - Save that change, eject the microSD card, and stick the card back into the Pi.
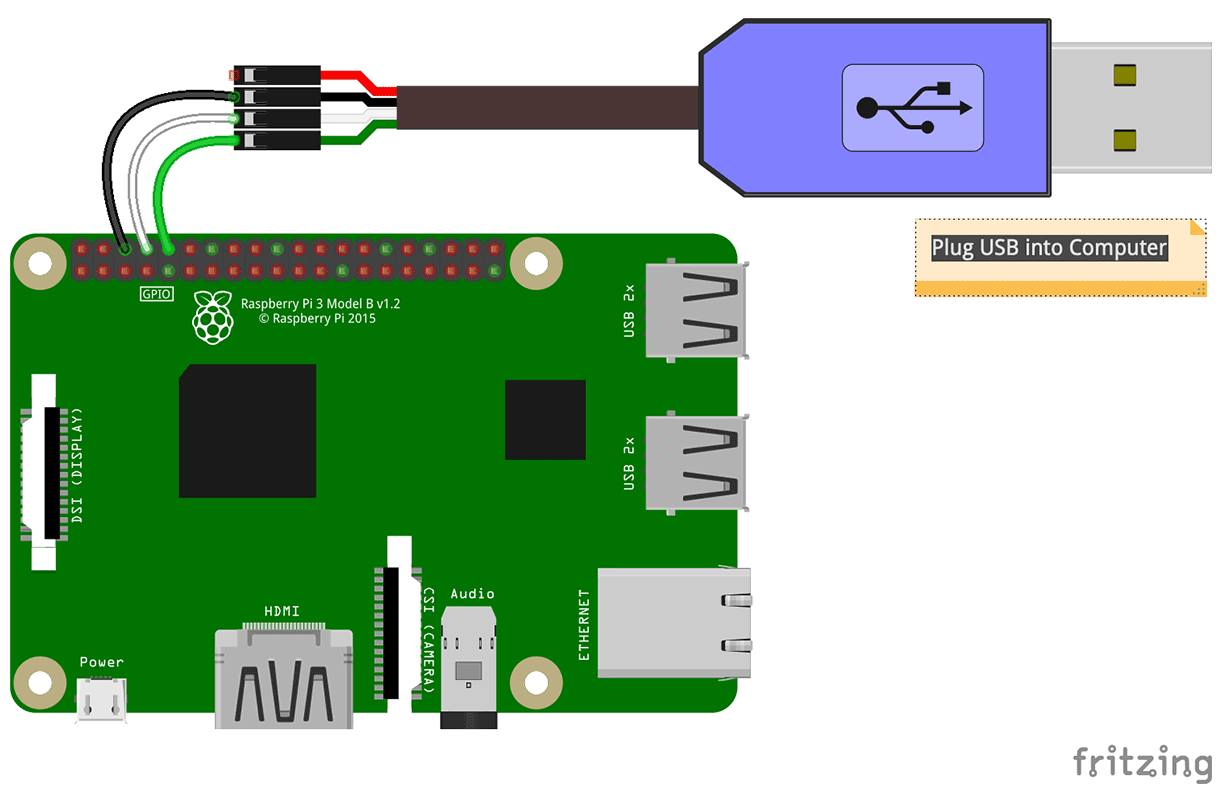
Plug the USB to serial adapter into the pins as pictured below on the Pi (Black to GND, White to GPIO 14/pin 8 (UART TX), and Green to GPIO 15/pin 10 (UART RX)):
Open a terminal window on your Mac, and run
ls /dev | grep usb- Note the
tty.usbserial-andcu.usbserial-numbers in there. That's the device you'll connect to on your Mac.
There are a number of ways to interact with the serial console on a Mac (and most are the same as on Linux, with sometimes minor usage differences), but the two I've used in the past are minicom and screen.
Use minicom
- Install minicom (
brew install minicom) so you can emulate a terminal connected over serial. - Run
minicom -b 115200 -D /dev/tty.usbserial-0001 - Boot the Pi.
- Within a few seconds, you should see data in your session.
Note: In metacom, the Meta key is mapped to 'Esc' by default, at least on macOS. So press 'Esc-Z' to get help.
Use screen
- Run
screen /dev/tty.usbserial-0001 115200 - Boot the Pi.
- Within a few seconds, you should see data in your session.
Note: To exit the screen session, press Ctrl-A, then Ctrl-K, and confirm you want to exit.
See also: Adafruit's guide to using a serial console on the Pi.
I've done this process a few times in the past, but I've grown tired of looking back at old notes to remember specifically which pins to use on the GPIO, since I don't do it that often and the pins are unlabeled on most Pis. Hope this helped!
Recommend
-
132
Attaching React.js to a template rendered on the server with Twig React.js is a JavaScript view library that allows developers to create interfaces is a structured way based on a hierarch...
-
6
Introduction Serial communication, while old, is still used in many embedded systems and microcontrollers. It is commonly used with Arduino, CircuitPy, and similar boards. We will look at how to connect, send, and receive data using...
-
7
Raspberry PI + Xbee: UART / Serial howto raspberry pi rpi xbee...
-
12
Sun Ultra 60 serial console login with a VT132 I recently assembled a VT132 and have been connecting it to various things to enjoy some serial terminal goodness. I’ve...
-
14
EC2 總算支援透過 Serial Console 操作了... 以往 Amazon EC2 的機器爛到開不起來時只能「看」到 Console 的輸出,然後要把 root volume 掛到其他機器上修正,接著再掛回來 (然後沒修好就要再重複......
-
8
Raspberry Pi CM4 based controller offers isolated serial and DIO Jun 17, 2021 — by Eric Brown — 759 views ...
-
8
Enabling serial tty login to a Raspberry Pi Depending on what Raspbian version you are running on your Pi, the approach for enabling a serial tty login via a VT terminal differs, but on current/recent versions you can enable...
-
5
Serial Console Cable for Aruba AP-205H Serial Console Cable for Aruba AP-205H 2022-10-17 20:19:14 #网络
-
9
Unintentionally BREAKing a serial console I heard about a neat bug once that was caused by the interaction of some hardware that was missing some electronics and some software which was just doing what it was told. It had to do with t...
-
9
News Attacker uses the Azure Serial Console to gain access to Microsoft VM Using...
About Joyk
Aggregate valuable and interesting links.
Joyk means Joy of geeK