

How do I replace my hacked WordPress site? – DreamHost Knowledge Base
source link: https://help.dreamhost.com/hc/en-us/articles/214823608-How-do-I-replace-my-hacked-WordPress-site-
Go to the source link to view the article. You can view the picture content, updated content and better typesetting reading experience. If the link is broken, please click the button below to view the snapshot at that time.

Overview
The following sections describe the steps on how to manually reinstall a new copy of WordPress to your hacked site and should be done in order as they appear.
If you're not comfortable fixing your WordPress site on your own, you can request DreamHost's Hacked Site Repair (a professional malware removal service). DreamHost experts will access your account and make the necessary repairs to get you back online quickly. See the Terms of Service page for more information.
DreamPress sites
If you are a DreamPress customer and believe your site may be hacked, please contact support.
Step 1 — change your WordPress theme
If possible, log into your WordPress dashboard at example.com/wp-admin. Once logged in, navigate to ‘Appearance > Themes’ to change your theme to the current default theme. Changing your theme now makes the process easier for you later.
Step 2 — change your passwords
There are a few general notes on passwords you should always follow:
- Don't reuse passwords – Most people use the same password in multiple places. Don't do it. You should make sure that your passwords are all unique from one another. This way, if one password is compromised, your other logins will remain secure.
- Use strong passwords – You can generate them from places like passwordsgenerator.net. At the very least, your passwords should be 8 characters long and consist of a mix of numbers and letters.
- Use a password tool – LastPass and OnePassword are great for protecting your passwords and generating new ones.
You should change both your FTP user password as well as your database user password.
Changing the FTP user password
The following article walks you through how to change this password:
For greater security, if your user is currently an FTP-only user, change it to an SFTP or SSH user at the same time you change the password. View the Creating a user with Shell (SSH) access article for further details.
Changing the database user password
View the Finding your MySQL credentials article for instructions on how to obtain your database username and change its password.
Updating your wp-config.php file
When you change the database user’s password, you will also need to edit your wp-config.php file to reflect this new password. There is information on how to edit the wp-config.php file to change the database password at Editing wp-config.php. You can also view the WordPress wp-config article for further details.
If you have multiple users for your database, make sure that you are changing the correct user's password. You can check which database user logs into your database for your WordPress install by looking at the wp-config.php file.
If there is anything like the following in your file, you have definitely been hacked, and you MUST remove it ASAP:
<?php eval(gzinflate(base64_decode('dVRtb6NGE.....')));?>
Base64 hacks are insidious and leave a backdoor that hackers can use again and again on your site. Delete that section entirely, or better yet, just rebuild the wp-config.php.
Step 3 — take the hacked code offline
- Log into the web server via FTP.
- Find your domain's directory (folder) which is most likely a folder with your sites name. If you’re in the correct directory, you’ll see a list of files and directories beginning with wp-. It’s also possible you installed WordPress in a subdirectory such as /blog.
- Rename the directory (folder) where WordPress is installed. If it’s your primary directory, rename it example.com_HACKED. If it’s in a subdirectory, rename it to example.com/blog_HACKED.
When you rename the web directory, your site will immediately be taken offline.
- Create a new, empty domain directory with the same directory name as the old one.
Step 4 — install a new unhacked copy of WordPress
Reinstall WordPress in one of two ways:
- Manually (using FTP or wp-cli)
- Using the One-Click Installer
Manually reinstalling WordPress
View the following article for details on how to manually reinstall WordPress:
When removing the current One-Click Install, make sure to click the Remove from List button. DO NOT click the Delete all Files as that will permanently remove your website files.
Step 5 — connect your new install to your old database
You must connect the new files you’ve downloaded to your existing database. To do this, you need the following information:
- Database name
- Database username
- Database user password
- Hostname
- Table prefix
This information is located in your former wp-config.php file:
- Log into your server via FTP.
- Navigate to your former hacked directory which you renamed to example.com_HACKED.
- Open the wp-config.php file. You’ll find all of the values listed above.
- The table prefix line begins with $table_prefix =.
- For DreamHost installs, the table prefix starts with wp_ and is followed by a series of random numbers and letters. For example: wp_17Dz9g
- Navigate to your new WordPress install directory.
- Delete or rename the wp-config.php in that new folder.
- Load your site.
You are prompted to select a language:
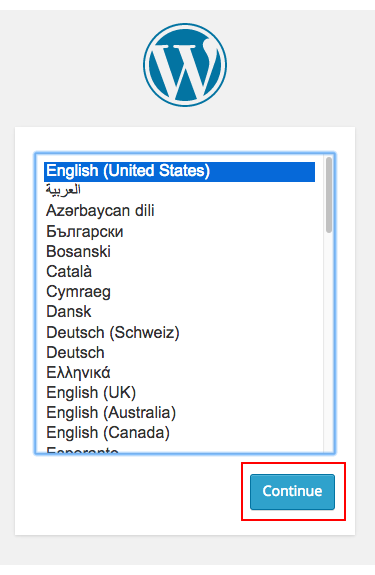
- Select your preferred language, and then click Continue.
The WordPress setup page opens:
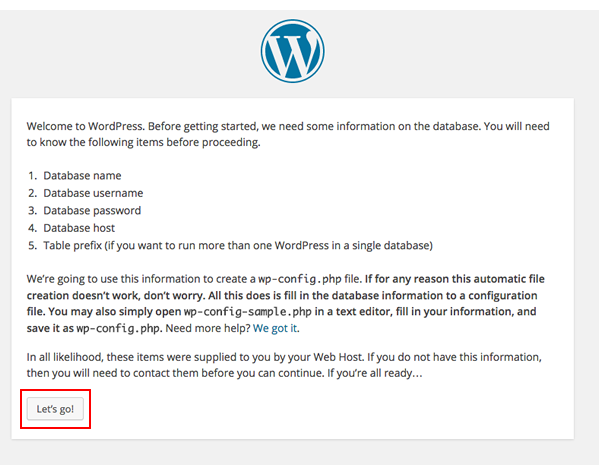
- Click Let’s go!
The following page appears asking you to enter your credentials:

- Enter the required information, and then click Submit.
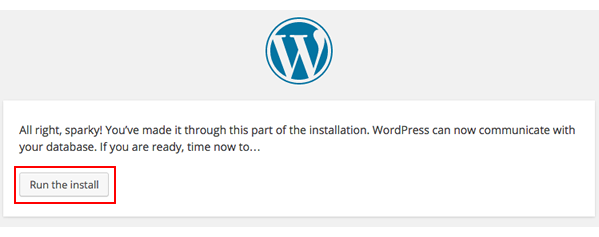
- Click the Run the install button.
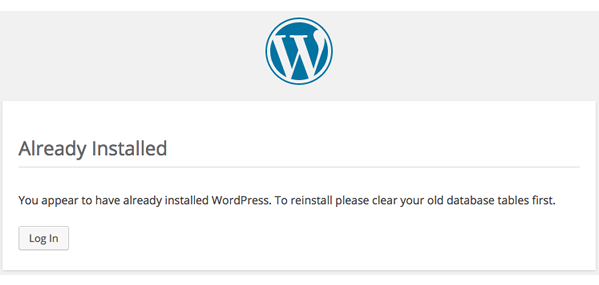
Since you already have data, a message appears indicating that WordPress is already installed, which means that you've successfully connected your WordPress installation to your old database:
Step 6 — add your previous content
Your WordPress site is now fully installed and connected to your old database. However, it is not using your former theme, plugins, or previously uploaded images.
This step describes how to add all of your previous themes, uploads, and plugins.
Installing your previous theme
WordPress themes are vulnerable to hacking. Always download and install a new copy of your theme rather than moving the theme files from your old install.
If you changed your theme to the default theme before you started, your site should load your posts, but without the correct theme.
If your specific theme is not currently installed, you can install it through the WordPress dashboard. View the following page for instructions on how to install a different theme:
If you did not change the theme to the default theme before beginning, the site may load a blank white page. This is because your database is looking for a theme that is no longer installed.
Since you cannot access the WordPress dashboard at this point, you will need to download a copy of your chosen theme (usually delivered in a ZIP format). You can upload and install the theme from within the WordPress dashboard. You can also unzip it on your computer, and then log into your server using your FTP account to upload the theme to the themes directory. It’s located in the following folder:
example.com/wp-content/themes
So, if your theme name is /my_theme, it should look like this:
example.com/wp-content/themes/my_theme/
Once you have your chosen theme installed and activated, you should be able to load your site and see your posts.
Copying your previous uploads
Your uploads (images and other media) are still in the old hacked install's directory. Using FTP, copy the contents from the old folder to the new one. For example:
example.com_HACKED/wp-content/uploads
example.com/wp-content/uploads
Please check over the files you are moving and make sure they are all yours. If you move hacked code into your new install, it will infect your new site. The /uploads directory primarily contains media, so the files should end with extensions that indicate what kind of file they are (.jpg for a JPEG image, for example, or .mp3 for a MP3 audio file). BE VERY CAUTIOUS ABOUT FILES ENDING IN .PHP IN THE /uploads DIRECTORY.
Installing your former plugins
The final step is to install the WordPress plugins that you need for your site. Again, it is very important to install brand-new copies of your plugins, rather than copying over the files from the hacked install.
You can install the plugins from your new WordPress dashboard. Only install the plugins you know you need and use. Cutting down on inactive plugins limits a hacker's access to your install and makes WordPress run faster as well.
Step 7 — finish successfully
If everything goes well, you now have a brand-new install of WordPress, connected to your old database and with all your uploaded content, your chosen theme, and your chosen plugins.
See also
Recommend
-
4
The following provides information to help you prepare your website for Debian Stretch. What is changing? Any new private server purchased after March 9th, 2020 runs the operating system Debian Stretch. The former operat...
-
13
The following provides information to help you prepare your site for the Ubuntu upgrade from Trusty Tahr to version 18.04.1 LTS (aka Bionic). What to expect DreamHost will contact you via email in advance of the upgrade....
-
12
How do I upgrade a WordPress site to DreamPress? Overview You can easily transfer any domain to DreamPress that is currently using WordPress as a
-
14
Installing WordPress using wp-cli and SSH Overview wp-cli is a command line tool, buil...
-
13
How to log into your WordPress site Overview You can log into any WordPress site at the following address: example.com/wp-login.php Replac...
-
11
Difference between WordPress.com and WordPress.org Overview WordPress offers two versions of its product: WordPress.com and WordPress.org. The following is a brief comparison of th...
-
8
How to manually migrate WordPress to DreamHost Overview You can now migrate your own WordPress site to DreamHost for free, using the DreamHost Automated Migration Plugin. The...
-
8
Removing the WordPress comments box Overview This article describes how to use built-in WordPress tools to remove the comments box from pages and posts.
-
13
How do I edit my WordPress users? Overview The following describes how to edit your WordPress user in the WordPress admin dashboard in order to change your display name, email addr...
-
3
Overview If you suspect that your website has been hacked, the best thing to do is to reinstall any software application (such as WordPress or Joomla). The steps below apply primarily to reinstalling WordPress, since that is th...
About Joyk
Aggregate valuable and interesting links.
Joyk means Joy of geeK