

Uploading a plugin manually
source link: https://help.dreamhost.com/hc/en-us/articles/360022932212-Uploading-a-plugin-manually
Go to the source link to view the article. You can view the picture content, updated content and better typesetting reading experience. If the link is broken, please click the button below to view the snapshot at that time.
Uploading a plugin manually
Overview
The easiest way to install a plugin is within your WordPress dashboard. However, some 3rd party plugins may need to be installed manually on the server. This article walks you through how to install and activate a plugin manually.
Downloading the plugin
First, you must download the plugin. If you're obtaining this from a 3rd party, ask them for the file. It will most likely be in zip format.
You can also download a plugin if it appears in the plugin repository. If so, just click the Download button on the plugin page to download its zip file.

This downloads the zip file of the plugin to your computer's Downloads directory. Navigate to that directory.
Windows
Right click the file and choose 'Extract All'.
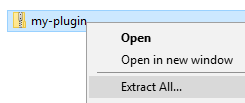
This opens a pop-up.
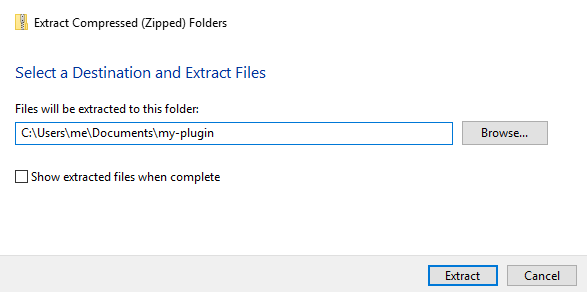
It asks you where you want to extract the files to. It's usually fine to click Extract which places them in the current directory.
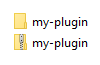
This creates a new UN-zipped folder containing all of your plugin files. You can now proceed with uploading this folder to your server.
Uploading to your WordPress site
Log into your website via FTP. You can either use the file manager option in the panel or a 3rd party FTP client.
The examples below use the panel's file manager option:
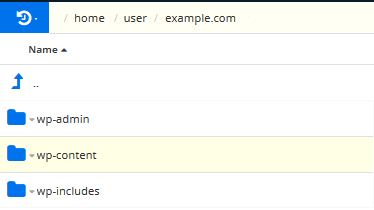
Once logged in, navigate to the wp-content directory.

Next, click into the plugins directory. In this folder you'll see your existing plugins.
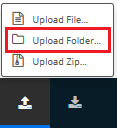
On the bottom left, click the Upload button. In the pop-up, click 'Upload Folder'. This opens a window where you can navigate to the location you extracted the zip file above.
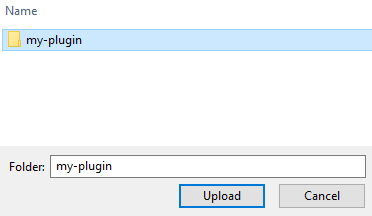
Once found, click 'Upload'.
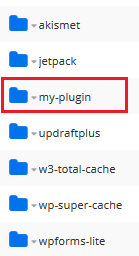
You should now see the folder listed in your FTP client.
Activating the plugin
Now that the plugin has been uploaded, you can activate it within your WordPress dashboard.
- Log into your WordPress site at example.com/wp-login.php.

- Navigate to the 'Plugins > Installed Plugins' page.

-
Click the Activate button under your plugin.
Did this article answer your questions?
Recommend
About Joyk
Aggregate valuable and interesting links.
Joyk means Joy of geeK