
2

HarmonyOS实战—实现相亲APP
source link: https://my.oschina.net/xdr630/blog/5191383
Go to the source link to view the article. You can view the picture content, updated content and better typesetting reading experience. If the link is broken, please click the button below to view the snapshot at that time.
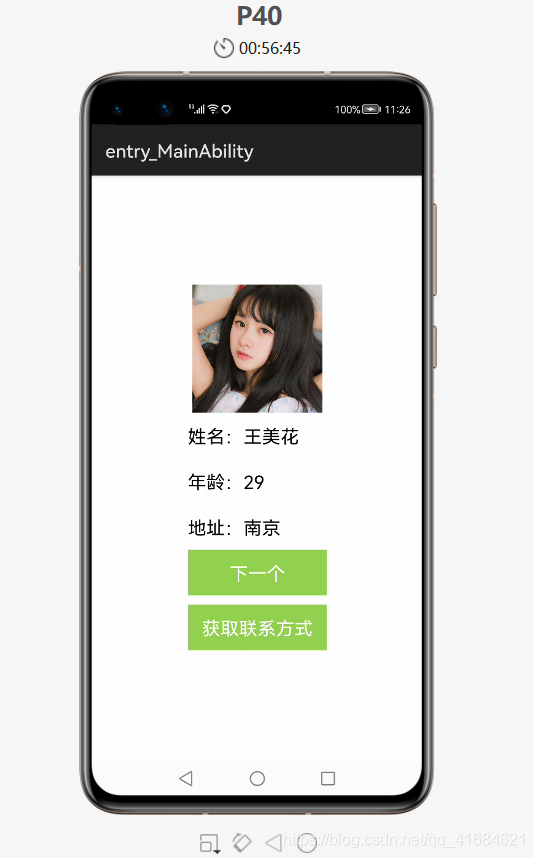
简易版 相亲APP
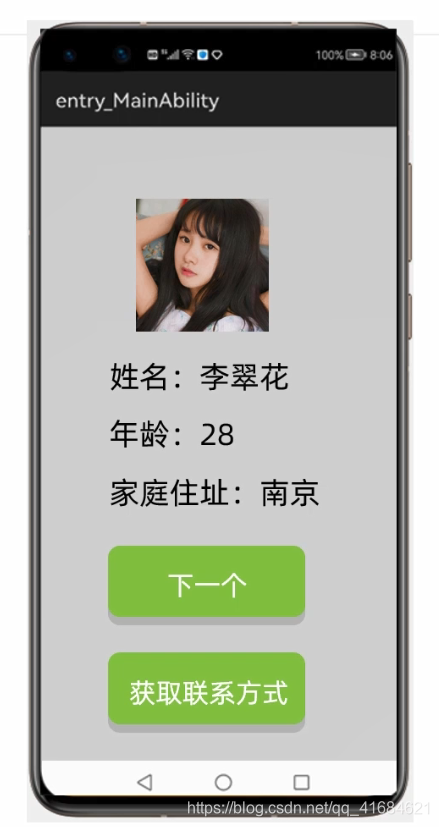
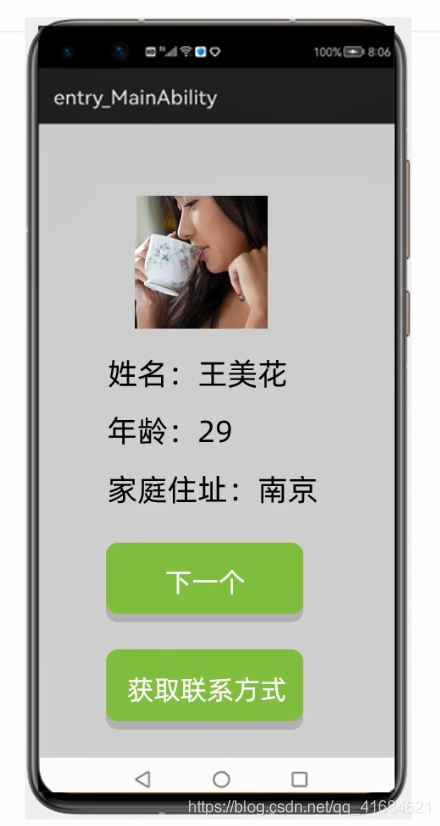
- 实现如下效果:
- 如果喜欢就点击下面的“联系方式”,不喜欢就点击“下一个”
1. 布局实现
- 新建项目:
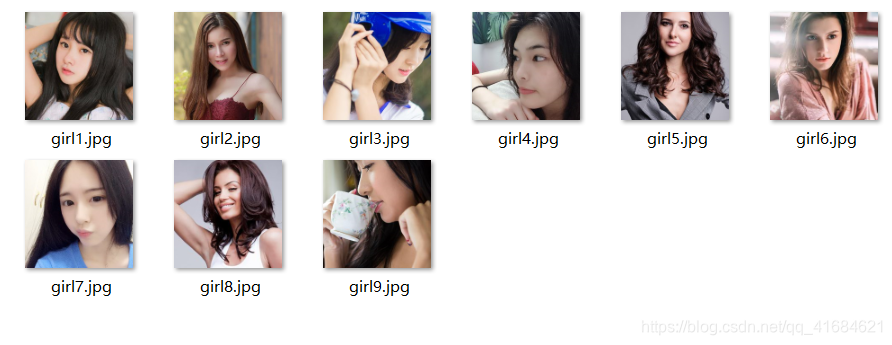
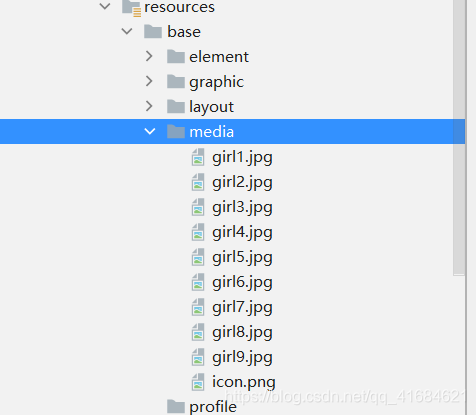
MakeFriendsApplication - 把以下九个
girl图片复制到media文件夹下
- 有需要上面图片素材的小伙伴可以自取:https://www.aliyundrive.com/s/j59dy5redPR
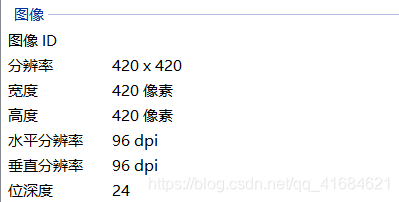
- 当然也可以自己在网上找,图片信息如下:
- 可以在上面的实现看到布局是由:一个图片+三个文本+两个按钮 组成的
- 布局实现:
ability_main
<?xml version="1.0" encoding="utf-8"?>
<DirectionalLayout
    xmlns:ohos="http://schemas.huawei.com/res/ohos"
    ohos:height="match_parent"
    ohos:width="match_parent"
    ohos:alignment="center"
    ohos:orientation="vertical">

    <Image
        ohos:id="$+id:img"
        ohos:height="match_content"
        ohos:width="match_content"
        ohos:image_src="$media:girl1"/>

    <Text
        ohos:id="$+id:name"
        ohos:height="50vp"
        ohos:width="150vp"
        ohos:text="姓名:王美花"
        ohos:text_size="20fp"/>

    <Text
        ohos:id="$+id:age"
        ohos:height="50vp"
        ohos:width="150vp"
        ohos:text="年龄:29"
        ohos:text_size="20fp"/>

    <Text
        ohos:id="$+id:address"
        ohos:height="50vp"
        ohos:width="150vp"
        ohos:text="地址:南京"
        ohos:text_size="20fp"/>

    <Button
        ohos:id="$+id:next"
        ohos:height="50vp"
        ohos:width="150vp"
        ohos:background_element="#92D050"
        ohos:text="下一个"
        ohos:text_size="20fp"
        ohos:text_color="#FFFFFF"/>

    <Button
        ohos:id="$+id:get"
        ohos:height="50vp"
        ohos:width="150vp"
        ohos:background_element="#92D050"
        ohos:text="获取联系方式"
        ohos:text_size="20fp"
        ohos:text_color="#FFFFFF"
        ohos:top_margin="10vp"/>

</DirectionalLayout>
2. 核心业务逻辑实现
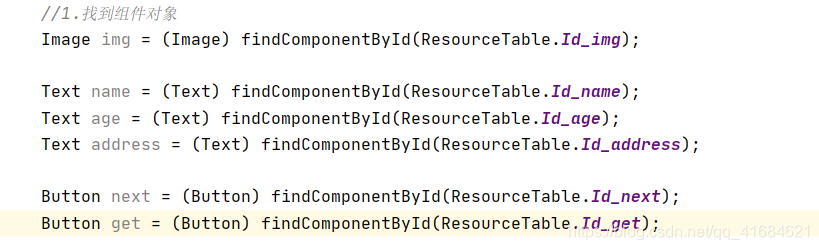
- 先找到组件对象
- 业务:点击了按钮“下一个”就要修改上面的信息,能不能把上面的信息看作成一个整体的对象? 现在有9个相亲对象,点击“下一个”的时候,就会随机把一个相亲对象的信息去显示在上面。
- 创建一个Javabean类去描述女朋友信息,有了Javabean类后才能在代码中创建对象

- 在
domain中新建类名为:GirlFriend,在类中的属性有哪些? - 如:图片、姓名、地址、年龄都是GirlFriend类中的属性
- 在资源管理器中获取图片,发现
girl图片是int类型的

- 所以在JavaBean中
GirlFriend类中图片类型使用int类型
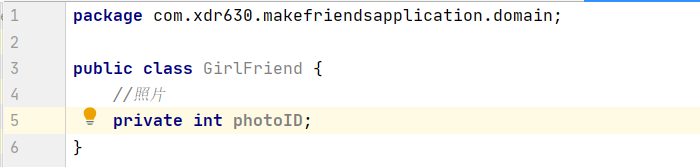
- 其他属性使用对应的类型
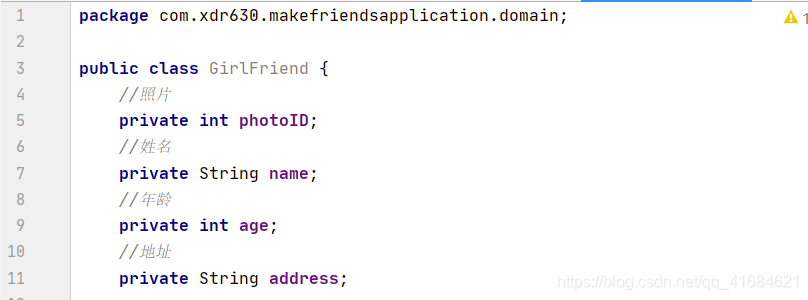
- 最后生成标准的JavaBean即可
package com.xdr630.makefriendsapplication.domain;

public class GirlFriend {
    //照片
    private int photoID;
    //姓名
    private String name;
    //年龄
    private int age;
    //地址
    private String address;

    //空参 + 全参:alt + insert

    public GirlFriend() {
    }

    public GirlFriend(int photoID, String name, int age, String address) {
        this.photoID = photoID;
        this.name = name;
        this.age = age;
        this.address = address;
    }

    public int getPhotoID() {
        return photoID;
    }

    public void setPhotoID(int photoID) {
        this.photoID = photoID;
    }

    public String getName() {
        return name;
    }

    public void setName(String name) {
        this.name = name;
    }

    public int getAge() {
        return age;
    }

    public void setAge(int age) {
        this.age = age;
    }

    public String getAddress() {
        return address;
    }

    public void setAddress(String address) {
        this.address = address;
    }
}
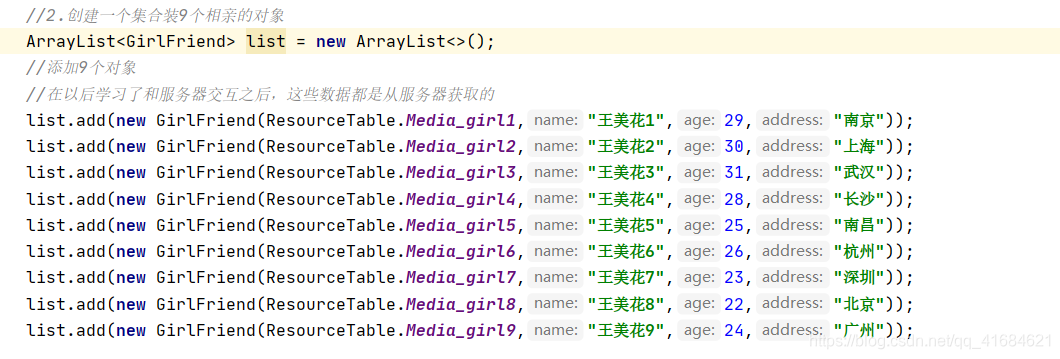
- 创建好了Javabean,就可以创建一个集合装9个相亲的对象,使用集合来存储了,
ArrayList,泛型就可以直接写创建好的GirlFriend类

- 在以后学习了和服务器交互之后,这些数据都是从服务器获取的,就不是一个一个添加了
- 下面就是手动添加数据来源
- 创建一个女朋友对象(
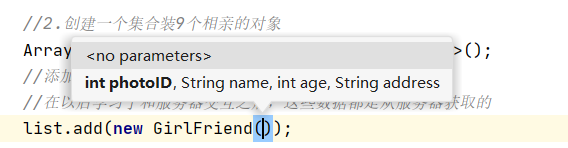
new GirlFriend)并添加到list当中 - 为了方便,省的去查看Javabean中属性的排序,
Ctrl + P就可以查看参数了
- 添加完成
9个对象
- 接着给按钮添加点击事件,两个按钮都要添加,分别是“
next”和“get”按钮 - 实现本类中点击事件

- 当
next按钮被点击后,就会执行本类中的onClick方法

get按钮同上也要添加单击事件

- 然后在
onClick方法中判断点击是next按钮 或get按钮 - 因为在
onClick方法中要用到按钮的对象,所以把按钮的对象提升为 成员变量 才能在onClick方法中被访问的到,用到哪个就提哪个,这些组件都用的到,所以都提为成员变量。 - 在下面
onClick方法当中,要从集合中获取girl信息,所以集合也要提为成员变量
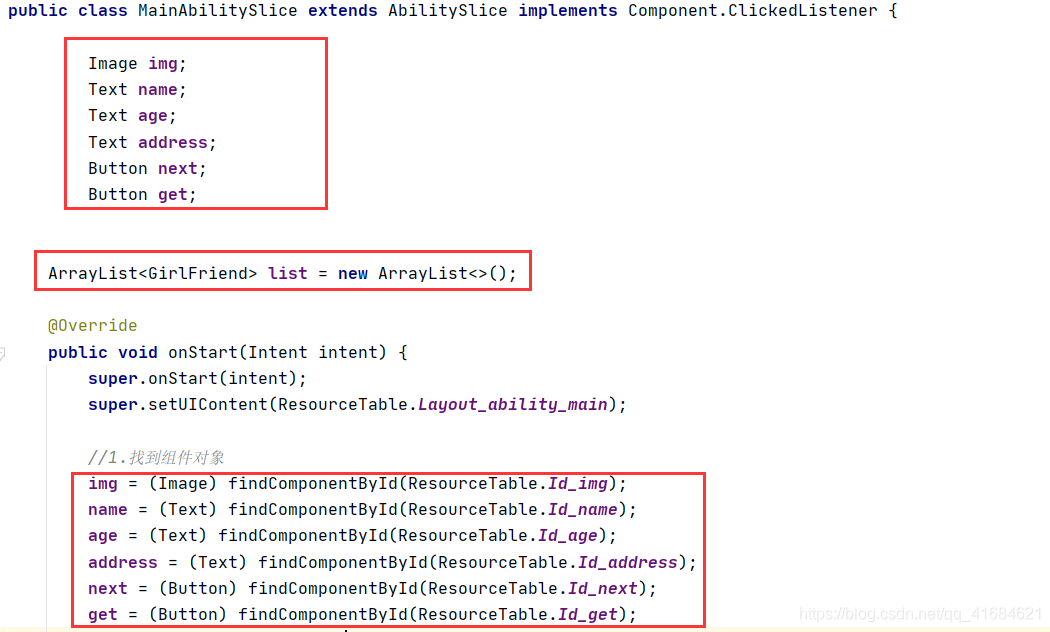
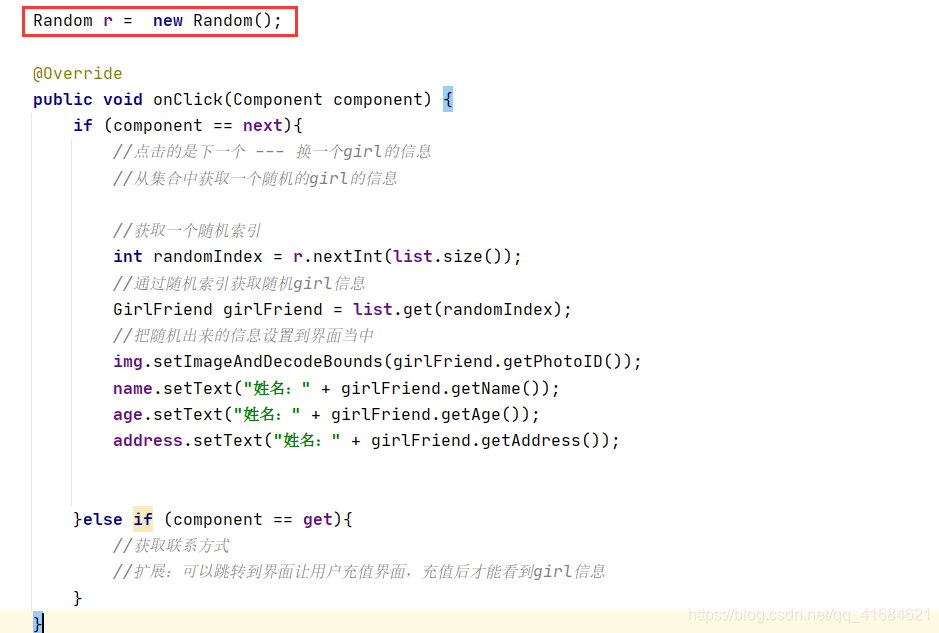
Random对象也放在成员位置,表示在程序启动之后就创建了一个,如果放在onClick方法中,当点击一次就创建一次,内存冗余。
MainAbilitySlice
package com.xdr630.makefriendsapplication.slice;

import com.xdr630.makefriendsapplication.ResourceTable;
import com.xdr630.makefriendsapplication.domain.GirlFriend;
import ohos.aafwk.ability.AbilitySlice;
import ohos.aafwk.content.Intent;
import ohos.agp.components.Button;
import ohos.agp.components.Component;
import ohos.agp.components.Image;
import ohos.agp.components.Text;

import java.util.ArrayList;
import java.util.Random;

public class MainAbilitySlice extends AbilitySlice implements Component.ClickedListener {

        Image img;
        Text name;
        Text age;
        Text address;
        Button next;
        Button get;

        ArrayList<girlfriend> list = new ArrayList<>();

    @Override
    public void onStart(Intent intent) {
        super.onStart(intent);
        super.setUIContent(ResourceTable.Layout_ability_main);

        //1.找到组件对象
        img = (Image) findComponentById(ResourceTable.Id_img);
        name = (Text) findComponentById(ResourceTable.Id_name);
        age = (Text) findComponentById(ResourceTable.Id_age);
        address = (Text) findComponentById(ResourceTable.Id_address);
        next = (Button) findComponentById(ResourceTable.Id_next);
        get = (Button) findComponentById(ResourceTable.Id_get);
        //2.创建一个集合装9个相亲的对象


        //添加9个对象
        //在以后学习了和服务器交互之后,这些数据都是从服务器获取的
        list.add(new GirlFriend(ResourceTable.Media_girl1,"王美花1",29,"南京"));
        list.add(new GirlFriend(ResourceTable.Media_girl2,"王美花2",30,"上海"));
        list.add(new GirlFriend(ResourceTable.Media_girl3,"王美花3",31,"武汉"));
        list.add(new GirlFriend(ResourceTable.Media_girl4,"王美花4",28,"长沙"));
        list.add(new GirlFriend(ResourceTable.Media_girl5,"王美花5",25,"南昌"));
        list.add(new GirlFriend(ResourceTable.Media_girl6,"王美花6",26,"杭州"));
        list.add(new GirlFriend(ResourceTable.Media_girl7,"王美花7",23,"深圳"));
        list.add(new GirlFriend(ResourceTable.Media_girl8,"王美花8",22,"北京"));
        list.add(new GirlFriend(ResourceTable.Media_girl9,"王美花9",24,"广州"));

        //3.给按钮添加点击事件
        next.setClickedListener(this);
        get.setClickedListener(this);

    }

    @Override
    public void onActive() {
        super.onActive();
    }

    @Override
    public void onForeground(Intent intent) {
        super.onForeground(intent);
    }

    Random r =  new Random();

    @Override
    public void onClick(Component component) {
        if (component == next){
            //点击的是下一个 --- 换一个girl的信息
            //从集合中获取一个随机的girl的信息

            //获取一个随机索引
            int randomIndex = r.nextInt(list.size());
            //通过随机索引获取随机girl信息
            GirlFriend girlFriend = list.get(randomIndex);
            //把随机出来的信息设置到界面当中
            img.setImageAndDecodeBounds(girlFriend.getPhotoID());
            name.setText("姓名:" + girlFriend.getName());
            age.setText("年龄:" + girlFriend.getAge());
            address.setText("地址:" + girlFriend.getAddress());


        }else if (component == get){
            //获取联系方式
            //扩展:可以跳转到界面让用户充值界面,充值后才能看到girl信息
        }
    }
}
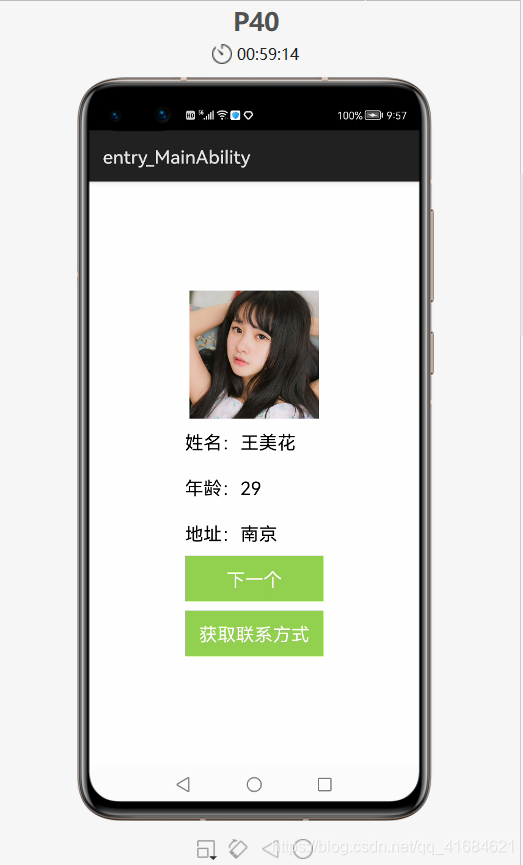
- 点击“下一个”
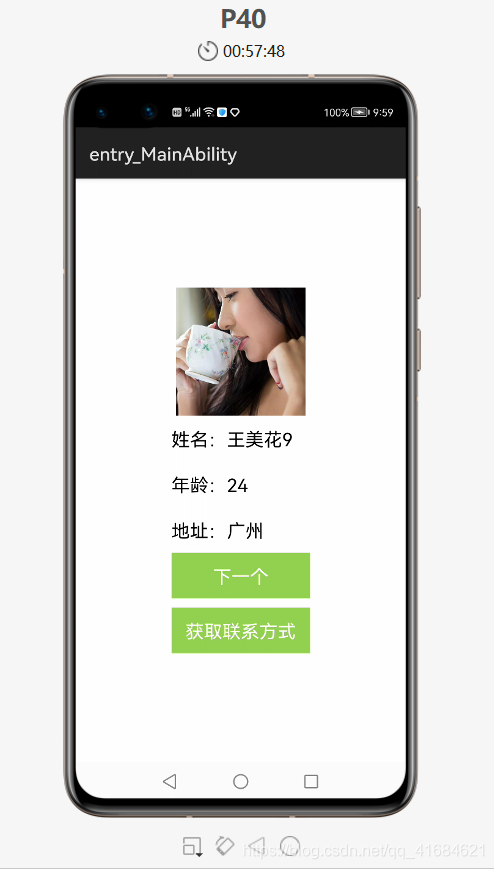
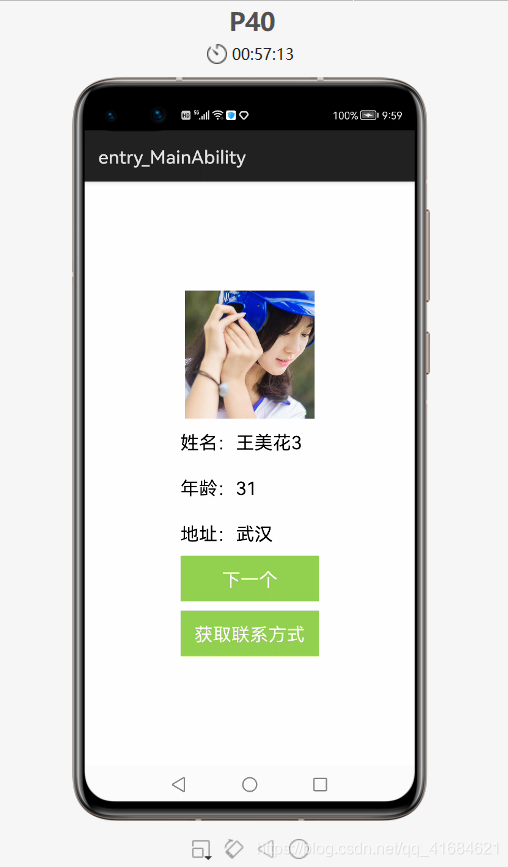
- 当点击“下一个”按钮时,信息也会随之一起获取的到,所以有需求的小伙伴可以扩展下,当点击“下一个”按钮时信息是隐藏的,只有当点击“获取联系方式”时才能显示出对应的信息,或也可以添加充值页面,当点击“获取联系方式”时,就跳转到充值页面,只有充值完后才能看到对应的信息。
Recommend
About Joyk
Aggregate valuable and interesting links.
Joyk means Joy of geeK