

Security panel page overview
source link: https://help.dreamhost.com/hc/en-us/articles/360033502232-Security-panel-page-overview
Go to the source link to view the article. You can view the picture content, updated content and better typesetting reading experience. If the link is broken, please click the button below to view the snapshot at that time.
Security panel page overview
Overview
The panel Security page allows you to control the following security-related aspects of your DreamHost account.
Change Password
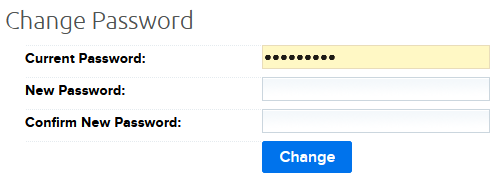
The Change Password section allows you to change the password of your DreamHost panel. This is the email and password you use to log in at https://panel.dreamhost.com.
Multifactor Authentication
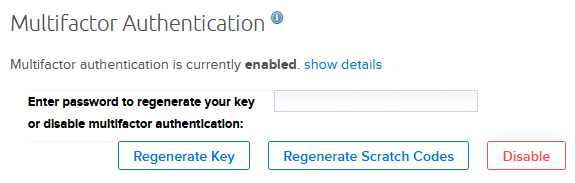
Multifactor Authentication adds an additional layer of security when logging into your DreamHost panel. View the following article for further details.
Change Secret Question & Answer
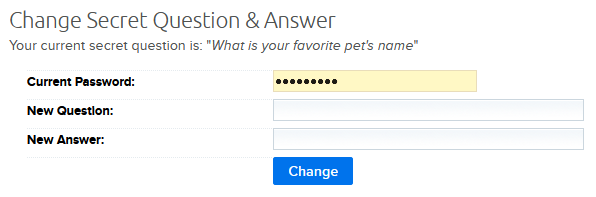
DreamHost support may ask you a security question in case you ever lose access to your account.
IP Locking
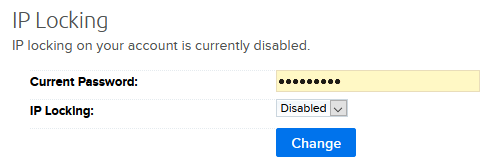
If you enable the IP Locking service, you will only be able to access your account from the current IP address you're logged in as. Every time you log into your account in the future, you must continue to use the same IP address. This is only recommended if you are sure your IP will not change and that you will always access your account from the same IP address.

If you then attempt to access your site from a different IP address, you will see the following message. Click the here link to reset your IP address.
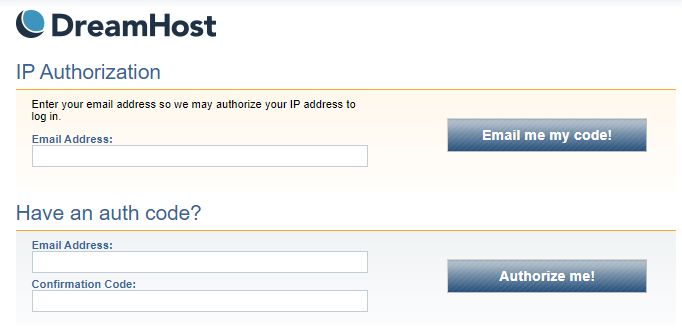
You are then taken to a page where you can either enter your account's primary email address or an auth code you previously saved. If you submit your email address, you are mailed a long auth code that looks like this:
275d686b553f1b45cea8d1cc4566d8feVisit the link sent in the email and enter this code. You are taken to the following page.
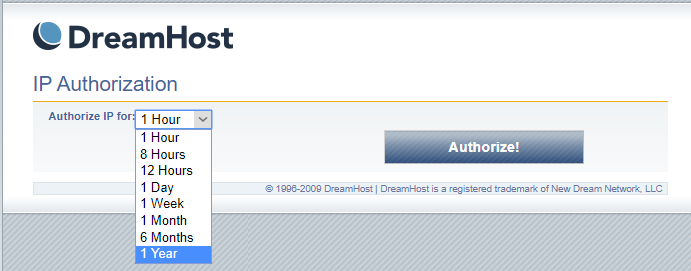
Choose how long you would like to authorize the current IP address you're using, then click the Authorize! button. A success message displays notifying you of the date this new IP address will expire.
Active Sessions
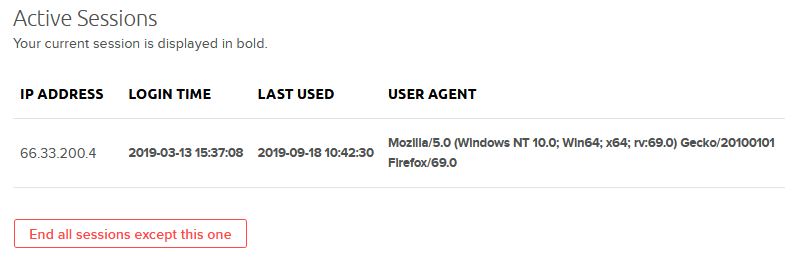
The Active Sessions section displays all IP addresses that have logged into your panel. Your current session is displayed in bold text. You can end any other sessions shown by clicking End all sessions except this one.
Did this article answer your questions?
Recommend
About Joyk
Aggregate valuable and interesting links.
Joyk means Joy of geeK