

掌握了SpringBoot的自动装配原理后你会发现自定义Starter也是非常容易的哦!
source link: https://blog.csdn.net/qq_38526573/article/details/118970061
Go to the source link to view the article. You can view the picture content, updated content and better typesetting reading experience. If the link is broken, please click the button below to view the snapshot at that time.

在实际项目中我们需要手动来手写Starter组件的场景相对来说还是比较少的,但是对于自定义Starter组件的原理大家还是需要掌握清楚,第一个是增加自己的自信心,第二个是掌握的自动装配的原理后Starter组件的实现其实就是非常简单的事情了。我们通过Redis的客户端程序来给大家介绍。对于Redis服务我们可以使用的Java客户端还是比较多的,但是在SpringBoot项目中我们怎么来使用呢?
手写SpringBoot Starter组件
1.自定义Starter
创建一个普通的Maven项目,名称为redisson-spring-boot-starter,命名要注意,第三方starter约定是 xxxx+spring-boot-starter.
添加相关的依赖
    <dependencies>
        <dependency>
            <groupId>org.redisson</groupId>
            <artifactId>redisson</artifactId>
            <version>3.15.6</version>
        </dependency>
        <dependency>
            <groupId>org.springframework.boot</groupId>
            <artifactId>spring-boot-starter</artifactId>
            <version>2.4.8</version>
            <optional>true</optional>
        </dependency>
    </dependencies>
添加属性类
/**
 * 定义属性类
 *    指定前缀为 bobo.redisson
 */
@ConfigurationProperties(prefix = "bobo.redisson")
public class RedissonProperties {

    private String host = "localhost";
    private int port = 6379;
    private int timeout = 0;
    private boolean ssl = false;

    public String getHost() {
        return host;
    }

    public void setHost(String host) {
        this.host = host;
    }

    public int getPort() {
        return port;
    }

    public void setPort(int port) {
        this.port = port;
    }

    public int getTimeout() {
        return timeout;
    }

    public void setTimeout(int timeout) {
        this.timeout = timeout;
    }

    public boolean isSsl() {
        return ssl;
    }

    public void setSsl(boolean ssl) {
        this.ssl = ssl;
    }
}
然后创建对应的配置类。
@ConditionalOnClass(Redisson.class) // 条件装配
// 关联 属性配置类
@EnableConfigurationProperties(RedissonProperties.class)
@Configuration
public class RedissonAutoConfiguration {


    @Bean
    public RedissonClient redissonClient(RedissonProperties redissonProperties){
        Config config = new Config();
        String prefix = "redis://";
        if(redissonProperties.isSsl()){
            prefix = "rediss://";
        }
        // 单节点连接配置
        config.useSingleServer()
                .setAddress(prefix+redissonProperties.getHost()+":"+redissonProperties.getPort())
                .setConnectTimeout(redissonProperties.getTimeout());
        return Redisson.create(config);
    }

}
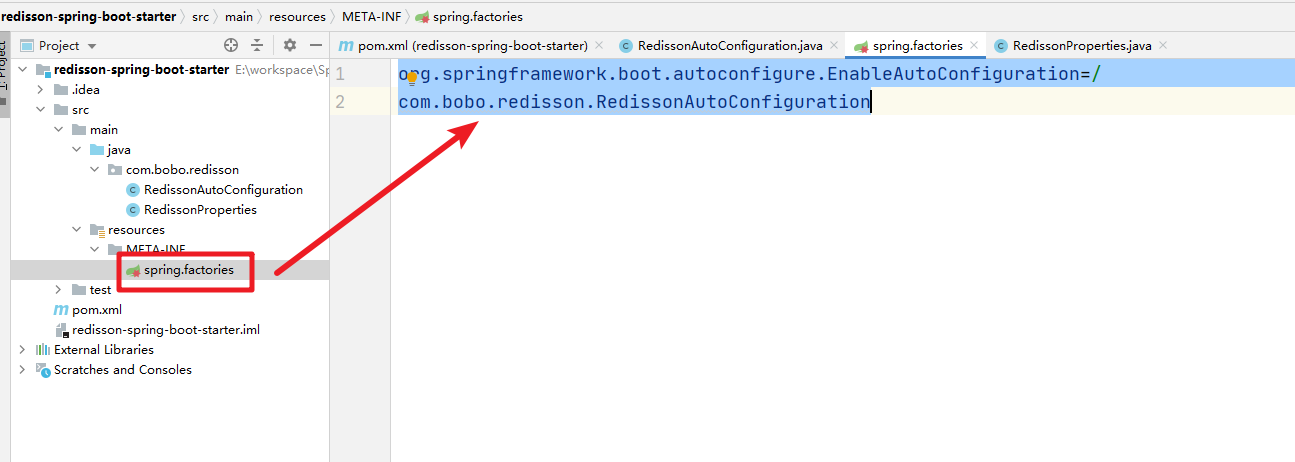
这样我们的自定义Starter的功能就差不多了,然后是要创建spring.factories文件。来实现和SpringBoot项目的自动装配。
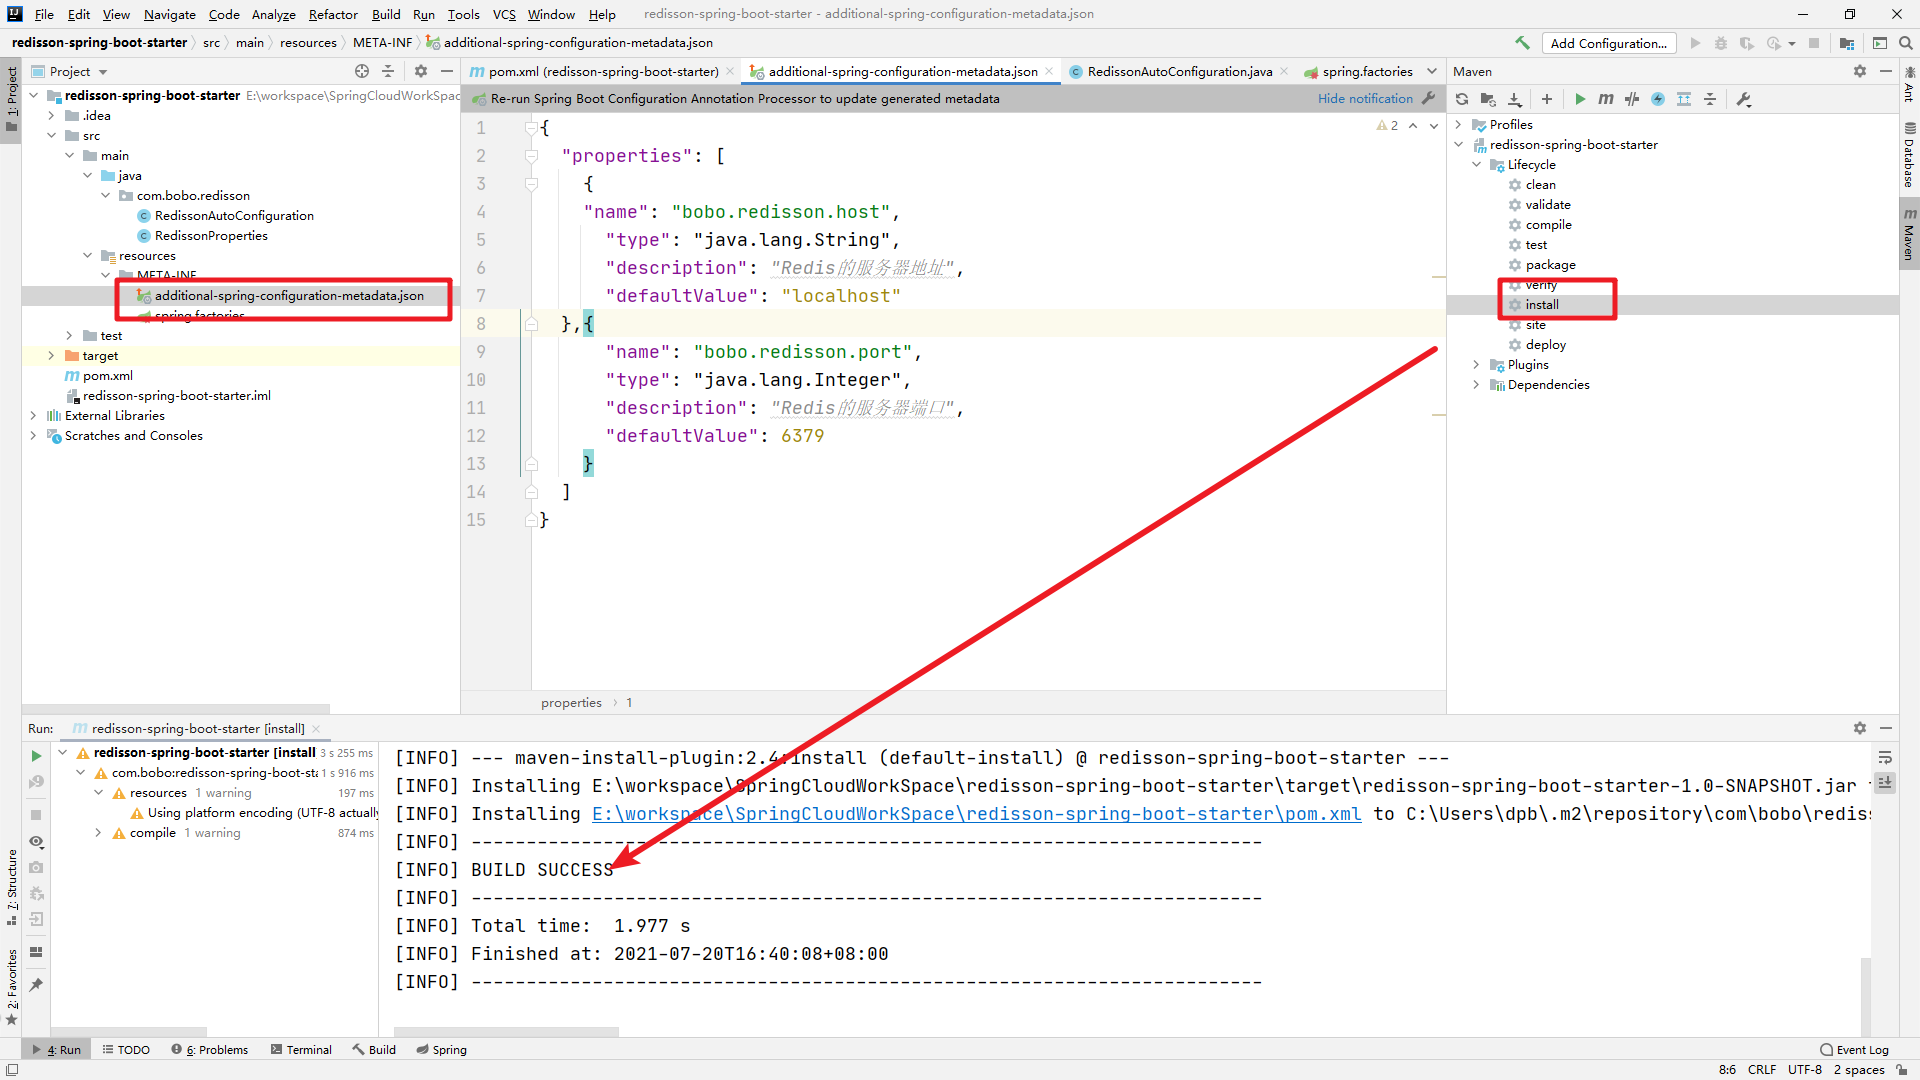
最后为了增加在添加属性文件的时候有提示信息。我们可以先导入依赖
        <dependency>
            <groupId>org.springframework.boot</groupId>
            <artifactId>spring-boot-configuration-processor</artifactId>
            <version>2.4.8</version>
        </dependency>
然后添加json文件,名称必须为additional-spring-configuration-metadata.json
{
  "properties": [
    {
    "name": "bobo.redisson.host",
      "type": "java.lang.String",
      "description": "Redis的服务器地址",
      "defaultValue": "localhost"
  },{
      "name": "bobo.redisson.port",
      "type": "java.lang.Integer",
      "description": "Redis的服务器端口",
      "defaultValue": 6379
    }
  ]
}
到这儿就可以了install了,然后就可以使用了。
2.SpringBoot项目使用
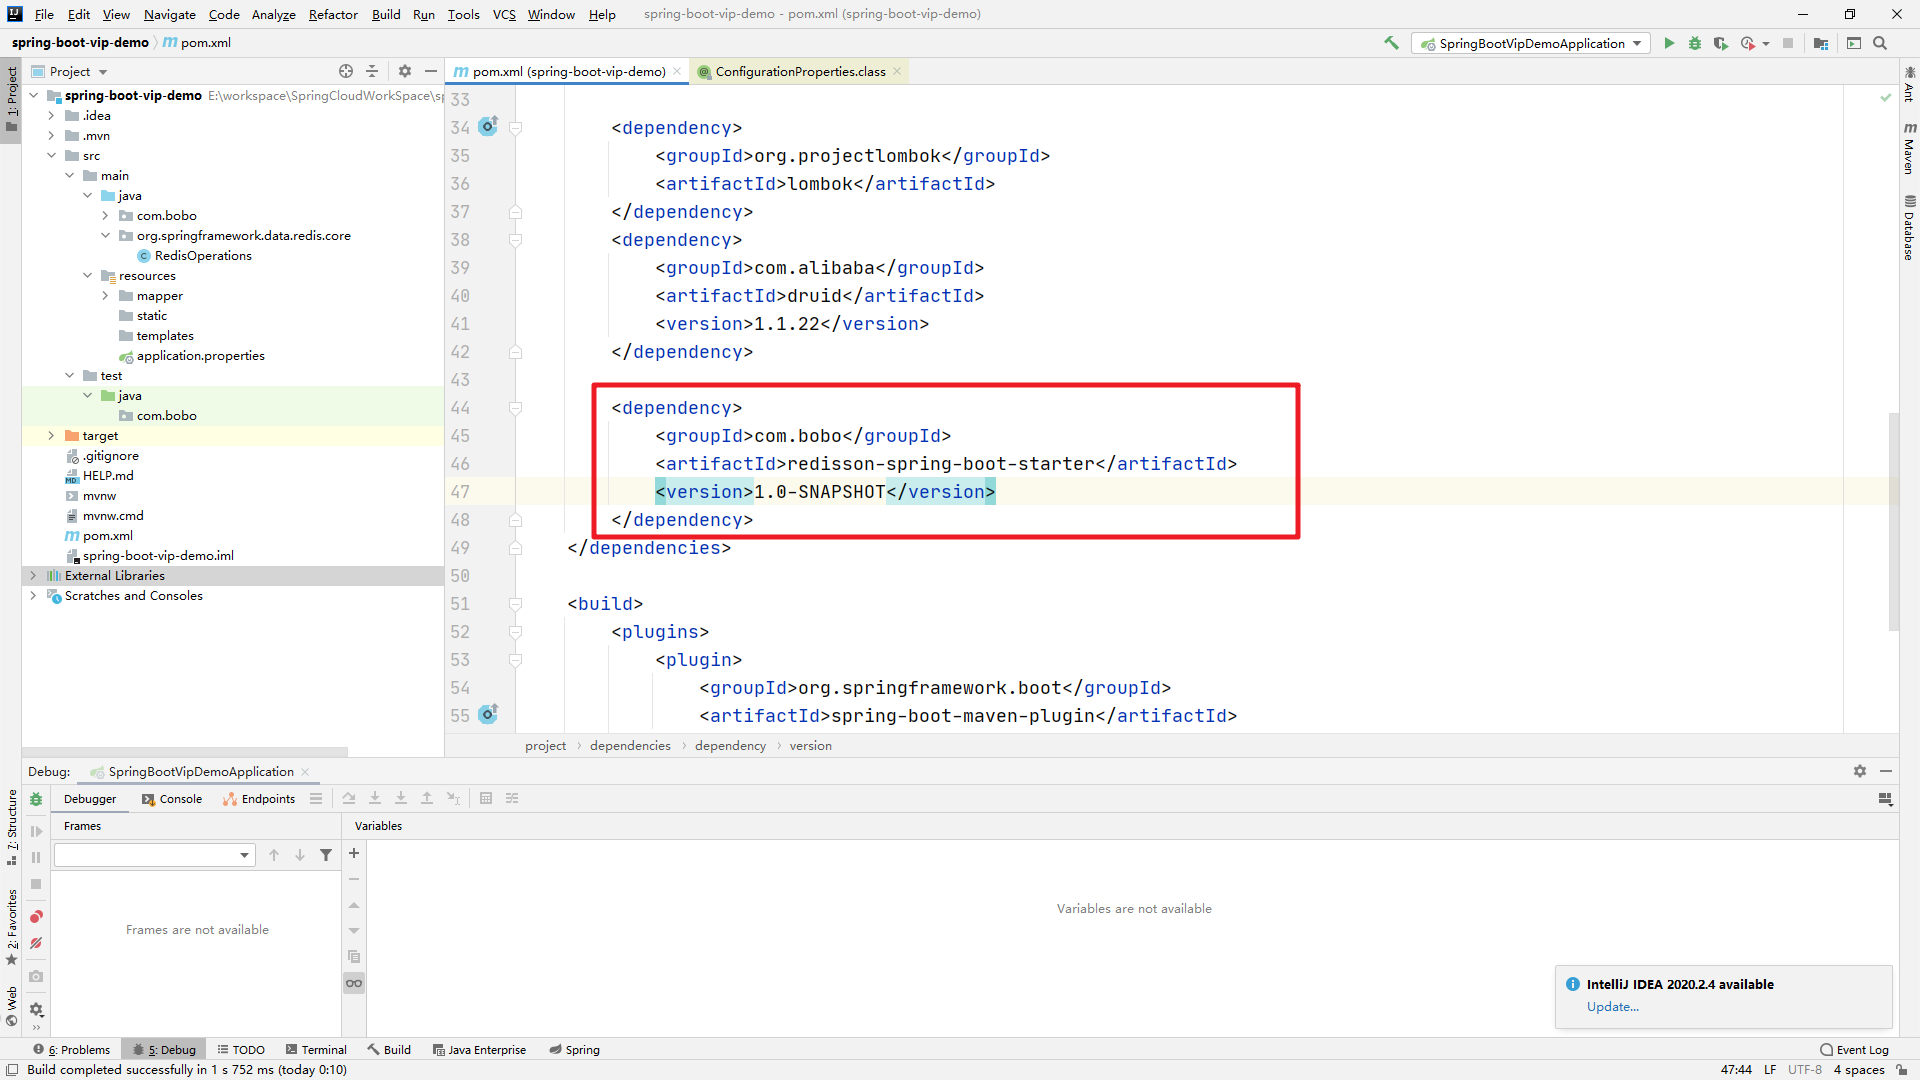
自定义Starter项目创建完成后,我们就可以在SpringBoot项目中来使用了。先导入对应的依赖。
然后我们在属性文件中配置Redis的连接信息,首先可以看到提示信息了
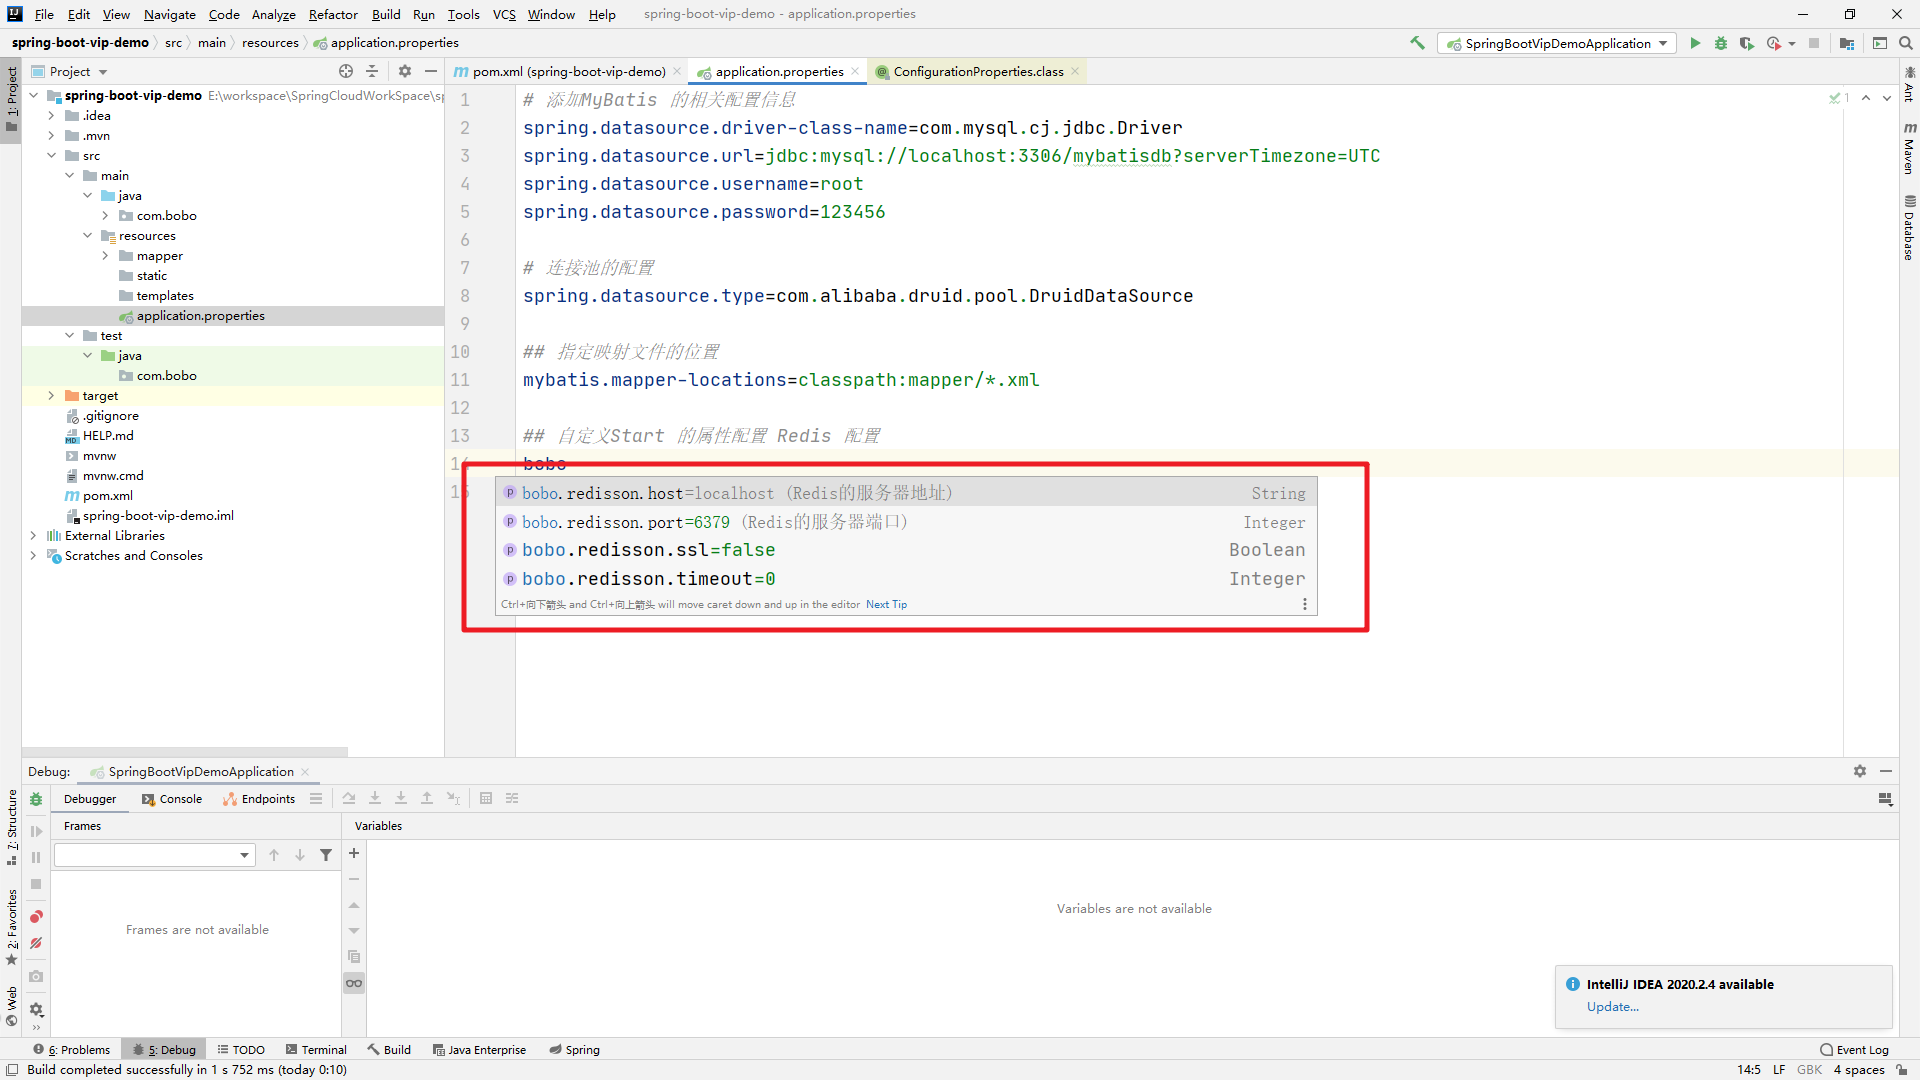
完整的配置信息
# 添加MyBatis 的相关配置信息
spring.datasource.driver-class-name=com.mysql.cj.jdbc.Driver
spring.datasource.url=jdbc:mysql://localhost:3306/mybatisdb?serverTimezone=UTC
spring.datasource.username=root
spring.datasource.password=123456

# 连接池的配置
spring.datasource.type=com.alibaba.druid.pool.DruidDataSource

## 指定映射文件的位置
mybatis.mapper-locations=classpath:mapper/*.xml

## 自定义Start 的属性配置 Redis 配置
bobo.redisson.host=192.168.100.120
bobo.redisson.port=6379
bobo.redisson.timeout=5000
然后创建控制器测试。
@RestController
public class UserController {
@Autowired
private IUserService userService;
@Autowired
private RedissonClient redissonClient;
@GetMapping("/hello")
public List<User> hello(){
return userService.query();
}
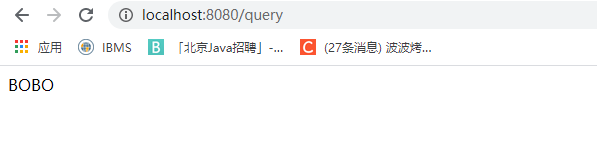
@GetMapping("/query")
public String query(){
RBucket<Object> name = redissonClient.getBucket("name");
if(name.get() == null){
name.set("BOBO");
}
return name.get().toString();
}
}
启动服务测试:
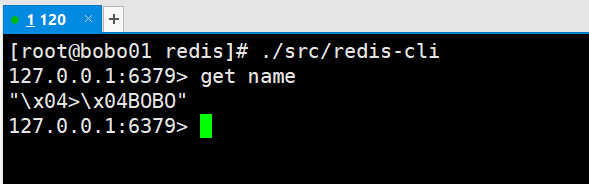
进入Redis中也可以看到对应的数据信息
SpringBoot的自定义Starter搞定!!!
Recommend
About Joyk
Aggregate valuable and interesting links.
Joyk means Joy of geeK