

How to turn on Memory Integrity and Core Isolation in Windows 10
source link: https://www.hanselman.com/blog/how-to-turn-on-memory-integrity-and-core-isolation-in-windows-10
Go to the source link to view the article. You can view the picture content, updated content and better typesetting reading experience. If the link is broken, please click the button below to view the snapshot at that time.
According to the Microsoft Support website:
"Core isolation is a security feature of Microsoft Windows that protects important core processes of Windows from malicious software by isolating them in memory. It does this by running those core processes in a virtualized environment.
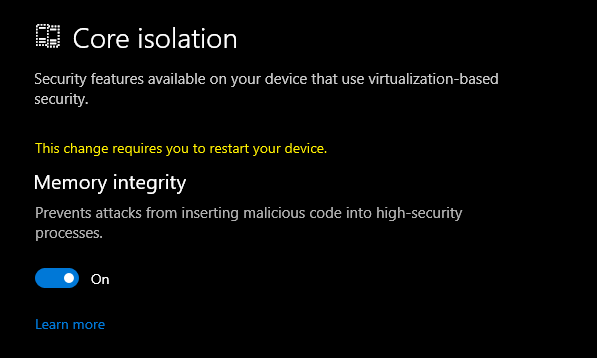
Memory integrity is one feature of core isolation which regularly verifies the integrity of the code running those core processes in an attempt to prevent any attacks from altering them.
We recommend that you leave this setting on, if your system supports it."
Cool. Before we start
MASSIVE WARNING
Be aware:
Do be conscious of each driver and what it does and consider what functionality - if any - you'll be losing if you remove them. If this blog post or specifically, you following the directions of this blog post, renders your machine unusable or unbootable, I'm sorry but you gotta do your research and back up your system. You should be able to turn it off and reinstall, but still, be careful.
Ok, ready? Feeling technically confident and have backups? Now continue.
Turns out this was added way back in 2017 in Windows 10 build 17093. In fact, Hypervisor-Protected Code Integrity (HVCI) has been around since the dawn of Windows 10 itself!
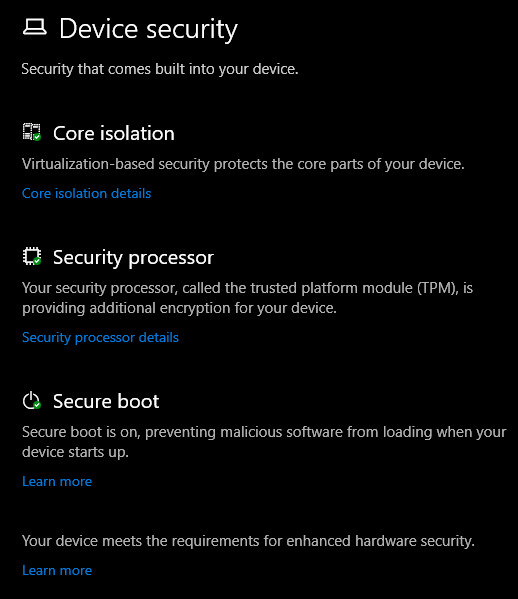
I ran the Windows Security app on my system and noticed a few things. First, at the bottom it says "Your device meets the requirements for standard hardware security" but this can read "...for enhanced hardware security."
In order to be considered enhanced, your system needs to support:
- TPM 2.0
- Secure boot
- DEP - Data Execution Prevention
- UEFI MAT - Unified Extensible Firmware Interface Memory Memory Attributes Table
Some of these technologies are quite old and have been in Windows for a while. It's the collection of all them together, working as a team, that enhances your systems security. Virtualization-based Security (VBS) isolates a secure region of memory from the rest of the OS.
I started digging to understand what was interesting or unique about my system that was preventing me from turning these new features on. Additionally I wanted to make sure I was ready for Windows 11 whenever it arrives and adds more security features and requirements.
Go to the Windows Security app and click Device Security.

I clicked on Core Isolation to turn on VBS and noticed that the on/off switch was grayed out and I could scan for driver incompatibilities. I want to ensure that drivers I have loaded into the kernel are secure. Windows 10 has a feature where drivers can use HVCI but those drivers need to be written in certain ways to ensure they have a clear separation between data and code, and can't load data files as executable, or use dynamic code in the kernel. Again, NONE of this is new and goes back as far as 2015 or earlier.
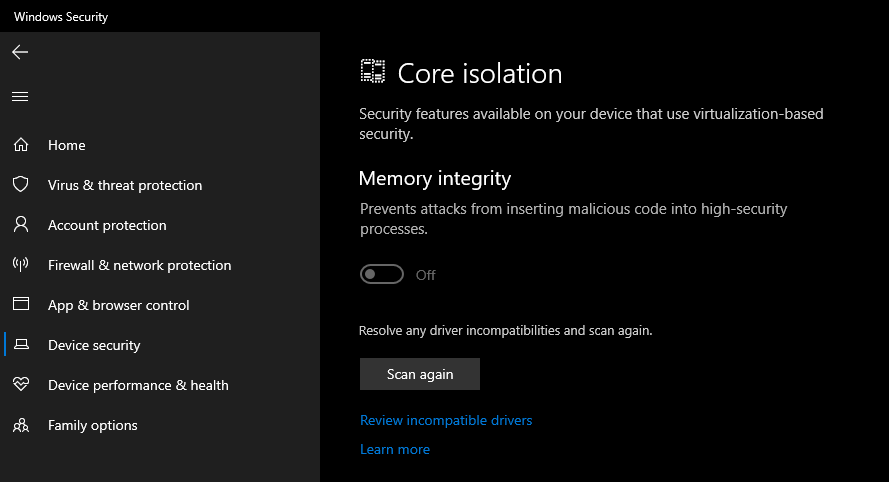
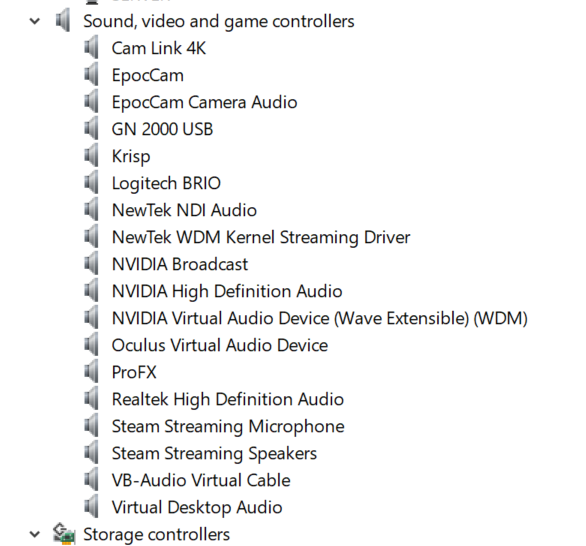
What do I have installed? Well, friends, a ton of crap, it turns out! LOL. All off these drivers are either super old or are using insecure coding techniques that are preventing my system from turning on the Core Isolation Memory Integrity feature.
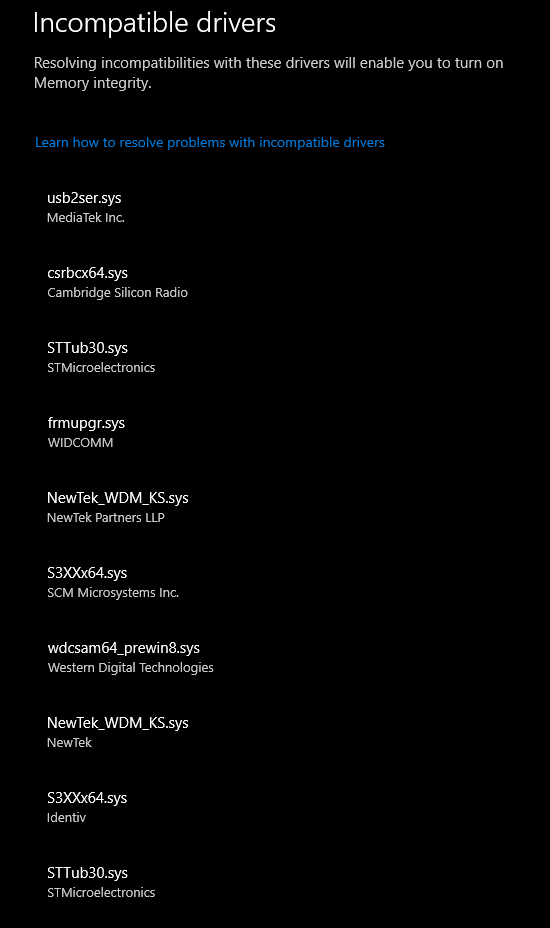
I can start searching for each of these and I see a few interesting culprits. Remember, these are all either old or poorly written drivers that are loaded into the kernel on my desktop machine, chillin'.
That Western Digital one? Notice that it evens says "_prewin8.sys" so I hope someone from WDC reads this blog and feels just a little bit bad about it. This is from an external USB hard drive. I certainly don't need whatever extra feature that driver lights up. My USB Hard drive is just fine without it.
The STT*.sys and S3x*.sys drivers are all from various Arduino COM Port utilities and DFU-util firmware flashers. Remember those unsigned warnings you thought nothing of years ago? Well, those drivers are still with you...I mean, me.
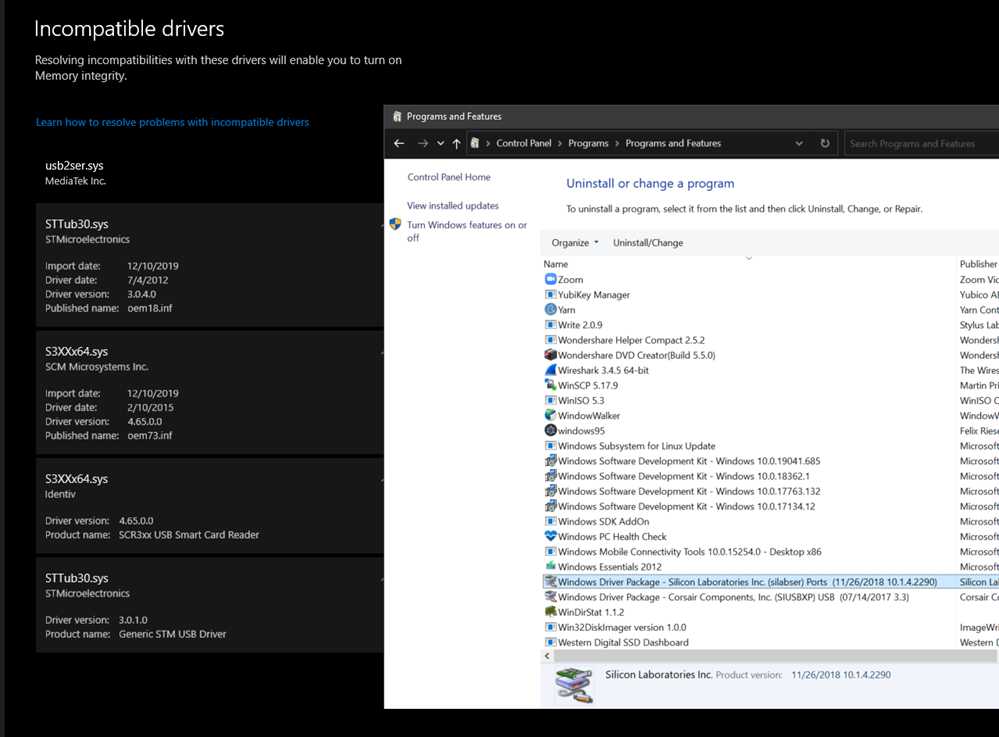
It's easy to look for "Windows Driver Package" and line up some of these drivers with actual installers and remove from Add/Remove Programs.
However, since I do a lot of IoT stuff and install random INFs manually...many of these drivers won't show up in ARP (Add/Remove Programs).
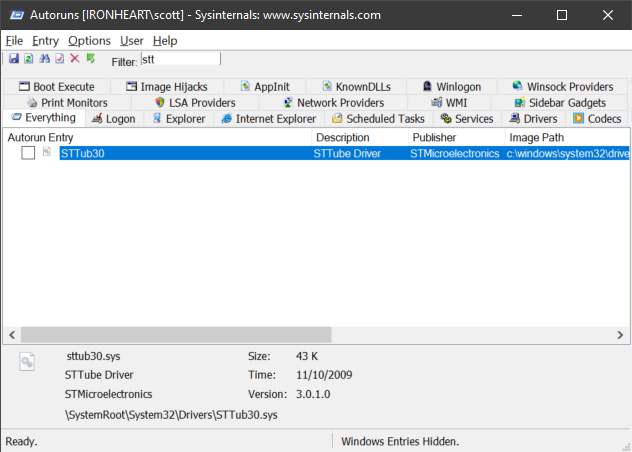
I could use Autoruns.exe and click the Drivers tab, but not every one shows up there, and even if you uncheck a driver here it won't be removed from the Windows Security Scan. It needs to be uninstalled and deleted.
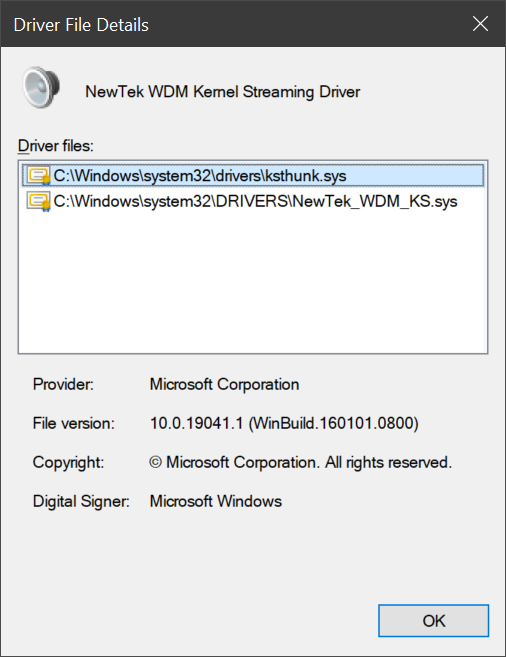
For visible drivers, I can open Device Manager and look at the Driver details for each one.
If the .sys file matches, I can right click uninstall and check the delete checkbox to remove the driver entirely.
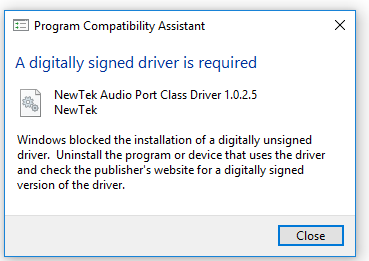
This NDI Webcam Input (NDI Virtual Input) driver knowledge base literally tells you to turn off Secure Boot and turn off Memory Integrity to install their unsigned driver. No thanks.
From an admin command line you can get a list of drivers. This one gets a list in PowerShell and puts it in your clipboard.
get-windowsdriver -online | clip.exe
While this one works anywhere and gets a simple list:
wmic sysdriver get name
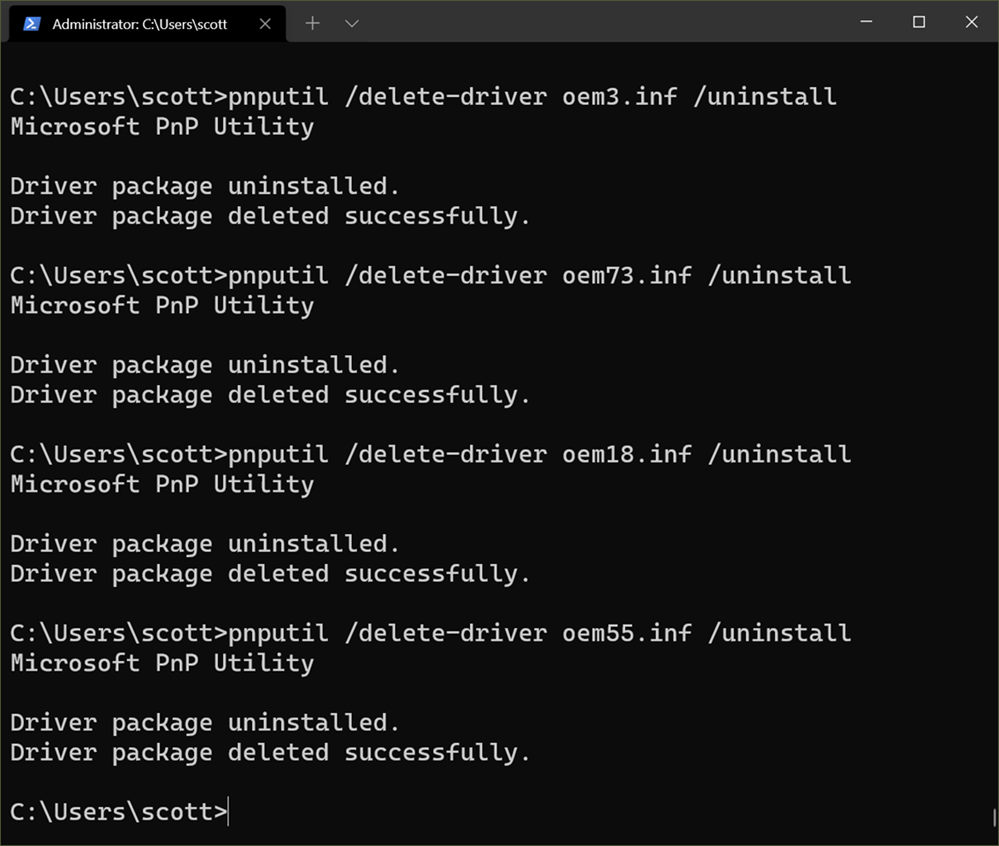
TL;DR - Find the oem.inf from the Incompatible Drivers list and remove it at the Command Line.
But when you have the list from the Incompatible Drivers scan as seen in the screenshot above, just click each driver and you'll see the "oemXX.inf" file that describes the driver. Note your numbers will vary.
pnputil /delete-driver <example.inf> /uninstall
Then you can use pnputil that comes with Windows to delete the driver package from your system's driver store. Here is me doing that:
Do be conscious of each driver and what it does and consider what functionality - if any - you'll be losing if you remove them. If this blog post or specifically, you following the directions of this blog post, renders your machine unusable or unbootable, I'm sorry but you gotta do your research and back up your system. You should be able to turn it off and reinstall, but still, be careful.
If you're removing a Graphics Driver or something that looks or feels essential you'd be better off finding an updated version of that driver than just removing it.
Now I'm all set:
And my system says "meets the requirements for enhanced hardware security." Sweet.
Hope this helps you and sets you up for future success. I did a LOT of searching to figure this out and spent many hours to break this down for y'all.
Sponsor: This week's sponsor is...me! This blog and my podcast has been a labor of love for over 18 years. Your sponsorship pays my hosting bills for both AND allows me to buy gadgets to review AND the occasional taco. Join me!
Recommend
About Joyk
Aggregate valuable and interesting links.
Joyk means Joy of geeK