

使用 Rust 開發 WebAssembly 程式 - 1 Hello World
source link: https://yodalee.me/2021/05/1helloworld/
Go to the source link to view the article. You can view the picture content, updated content and better typesetting reading experience. If the link is broken, please click the button below to view the snapshot at that time.
故事是這樣子的,很早之前寫了 Rust/Amethyst 系列文,
最後把這個系列文拿去投稿了 2020 年的 MOPCON,
在投稿的時候,為了跟以網路為主題的 MOPCON 有所連結,我刻意的在最後一部分加上 rust/webassembly 的介紹,
但其實也沒有介紹得很深入,比較像為了騙被接受所以加進去的內容。
為了贖罪,就來寫幾篇文深入介紹一下 rust 開發 WebAssembly 程式。
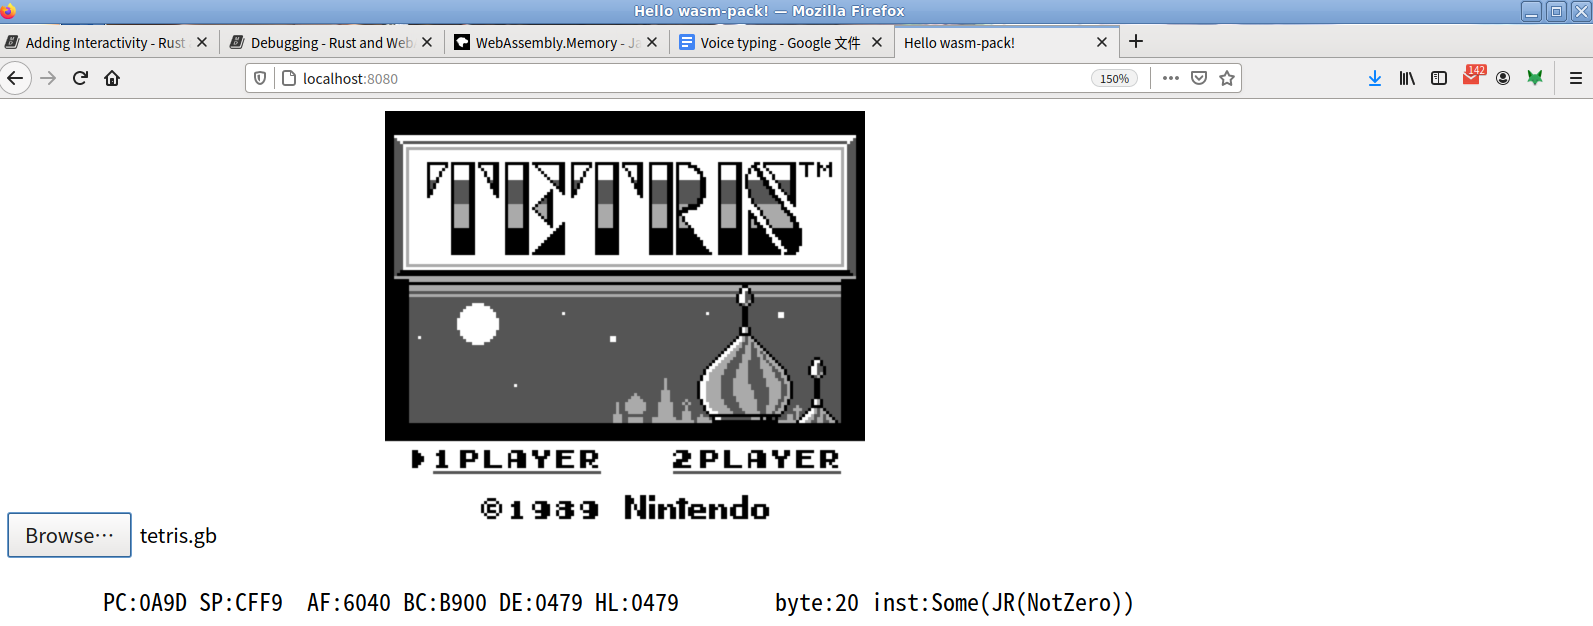
先附一張最後的成果圖,沒錯,把之前開發的 Rust Gameboy emulator 移植到 WebAssembly 讓它在瀏覽器裡面執行。
本系列文前兩篇的範例來自 rustwasm book 的 tutorial,看完 tutorial 的範例之後我們再來寫自己的程式。
前置工作#
請先安裝好下列工具
- rustup:並用 rustup 安裝好 rust toolchain
- 安裝 wasm-pack:整合式的工具包,將 rust 編譯為 wasm
- cargo-generate:使用
cargo install cargo-generate安裝,能從既有的 repository 複製j生成新專案。 - npm:wasm 需要 javascript 作為呼叫者。
編譯 Rust 為 WebAssembly#
cargo generate --git https://github.com/rustwasm/wasm-pack-template
這步會問你新的 project 要叫什麼,我們就叫 wasm-gameboy,表示我們的最終目標。
進到 wasm-gameboy 資料夾,要修改的內容都放在 src 裡,Cargo.toml 裡面已經設定好 crate-type 以及其他所需的相依套件。
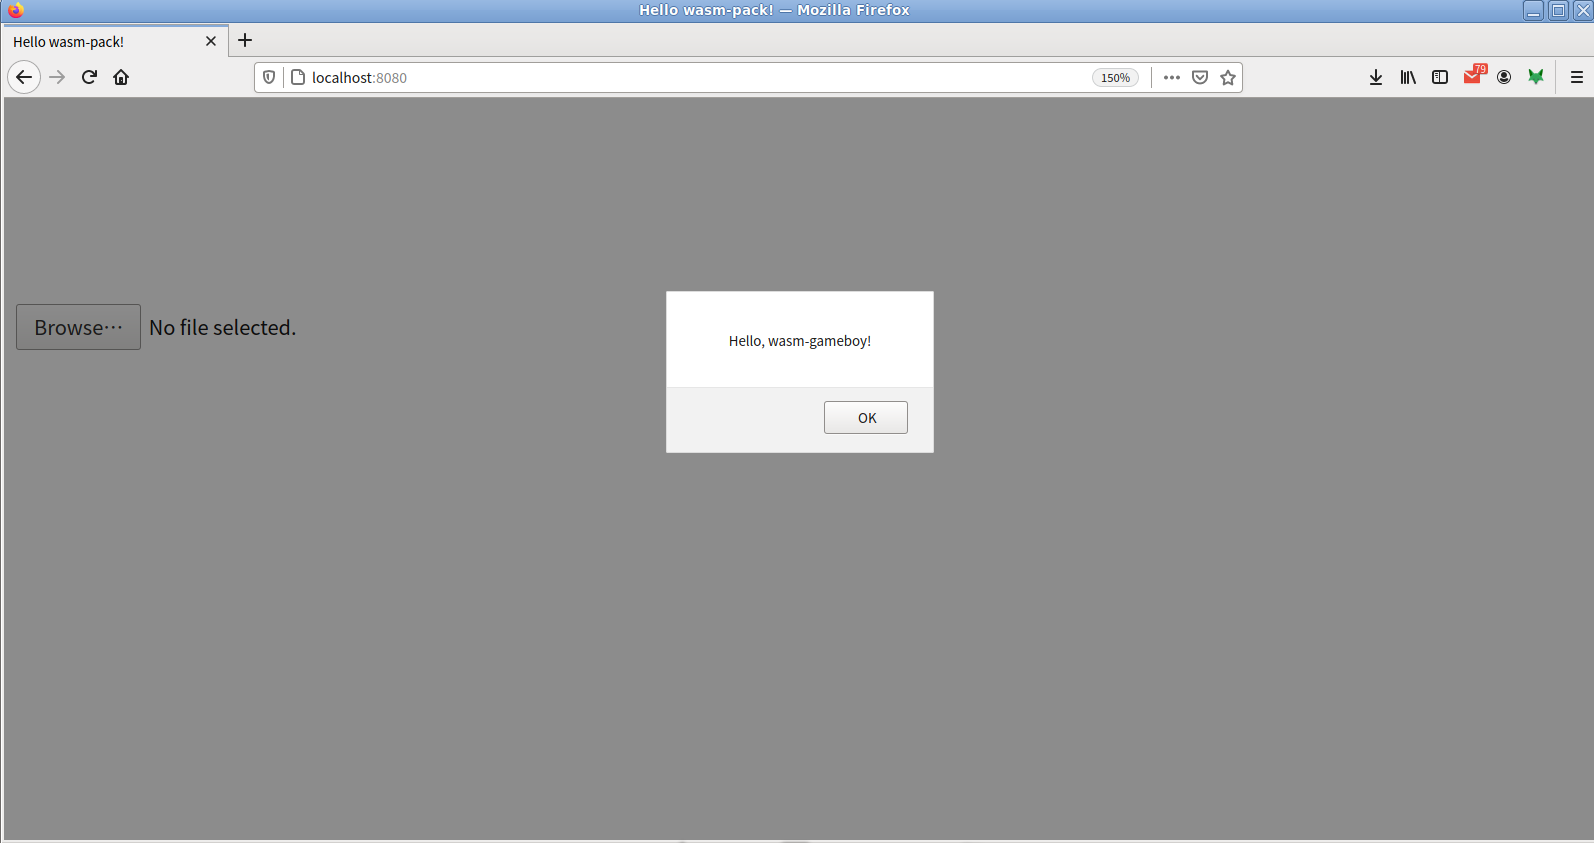
Src/lib.rs 的內容是預設的模板,使用 wasm-bindgen 產生和 javascript 的介面,引入 window.alert 函式和提供 greet rust 函式的介面。
extern crate cfg_if;
extern crate wasm_bindgen;

mod utils;

use cfg_if::cfg_if;
use wasm_bindgen::prelude::*;

cfg_if! {
    // When the `wee_alloc` feature is enabled, use `wee_alloc` as the global
    // allocator.
    if #[cfg(feature = "wee_alloc")] {
        extern crate wee_alloc;
        #[global_allocator]
        static ALLOC: wee_alloc::WeeAlloc = wee_alloc::WeeAlloc::INIT;
    }
}

#[wasm_bindgen]
extern {
    fn alert(s: &str);
}

#[wasm_bindgen]
pub fn greet() {
    alert("Hello, wasm-gameboy!");
}
Src/utils.rs 內含一些共用的部分,基本上都不用理它。
編譯專案有下列三個步驟:
- Rustup target install wasm32-unknown-unknown
- 用 cargo 把 rust 編譯為 .wasm 檔
- 用 wasm-bindgen 為 wasm 檔產生 javascript API
不過不用擔心,wasm-pack 已經幫我們打包好了,要做的只有:
wasm-pack build
沒錯就是這麼簡單。
產生的檔案如下:
- pkg/wasm_gameboy_bg.wasm: 從 rust 編譯而成的 wasm 檔,公開我們有加上 #[wasm_bindgen] Attributes 的函式。
- pkg/wasm_gameboy.js: wasm-bindgen 產生的 javascript 與 wasm 的中介層, 對 wasm 引入javascript 函式或 DOM,對 javascript 公開 rust 的函式,例如 greet。
- pkg/wasm_gameboy.d.ts: 如果喜歡 typescript 的話,wasm-pack 也幫我們生好了, 事實上如果你因為喜歡 rust 而看到這一篇,應當也會喜歡 typescript 才是。
- pkg/package.json: npm 用的 package.json 也生好了,想要公開寫好的 package 也可以輕鬆完成。
生成網頁#
npm init wasm-app www
用 npm 複製一套 wasm-app 模板到 www 裡面,讓我們看看模板裡幾個檔案的功用:
- www/package.json:自帶 webpack, webpack-dev-server 的 npm 設定檔。
- www/webpack.config.js:webpack 設定檔
- www/index.html:webpack 沒什麼內容的首頁,裡面會載入 bootstrap.js,後者會負責載入 index.js
- www/index.js:預設會從 hello-wasm-pack npm 套件裡載入 wasm 的內容
import * as wasm from "hello-wasm-pack";
wasm.greet();
改用我們編譯的 WebAssembly#
編輯 www/package.json,在相依套件內加入我們自己編譯的 wasm-gameboy
{
  // ...
  "dependencies": {
     "wasm-gameboy": "file:../pkg"
  }
}
並修改 index.js 的內容:
import * as wasm from "wasm-gameboy"
wasm.greet()
npm install
執行#
npm run start
打開網頁瀏覽 localhost:8080 就會看到一般 javascript 呼叫 alert 的內容,不過這邊的 alert 進到 wasm 轉了一圈,依序是:
- index.js 呼叫 wasm greet
- 對應到 wasm-gameboy lib.rs greet 函式
- greet 呼叫外部引入的 javascript 函式 alert
- wasm 呼叫 javascript alert
這樣就完成了我們 wasm 的第一步,下一步我們要用 wasm 寫一個 conway 的 game of life。
Recommend
About Joyk
Aggregate valuable and interesting links.
Joyk means Joy of geeK