
How to Create the Angular Scheduler Component Dynamically
source link: https://code.daypilot.org/28800/how-to-create-the-angular-scheduler-component-dynamically
Go to the source link to view the article. You can view the picture content, updated content and better typesetting reading experience. If the link is broken, please click the button below to view the snapshot at that time.

Overview
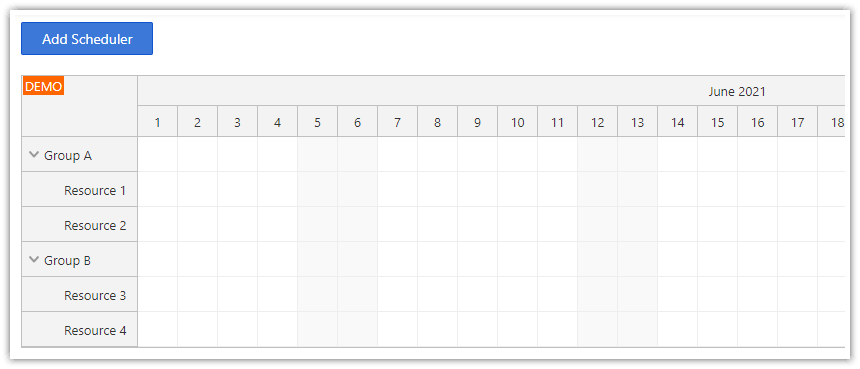
It is possible to create the Angular Scheduler component dynamically using ViewContainerRef.createComponent() method.
Another option is to define the component using HTML template and make it visible when necessary.
Includes a trial version of DayPilot Pro for JavaScript (see License below)
License
Licensed for testing and evaluation purposes. Please see the license agreement included in the sample project. You can use the source code of the tutorial if you are a licensed user of DayPilot Pro for JavaScript. Buy a license.
Dynamically Creating the Scheduler Component
If you need to create the Scheduler component dynamically and display it at the specified location, it's necessary to create a placeholder in the HTML template:
<div #target></div>
Get a reference to this element using its ID in the component class:
@ViewChild('target', { read: ViewContainerRef }) target: ViewContainerRef;Now you can create the component using ViewContainerRef.createComponent() method:
addScheduler() {
  this.target.clear();
  const factory = this.resolver.resolveComponentFactory(SchedulerComponent);
  const componentRef = this.target.createComponent(factory);
}
Showing a Hidden Component
Instead of creating the component dynamically on the button click you can also create it in advance and just make it visible. This will make it display faster as the underlying data will be already loaded.
One of the ways to hide the Scheduler is to use the built-in visible property:
config: DayPilot.SchedulerConfig = {
  visible: false,
  // ...
};
You can show the Scheduler by changing the visible property value:
show(): void {
  this.config.visible = true;
}
Example scheduler.component.ts file that hides/shows the Scheduler using visible property:
import {Component, ViewChild, AfterViewInit} from '@angular/core';
import {DayPilot, DayPilotSchedulerComponent} from 'daypilot-pro-angular';
import {DataService} from './data.service';

@Component({
  selector: 'scheduler-component',
  template: `<daypilot-scheduler [config]="config" [events]="events" #scheduler></daypilot-scheduler>`,
  styles: [``]
})
export class SchedulerComponent implements AfterViewInit {

  @ViewChild('scheduler')
  scheduler!: DayPilotSchedulerComponent;

  events: DayPilot.EventData[] = [];

  config: DayPilot.SchedulerConfig = {
    visible: false,
    // ...
  };

  constructor(private ds: DataService) {
  }

  show(): void {
    this.config.visible = true;
  }

  ngAfterViewInit(): void {
    // ..
  }

}
Full Source Code
Source code of the attached project that creates the Scheduler component dynamically on button click:
app.component.html
<div>
  <button (click)="addScheduler()">Add Scheduler</button>
</div>

<div #target></div>
app.component.ts
import {Component, ComponentFactoryResolver, ViewChild, ViewContainerRef} from '@angular/core';
import {SchedulerComponent} from './scheduler/scheduler.component';

@Component({
  selector: 'app-root',
  templateUrl: './app.component.html',
  styleUrls: ['./app.component.css']
})
export class AppComponent {

  @ViewChild('target', { read: ViewContainerRef }) target!: ViewContainerRef;

  constructor(private resolver: ComponentFactoryResolver) { }

  addScheduler() {
    this.target.clear();
    const factory = this.resolver.resolveComponentFactory(SchedulerComponent);
    const componentRef = this.target.createComponent(factory);
  }

}
scheduler.component.ts
import {Component, ViewChild, AfterViewInit} from '@angular/core';
import {DayPilot, DayPilotSchedulerComponent} from 'daypilot-pro-angular';
import {DataService} from './data.service';

@Component({
  selector: 'scheduler-component',
  template: `<daypilot-scheduler [config]="config" [events]="events" #scheduler></daypilot-scheduler>`,
  styles: [``]
})
export class SchedulerComponent implements AfterViewInit {

  @ViewChild('scheduler')
  scheduler!: DayPilotSchedulerComponent;

  events: DayPilot.EventData[] = [];

  config: DayPilot.SchedulerConfig = {
    timeHeaders: [{groupBy: 'Month'}, {groupBy: 'Day', format: 'd'}],
    scale: 'Day',
    days: DayPilot.Date.today().daysInMonth(),
    startDate: DayPilot.Date.today().firstDayOfMonth(),
    timeRangeSelectedHandling: 'Enabled',
    visible: true,
    onTimeRangeSelected: async (args) => {
      const dp = this.scheduler.control;
      const modal = await DayPilot.Modal.prompt('Create a new event:', 'Event 1');

      dp.clearSelection();
      if (!modal.result) { return; }
      dp.events.add({
        start: args.start,
        end: args.end,
        id: DayPilot.guid(),
        resource: args.resource,
        text: modal.result
      });

    },
    treeEnabled: true,
  };

  constructor(private ds: DataService) {
  }

  ngAfterViewInit(): void {
    this.ds.getResources().subscribe(result => this.config.resources = result);

    if (this.scheduler) {
      const from = this.scheduler.control.visibleStart();
      const to = this.scheduler.control.visibleEnd();
      this.ds.getEvents(from, to).subscribe(result => {
        this.events = result;
      });
    }
  }

}
Recommend
About Joyk
Aggregate valuable and interesting links.
Joyk means Joy of geeK