

My 6-node 1U Raspberry Pi rack mount Cluster
source link: https://www.jeffgeerling.com/blog/2021/my-6-node-1u-raspberry-pi-rack-mount-cluster
Go to the source link to view the article. You can view the picture content, updated content and better typesetting reading experience. If the link is broken, please click the button below to view the snapshot at that time.

My 6-node 1U Raspberry Pi rack mount Cluster
May 20, 2021
Now that I have a half-height rack and a 3D Printer, I figured I should finally move all my Raspberry Pis from sitting in odd places in my office to the rack. And what better way than to print my own 1U Raspberry Pi Rack mount unit?

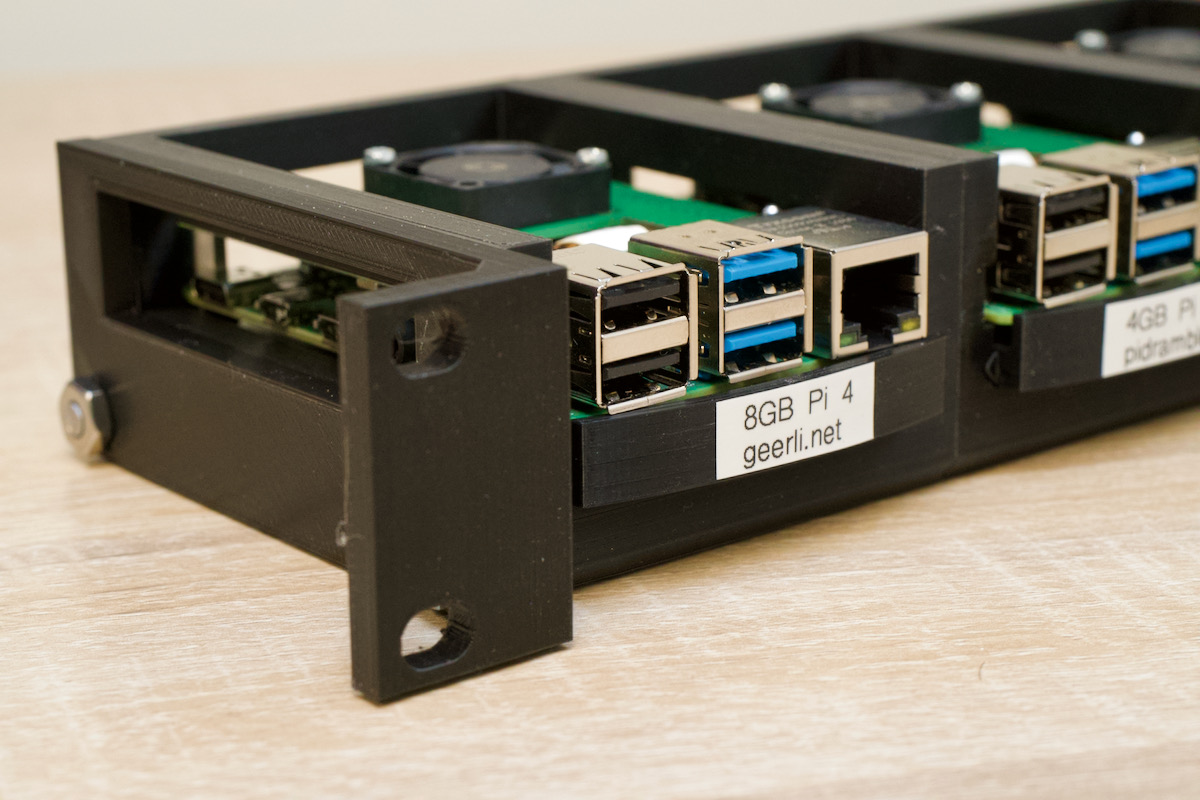
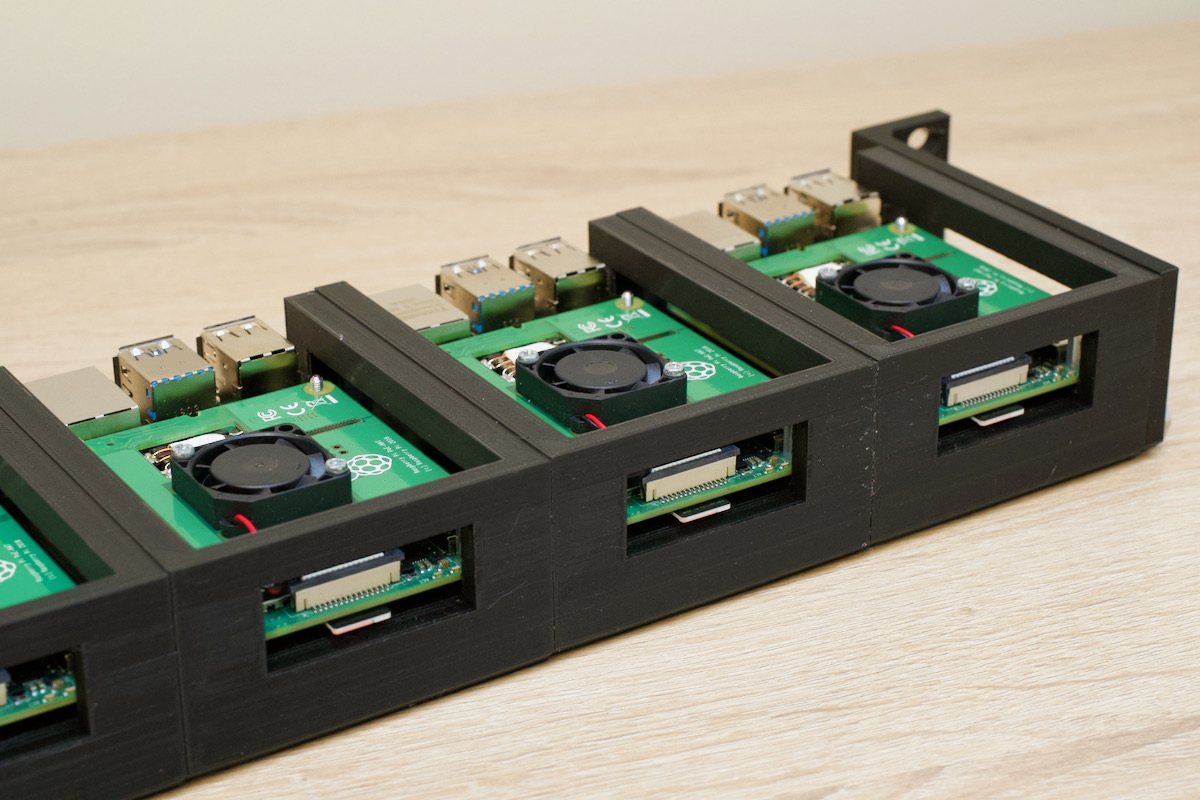
The rack unit you see above was assembled from 6 'frames', 6 hot-swappable Pi carrier trays, 2 rack mount ears, and a couple lengths of threaded rod for rigidity.
It was printed from these plans from russross on Thingiverse; Russ Ross also made an assembly video, and shows how you can build a 2U 12-Pi enclosure using the same basic design, with interchangeable Pi trays!
Video
There is more detail and a full walkthrough of my home rack in this video:
Rack printing and assembly
Firstly, I should note that I still consider myself a 3D Printing novice. It's not like you can go to the store, buy a 3D Printer, unbox it, plug it in, and get good prints right away. Even the more expensive models require a lot of 'tuning' to get right, and that assumes you also know at least a decent amount about slicing and at least have rudimentary 3D CAD skills!
My first attempt at printing the frame resulted in the printer trying to bridge 10cm gaps and printing on air. It tried, but I've found time and time again, if you ask the printer to do the impossible, it'll blindly trust your input, no matter the result:

But once I figured out I needed supports, and to be extra careful about bed leveling and shrinkage—compensated for by using a brim in this case—I was able to get the frames, trays, and ears printed without issue. The full process involved:
- Printing 6 'frames' that hold the Pi trays and are put together through threaded rod running underneath.
- Printing 6 'trays' that hold the Raspberry Pis using 12mm M2.5 screws.
- Printing 2 'ears' that allow the trays to be mounted to a standard 1U rack space.
- Assembling everything together using 2 #10-24 threaded rods cut to precisely 17 5/8", and secured with a #10-24 nut on each side
It came together very well after I sorted the frame printing issues:
You can see the whole structure gets its rigidity from the two threaded rods running underneath:
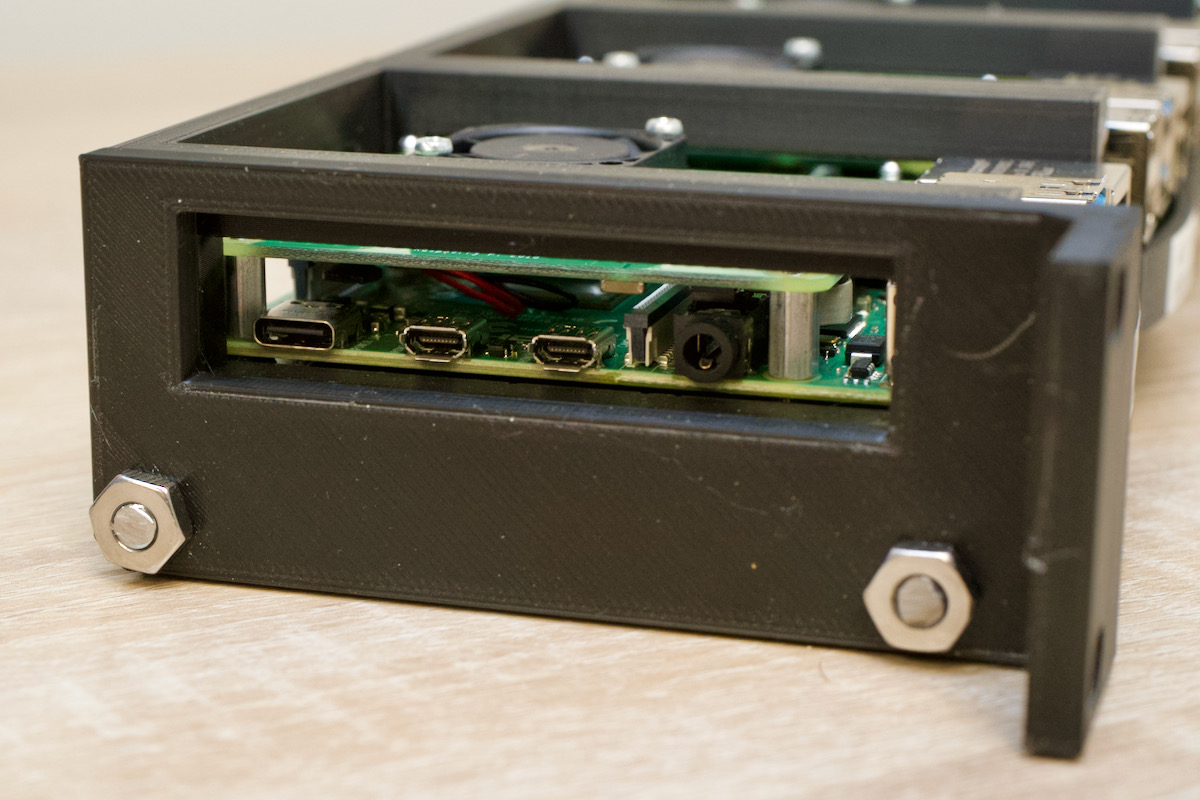
And while the frames in this enclosure don't block the ports on the Pi, there's not really enough room between frames to fit standard connectors in except on the left-most Pi. The rear is also open for ventilation, but don't expect to be able to pop out a microSD card unless you slide the Pi out in its tray:
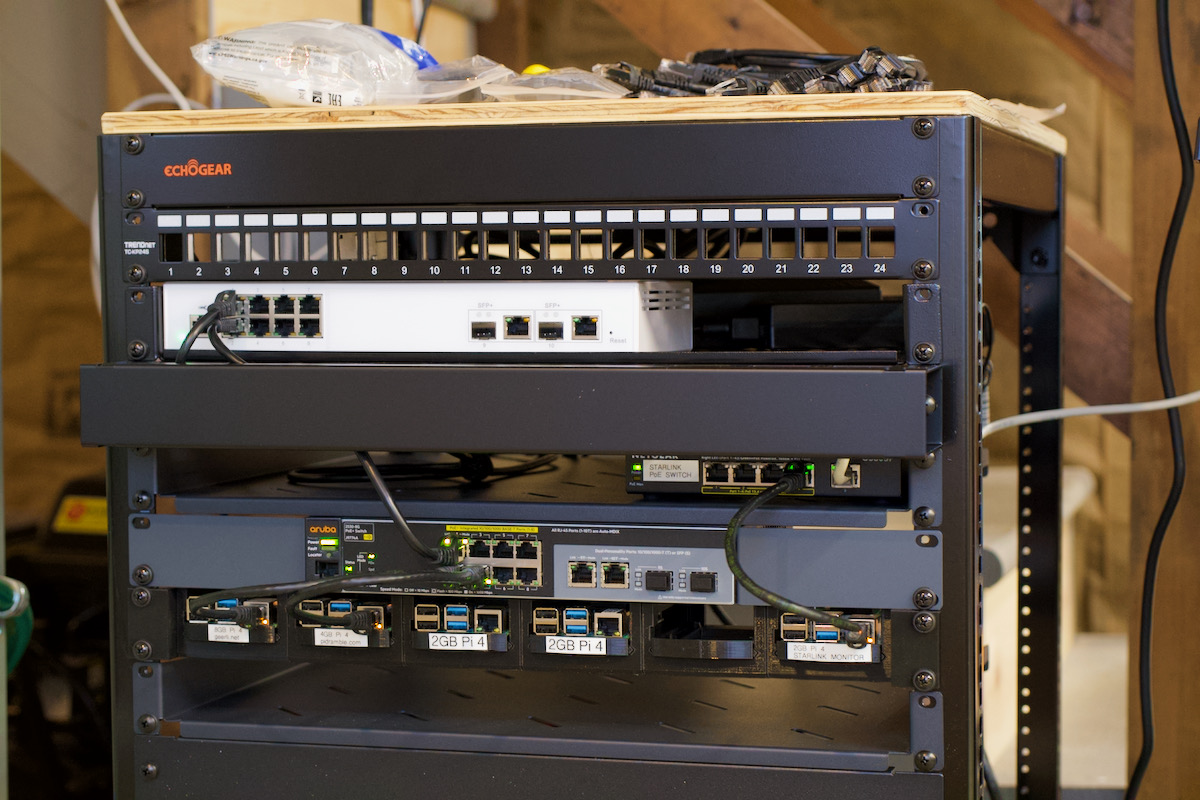
The enclosure feels great, and besides being a little 'proud' of the other metal rack units on the front (there's more depth to provide more strength in the 3D print), it looks right at home in my rack:
What do I do with the Pis?
The first Pi is running my internet-pi configuration, which sets up Pi-hole for ad-blocking and DNS on my home network, and also runs a Prometheus + Grafana internet-monitoring dashboard so I can see how my home Internet is doing (and whether I am getting the full speeds I pay for).
The second Pi is currently running the Raspberry Pi Dramble website solo—at some point I'll migrate my K3s Kubernetes cluster into the rack, and it will be running that way again, but right now the site is just running on one Pi with Docker and Docker Compose.
The Pi at the end is monitoring my Starlink Internet connection, and is on a separate PoE switch.
In the video, I go into a little more detail about the rack itself, as well as some of the other things I intend to do with my rack and home network in general, so check it out if you haven't watched it already.
Recommend
-
99
作为 Rails 开发者,基本上每天都与 Rails 的各种 API 以及数据库打交道,Rails 的世界虽然非常简洁,不过其内部的实现还是很复杂的,很多刚刚接触 Rails 的开发者可能都不知道 Rails 其实就是一个 Rack 应用,在这一系列的文章中,我们会分别介绍 Rack 以及一些常...
-
17
exadata Extending an Exadata Eighth Rack to a Quarter Rack Svetoslav Gyurov...
-
16
Introduction This tutorial demonstrates how to deploy a Ruby web app using the Sinatra framework using uWSGI and nginx as the web server...
-
18
Troubleshooting IPv6 badness to certain hosts in a rack IPv6 is generally a good thing to have working on your network. However, getting there may expose a bunch of problems in the infrastructure. This story is about one of them...
-
10
An Enigma, unikernels booting on RISC-V, a rack encased in liquid. OH MY. Sunday, March 17, 2019 · 4 min read I have written a bit about how I am spending my time while being unemployed and I thought I would continue....
-
18
Ruby Magic Running Rack: How Ruby HTTP servers run Rails apps Jeff Kreeftmeijer on Jan 24, 2017 “I absolutely love AppSignal.”
-
14
Rack apps mounted in Rails — how to protect access to them? Sidekiq, Flipper, RailsEventStore — what do these Rails gems have in common? They all ship web apps with UI to enhance their usefulness in the application....
-
12
Explaining Rack — desugaring Rack::Builder DSLHi, weʼre arkency 👋 Yesterday I wro...
-
8
MyElectronics, a small business in the Netherlands, specializes in...
-
13
Sonnet's Latest Enclosures Help You Rack Mount Your Mac Studio ...
About Joyk
Aggregate valuable and interesting links.
Joyk means Joy of geeK