

一套标准的前端代码工作流
source link: https://zhuanlan.zhihu.com/p/368740753
Go to the source link to view the article. You can view the picture content, updated content and better typesetting reading experience. If the link is broken, please click the button below to view the snapshot at that time.

一套标准的前端代码工作流
工欲善其事,必先利其器。对于写代码而言,也是需要有一套完善的工作流(工具和流程)。
先说下编辑器选择,在踏入前端行业之前,我最喜欢的代码编辑器就是 sublime text ,它很简单,编写大部分语言都很ok,就比如说写 python ,下面是我在2017年我在学习 python时发布过一篇关于 sublime text 的百度经验:

但是我现在几乎不再使用它,取而代之的是 VSCode,一款微软开源的代码编辑器,它自带 git , eslint 等工具,让我们编码更加的有质量,有效率。
接下来是代码规范方面,刚写代码的前几年,我毫不关心代码质量,遵循“能用就行”的原则,随着项目的迭代,代码越来越臃肿(好在我之前项目都不需要迭代),我仿佛听到有人骂骂咧咧的在吐槽我代码 ,就像我吐槽别人代码一样。现在我们完全可以使用 eslint ,prettier , editorConfig 来规范我们的代码,对于团队而言,这个至关重要。
再聊聊 git工作流 ,现在管理代码几乎都是使用 git 版本管理工具,了解它是必要的,像一些基本的推拉合,解决冲突这些我们就不聊了,主要聊下团队协作方面使用 git 的工具及使用方法。
下面我将主要围绕上面三个点来推荐一些工具和使用方法。
ESLint
ESLint 是一款插件化的 JavaScript 代码静态检查工具,其核心是通过对代码解析得到的 AST(Abstract Syntax Tree,抽象语法树)进行模式匹配,来分析代码达到检查代码质量和风格问题的能力。
安装
安装并初始化 eslint:
// 全局安装
npm install -g eslint

// cd到项目根目录下
// 强制初始化package.json
npm init -force

// 初始化ESLint
eslint --init
使用方式
写注释
下面这行注释表示在当前文件中禁用 console 关键字
/* eslint no-console: "error" */
写文件
ESLint支持 eslint.js , eslintrc.yaml , eslintrc.json 类型的配置文件。
如 eslint.js 配置文件:
module.exports = {
        env: {
                // 环境
                browser: true,
                es2021: true,
        },
        extends: [
                // 拓展
                'eslint:recommended',
                'plugin:@typescript-eslint/recommended',
        ],
        parser: '@typescript-eslint/parser', // 解析器,本解析器支持Ts
        parserOptions: {
                // 解析器配置选项
                ecmaVersion: 12, // 指定es版本
                sourceType: 'module', // 代码支持es6,使用module
        },
        plugins: [
                // 插件
                '@typescript-eslint',
        ],
        rules: {
                // 规则
        },
};
配置项
- parser - 解析器
- parserOptions - 解析器选项
- env 和 globals - 环境和全局变量
- rules - 规则
- off或0,关闭规则
- warn或1,开启规则
- error或2,开启规则,并会出错阻止代码运行
- plugins - 插件
- extends - 拓展
配置优先级
规则是使用离要检测的文件最近的 .eslintrc文件作为最高优先级。
- 命令行选项
- 项目级配置
- IDE环境配置
Prettier
Prettier 是一个代码格式化的工具。
安装使用
npm install --save-dev --save-exact prettier

// 格式化所有文件,npx命令是使用当前项目下的prettier
npx prettier --write .
配置文件
Prettier 支持 .prettierrc 为名称,以 .yaml .yml .json .js 为后缀的的配置文件,当然你也可以使用 package.json 文件中的 Prettier 属性来配置。
module.exports = {
        printWidth: 80, //一行的字符数,如果超过会进行换行,默认为80
        tabWidth: 2, //一个tab代表几个空格数,默认为80
        useTabs: false, //是否使用tab进行缩进,默认为false,表示用空格进行缩减
        singleQuote: false, //字符串是否使用单引号,默认为false,使用双引号
        semi: true, //行位是否使用分号,默认为true
        trailingComma: 'none', //是否使用尾逗号,有三个可选值"
}
EditorConfig
EditorConfig有助于维护跨多个编辑器和IDE从事同一项目的多个开发人员的一致编码风格,团队必备神器。
.editorconfig文件
# EditorConfig is awesome: https://EditorConfig.org

# top-most EditorConfig file 表示是最顶层的配置文件,发现设为true时,才会停止查找.editorconfig文件
root = true

# Unix-style newlines with a newline ending every file 对于所有的文件  始终在文件末尾插入一个新行
[*]
end_of_line = lf
insert_final_newline = true

# Matches multiple files with brace expansion notation
# Set default charset  对于所有的js,py文件,设置文件字符集为utf-8
[*.{js,py}]
charset = utf-8

# 4 space indentation 控制py文件类型的缩进大小
[*.py]
indent_style = space
indent_size = 4

# Tab indentation (no size specified) 设置某中文件的缩进风格为tab Makefile未指明
[Makefile]
indent_style = tab

# Indentation override for all JS under lib directory  设置在lib目录下所有JS的缩进为
[lib/**.js]
indent_style = space
indent_size = 2

# Matches the exact files either package.json or .travis.yml 设置确切文件 package.json/.travis/.yml的缩进类型
[{package.json,.travis.yml}]
indent_style = space
indent_size = 2
通配符
*                匹配除/之外的任意字符串
**               匹配任意字符串
?                匹配任意单个字符
[name]           匹配name中的任意一个单一字符
[!name]          匹配不存在name中的任意一个单一字符
{s1,s2,s3}       匹配给定的字符串中的任意一个(用逗号分隔)
{num1..num2}    匹配num1到num2之间的任意一个整数, 这里的num1和num2可以为正整数也可以为负整数
属性
indent_style    设置缩进风格(tab是硬缩进,space为软缩进)
indent_size     用一个整数定义的列数来设置缩进的宽度,如果indent_style为tab,则此属性默认为tab_width
tab_width       用一个整数来设置tab缩进的列数。默认是indent_size
end_of_line     设置换行符,值为lf、cr和crlf
charset         设置编码,值为latin1、utf-8、utf-8-bom、utf-16be和utf-16le,不建议使用utf-8-bom
trim_trailing_whitespace  设为true表示会去除换行行首的任意空白字符。
insert_final_newline      设为true表示使文件以一个空白行结尾
root           表示是最顶层的配置文件,发现设为true时,才会停止查找.editorconfig文件
VSCode集成
我使用的是 VSCode ,来给它添加魔法,加 EditorConfig , Eslint , Prettier , Git扩展。
下面是 Prettier 的扩展,我以下安装好了,大家在扩展中自行搜索安装就好了。
配置全局工作区 setting.json 文件,在文件中加入下面配置:
// 设置全部语言在保存时自动格式化
"editor.formatOnSave": ture,
// 设置特定语言在保存时自动格式化
"[javascript]": {
    "editor.formatOnSave": true
}
prettier配置
{
  // 设置全部语言的默认格式化程序为prettier
  "editor.defaultFormatter": "esbenp.prettier-vscode",
  // 设置特定语言的默认格式化程序为prettier
  "[javascript]": {
    "editor.defaultFormatter": "esbenp.prettier-vscode"
  }
}
ESLint配置
{
// 保存时自动修复
"editor.codeActionsOnSave": {
    // For ESLint
    "source.fixAll.eslint": true,
}
}
husky/lint-staged
在提交 git 之前,我们需要校验我们的代码是否符合规范,如果不符合,则不允许提交代码。
首先,安装依赖:
npm install -D husky

// lint-staged 可以让husky只检验git工作区的文件,不会导致你一下出现成百上千个错误
npm install -D lint-staged
然后修改 package.json,增加配置:
"scripts": {
 "precommit": "eslint src/**/*.js"
}
"husky": {
  "hooks": {
    "pre-commit": "lint-staged"
  }
},
"lint-staged": {
  "src/**/*.{js,vue}": ["prettier --write", "eslint --cache --fix", "git add"]
}
在 git commit 之前会进入 工作区文件的扫描,执行 prettier 脚本,修改 eslint 问题,然后重要提交到工作区。
Commitizen
一个格式化commit message的工具,为什么需要这个工具,下面是 angular.js 开源项目的commit message,很清楚明了是不是,几乎所有大项目和大公司都在使用这种 commit 规范。
好处:
- 提供更多的历史信息,方便快速浏览
- 可以过滤某些
commit,便于筛选代码review - 可以追踪
commit生成更新日志 - 可以关联issues
安装
npm install -g commitizen
安装符合AngularJS规范的提交说明,初始化cz-conventional-changelog适配器:
commitizen init cz-conventional-changelog --save --save-exact
然后使用 git cz 命令 代替 git comit 来提交git说明:
定制化项目提交说明
上面的提交说明都是英文的,如果想自定义,可以试试cz-customizable,先安装:
npm install cz-customizable --save-dev
修改package.json文件:
"config": {
  "commitizen": {
    "path": "node_modules/cz-customizable"
  }
}
在项目根目录下创建 .cz.config.js 文件:
'use strict';

module.exports = {

  types: [
    {value: '特性',     name: '特性:    一个新的特性'},
    {value: '修复',      name: '修复:    修复一个Bug'},
    {value: '文档',     name: '文档:    变更的只有文档'},
    {value: '格式',    name: '格式:    空格, 分号等格式修复'},
    {value: '重构', name: '重构:    代码重构,注意和特性、修复区分开'},
    {value: '性能',     name: '性能:    提升性能'},
    {value: '测试',     name: '测试:    添加一个测试'},
    {value: '工具',    name: '工具:    开发工具变动(构建、脚手架工具等)'},
    {value: '回滚',   name: '回滚:    代码回退'}
  ],

  scopes: [
    {name: '模块1'},
    {name: '模块2'},
    {name: '模块3'},
    {name: '模块4'}
  ],

  // it needs to match the value for field type. Eg.: 'fix'
  /*
  scopeOverrides: {
    fix: [
      {name: 'merge'},
      {name: 'style'},
      {name: 'e2eTest'},
      {name: 'unitTest'}
    ]
  },
  */
  // override the messages, defaults are as follows
  messages: {
    type: '选择一种你的提交类型:',
    scope: '选择一个scope (可选):',
    // used if allowCustomScopes is true
    customScope: 'Denote the SCOPE of this change:',
    subject: '短说明:\n',
    body: '长说明,使用"|"换行(可选):\n',
    breaking: '非兼容性说明 (可选):\n',
    footer: '关联关闭的issue,例如:#31, #34(可选):\n',
    confirmCommit: '确定提交说明?'
  },

  allowCustomScopes: true,
  allowBreakingChanges: ['特性', '修复'],

  // limit subject length
  subjectLimit: 100

};
然后运行, git cz :
Commitizen校验
检验提交的说明是否符合规范,不符合则不可以提交
npm install --save-dev @commitlint/cli

// 安装符合Angular风格的校验规则
npm install --save-dev @commitlint/config-conventional
在根目录下创建 commitlint.config.js 并配置检验:
module.exports = {
  extends: ['@commitlint/config-conventional']
};
然后在 package.json 中配置 husky ,之前我们已经安装过了,直接添加配置:
"husky": {
  "hooks": {
    "commit-msg": "commitlint -E HUSKY_GIT_PARAMS"
  }
}
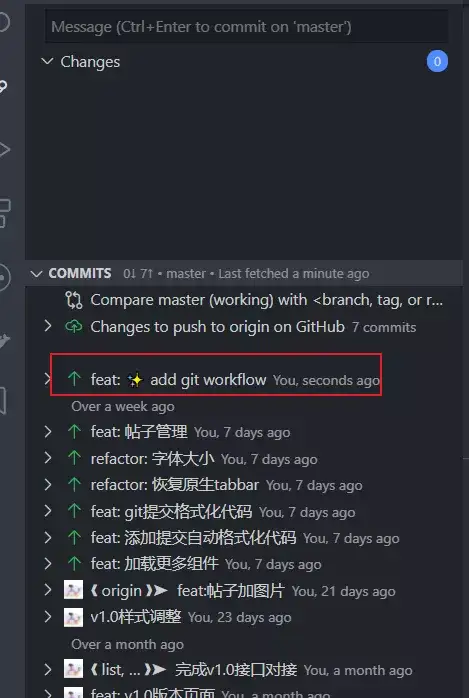
给commit加表情
如这样子的,是不是更加生动形象了,有意思了。
npm i -g gitmoji-cli
使用:你可以在这个 gitmoji 网站找到更多的表情来丰富你的提交记录,只需要在提交记录中加上类型 :bug: 的代码就可以显示表情了。
原作者姓名:geekape
原出处:掘金
原文链接:一套标准的前端代码工作流
Recommend
About Joyk
Aggregate valuable and interesting links.
Joyk means Joy of geeK